MECCHA CHAMELEON Seeker Guide
A practical MECCHA CHAMELEON seeker guide for players who keep missing tiny hiders, wasting health on missed shots, walking past good spots, and struggling with score clues, whistles, curtains, shelves, ceilings, Indoor Country, and room sweeps.
Updated:
Quick Answer
To find hiders in MECCHA CHAMELEON, do not spam shots. Missed shots cost health, so sweep first, build suspicion, then shoot to confirm. Look for broken body shapes, strange shadows, score spikes, whistles, low spots, ceiling spots, curtains, shelves, and areas that look too clean compared with the rest of the room.
What This Seeker Guide Covers
Seeking is not just running through the map and shooting anything that looks wrong.
Good hiders know how to become part of the room. They use lighting, patterns, object logic, curtains, shelves, high walls, hay bales, signs, and score pressure to make you doubt yourself. Your job is to clear rooms with a method instead of relying on luck.
This guide covers:
- why missed shots are costly
- how to sweep rooms without wasting health
- how to read score clues
- how to use whistles as a search cone
- how to identify too-perfect spots
- how to check curtains, shelves, ceilings, and object disguises
- how map type changes your search route
- why playing hider first makes you a better seeker
Start With a Fast Sweep
Your first pass should answer one question: does anything immediately break the room?
Move through the room quickly, but not blindly. You are looking for obvious movement, a body sitting in the open, a strange object that does not belong, a whistle direction, or a score change that tells you someone is nearby.
Do not shoot every suspicious object during this first sweep. Your first pass is for information.
| First-sweep target | What to notice | What not to do |
|---|---|---|
| Movement | Any small adjustment, panic crawl, or last-second reposition | Ignore it because the paint looks decent |
| Room silhouette | Objects that create a player-sized mass | Shoot every prop with no clue |
| Low areas | Under tables, chairs, shelves, hay, and floor clutter | Only scan normal eye level |
| High areas | Ceiling fans, upper shelves, beams, wall seams, signs | Leave before looking above the doorway |
| Sound direction | The general room or side where a whistle came from | Treat the sound as an exact coordinate |
| Score movement | Score rising while you are near an area | Tunnel on one object forever |
Slow Down on the Second Pass
The second pass is where many hiders die.
After your first sweep, you know which rooms were empty-looking, which areas had score movement, and which objects felt slightly wrong. Now slow down and inspect the suspicious zones from a different viewing position.
| Second-pass check | What to do | Why it works |
|---|---|---|
| Step to the side | View the object from a side lane instead of the doorway | Body thickness and shadow mismatch become easier to see |
| Look below furniture | Crouch or lower your view near shelves, chairs, hay, tables | Many hiders survive under your first eye-level scan |
| Look above the room | Check fans, upper walls, ceiling seams, beams, and signs | High spots beat seekers who never change height |
| Recheck clean corners | Inspect areas that look unusually smooth or edited | Hiders often over-fix the spot they are using |
| Compare nearby objects | Ask whether one cushion, barrel, prop, or statue differs | Object disguises fail when compared with the real props |
| Leave and return later | Mark a 50-50 object and clear the rest first | A stubborn guess can waste the whole round |
Confirm Before You Shoot
Missed shots cost health, so your shot is a limited resource, not a search tool.
That does not mean you should be afraid to shoot. It means every shot should come from a clue. A good seeker fires when the room gives them a reason: an object has the wrong volume, a shadow does not match, a pattern breaks, score rises near your view, a whistle narrows the zone, or a prop looks too perfectly placed.
| Shoot when… | Why it is worth testing |
|---|---|
| An object has a player-sized volume | The prop is too soft, round, thick, or body-like |
| The shadow does not match | Painted bodies often create lighting that the room does not |
| The pattern breaks | Bricks, tiles, wallpaper, or signs do not continue correctly |
| Score rises while you face the area | A hider may be in or near your current view |
| A whistle came from the zone | Sound gives you a search cone to narrow |
| The object is too perfectly placed | Hiders often clean up the exact spot they are trying to sell |
Be Suspicious of the Too-Perfect
MECCHA CHAMELEON rooms are messy.
Shelves have uneven objects. Curtains have folds. Brick walls have rough rhythm. Hay stacks are chaotic. Penguin Hotel props look silly. Mansion furniture rarely lines up perfectly. When one small area looks unusually clean, centered, smooth, or “edited,” it may be hiding a player.
| Too-perfect clue | What it may mean | How to check without wasting shots |
|---|---|---|
| One corner is cleaner than the rest | A hider may have painted over clutter or shadow | Change your view height and inspect the edge |
| A cushion is too centered | It may be a body posed as a pillow | Compare it with other cushions before shooting |
| A wall patch is too smooth | Paint may be covering a body | Look for thickness, shadow, and pattern breaks |
| A shelf object is too rounded | A crouched body may be sitting among hard props | Check the side profile and nearby shelf lines |
| A hay or trash shape is too neat | The object may be player-shaped rather than map-shaped | Look for limbs, head curve, or odd contact with the floor |
Use Score Clues Without Tunneling
Score is one of the best seeker tools, but it can also trap you.
If a hider’s score rises while you are near an area, that area deserves attention. But score does not tell you the exact object to shoot. Use it to choose where to slow down, not where to panic-fire.
| Score situation | What it suggests | Seeker response |
|---|---|---|
| One hider score jumps while you enter | Someone may be near your current room or line of sight | Slow the scan and check low, high, and side objects |
| Several scores rise together | You may be looking at a group area or crowded room | Clear the room in zones instead of chasing one object |
| Score rises but nothing looks wrong | The hider may be plain-sight or above/below your scan line | Re-read the room from a new height |
| Score stops rising after you leave | You may have walked away from the correct zone | Mark the room mentally and return after clearing nearby |
| A low-score hider remains late | They may be far from common routes or in a skipped room | Sweep the rooms your team barely entered |
| Score rises while you stare too long | You may be feeding points without confirming | Decide: gather one more clue, shoot, or move on |
Treat Whistles as a Search Cone
A whistle is not a GPS ping.
It tells you a direction, a room, or a general side of the map. Smart hiders use sound to pull you away from the exact object, bait you into wasting time, or make you shoot too early.
| Whistle clue | Better seeker response |
|---|---|
| Clear sound from one room | Move to that room, then check zones instead of one object |
| Sound from a wall or corner | Check both sides, then look high and low |
| Repeated taunts | Assume the hider is confident or trying to bait health loss |
| Sound with score movement | Prioritize the room, but still confirm before shooting |
| Sound stops suddenly | The hider may be hoping you overcommit and leave late zones |
| Multiple hiders making noise | Clear the area systematically; do not chase the loudest one only |
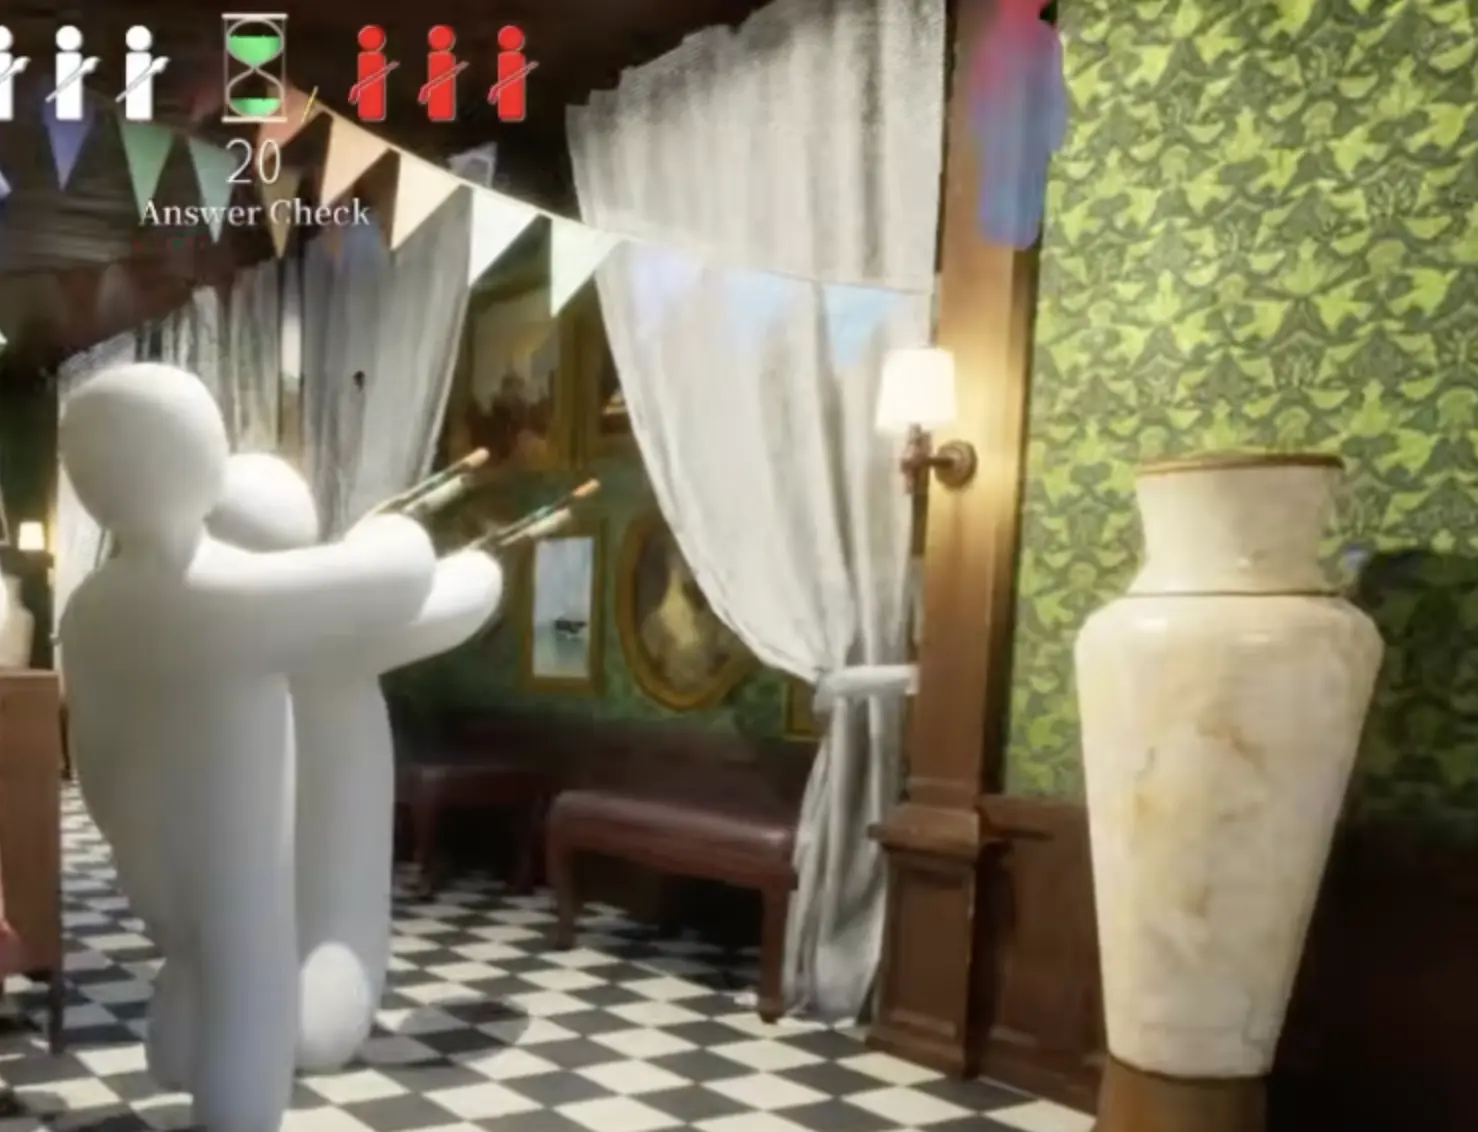
Check Curtains and Soft Surfaces
Curtains are not one object. They are a whole hiding zone.
A hider may be inside the cloth area, beside the edge, below the fold, above the rail, or using the curtain to distract from nearby furniture. Clear the whole curtain group before moving on.
| Curtain zone | What to check |
|---|---|
| Fabric center | Body thickness, smooth paint, and unnatural flat areas |
| Left and right edges | Player shape hiding where cloth meets wall or wood |
| Bottom fold | Crouched hiders, feet, low blobs, or floor contact |
| Upper rail / top | High body parts or wall-climb positions |
| Nearby furniture | Chair, shelf, or table spots using curtain as distraction |
| Side view | Thickness that disappears from the doorway angle |
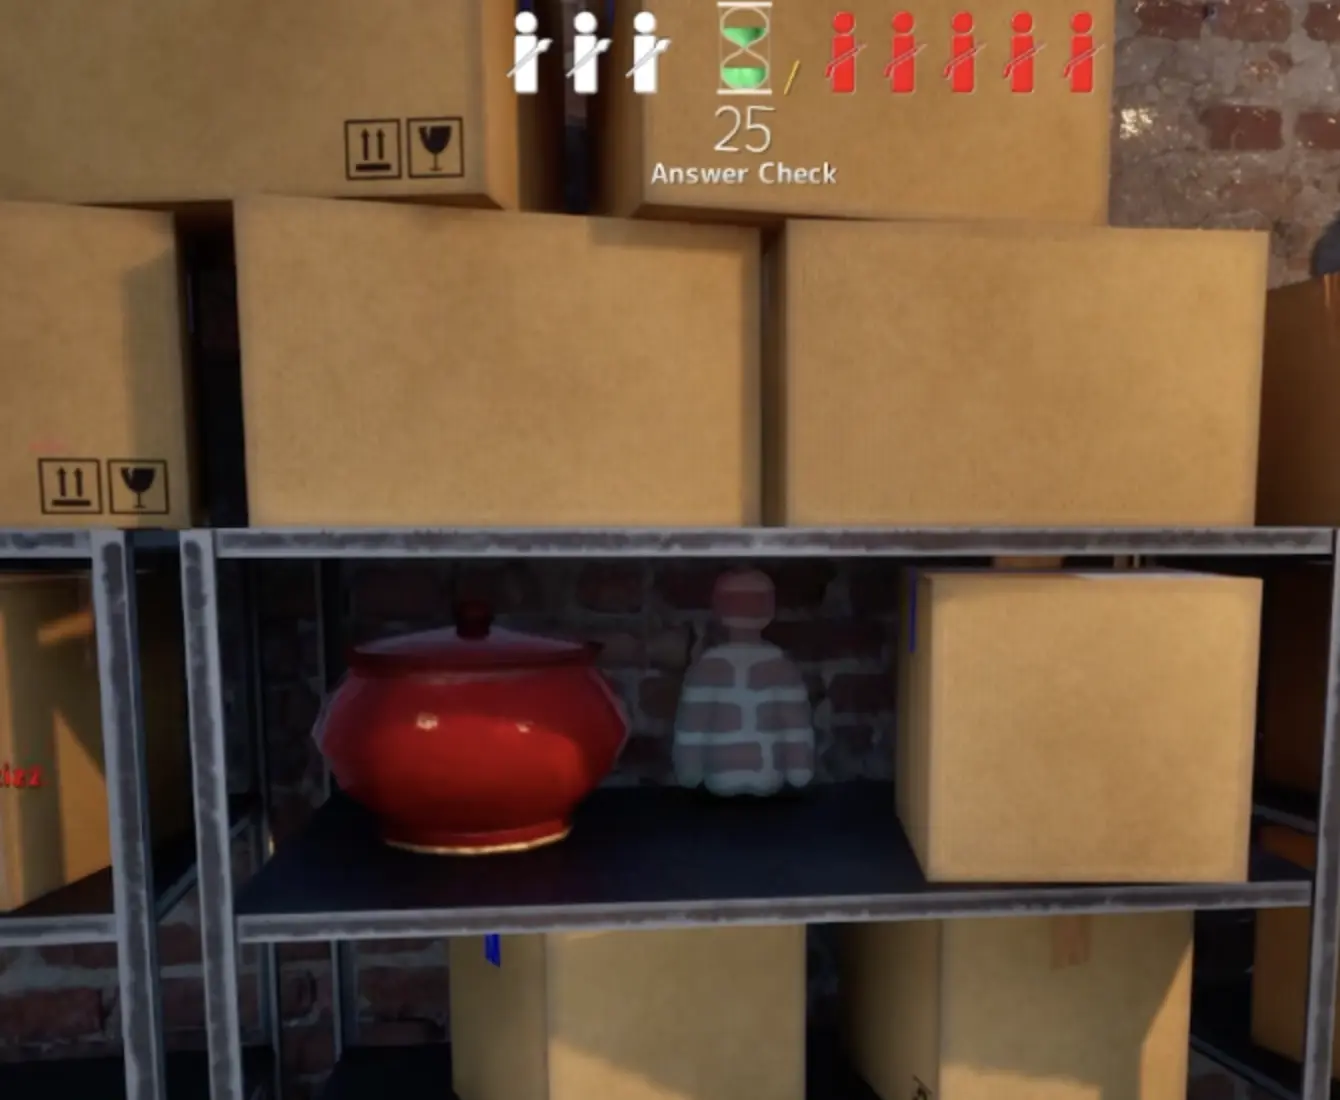
Check Shelves, Boxes, and Brick Walls
Shelves and brick walls are dangerous because they give hiders two kinds of cover: object clutter and pattern noise.
Do not look only for wrong color. Look for soft volume inside hard objects, broken brick rhythm, rounded shapes among boxes, and body parts that sit too smoothly on a shelf.
| Shelf or wall clue | Why it matters |
|---|---|
| Rounded shape among square props | Hider body is smoother than boxes, books, jars, or bricks |
| Broken brick rhythm | Pattern does not continue through the body |
| Object sitting too perfectly | Hider may have centered themselves to look decorative |
| Shadow does not belong | Painted body lighting may fight the room light |
| Shelf gap looks filled | A crouched body may be using the empty space |
| One prop reacts to your movement | A hider may panic-adjust when you get close |
Look Up: Ceilings, Fans, and Wall Climbs
High spots beat seekers who never change height.
Ceiling fans, wall seams, upper shelves, beams, signs, balcony edges, and hanging clutter can all hide players. Check high zones before leaving a room, especially on Penguin Hotel, Mansion, and any room with vertical structure.
| High spot | What to inspect |
|---|---|
| Ceiling fan | Extra mass, wrong-colored blades, or body-like lumps |
| Upper wall edge | Round head shapes, odd shadows, or broken wall rhythm |
| Shelf top | Smooth player shape sitting among hard props |
| Beam / ceiling seam | Body aligned along the seam |
| Hanging sign or décor | Extra pieces that look too soft or too centered |
| Stair or balcony edge | Hiders using height to stay outside your first scan |
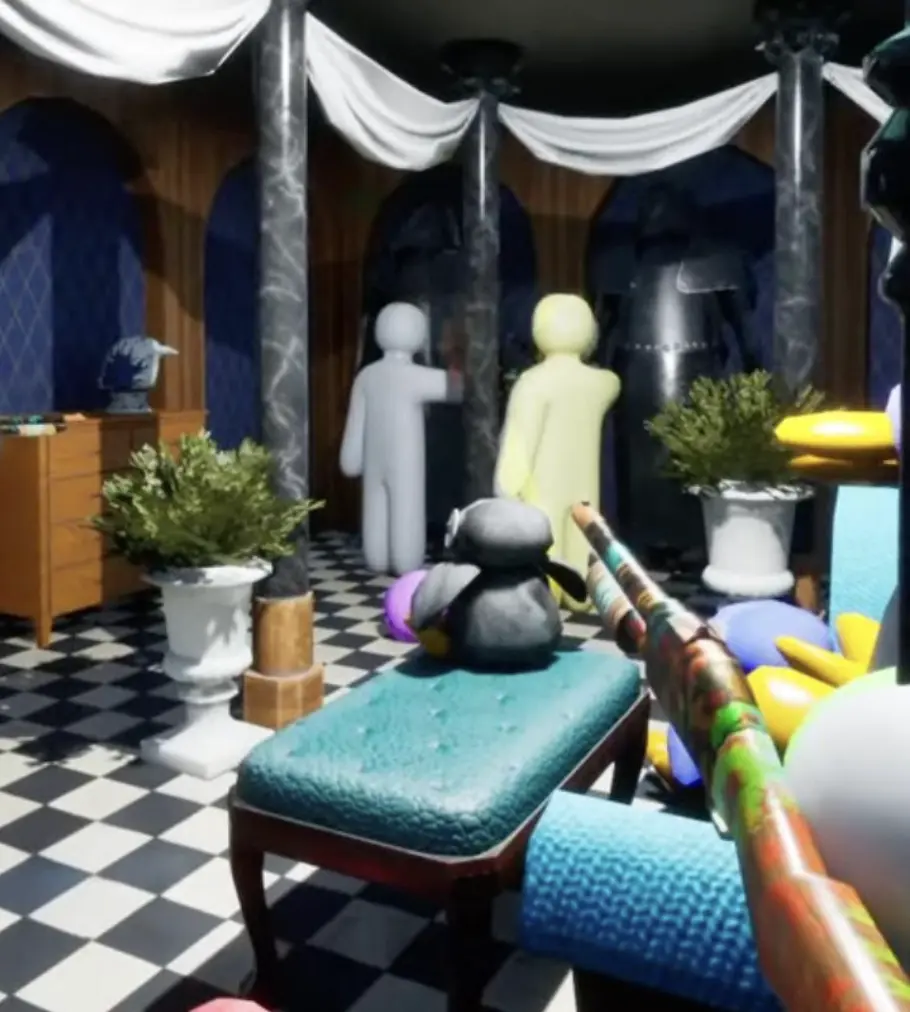
Check Object Disguises
Object disguises are strongest when the object belongs in the room.
A hider may become a pillow on a chair, a trash bag in a corner, a cow or animal prop in Indoor Country, a hay-colored lump near bales, a sign piece on a flat wall, or a statue-like shape in Penguin Hotel.
| Disguise type | Seeker check |
|---|---|
| Pillow / cushion | Compare size, placement, softness, and shadow |
| Trash bag / dark lump | Check for head curve, limbs, or floor contact |
| Cow or animal prop | Compare posture against nearby animal shapes |
| Hay bale / barn clutter | Check gaps, sides, and shapes that are too smooth |
| Sign detail | Look for rounded edges or a sign part that is too thick |
| Statue piece | Compare object posture and size against nearby decorations |
| Wall patch | Check pattern direction, thickness, and light mismatch |
Do Not Ignore Rough Paint
Rough paint can still hide a player if the room gives that roughness a reason to exist.
A hider with imperfect color can survive inside clutter, shadows, graffiti, hay, brick, curtain folds, or a busy prop cluster. Instead of asking “is the color exact?”, ask whether the object has a body-like volume, a strange edge, or lighting that does not match its neighbors.
| Rough-looking area | Why it may still be a hider |
|---|---|
| Messy wall mark | Could be a body using graffiti or brick noise |
| Uneven hay or trash shape | Clutter can hide the body’s edge |
| Ugly but believable cushion | The room expects soft objects, so bad paint may pass |
| Dark corner blob | Shadows can hide bad color and make shape harder to read |
| Flat patch with thickness | Color looks okay, but the surface has volume it should not |
| Object that feels edited | Hider may have painted over the exact area too carefully |
Room Sweep Pattern
Use this as your default seeker route.
| Step | Action | Goal |
|---|---|---|
| 1 | Enter and scan for movement | Catch panic movement before hiders settle |
| 2 | Check the doorway and room edges | Find players hiding beside the entrance |
| 3 | Sweep floor-level objects | Clear under tables, chairs, hay, trash, and low props |
| 4 | Sweep eye-level objects | Check shelves, curtains, signs, cushions, and wall patches |
| 5 | Sweep high zones | Check ceiling fans, beams, upper walls, and shelves |
| 6 | Watch score changes | Identify rooms or angles that need a slower check |
| 7 | Follow sound as a cone | Move toward the area without panic-shooting |
| 8 | Reposition around suspicious objects | Use side profile, low view, or upper view to test volume |
| 9 | Shoot only after a clue | Confirm the hider without wasting health |
Map Types Change How You Search
Every map asks seekers to look for different mistakes.
| Map or map style | What hiders use | Seeker adjustment |
|---|---|---|
| Hide-and-Seek Mansion | Chairs, curtains, bookshelves, kitchen shelves, ceilings | Check furniture groups, curtain edges, upstairs, and high lines |
| Indoor Country | Hay bales, animal props, barn walls, bright painted walls | Check hay gaps, cow/animal shapes, barn seams, and open wall color |
| Sewer | Bricks, shelves, pipes, red barrels, dark corners | Search for smooth curves inside noisy texture |
| Backrooms | Flat wall patches, signs, corners, ceiling lines | Inspect thickness, shadows, and broken wall patterns |
| Penguin Hotel | Themed props, statues, bathroom objects, ceiling fan spots | Check joke objects, bathrooms, statue clusters, and ceiling shapes |
| Small maps | One precise strong spot | Recheck known strong locations after score changes |
| Large maps | Skipped rooms and late routes | Clear zones and do not spend the whole round on one guess |
Common Seeker Mistakes
Use this after a lost seeker round.
| Problem | Likely cause | Better habit |
|---|---|---|
| I lose health too fast while searching | You are using shots as your search method | Sweep first, confirm second, and only fire when a clue supports it |
| I walk past hiders in the open | You accept the first object read too quickly | Compare suspicious objects with nearby normal objects |
| I chase one whistle forever | You treat sound as an exact location | Use sound to choose a zone, then clear it normally |
| I stare at one object too long | You get trapped by a 50-50 guess | Mark it, clear nearby rooms, then return |
| I never check ceiling spots | You search only floor and eye level | Add one high sweep before leaving each room |
| I miss low hiders | You never crouch or lower your camera | Check under furniture, hay, shelves, and floor clutter |
| I ignore score changes | You treat score as background noise | Slow down when score rises near your search area |
| I get fooled by polished spots | You trust clean corners too much | Recheck areas that look unusually centered or edited |
| I lose on Indoor Country | You search it like Mansion and ignore open prop logic | Check hay, animal props, barn edges, and bright walls |
After Your Next Few Seeker Rounds
The fastest way to improve as a seeker is to spend a few rounds hiding first. Once you know where you would hide, you start checking those same objects, corners, ceiling lines, shelves, curtains, hay bales, and wall patches from the other side.
After each seeker loss, do not only ask “where was the last hider?” Ask why the room protected them. Was it height, clutter, sound, score pressure, a too-perfect object, a curtain edge, or a map-specific prop?
If you keep losing to specific map spots, use the MECCHA CHAMELEON Maps & Hiding Spots Guide to learn the map pool. If you want to understand how hiders build those disguises, read the MECCHA CHAMELEON Hider Guide.
FAQ
How do you find hiders in MECCHA CHAMELEON? +
Sweep the room quickly first, then slow down around score changes, whistles, curtains, shelves, ceilings, object disguises, low corners, and anything that looks too clean, too smooth, or slightly wrong for the room.
Do missed shots cost health in MECCHA CHAMELEON? +
Yes. Missed shots cost seeker health, so do not test every object. Shoot only when you have a real clue from shape, shadow, score, sound, movement, pattern breaks, or suspicious object placement.
Should seekers shoot random objects? +
No. Random shots waste health, time, and attention. A good seeker uses the room sweep to build suspicion first, then shoots to confirm.
Why do I walk past obvious hiders? +
Most new seekers scan at normal eye level and move too fast. Good hiders sit low, high, behind curtains, inside shelves, on ceiling lines, or in object groups that your first sweep ignores.
What does it mean when a hider's score rises? +
Score rising usually means a seeker is near or looking close enough for the hider to gain attention points. It is not an exact radar, but it tells you which area deserves a slower second check.
How should I use whistles as a seeker? +
Treat whistles as a search cone, not a GPS ping. Move toward the general area, then check the nearby corners, shelves, curtains, ceilings, and object groups instead of shooting the first thing you see.
What are too-perfect spots? +
A too-perfect spot is an area that looks strangely clean, centered, smooth, or edited compared with the messy room around it. Hiders often over-fix the exact place where they are hiding.
How do I get better as a seeker? +
Play a few hider rounds first. Once you know where you would hide, you start checking those same wall edges, shelves, ceiling spots, hay bales, curtains, and object clusters as a seeker.