MECCHA CHAMELEON Beginner Guide
A practical MECCHA CHAMELEON beginner guide covering the first match, hide time, hiding spot selection, painting order, too-buried warnings, hider score, seeker basics, and common early mistakes.
Updated:

Quick Answer
In your first MECCHA CHAMELEON matches, use hide time in this order: choose a room, find a believable surface or object, change your body shape, paint the largest visible areas, check for the too-buried warning, and stop moving before seekers arrive. Do not spend the whole timer perfecting color. A simple legal spot with a believable outline is safer than perfect paint in an obviously human-shaped position.
What This Beginner Guide Covers
MECCHA CHAMELEON is a hide-and-seek game where hiders disguise their bodies against the map while seekers search for shapes, colors, shadows, sounds, and objects that do not belong.
The first few rounds are difficult because you are learning the timer, both player roles, map layouts, body positioning, painting, and seeker behavior at the same time.
This guide focuses on the decisions that matter during your first matches:
- which type of lobby is easiest to learn in;
- how to divide the hide-time countdown;
- why you should choose a spot before painting;
- how to make your body look less human;
- when rough paint is already good enough;
- how to avoid the too-buried warning;
- when to remain still or abandon a spot;
- how sound and hider score create clues;
- how to approach your first seeker round;
- how to identify the mistake that got you found.
First-Match Route
Use this as the short version of the entire guide.
| Match stage | Main job | Stop doing |
|---|---|---|
| Join a room | Choose a manageable public lobby or a private room with friends | Joining the largest or strangest custom lobby immediately |
| Hide time begins | Pick a room and a spot before painting | Opening Paint Mode in the middle of the room |
| Positioning | Break the normal human outline with the surface, prop, or pose | Depending on color to hide an obvious standing body |
| Painting | Cover the largest visible areas first | Polishing tiny details before the base disguise works |
| Final check | Check warnings, doorway angle, hands, feet, and exposed edges | Moving to a completely new room without enough time |
| Search starts | Stay still and trust the position | Panic-moving because a seeker enters the room |
| Seeker turn | Sweep quickly, then re-check suspicious areas more slowly | Shooting every object without a clue |
| After the round | Identify the first clue that exposed the spot | Blaming every loss on inaccurate paint |
Step 1: Start With a Manageable Match
For your first match, keep the lobby simple.
Enter a normal public room if you want to learn the standard round flow quickly. Pick a room with a familiar-looking map and a player count that is not too chaotic. A lobby with around 4–8 players is generally easier to follow than a very large room.
Private rooms are useful when learning with friends. They give you time to test body positions, painting, climbing, seeker movement, and map routes without random players rushing every phase.
| First-match choice | Use it when | Beginner advice |
|---|---|---|
| Public room | You want a normal match quickly | Choose a manageable player count and a standard-looking map |
| Private room | You are learning with friends | Use it to test positions and understand both roles |
| Small lobby | You want to see why a spot failed | Fewer players make sound, score, and seeker movement easier to follow |
| Large lobby | You already understand the basic loop | More players create noise and make individual mistakes harder to diagnose |
| Custom settings | You understand normal hide and search phases | Avoid unusual rules until the standard match makes sense |
Step 2: Divide Hide Time Into Three Jobs
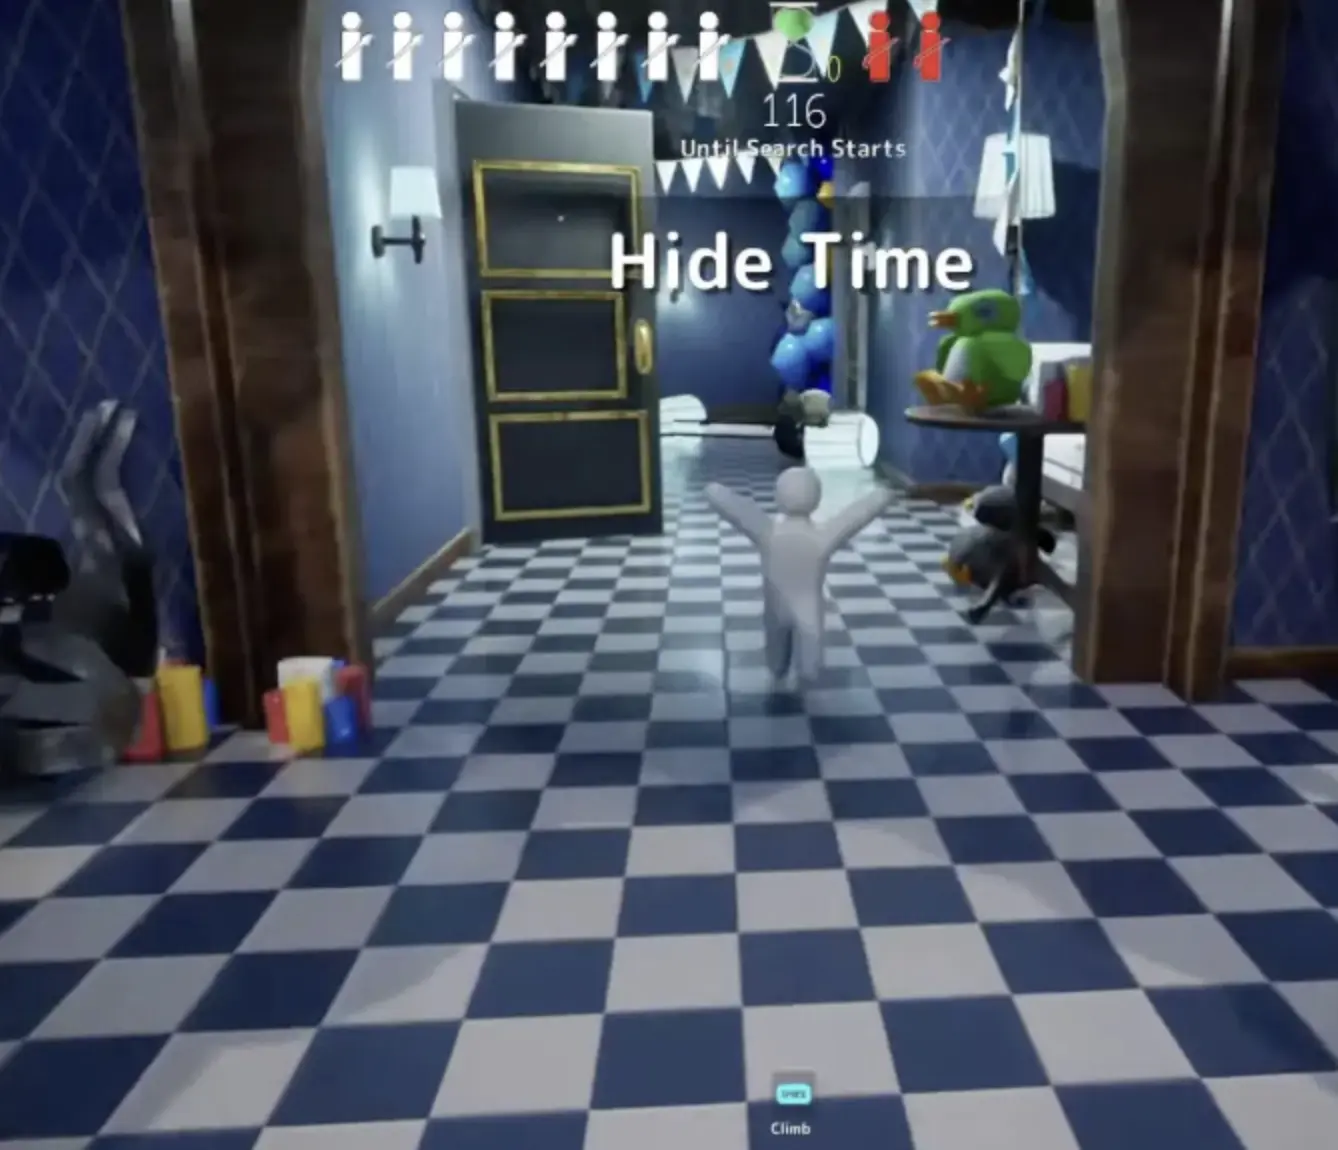
Hide time is the countdown before seekers begin searching.
The exact duration depends on the lobby and host settings. Normal casual rounds may provide around 90 seconds, but you should always follow the Until Search Starts timer shown in the current match.
Do not treat the entire countdown as painting time.
| Hide-time phase | What to do | What not to do |
|---|---|---|
| Opening 20–30 seconds | Choose a room, surface, object, and general spot type | Begin detailed painting without a final position |
| Middle of hide time | Adjust body shape and apply the main colors | Chase small details while the outline still looks human |
| Final 20 seconds | Check warnings, doorway angle, visible limbs, and weak sides | Move to a completely different room unless the current spot is unusable |
| Search begins | Stop moving and trust the disguise | React just because a seeker enters the room |
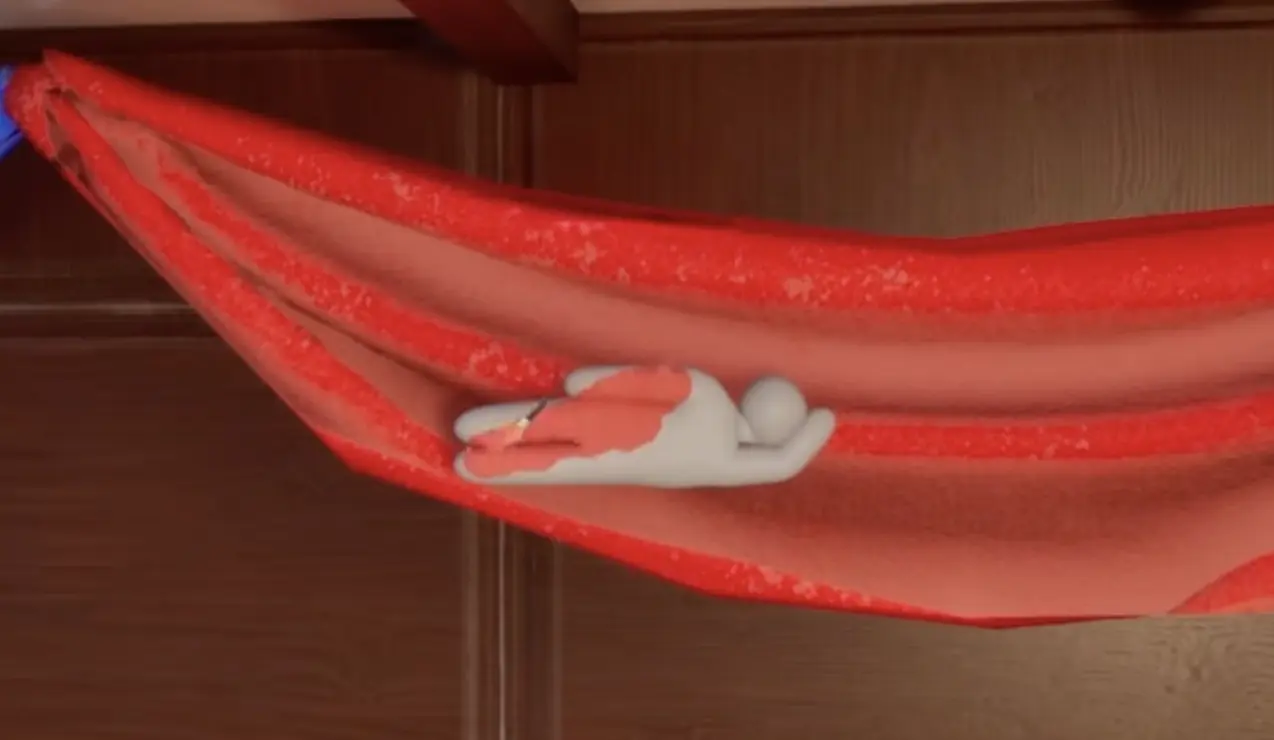
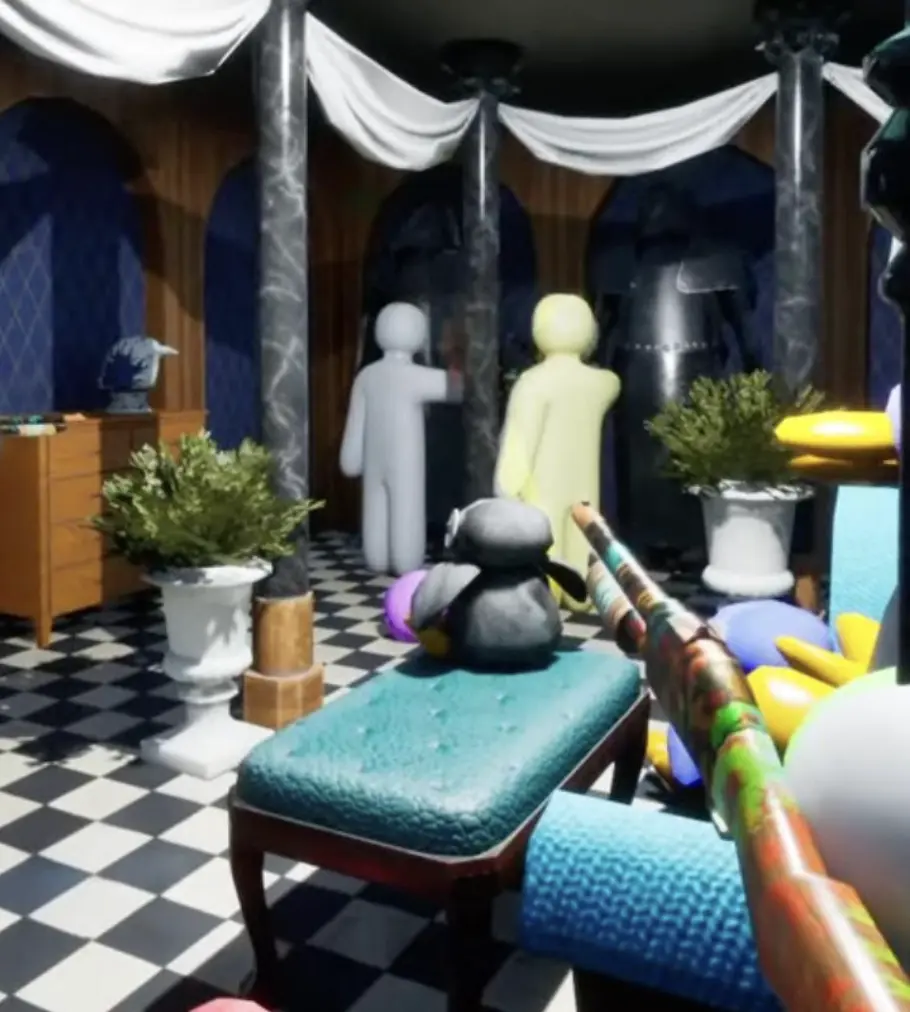
Step 3: Choose the Spot Before Painting
A beginner-friendly spot should make your body look less like a player before paint is added.
Useful surroundings include:
- wall edges;
- chairs and curtains;
- shelves and signs;
- low furniture;
- high walls and ceilings;
- pipes and storage clutter;
- large props with matching shapes;
- surfaces that hide part of your outline without triggering a warning.
The spot does not need to be clever. It needs to look believable from the direction seekers are most likely to enter.
Paint supports the position. It does not rescue a body that still looks like a standing person.
Before committing to a spot, ask these questions:
| Pre-search question | Good answer |
|---|---|
| Does my body still look human? | No; the position, surface, or pose breaks the normal silhouette |
| Can I finish the main paint quickly? | Yes; one or two large colors cover most visible areas |
| Am I too buried or flashing? | No warning and no reveal effect |
| What will seekers see from the doorway? | The first viewing angle looks believable |
| Are my hands or feet exposed? | No obvious body part breaks the object or surface |
| Can I remain still here? | Yes; the spot does not require constant adjustment |
| Should I make sound? | No, unless I deliberately want to redirect a distant seeker |
If two or more answers are bad, move before the timer ends.
A boring legal position is better than a funny spot that reveals you immediately.
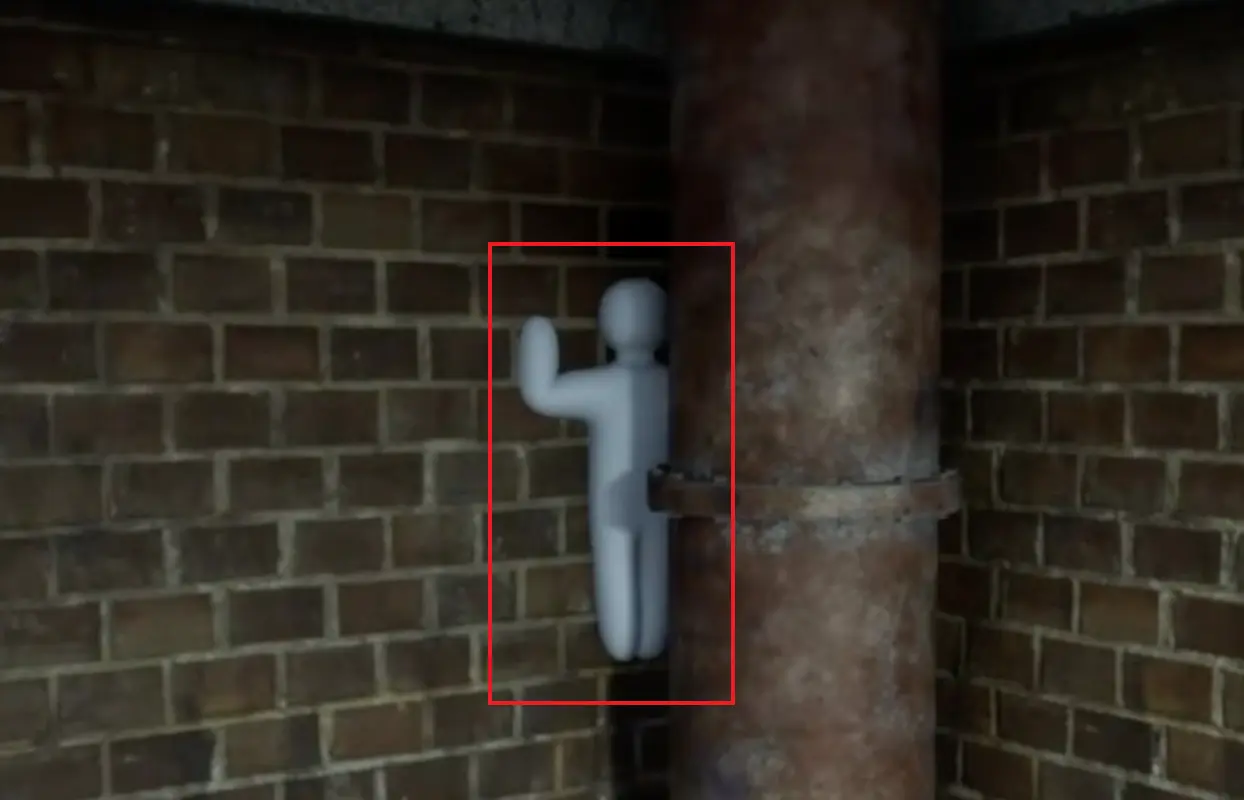
Step 4: Fix the Body Shape Before the Color
New players often assume paint quality decides whether a spot works.
In practice, seekers usually notice the outline first:
- a head shape where no head should exist;
- arms or legs extending beyond the surface;
- a standing posture against a flat wall;
- hands or feet with the wrong direction;
- a body angle that does not follow the nearby object;
- a shadow that reveals the character shape.
Use the available pose, crouch, climb, or positioning actions to make the body fit the environment before polishing the color.
| Body-shape problem | Better decision |
|---|---|
| You still look like a standing person | Change the position or use a surface that supports the silhouette |
| One limb extends into open space | Rotate or reposition until the limb follows the object |
| The body is flat against an empty wall | Find an edge, sign, pipe, shelf, or clutter that explains the shape |
| The pose only works from one direction | Check the nearest doorway and likely seeker route |
| The position requires constant movement | Choose a more stable spot before search begins |
| The surface is difficult to paint quickly | Use a simpler color area or a different nearby object |
Step 5: Paint the Largest Visible Areas First
Once the spot and body shape work, use Paint Mode to cover the most obvious visible color.
Use this order:
- Cover the largest exposed body area.
- Match the main surface color.
- Check the side facing the nearest doorway.
- Fix exposed hands, feet, and body edges.
- Adjust obvious lighting or shadow mismatches.
- Stop before the search begins.
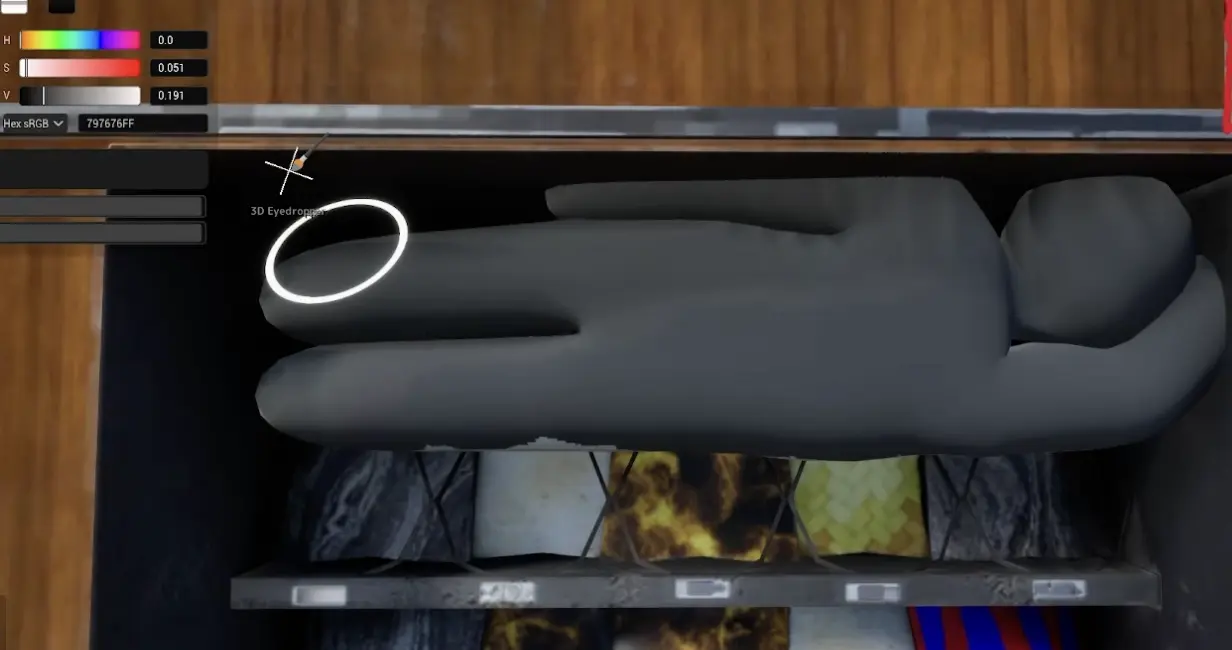
If you use the 3D Eyedropper, treat the sampled color as a starting point. Lighting, shadows, and reflective surfaces can make the sampled result look different from another angle.
The exact Eyedropper, Brush Size, camera rotation, Rotation Lock, and Paint Mode inputs belong in the Controls Guide.
| Painting priority | What to do |
|---|---|
| Main body color | Cover the largest visible area first |
| Nearby surface sample | Use it as a starting point rather than a guaranteed match |
| Doorway-facing side | Check the angle seekers will see first |
| Hands, feet, and edges | Fix parts that still look obviously human |
| Lighting adjustment | Correct colors that appear wrong under shadow or bright light |
| Fine details | Add them only when the basic disguise is already complete |
| Final position | Stop painting early enough to remain still before search |
Step 6: Fix the Too-Buried Warning Immediately
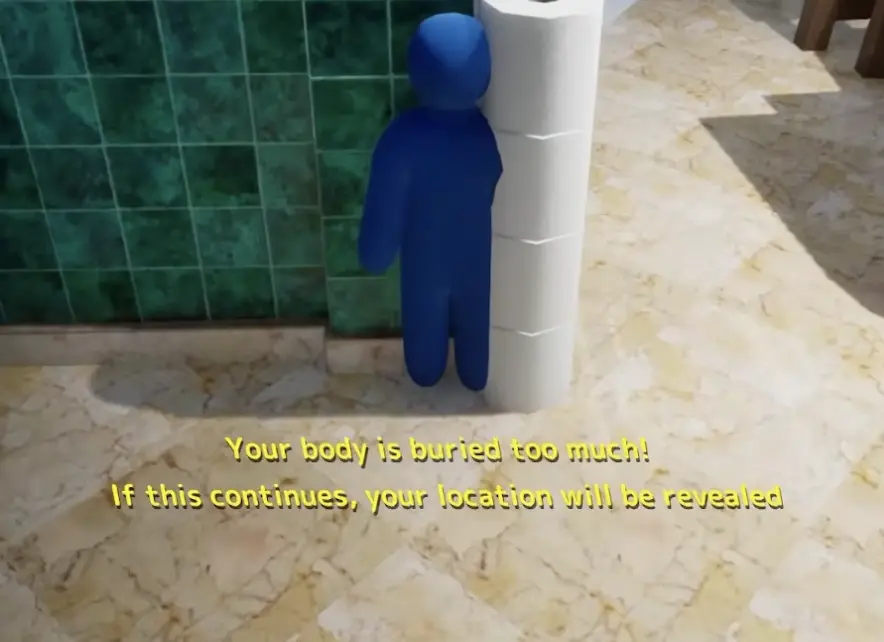
The too-buried warning appears when your body is pushed too far inside a wall, object, surface, or piece of map geometry.
This is not a cosmetic message.
If you keep forcing the position, the game can reveal your location. Move slightly outward as soon as the warning appears, then repair the visible paint if necessary.
| What you see | What it means | What to do |
|---|---|---|
| Your body is buried too much | You are too deep inside a surface or object | Move slightly outward and repaint the exposed section |
| Your character begins flashing | The game may be revealing your location | Leave or repair the spot immediately |
| You cannot move cleanly | The geometry may be trapping the body | Reset the position before search begins |
| Only one body part remains visible | The spot may still look unnatural | Check whether the visible part matches the surrounding object |
| The warning returns after every adjustment | The spot is too unstable | Choose a simpler nearby position |
| The timer is almost finished | There is not enough time to rebuild a complex hide | Move to a legal wall edge, prop, or piece of clutter |
Step 7: Use Taunts Only When They Change Seeker Movement
Taunts and whistles are not automatically mistakes.
Used correctly, sound can make seekers:
- turn away from another route;
- enter the wrong room;
- re-check an area they already cleared;
- waste the final seconds;
- focus on a wide area instead of your exact position.
The important question is not “Can I taunt?”
It is:
Will this sound move the seeker somewhere useful?
| Sound situation | Better decision |
|---|---|
| Seekers are far away | Use sound only if it pulls them toward the wrong route |
| A seeker has committed to another room | A taunt may make them turn back and waste time |
| Seekers are searching nearby | Stay quiet unless the spot can survive a direct check |
| A seeker is looking close to you | Do not make sound |
| The round is almost over | A late taunt can waste movement if your spot is stable |
| Your score is already increasing | Stay still; the position is already receiving useful attention |
| Another hider is being chased | Avoid creating a new clue that redirects the seeker toward you |
Step 8: Understand What Hider Score Tells You
Hider score is connected to attention.
In normal hiding rounds, you can gain points when you remain in a seeker’s view without being found. Players can also use score changes as a clue that a hider may be visible or nearby.
The score is not an exact radar. It does not reveal the exact object or pixel.
For the hider, it means your position may be receiving attention.
For the seeker, it means the current area may deserve a slower second look.
| Score situation | What it may mean | Hider response |
|---|---|---|
| Score rises while seekers are nearby | The spot is being viewed and may be working | Stay still unless they clearly identify you |
| Score rises quickly | A seeker may be staring near your position | Do not panic-move |
| Score stays low | The spot may be far from common search routes | Survive first; test a riskier position in another round |
| A seeker leaves and returns | The score or another clue may have made them suspicious | Prepare for a second viewing angle |
| Several hiders score together | The seeker may be scanning a shared room or area | Remain quiet and let the room look normal |
| The score rises after a taunt | Sound may have redirected attention toward your area | Stop taunting and stay still |
Step 9: Use a Search Order in Your First Seeker Round
When you become a seeker, your job is to confirm hiders by shooting suspicious shapes.
The exact shooting input belongs in the Controls Guide. The important beginner skill is deciding what deserves a shot.
Start with a fast sweep:
- Enter the room and scan normal eye level.
- Check large props and obvious body-shaped objects.
- Look low under furniture and clutter.
- Look high on walls, shelves, ceilings, and signs.
- Slow down when you hear sound or notice score changes.
- Re-check suspicious areas from another angle.
- Shoot only when shape, color, shadow, sound, or placement gives you a reason.
Missed shots may not always show a severe punishment in casual rounds, but they still consume time and attention.
| Seeker clue | What to check |
|---|---|
| Human-shaped outline | Limbs, heads, standing bodies, and poses that do not match the surface |
| Incorrect color | Bright or dark areas that break the nearby wall, floor, or object |
| Strange shadow | A body-shaped shadow that does not belong to the prop |
| Taunt or whistle | Use it to choose the room or general area, not the exact target |
| Score change | Slow down and inspect the current viewing direction |
| Unusual object placement | Props that appear duplicated, rotated, or disconnected from the room |
| Empty-looking wall | Check high, low, and edge positions where a painted body may blend in |
| Previously cleared area | Return from a second angle if another clue suggests you missed something |
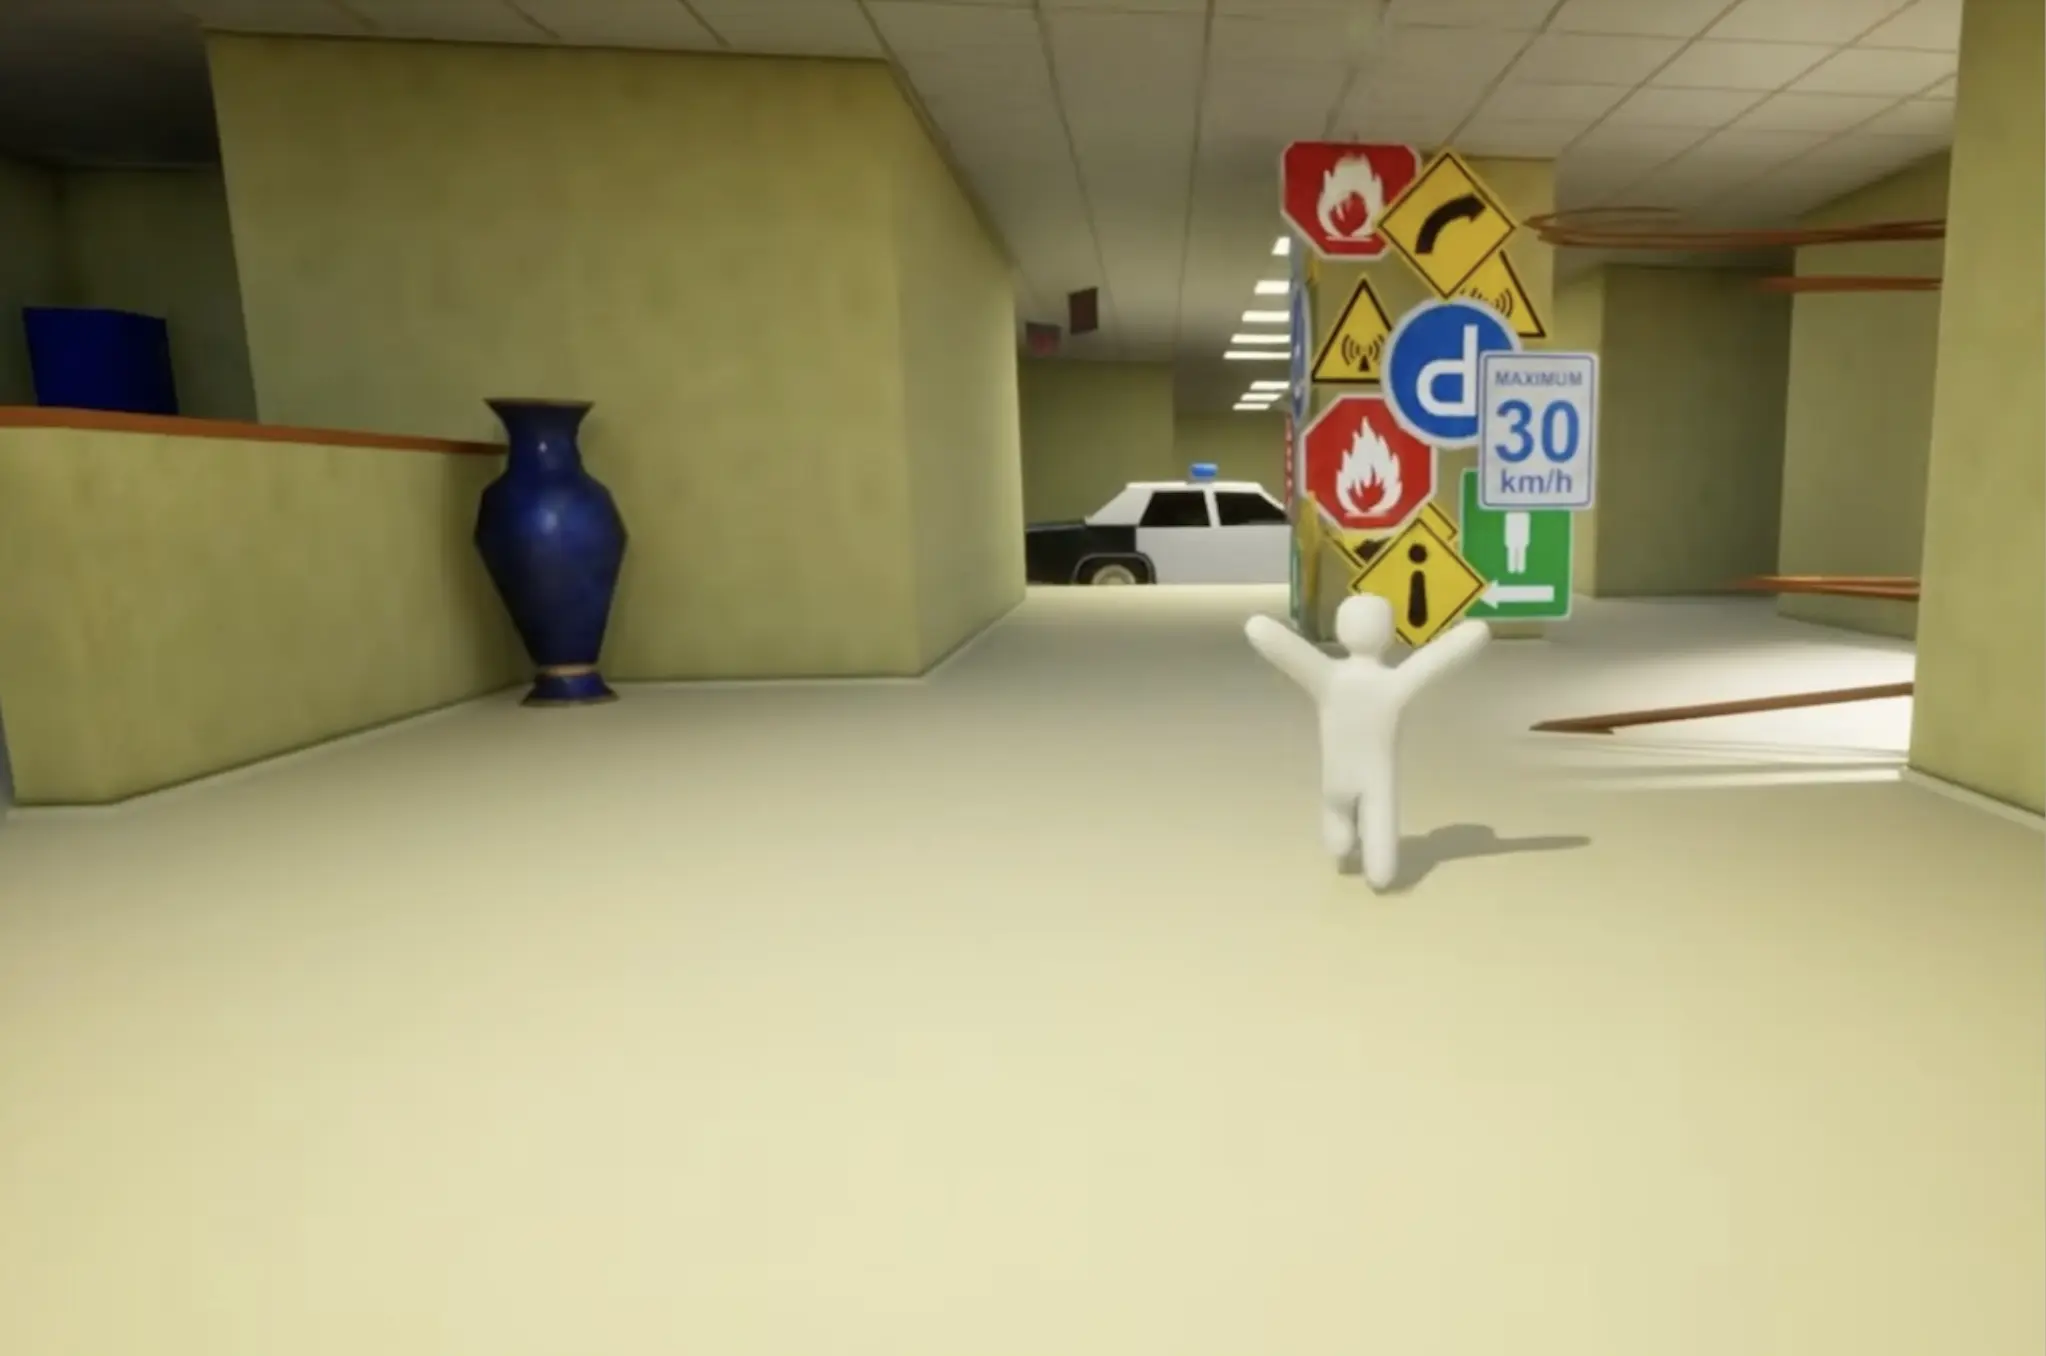
Map Differences Beginners Should Notice
You do not need to memorize every named hiding spot during your first day.
Start by recognizing map styles. Different layouts reward different beginner decisions.
| Map style | Beginner lesson |
|---|---|
| Furniture-heavy rooms | Chairs, curtains, shelves, stairways, and object edges create believable outlines |
| Themed prop rooms | Strange shapes can work when the surrounding objects support them |
| Cluttered storage rooms | Pipes, boxes, shelves, brick, and low corners create visual noise |
| Flat-wall rooms | Body outlines and color mismatches are easier to notice |
| Vertical maps | Seekers must check walls, roofs, shelves, and positions above eye level |
| Small maps | Common hiding positions are learned quickly and receive frequent checks |
| Large maps | Room choice and seeker travel path matter more |
| Bright maps | Paint and shadow errors become easier to see |
| Dark maps | Outlines and movement may matter more than small color differences |
For named maps, recurring hiding patterns, and stronger location ideas, use the MECCHA CHAMELEON Maps and Hiding Spots Guide.
Common Beginner Mistakes
Use this table after the round ends.
Do not ask only whether the paint looked accurate. Identify the first clue that made the seeker suspicious.
| Problem | Likely cause | Better habit |
|---|---|---|
| I spend the whole timer reading prompts | You are trying to learn every input during a live round | Learn the essential actions in the Controls Guide before joining another match |
| I get found immediately | Your body outline was easy to recognize | Fix the position and pose before painting |
| I run out of hide time | You painted before choosing a final spot | Choose the room and surface first |
| My color never matches | Lighting changed the sampled color | Use the sample as a starting point and adjust obvious differences by eye |
| The game reveals my position | You ignored the too-buried warning | Move outward as soon as the message appears |
| I move when a seeker looks near me | Panic movement exposes a working disguise | Stay still until the seeker clearly reacts |
| I keep getting found through sound | You taunt while seekers are close | Use sound only when it creates a useful route mistake |
| My hands or feet give me away | You only checked the center of the body | Inspect edges and visible limbs before search starts |
| The spot works from one side only | You checked the hiding camera but not the doorway angle | Evaluate the likely seeker entrance |
| I cannot find anyone as seeker | You sweep too quickly and only check eye level | Re-check low, high, corners, curtains, walls, and shelves |
| I shoot everything and still miss | You are firing without a clue | Shoot based on shape, color, sound, shadow, score, or object placement |
| I survive but receive little score | The spot is far from normal seeker routes | Test a more visible but believable position in a later round |
| I change rooms during the final seconds | You are still searching for a perfect spot | Finish a simple legal position instead |
| I blame every loss on paint | You did not review the first reason the seeker stopped | Check outline, doorway angle, exposed limbs, sound, and movement first |
Beginner FAQ
What should I do if I cannot find a hiding spot?
Stop searching for a perfect trick spot once the final part of hide time begins.
Choose a simple wall edge, shelf, curtain, large prop, or piece of clutter that breaks the body outline. Apply a rough base color, check for warnings, and stop moving.
A simple finished position is safer than an ambitious spot that remains unfinished.
Is perfect paint more important than a good pose?
No.
The outline is usually noticed before small color differences. Check whether the position still looks human from the nearest doorway. If the silhouette is wrong, change the position before adding more paint detail.
When should I abandon a hiding spot?
Leave before search begins when:
- the too-buried warning keeps returning;
- your character begins flashing;
- the position traps your movement;
- an exposed limb cannot be hidden;
- seekers will enter facing the weakest side;
- the remaining paint cannot be completed in time.
Do not abandon a legal spot only because the color is slightly imperfect.
Should beginners use taunts?
Use them sparingly.
A taunt is most useful after a seeker has committed to the wrong route or during the final seconds of a stable hide. Do not use one when a seeker is already checking your room, corner, or surface.
What should I check after being found?
Review the moment before the shot.
Check:
- the first doorway angle;
- your body outline;
- visible hands or feet;
- mismatched shadow or color;
- whether a taunt revealed the area;
- whether score changes encouraged a second check;
- whether you moved while the seeker was already leaving.
The first suspicious clue is more useful than the final shot.
Which guide should I read next?
Use the guide that matches the problem:
- Controls Guide if you still need exact inputs;
- Hider Guide if you are found quickly;
- Seeker Guide if you keep walking past players;
- Maps and Hiding Spots Guide if you understand the basics but need map-specific positions.
After Your First Three Rounds
After several matches, do not judge progress only by wins.
Ask what type of problem remains.
If you are found in the first 20 seconds, the main problem is usually the spot, body outline, doorway angle, or movement rather than fine paint quality. Continue with the MECCHA CHAMELEON Hider Guide.
If you become a seeker and repeatedly walk past players, your problem is probably search rhythm. You may be checking eye level too quickly and missing shelves, curtains, walls, ceilings, low corners, or small object disguises. Continue with the MECCHA CHAMELEON Seeker Guide.
If you understand the match flow but cannot decide where to hide on each map, continue with the MECCHA CHAMELEON Maps and Hiding Spots Guide.
If the remaining problem is the actual inputs, camera actions, Paint Mode tools, shooting, spectating, or controller setup, use the MECCHA CHAMELEON Controls Guide.
FAQ
What should I do if I cannot find a hiding spot? +
Stop searching for a perfect trick spot once the final part of hide time begins. Choose a simple wall edge, large prop, shelf, curtain, or piece of clutter that breaks your outline, then complete a rough base color and stay still.
Is perfect paint more important than a good pose? +
No. A believable outline and body position usually matter more than exact color. Check how your silhouette looks from the nearest doorway before spending time on small paint details.
When should I abandon a hiding spot? +
Leave the spot before search starts if you see the too-buried warning, begin flashing, become trapped, cannot finish the visible paint, or realize seekers will enter facing your weakest angle.
Should beginners use taunts in MECCHA CHAMELEON? +
Use taunts sparingly. They work best after a seeker has committed to the wrong route or when the remaining time is short. Do not taunt while a seeker is already checking your room or nearby corner.
What should I check after being found? +
Review the first doorway angle, body outline, visible hands or feet, shadow mismatch, sound timing, and whether you moved while a seeker was already walking away. The first visible clue is usually more important than the final shot.
Which MECCHA CHAMELEON guide should I read next? +
Use the Hider Guide if you are found quickly, the Seeker Guide if you keep walking past players, the Maps and Hiding Spots Guide if you need map-specific ideas, and the Controls Guide if you still need exact keybinds.