MECCHA CHAMELEON Hider Guide
A practical MECCHA CHAMELEON hider guide for players who want better hiding spots, cleaner paint matching, light and shadow blending, safer poses, stronger plain-sight hides, and fewer too-buried mistakes.
Updated:
Quick Answer
To hide better in MECCHA CHAMELEON, build the disguise in this order: choose a believable spot, set your pose, paint the surface’s light and shadow, copy any strong pattern, then check for the too-buried warning. Your best hides are not always the darkest corners. A visible spot can be stronger if seekers read it as a pillow, wall patch, curtain fold, ceiling piece, or normal room clutter.
What This Hider Guide Covers
Hiding in MECCHA CHAMELEON is not just “find a wall and paint yourself the same color.”
Good hiders think like this:
- What will the seeker see first from the doorway?
- Does my body look like a room object or a player?
- Does the light hit one side of me harder than the other?
- Is there a pattern I need to copy?
- Am I legal, or am I about to trigger the too-buried warning?
- Can I score by being seen without being recognized?
This guide focuses on hider decisions that actually change your survival rate.
| Hider skill | What it means | Why it matters |
|---|---|---|
| Spot reading | Choose a place that looks believable from seeker angles | A bad angle can expose even a good paint job |
| Body positioning | Use crouch, climb, pose, and rotation to fit the surface | Your body needs to belong to the room |
| Light and shadow painting | Paint bright sides and dark sides separately | One flat color often looks pasted on |
| Pattern matching | Copy the direction of bricks, tiles, stripes, or wallpaper | Repeated patterns break instantly when misaligned |
| Too-buried control | Stay legal and stable without flashing | A greedy spot can reveal you |
| Score awareness | Understand when seekers are looking near you | Score can tell you whether the spot is being tested |
| Sound discipline | Use whistles and taunts to misdirect, not self-report | Sound can waste seeker time or expose your corner |
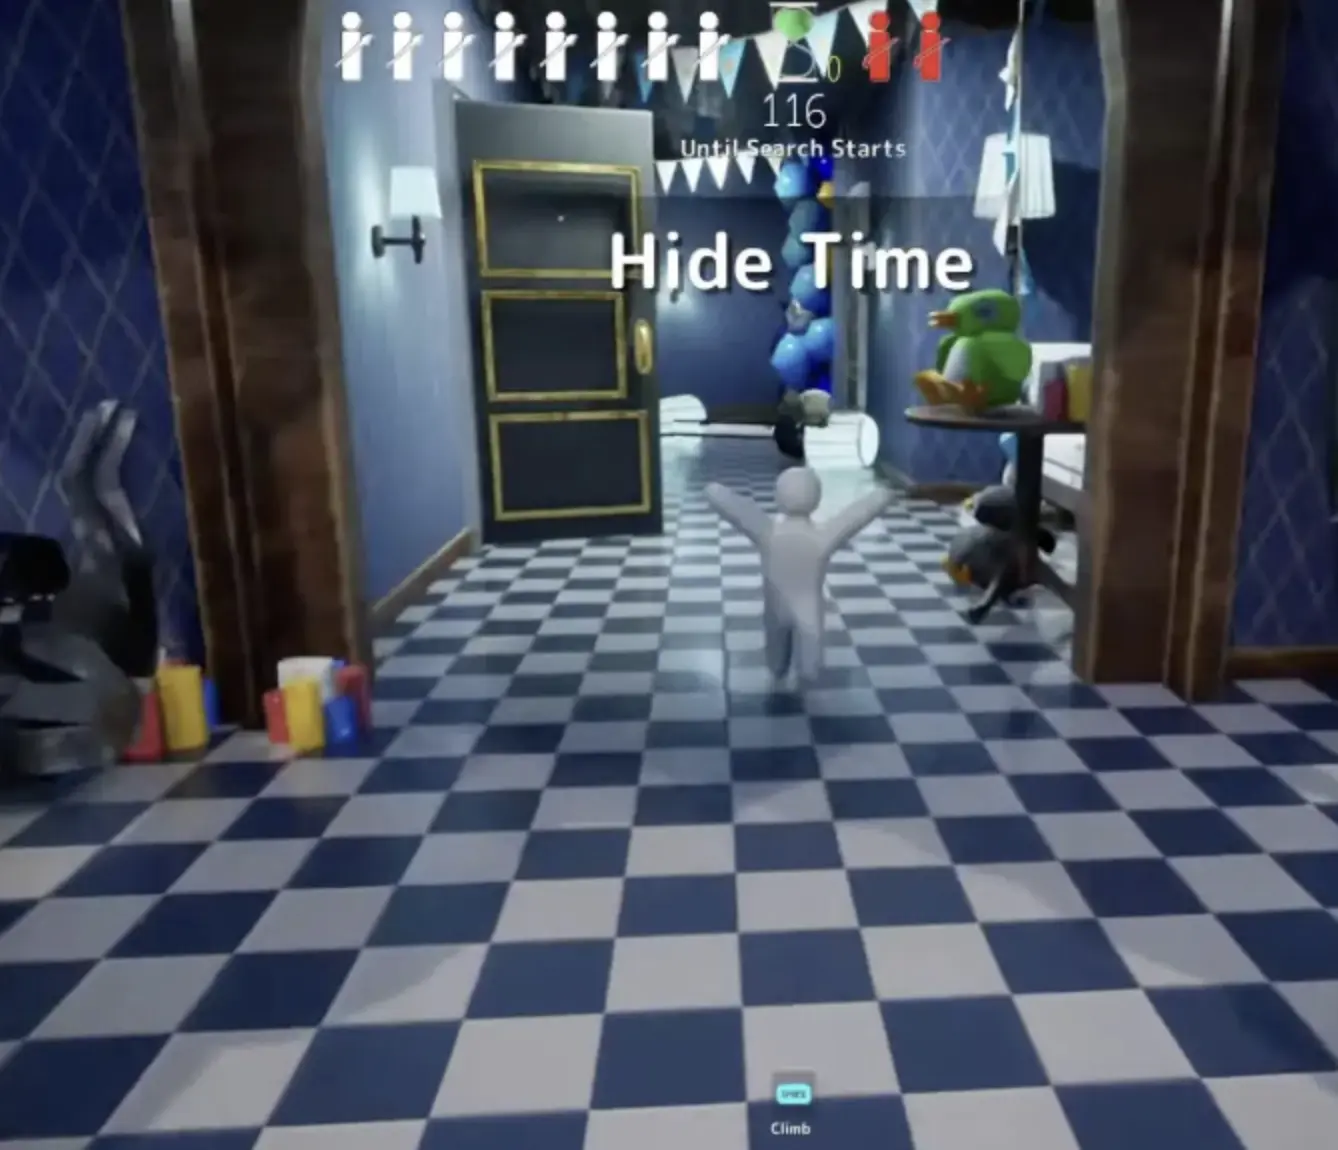
Choose the Spot Before the Paint
Your spot decides everything else.
If the surface is flat, you need cleaner paint and better body alignment. If the room is cluttered, you can rely more on object confusion. If the spot is high, seekers may miss it once, but it must still look believable when they finally look up.
Pick the location first, then build the disguise around that location.
| Spot question | Good sign | Bad sign |
|---|---|---|
| Will seekers enter facing me? | The first doorway angle makes you look normal | The entrance shows your weakest side |
| Can my body become part of this object? | Your pose can follow a chair, shelf, wall, curtain, or sign | You still look like a tiny body attached to the surface |
| Can I paint it fast enough? | One base color plus simple light/shadow is enough | The spot needs detailed art before it works |
| Is the surface patterned? | You can copy the pattern direction quickly | You cannot align the pattern before search starts |
| Is the spot stable? | No warning, no flashing, no constant repositioning | The spot keeps pushing you into a too-buried state |
| Can it score? | Seekers may look near you and still misread the object | Nobody will ever pass by, so the score stays low |
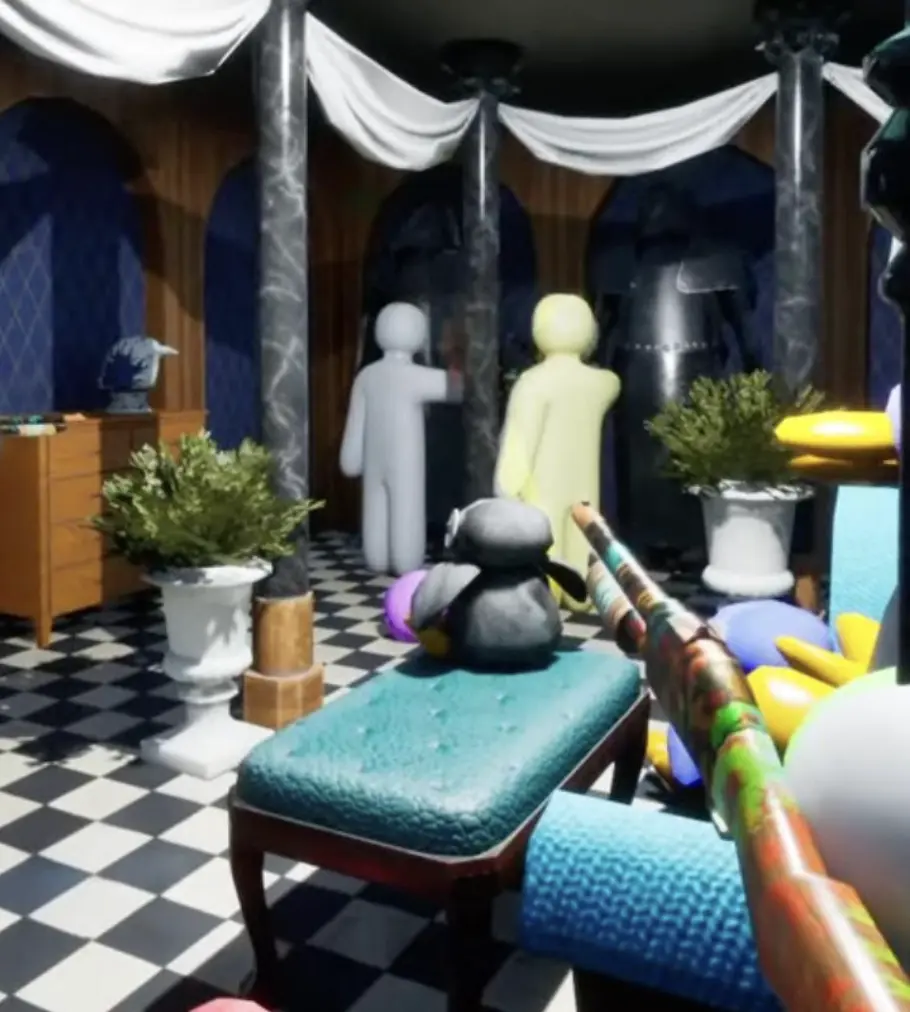
Break the Player Silhouette
The easiest hiders to find are the ones still shaped like people.
A round head against a flat wall, arms sticking out from a shelf, or legs hanging below a chair can ruin the disguise before color even matters. Change your pose so the visible body parts follow the room.
| Silhouette problem | Why it gets found | Better move |
|---|---|---|
| Round head on a flat surface | The head becomes the first thing seekers notice | Put the head near curves, clutter, signs, shadows, or folds |
| Arms sticking outward | Limbs create a player-shaped outline | Rotate until the arms follow the object or wall |
| Legs visible below furniture | It looks like a person hiding behind furniture | Crouch, flatten, or choose a wider object |
| Body floating from the wall | Gaps and shadows make the player shape obvious | Move closer without triggering buried warnings |
| Pose fights the surface | The body does not match the object you are pretending to be | Change pose or choose a different surface |
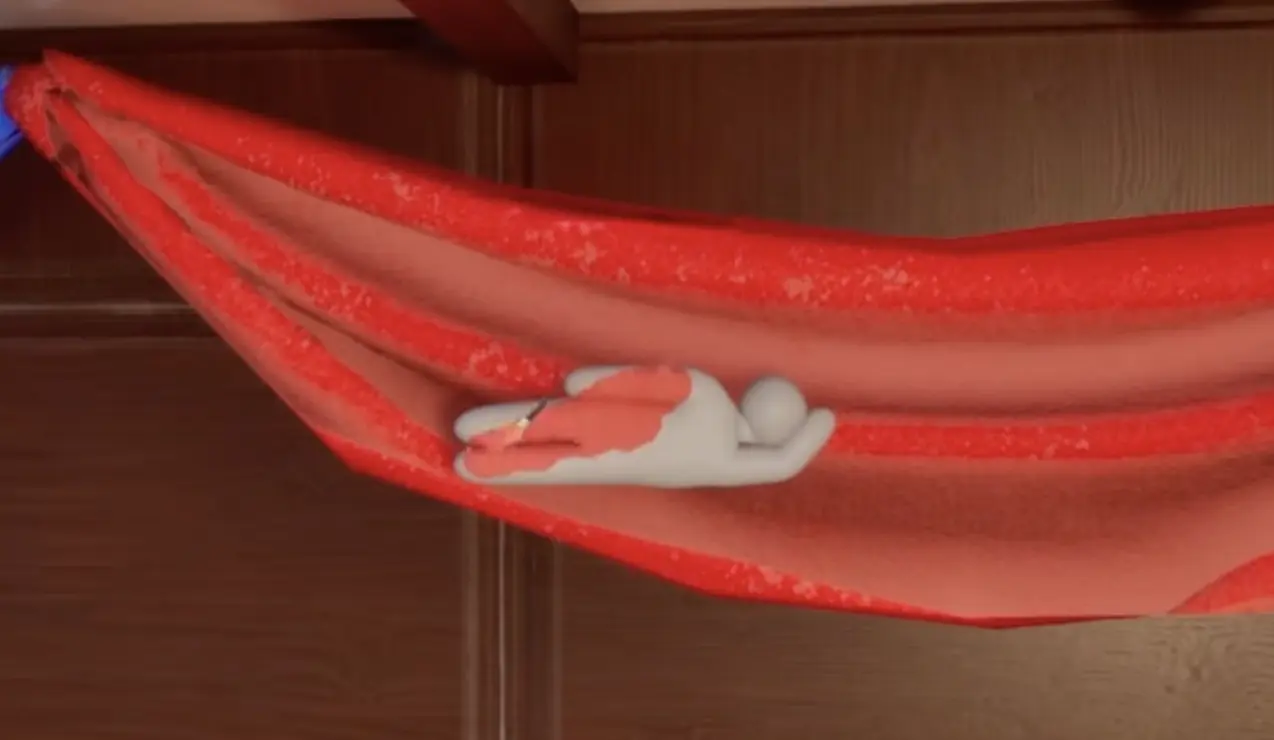
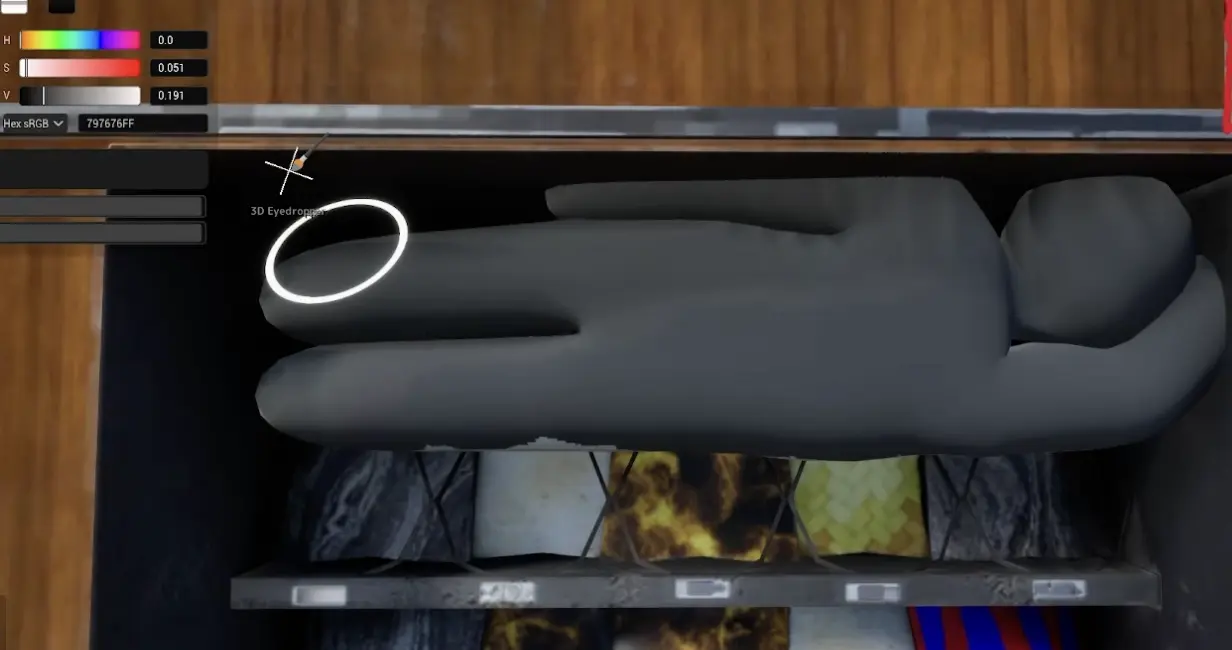
Paint the Light, Not Just the Colour
A common hider mistake is sampling one color and filling the whole body with it.
Real surfaces are not one flat color. One side may face the lamp. Another side may be in shadow. A chair, curtain, wall, or shelf can have bright highlights, dull midtones, and dark edges.
Instead of painting your whole body one sampled color, paint in layers:
- use a base color for the main surface
- brighten the side facing the light
- darken the side facing away from the light
- soften the transition if the surface is cloth, shadow, or curved
- keep details simple unless they help the disguise
| Surface situation | Better hider paint choice |
|---|---|
| One side faces a lamp | Add a lighter patch on that side |
| Back side is in shadow | Use a darker tone instead of the same sampled color |
| Cloth or curtain | Use soft light/dark areas rather than sharp lines |
| Shiny object | Keep the main color close, but respect the bright highlight |
| Flat wall | Avoid unnecessary detail; keep the body aligned and low-noise |
| Dark corner | Match the shadow first, then hide the body edges |
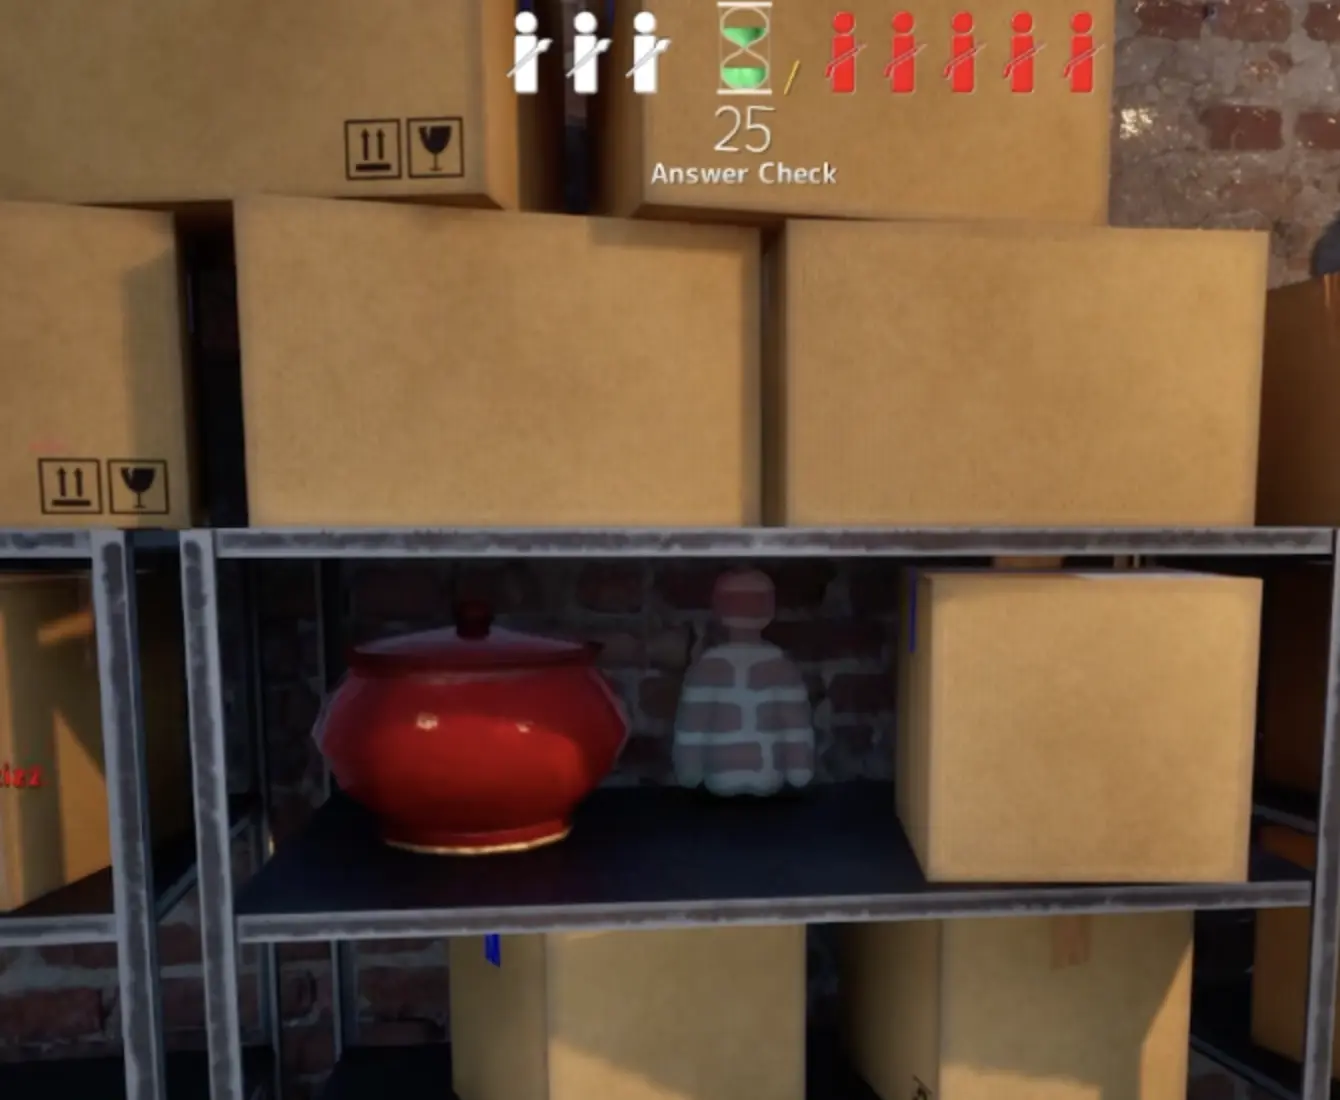
Copy Patterns, Not Only Colors
Patterned surfaces need a different approach.
On brick walls, tiled floors, striped objects, wallpaper, signs, and geometric decorations, the direction and rhythm of the pattern matter. If your body has the right color but the pattern breaks the wrong way, a seeker can spot you on the second glance.
You do not need to copy every detail. You need to copy the pattern’s main direction.
| Pattern type | What to copy first | Common mistake |
|---|---|---|
| Brick wall | Horizontal bands and rough spacing | Drawing random lines that do not match the brick rows |
| Tile floor | Grid direction and light/dark tile blocks | Painting one flat color over a checkered surface |
| Wallpaper | Large repeated shapes or color rhythm | Overdrawing small details while the body outline is obvious |
| Warning sign / graphic | Big color blocks and the main symbol direction | Copying tiny icons while the pose does not align |
| Shelf pattern | Box edges, object spacing, and shadow blocks | Looking smoother than the hard props around you |
| Curtain folds | Vertical flow and shadow direction | Painting stiff lines that fight the cloth |
Use Plain-Sight Hiding When the Room Supports It
Plain-sight hiding works when you are visible but believable.
A seeker can look near you, hesitate, and still move on if your spot gives them a normal explanation. You might look like a cushion, a wall mark, a sign piece, a curtain fold, a shadow, or an object that belongs in that room.
| Plain-sight situation | Why it can work |
|---|---|
| You look like a normal object | Seekers accept the first read and keep moving |
| The room already has visual clutter | Your body becomes one more strange shape |
| The pattern continues through your body | The surface explains your presence |
| You are above or below the normal scan line | Seekers often check eye level first |
| The seeker’s score clue is not precise | They know someone is near, but not exactly where |
| You stay calm during the check | No movement confirms the disguise |
Use Nearby Chaos as Cover
Sometimes the best thing you can do is nothing.
If another hider near you has a bad disguise, seekers may rush toward that obvious target first. That creates noise, shooting, movement, and attention somewhere else in the room. Your job is to stay still and let the chaos work for you.
This is especially useful in busy rooms, large lobbies, or late-round situations where seekers panic and start checking the loudest clue first.
| Nearby situation | Hider response |
|---|---|
| Another hider is obvious | Stay still and let seekers focus there first |
| Seekers are shooting random objects | Do not move unless they are correcting toward your exact spot |
| Several hiders are scoring nearby | Let the room look confusing instead of adding sound |
| A teammate whistles from another angle | Use the distraction, but do not whistle too |
| Someone gets found beside you | Wait for the seeker’s next movement before reacting |
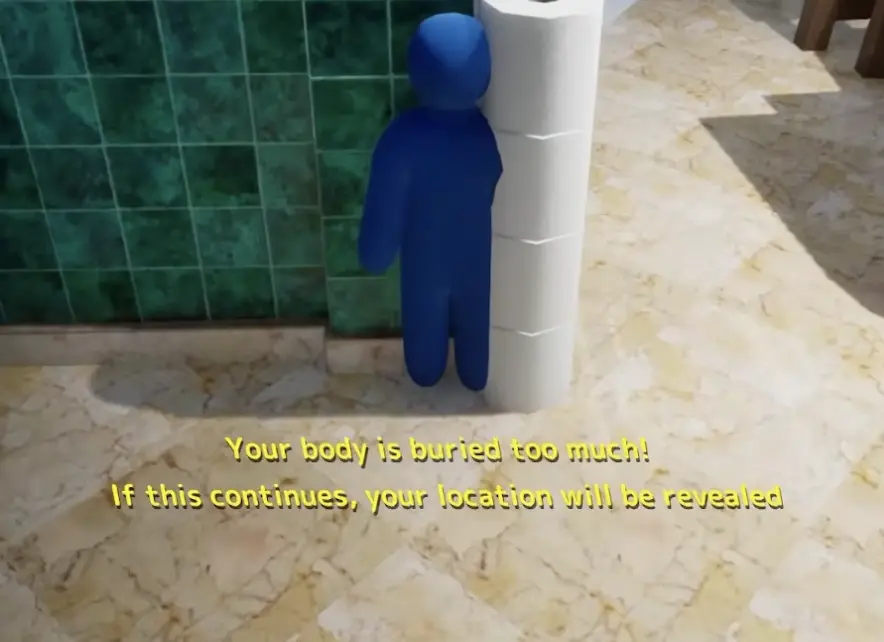
Avoid Too-Buried and Flashing Spots
Some spots look strong because they hide most of your body.
That does not mean they are safe.
If your body is pushed too far into a wall, object, toilet, curtain, shelf, vehicle, or ceiling piece, the game can warn that your body is buried too much. If you keep forcing the position, your location can be revealed.
| Warning or problem | What it means | Fix |
|---|---|---|
| Your body is buried too much | You are too deep inside geometry | Move outward and repaint the exposed area |
| You flash while hiding | The game may be revealing your position | Leave the spot unless you can fix it immediately |
| You cannot stand or move cleanly | The spot may be trapping your body | Reset before search starts |
| Your view looks hidden but unstable | The spot may work only from your own angle | Think about what the seeker sees from the room entrance |
| You need constant tiny adjustments | The spot is too fragile | Use a simpler, quieter spot |
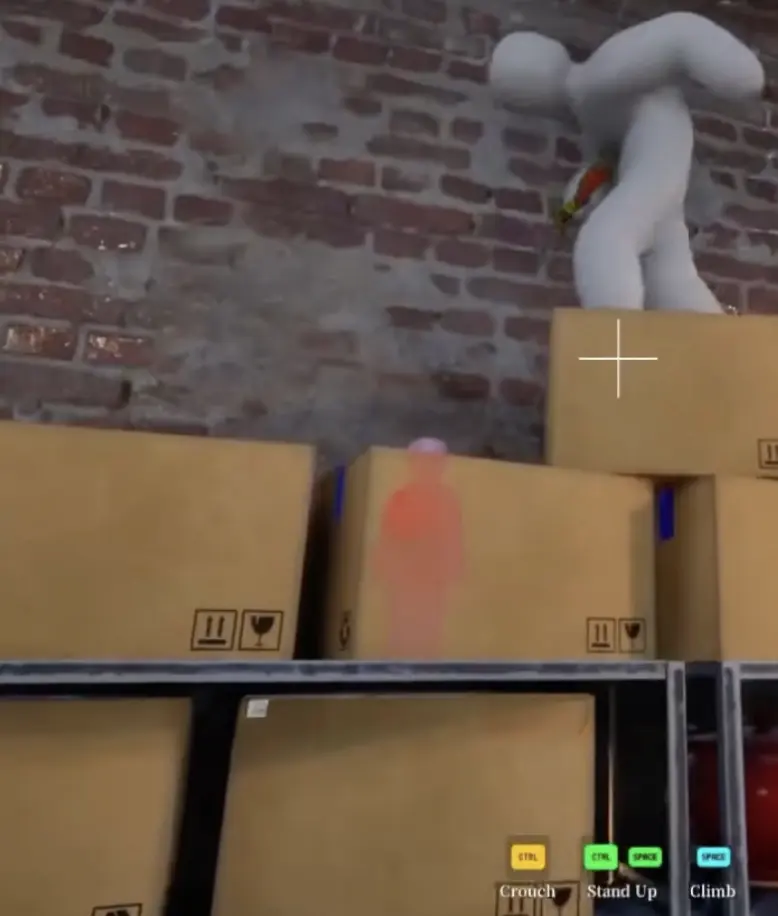
Wall, Ceiling, and High Spots
Wall and ceiling spots work because many seekers check the floor first.
That advantage disappears once seekers learn to look up. A high spot still needs a believable surface, stable body position, and paint that does not glow against the background.
| High spot type | When it works | What gives it away |
|---|---|---|
| Wall edge | Your body follows a column, pipe, brick edge, or vertical line | Round head or arms break the line |
| Ceiling corner | Seekers forget to check above normal eye level | Bright body color against a darker ceiling |
| Shelf top | Boxes or clutter hide the body’s outline | Legs or head stick out cleanly |
| Object stack | You look like one more object in a pile | Your body is smoother than the props nearby |
| Upper shadow | Darkness hides small paint errors | Whistle or movement gives the area away |
Object Disguises: Pillows, Signs, Props, and Clutter
Object disguises work when the seeker accepts the big shape first.
You can pretend to be a pillow, cushion, lump, sign detail, trash bag, statue piece, pipe shadow, or shelf object. The trick is to copy the object’s first impression, not every tiny detail.
| Object disguise | What to copy first | What not to over-focus on |
|---|---|---|
| Throw pillow / cushion | Shape, color block, and soft position | Tiny fabric texture before the silhouette works |
| Trash bag / dark object | Low profile, shadow, and clutter placement | Perfect linework |
| Sign or warning panel | Large color regions and object angle | Small icons if you are running out of time |
| Statue or figure | Posture and object-like stillness | Exact color if the room has similar shapes |
| Brick or wall patch | Pattern direction and edge alignment | Drawing every brick line |
| Ceiling fan / hanging object | Position and angle | Details nobody can see from below |
Sound: Whistles and Taunts
Sound is not only a mistake. Used well, it can make seekers waste time, turn around, or check the wrong side of a room.
The key is to use sound when it creates confusion, not when it gives away your exact corner. If a seeker is already close, stay quiet. If they are far away or chasing the wrong route, a sound cue can become bait.
| Sound situation | Better hider choice |
|---|---|
| Seekers are far away | Use a taunt that makes them check the wrong room or wrong route |
| Seekers are nearby but not on your spot | A quick sound can pull them wider, then you stay still |
| Seekers are one room away | Stay quiet unless your spot can survive a direct check |
| A seeker is looking near you | Do not make sound unless you are gambling on the final seconds |
| Time is almost over | A late sound can waste movement if your spot is stable |
| Your score is already rising | Stay still; your spot is already doing its job |
When Bad Paint Still Works
Bad paint does not automatically mean a bad hide.
Sometimes a rough disguise survives because the room is busy, the body is small, the pose fits the object, or seekers are distracted by a louder clue. When that happens, do not “fix” the spot while seekers are active. Let the room do the work.
| Rough hide survives when… | Why it works |
|---|---|
| The room has many strange objects | Your body becomes one more odd shape |
| The first angle is forgiving | The seeker’s doorway view does not show the weak side |
| Another hider pulls attention | Seekers spend time on the obvious target first |
| The surface has shadows or repeated marks | Small paint errors blend into visual noise |
| The seeker checks too quickly | A fast sweep misses small body details |
| You do not react too early | The seeker has no movement cue to confirm suspicion |
Hider Checklist Before Search Starts
Use this checklist during the final seconds of hide time.
| Check | Good answer |
|---|---|
| Spot chosen? | Yes, and it looks believable from the main seeker angle |
| Body read fixed? | My pose fits the surface or object |
| Light and shadow painted? | The bright and dark sides are not one flat color |
| Pattern aligned? | Bricks, tiles, signs, or wallpaper follow the right direction |
| Too-buried warning clear? | No warning, no flashing |
| Sound plan? | I know when to stay quiet and when to bait |
| Chaos nearby? | If another hider is obvious, I can let them draw attention |
| Panic avoided? | I will not move just because someone looks near me |
Common Hider Mistakes
Use this after a round ends. The checklist above is for before search starts; this table is for after you get found.
| Problem | Likely cause | Better move |
|---|---|---|
| I get found instantly | Your first doorway angle exposed the disguise | Rotate the spot or choose a surface that hides the weak side |
| My color looks close but still obvious | You painted one flat color instead of light and shadow | Add a brighter side and darker side where the surface needs it |
| My wall hide looks wrong | The pattern direction does not match | Align brick, tile, wallpaper, or sign direction first |
| I trigger the warning | You pushed too far into an object or surface | Move outward and repaint |
| Seekers hear me too easily | You made sound while they were already close | Use taunts only to redirect distant seekers |
| I hide too far away and score low | Nobody looks near you | Try a more visible but believable spot next round |
| My good spot works once, then fails later | The lobby learned that exact location | Keep the spot type, but change room, height, or object |
| I move after surviving a close check | You reacted after the danger had already passed | Wait for the seeker to leave or commit elsewhere |
After Your Next Few Hider Rounds
Getting found during the first seeker sweep usually means the spot failed before the paint mattered. Check the doorway angle, your body shape, and whether the room gives seekers an obvious reason to question your position.
If your hides look good from your camera but fail when seekers get close, work on light, shadow, and pattern matching. A body that looks fine from your view can still break under the seeker’s angle.
If you understand the hiding basics but need stronger map-specific ideas, use the MECCHA CHAMELEON Maps & Hiding Spots Guide next. It covers room types, exact spot families, and seeker counters.
To understand how seekers think, read the MECCHA CHAMELEON Seeker Guide. The fastest way to become a better hider is to learn what seekers actually check.
FAQ
How do you hide better in MECCHA CHAMELEON? +
Choose a spot that makes your body believable from the seeker’s first angle, then paint for that surface, pose to reduce obvious body parts, avoid too-buried warnings, and stay calm when seekers look near you.
Should I paint one sampled color over my whole body? +
No. Use the sampled color as a starting point, then paint lighter areas toward the light and darker areas on the shadow side. One flat color often makes your body look pasted onto the map.
How do I match patterns like bricks, tiles, or wallpaper? +
Copy the direction and rhythm of the pattern first. On bricks, tiles, stripes, or geometric surfaces, a few aligned lines are better than many details that do not match the surface.
What does hiding in plain sight mean? +
It means you hide somewhere a seeker can technically see, but your shape, paint, pose, and placement make you look like part of the room. These spots can score well when seekers look near you without finding you.
What should I do when my body is buried too much? +
Move slightly out of the wall, object, or surface, then repaint the exposed part. If you keep forcing the spot, the game can reveal your location.
Can nearby bad hiding spots help me? +
Yes. If another hider is obvious, seekers may focus on them first. Stay still, let the chaos pull attention away, and do not reveal yourself with movement or sound.
Should I use whistles or taunts as a hider? +
Use sound to misdirect seekers, not just to make noise. A good taunt pulls them toward the wrong angle or wrong room; a bad taunt tells them your exact corner.
Are wall and ceiling spots good? +
Yes, but only when your pose, paint, and warning state are stable. High spots work because seekers often check the floor first, but they fail quickly if your outline is obvious or you start flashing.