How I Manage Immunity in Honeycomb
Immunity becomes a real travel limit once the opening protection disappears. I use the IM Pump I, IMX plants and sealed shelter to stay outside without wasting perishable ingredients.
Updated:
Quick Answer
When the stasis antibiotics wear off, I make IM Pump I my next survival job.
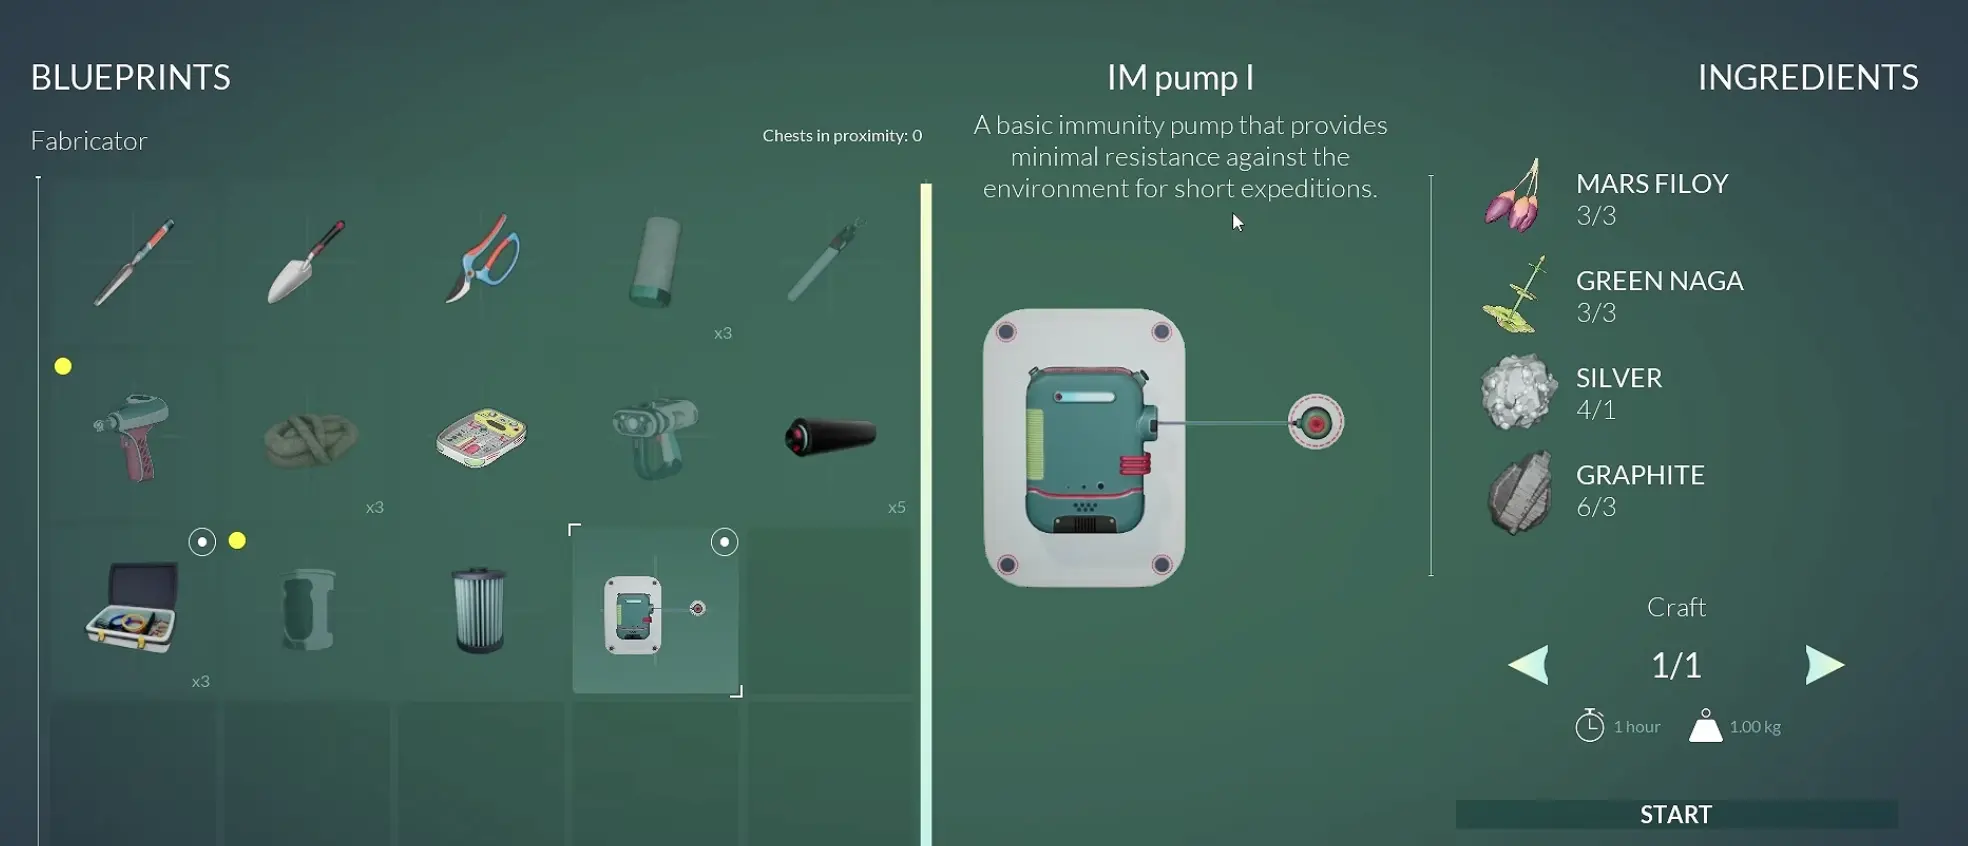
Its recipe is 3 Mars Filoy + 3 Green Naga + 1 Silver + 3 Graphite. I collect the biological ingredients last, return before they expire, craft the pump in 1 in-game hour, equip it, and use my sealed base or IMX-rich items when I need to restore immunity.
The Immunity System Starts When the Free Protection Ends
For the opening stretch of Honeycomb, the atmosphere never felt like an immediate problem. I could wander, scan and gather without planning the trip around environmental exposure.
That changes when IVS reports that the stasis antibiotics have metabolized.
The protection I arrived with is gone, Sota 7’s pathogens are now relevant, and low immunity can eventually start damaging me.
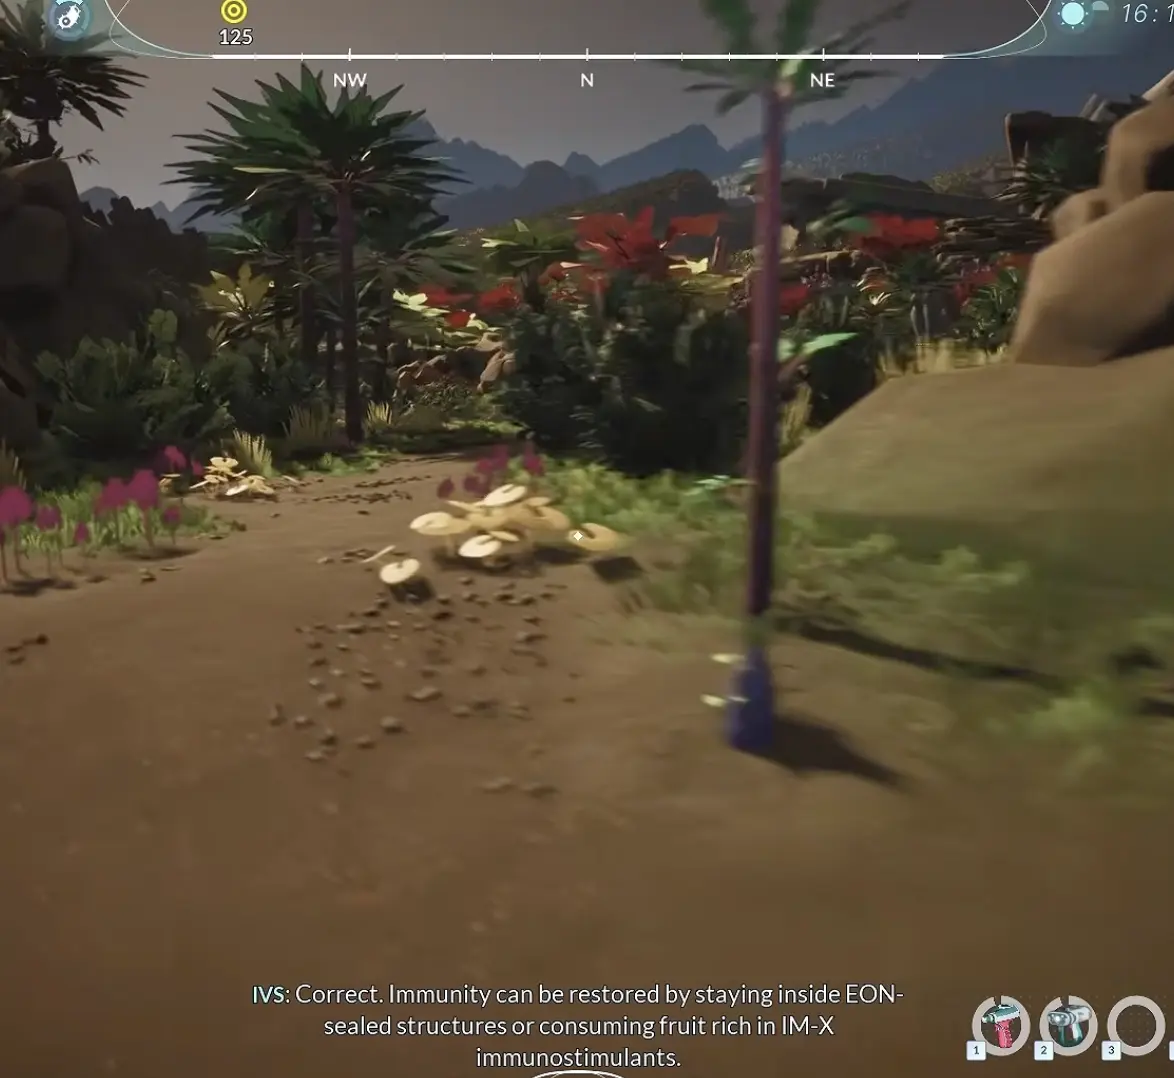
This warning arrived after I had already established the first home and started settling into the normal crafting loop. That timing is useful because I already had somewhere safe to return to.
From here on, the question is no longer only whether I have enough food and water.
I also need enough environmental margin to get home.
A destination that looks comfortably reachable with a full immunity bar can become a much worse idea after a long detour, especially if the return route is unfamiliar.
Sealed Structures Give Me a Reliable Recovery Point
IVS gives two early ways to restore immunity:
- stay inside an EON-sealed structure;
- consume fruit rich in IMX immunostimulants.
That makes the first enclosed base more than a crafting room.
It becomes the place I can reset before the next trip.
I use the sealed base when I am already close enough that returning costs little. Consumable immunity is more valuable when it changes what I can accomplish away from home.
This difference matters because an immunity item used ten seconds from the door does almost nothing for the route. The same item used halfway through a useful expedition may give me enough margin to finish the job and return safely.
The first-base utility setup is covered in the base-building guide; for immunity, what matters is having an enclosed fallback point before longer exploration becomes normal.
IMX Plants Become Much More Important After the Warning
The immunity objective sends me back to the flora rather than to another machine immediately.
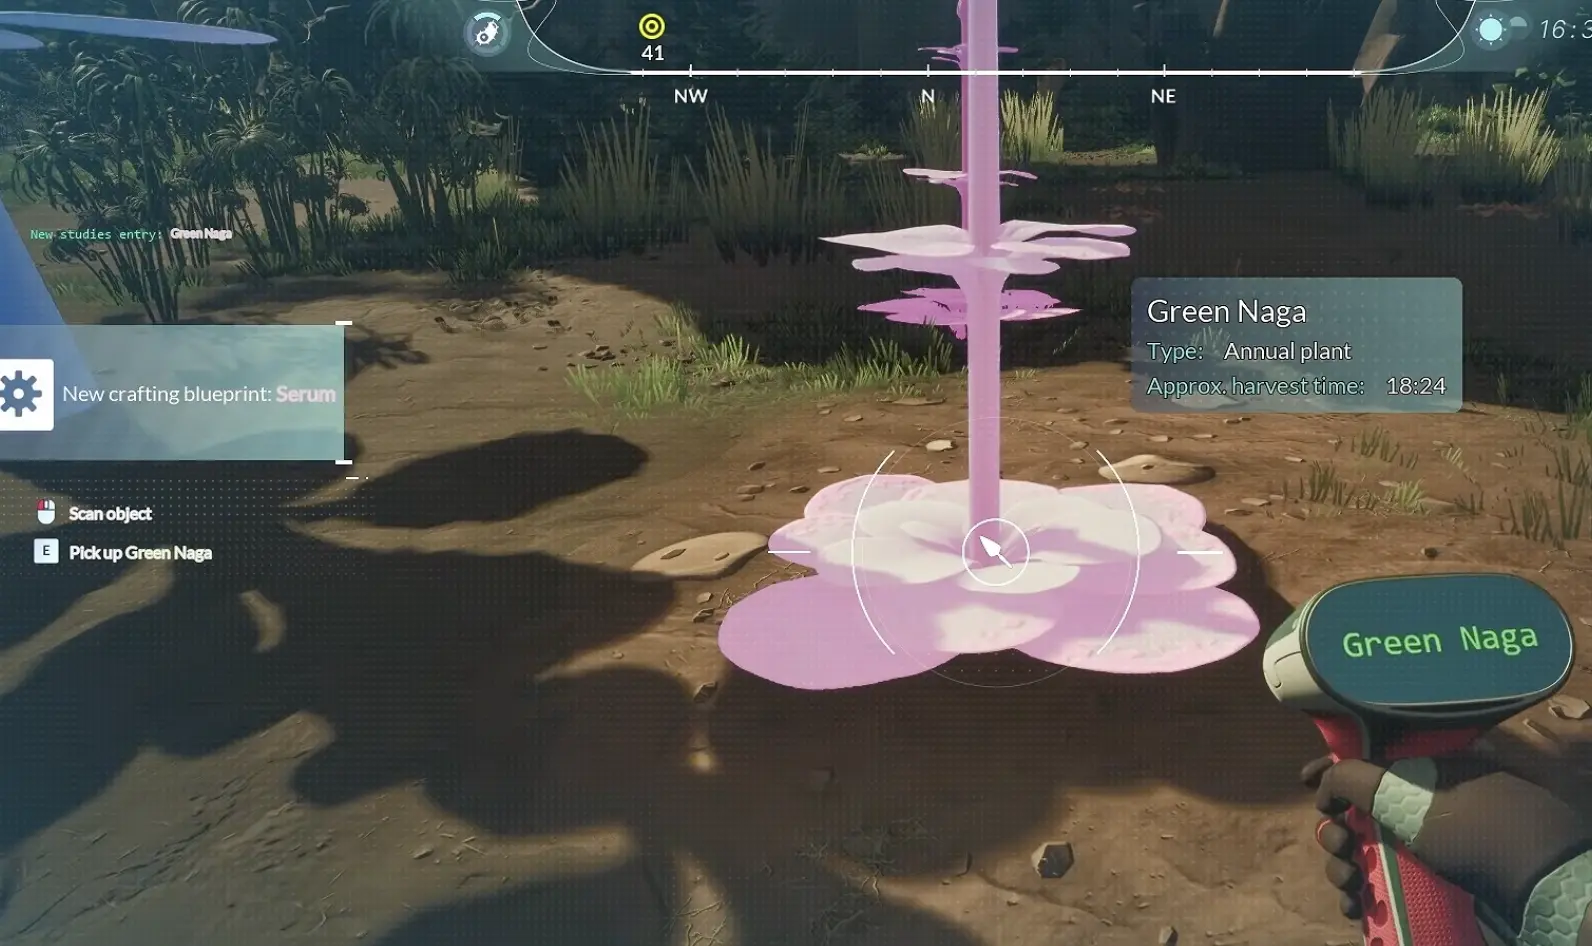
IVS points out that plants in volcanic soil may develop useful properties, so I start scanning around that region with a very different goal from the opening tutorial.
Earlier, a plant was mainly food, crafting material or research.
Now I am asking whether it can buy me more time outside.
That does not mean every useful immunity item becomes food.
One item I found, Beetle Soulum, restores:
- +25% Immunity
- +1% Thirst
- +2% Hunger
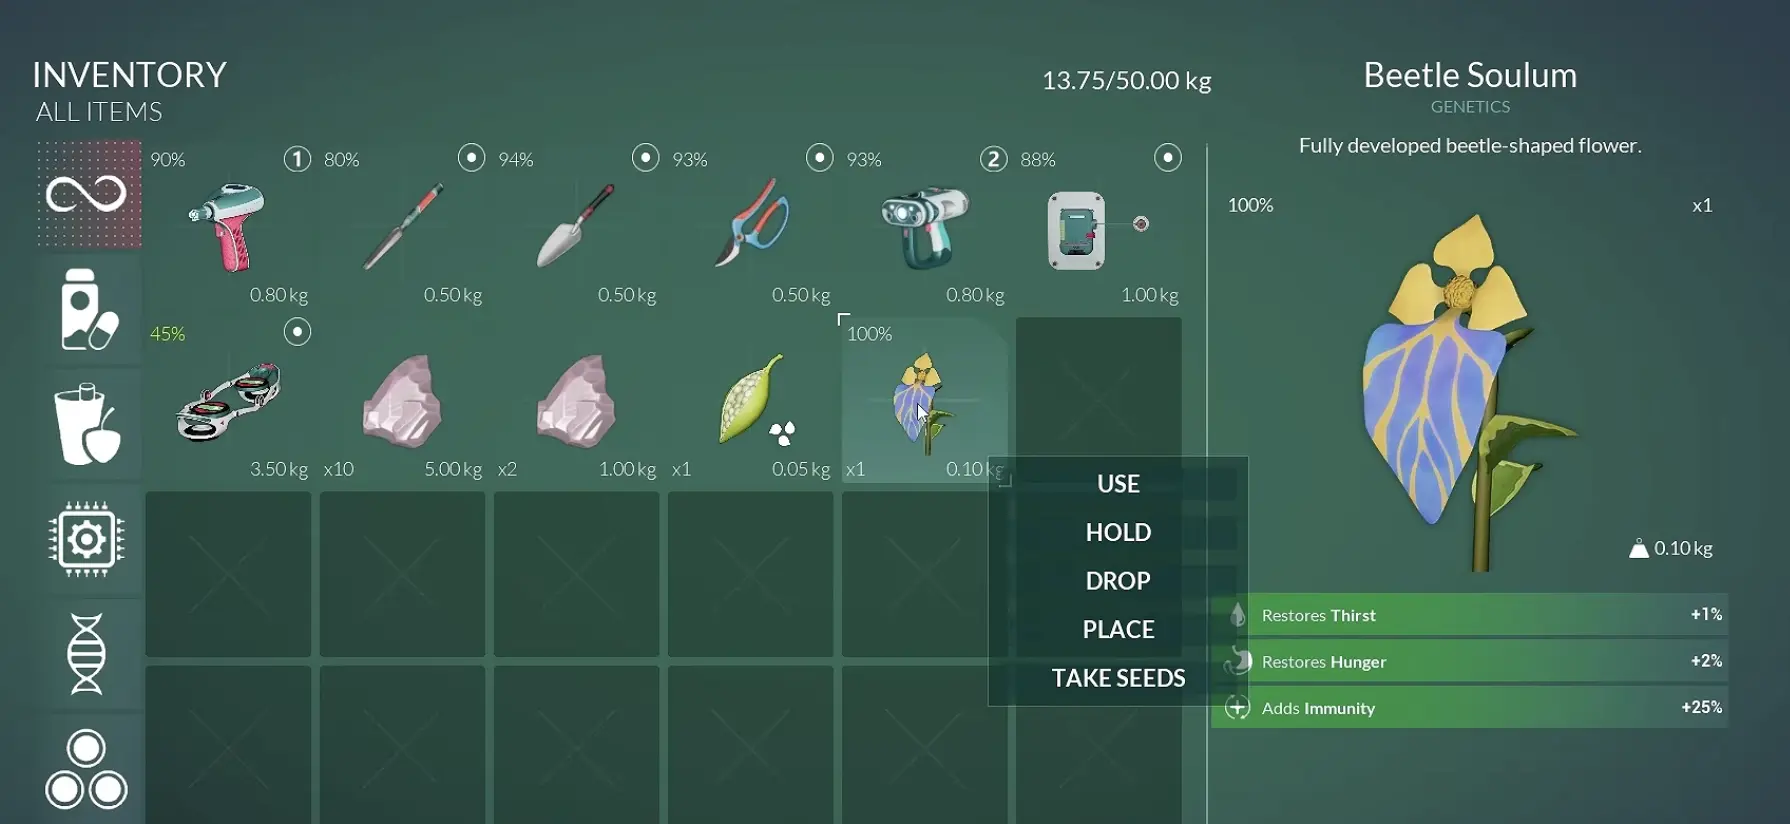
Those numbers make its role clear.
If hunger is the problem, I want food.
If immunity is the problem, Beetle Soulum is much more interesting.
That is the kind of distinction I start making once several survival bars can fail for different reasons.
IM Pump I Is the First Durable Immunity Upgrade
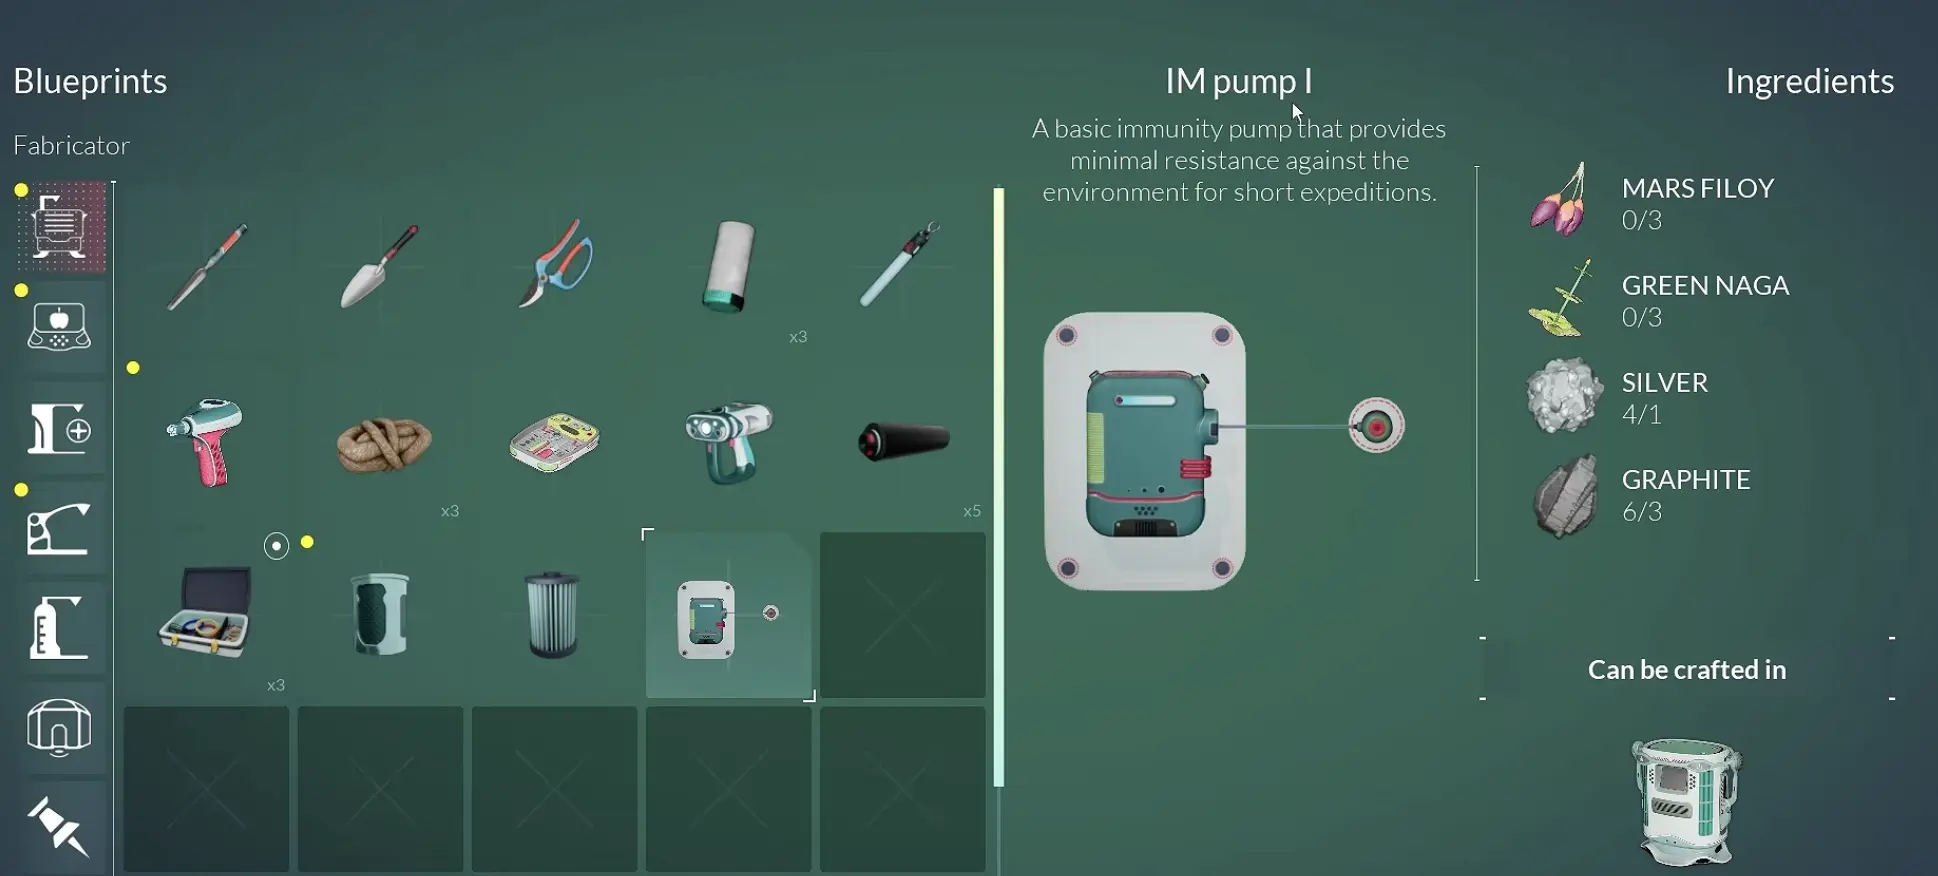
Consumables help, but the first upgrade I actively build around is IM Pump I.
The complete recipe is:
3 Mars Filoy + 3 Green Naga + 1 Silver + 3 Graphite
It takes 1 in-game hour to craft and the finished pump weighs 1.00 kg.
Silver and Graphite are easy to think of as the difficult part because they are minerals, but those are not what caused my failed attempt.
The biological materials were the real problem.
I already had routes for the mineral side. When Silver or Graphite is missing, I use the resource guide and solve that shortage first.
Then I collect Mars Filoy and Green Naga.
The order matters because the plant materials can deteriorate before I finish the craft.
Sleeping Cost Me an Entire Gathering Run
My first IM Pump attempt failed in a very ordinary way.
I collected what I thought I needed, returned, then slept before finishing the craft.
When I checked again, one of the biological ingredients was gone.
I initially assumed I had misplaced it or moved it into storage.
The actual explanation was worse for the route: the material had expired.
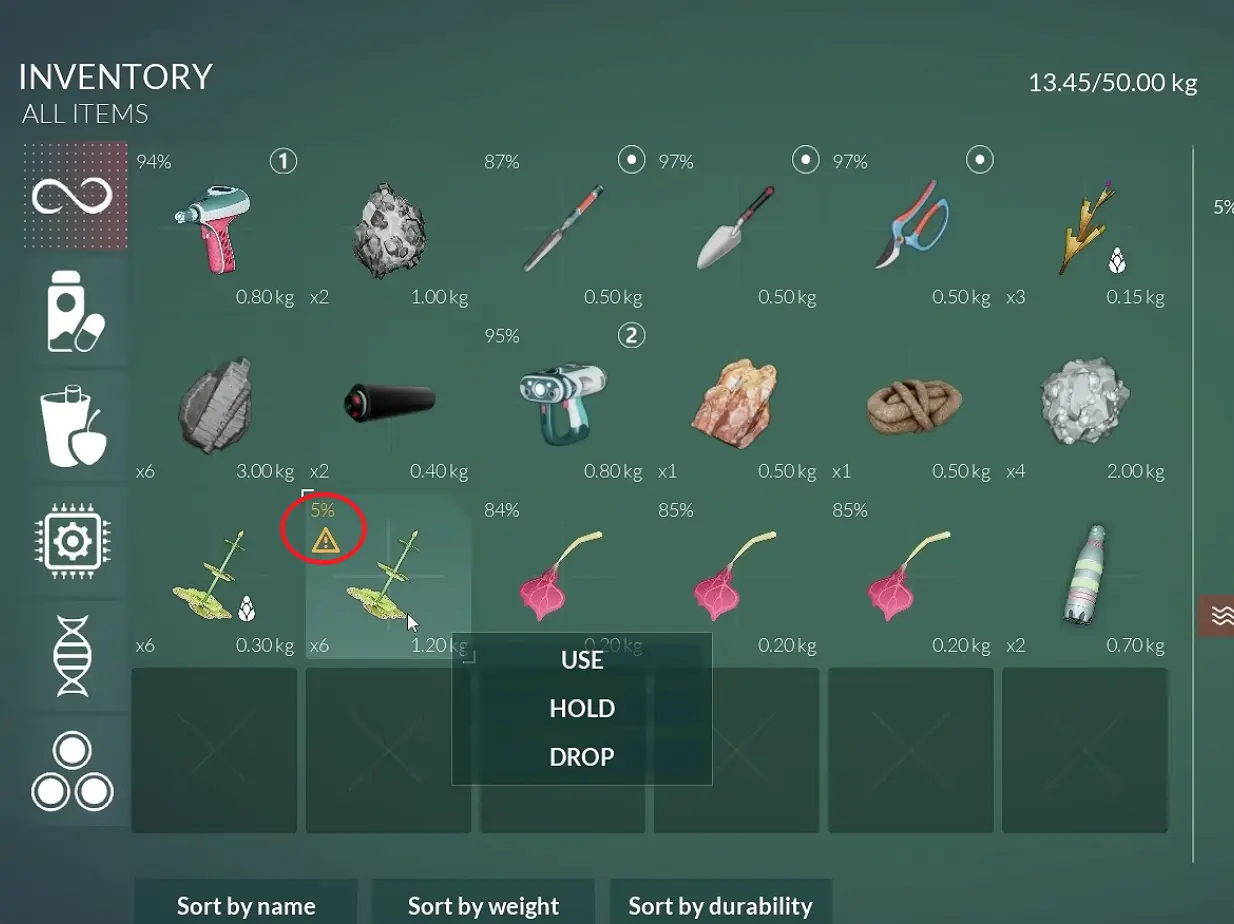
After that failure, I changed the sequence.
I make sure Silver and Graphite are already solved before starting the final biological run. Then I collect 3 Mars Filoy, collect 3 Green Naga, return to the Fabricator and start the IM Pump immediately.
The one-hour crafting time is not the risky part.
Waiting before I start it is.
A Correct Map Marker Can Still Lead to an Empty Plant
Replacing the expired ingredient exposed a second problem.
I returned to the location where I knew the plant grew, but there was nothing available to take.
The map marker was not wrong.
The plant simply had not regenerated yet.
One location showed:
Quantity 0/8
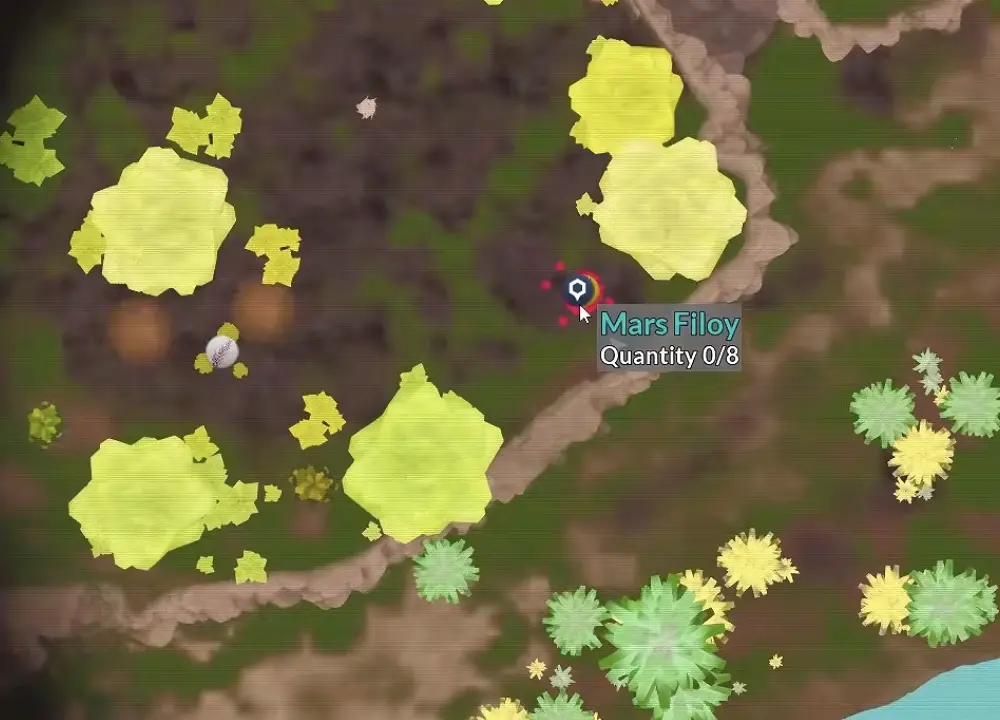
That distinction is much more important for biological materials than it is for the way I normally think about ore.
With an expiring ingredient, three things matter at the same time:
location, current quantity and remaining lifetime after harvest.
If the marker says zero, circling the same tree does not improve the situation. I either find another known source or wait for the plant to replenish.
I Wait Near the Source Instead of Restarting the Whole Trip
Once I knew the plant needed time, I stopped treating the delay like dead time.
There were still small jobs nearby.
I gathered Copper that was already close, scanned a few things around the route and dealt with a wound, but I avoided committing to another long destination.
That kept me close enough to check the plant again without turning the wait into a second expedition.
When it was ready, I came back with three inventory slots available, took three of the regenerated material, collected the other three required biological items and went directly to the Fabricator.
That attempt worked.
The useful pattern was not “wait until the resource returns.”
It was keeping the wait geographically cheap.
Leaving the entire region, sleeping and making the whole approach again would have recreated the same problem that caused the first failure.
IM Pump I Helps With Short Expeditions, Not Unlimited Exposure
Once crafted, the description of IM Pump I sets the right expectation: it provides minimal environmental resistance for short expeditions.
That wording is more important than simply seeing a new piece of equipment in the inventory.
I equip it immediately, but I do not treat the pump as permission to ignore immunity from then on.
It expands the distance I am comfortable covering.
It does not remove the need for a return plan.
Known resource routes become easier because I already understand the terrain and the travel time. Short pushes into new areas become more forgiving. A long trip through unfamiliar terrain still carries enough uncertainty that food, water, immunity and the route home all matter.
The game also makes it clear that more dangerous regions will demand stronger immunity solutions later, so IM Pump I is a first layer rather than the end of the system.
Low Immunity Makes Optional Exploration Much More Expensive
The biggest behavioral change came from how I handled distractions.
Earlier in the game, adding one more scan to a trip mostly cost time.
With immunity active, the same detour also uses environmental margin.
That matters when the main objective is already complete.
If I have the final IM Pump ingredient in my bag and another unidentified marker appears in the opposite direction, I already know which one matters more. The ingredient can expire and I still need to travel home; the scan will still be there on the next trip.
Likewise, if the immunity bar is already uncomfortable and I am near a known route back to base, I take the safe return instead of turning one successful expedition into two unfinished ones.
The calculation becomes less about curiosity and more about what the remaining immunity can realistically buy.
I Turn Around Before the Bar Becomes the Emergency
Waiting for damage is a poor way to decide that a trip has gone too far.
I prefer to make the return decision while I still have several options available.
The three things I check are:
how far home is, how much immunity remains, and whether the next detour actually completes something.
A plant ten meters away that finishes the IM Pump recipe may justify staying outside a little longer.
A random marker that sends me into another region usually does not.
The Hoverboard can shorten familiar routes once I have it, but mobility is not a substitute for immunity planning. An awkward terrain section, low charge or a route I have never traveled can easily erase the time I expected to save.
What finally made the immunity system manageable was separating its tools by role.
The sealed base is my reliable recovery point. IMX items extend field time. IM Pump I adds resistance for short expeditions. The map tells me whether critical biological materials are actually available before I build the route around them.
Once those pieces were working together, immunity stopped feeling like a surprise timer and became another part of deciding how far I could safely push into Sota 7.