Echoes of Aincrad Best Builds Guide
Use the best Echoes of Aincrad builds for Sword, Rapier, Dagger, Mace, Two-Handed Sword, and Two-Handed Axe, with Growth Points, ACV, Sword Skills, EX-Mods, gear, Iori flow, and Death Game safety.
Updated:
Quick Answer
The best Echoes of Aincrad build for most players is a Sword with shield safe build: add enough VIT to survive mistakes, enough END to guard, dodge, or reset after attacking, then invest in the damage stat your current weapon rewards through ACV. Pick Rapier for safer speed, Dagger for no-shield mobility, Mace for Guard Breaks, Two-Handed Sword for single-target punish windows, and Two-Handed Axe for area pressure.
Data snapshot: July 11, 2026, after the Day 1 Patch Ver.1.0.3 launch window. Named Sword Skill costs, cooldowns, and Weapon Proficiency requirements below reflect the current full-release data snapshot. Use the loadouts as practical targets, then replace any skill that does not fit the enemies, SP pressure, or openings in your route.
Best Builds at a Glance
Use this table to choose a complete direction before spending Growth Points or Smithy materials.
These are early and current-route recommendations, not permanent endgame formulas. Individual weapon panels can change the best stat plan because ACV, Unique MODs, EX-Mods, upgrade level, and material access all matter.
| Build | Recommended weapons | Growth Point direction | Core Sword Skill loadout to grow into | EX-Mod focus | Best for |
|---|---|---|---|---|---|
| Sword with Shield Safe Build | Upgraded Shortsword, Bronze Sword, Annealed Blade | VIT + END until stable, then the Sword’s best ACV damage stat | Sharp Nail, Breakrift, Horizontal Arc | Stamina, damage taken down, Sword Skill damage, ATK | First clear, bosses, Death Game safety |
| Rapier Speed Build | Wind Fleuret, Bronze Rapier, Annealed Foil | END + panel-supported AGI, then VIT | Pyre Dance, Tri Slash, Rumble Horn | Dodge value, attack speed, Sword Skill damage, stamina | Speed with shield access |
| Dagger Mobility Build | Sleek Knife, Iron Tooth, later Dagger upgrades | AGI + END, then enough VIT for no-shield safety | Incision, Disorder, Rising Helix | Stamina reduction, attack speed, sprint value, ATK | Hit-and-run pressure |
| Mace Guard Break Build | Iron Hatchet, Wild Edge, Annealed Rod | Panel-supported STR + END + VIT | Clashbang, Beatdown, Spiritfall | Down rate, downed damage, stamina, ATK | Shield-compatible control |
| Two-Handed Sword Punish Build | Annealed Longsword, Decapitator, Mithril Saber | END + VIT first, then the strongest weapon ACV stat | Brave Leap, Cascade, Piercing Blast | ATK, Sword Skill damage, stamina, recovery safety | Heavy single-target punishment |
| Two-Handed Axe Area Build | Quakemaker, Annealed Sledgehammer, Battlewise Sledgehammer | Panel-supported STR + END + VIT | Fierce Shock, Meteor Strike, Serpent Strike | ATK, stamina, damage reduction, area pressure | Heavy group pressure |
Growth Points, ACV, and Stat Planning
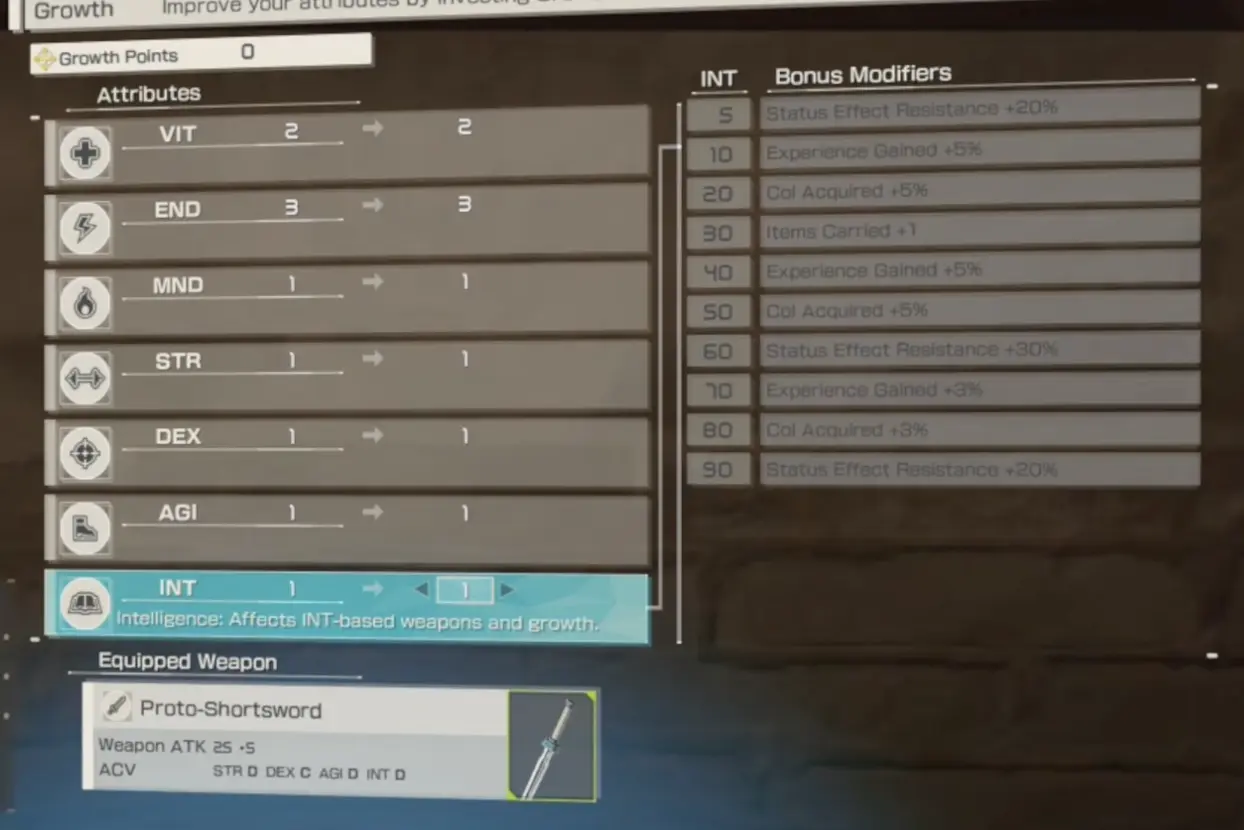
Do not copy a fixed stat spread without checking the equipped weapon.
A safe progression has three phases:
- Fix deaths with VIT.
- Fix failed exits, empty stamina, and unsafe recovery with END.
- Once survival is stable, invest in the damage stat supported by the weapon’s strongest useful ACV.
| Build | Phase 1: fix survival | Phase 2: fix stamina | Phase 3: add damage | Stop condition |
|---|---|---|---|---|
| Sword with Shield | Add VIT until boss mistakes are survivable | Add END until you can guard, punish, and reset | Add DEX only when the Sword panel rewards it | Stop adding survival when you can learn patterns without repeated deaths |
| Rapier | Add enough VIT to survive missed dodges | Add END until speed no longer removes your escape option | Add AGI when the Rapier rewards it; use another stat only when shown by ACV | You can pressure and still guard or dodge afterward |
| Dagger | Add VIT earlier than a shield build | Add END until every short chain leaves an exit | Add AGI when the Dagger rewards it | One positioning error no longer ends the fight immediately |
| Mace | Add VIT for close control exchanges | Add END until guard, break, and punish fit in one safe sequence | Add STR when the Mace rewards it | You can control an enemy without emptying stamina |
| Two-Handed Sword | Add VIT before chasing burst | Add END until one committed attack still leaves a roll | Add the weapon’s strongest ACV damage stat | You can swing, recover, and escape without relying on trading hits |
| Two-Handed Axe | Add VIT for long recovery mistakes | Add END until heavy pressure leaves a safe reset | Add STR when the Axe rewards it | Stamina remains above the threshold needed to roll away |
Sword with Shield Safe Build
This is the most reliable first build and the safest template for difficult bosses or an early Death Game route.
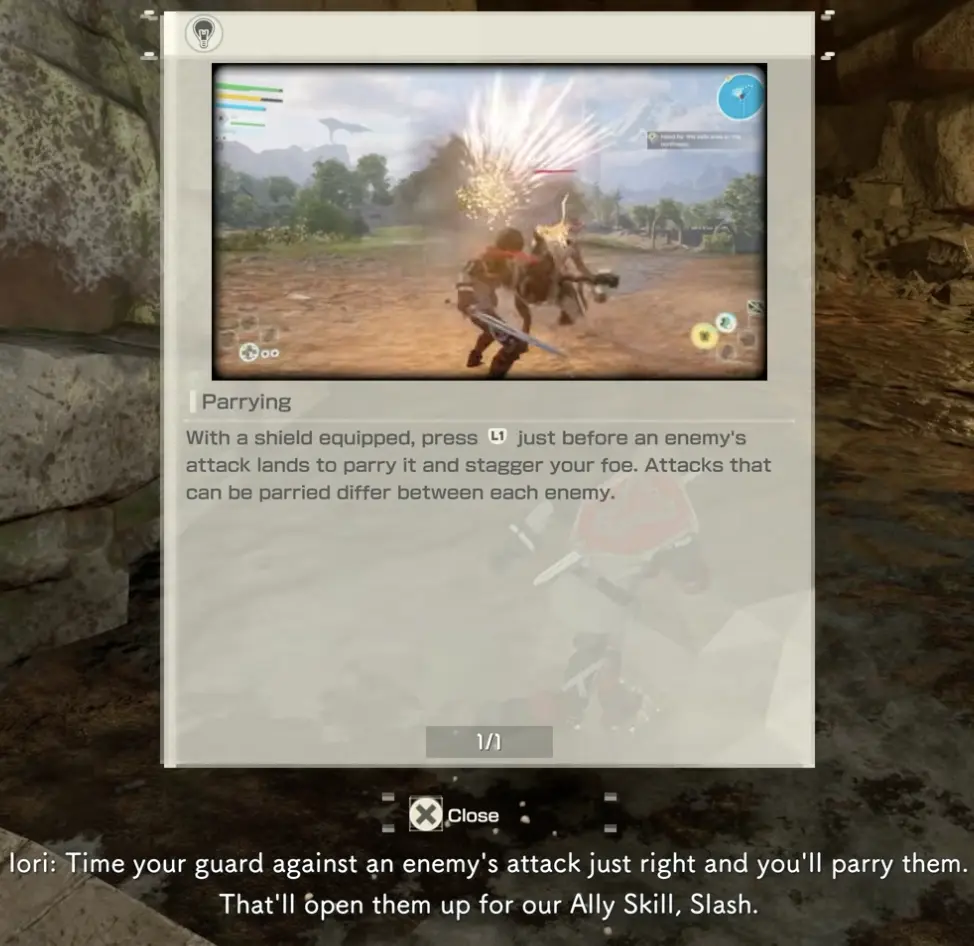
Sword with shield combines guard access, parry timing, Iori follow-up windows, and enough flexibility to correct mistakes. It is less specialized than faster or heavier builds, but it loses fewer attempts while you learn encounters.
| Build piece | Recommendation |
|---|---|
| Weapon | Keep an upgraded starter Sword until Bronze Sword or Annealed Blade clearly wins after upgrades |
| Stats | VIT and END until stable, then DEX only when the Sword ACV rewards it |
| Unique MOD direction | Use Leaps and Bounds only when Jump and Sprint Attacks are part of your real loop; otherwise prioritize a MOD that improves reliable openings |
| EX-Mod priority | Stamina comfort → damage taken down → Sword Skill damage → ATK |
| Iori flow | Guard or parry first, then use partner pressure to extend a safe punish rather than forcing an entry |
| Gear direction | Shield-compatible damage reduction, healing value, stamina, and balanced defense |
| Boss loop | Guard or parry → Iori pressure → one Sword Skill → keep stamina for the reset |
| Farming adjustment | Replace the most defensive skill or EX-Mod with wider pressure, ATK, or farming utility |
| Avoid | Spending every Growth Point on damage while failed boss attempts still come from survival or stamina |
Sword Skill Loadout
| Sword Skill | SP | Cooldown | Proficiency | Build role |
|---|---|---|---|---|
| Sharp Nail | 80 | 50s | Lv.5 | Long-range three-hit burst for a clear punish window |
| Breakrift | 30 | 25s | Lv.6 | Low-cost piercing knockback for control and safer spacing |
| Horizontal Arc | 40 | 25s | Lv.9 | Two mid-range horizontal strikes followed by a step back |
Use available starter skills until these unlock. The finished loadout gives you one heavier burst option and two lower-cost tools that help control distance.
Rapier Speed Build
Rapier is the safest speed build because it keeps shield access while adding reach, fast pressure, and counter-friendly timing.
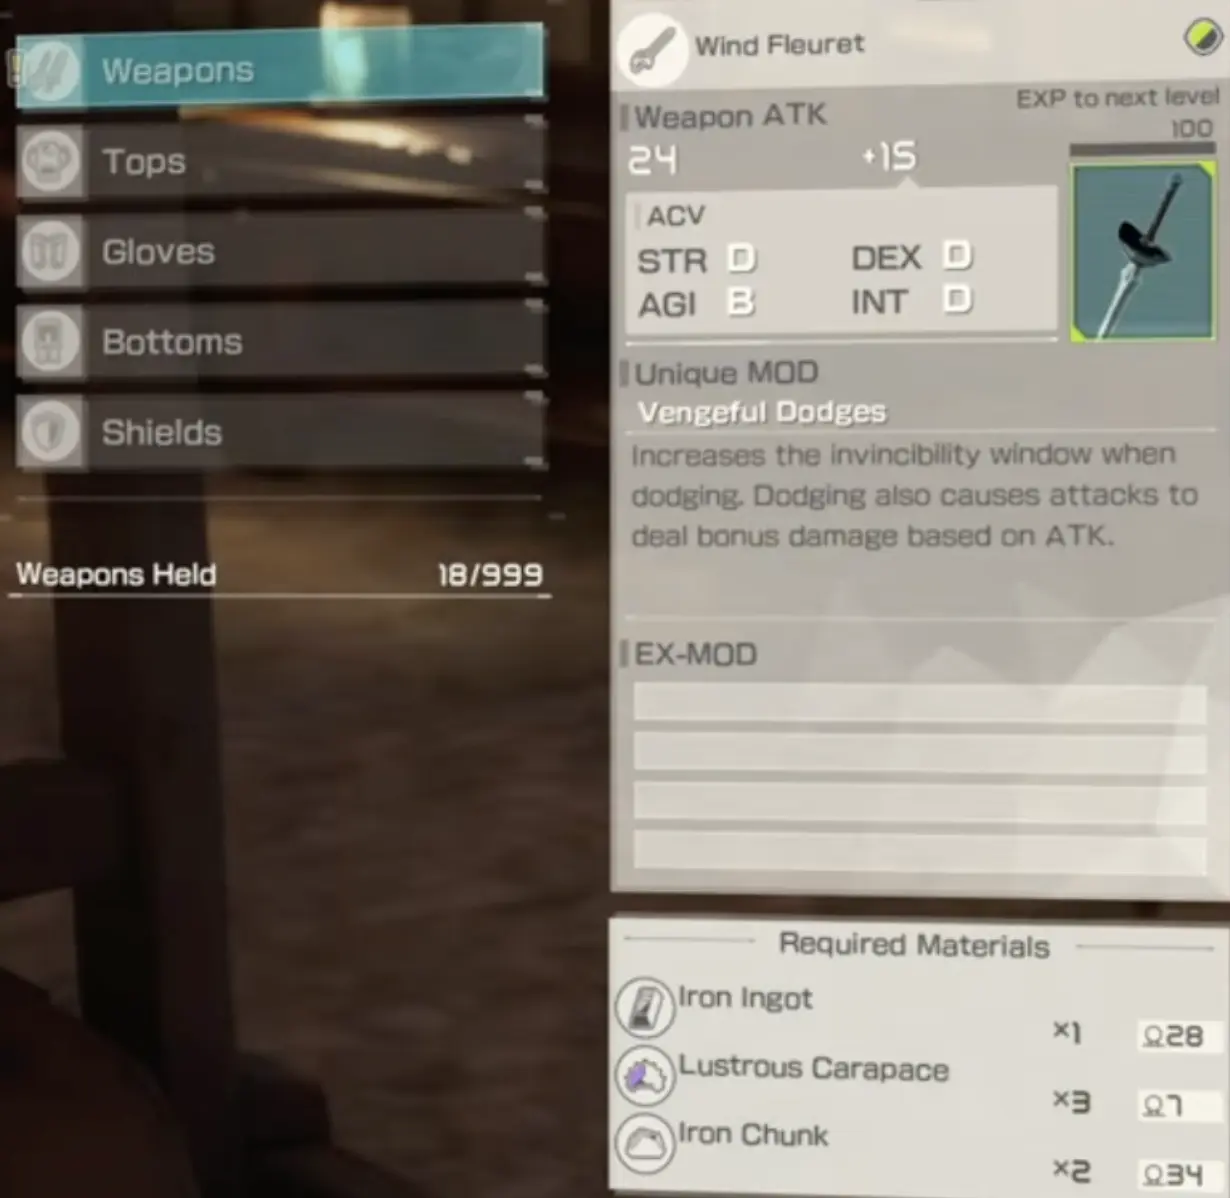
Use Wind Fleuret for dodge-focused value or Bronze Rapier when your weapon loop naturally uses a Sword Skill before normal follow-up attacks.
| Build piece | Recommendation |
|---|---|
| Weapon | Wind Fleuret for dodge value; Bronze Rapier for Sword Skill-to-attack rhythm |
| Stats | END and panel-supported AGI first, then enough VIT for mistakes |
| Unique MOD direction | Vengeful Dodges for dodge timing; After-Attack for skill follow-up pressure |
| EX-Mod priority | Dodge value → Sword Skill damage → attack speed or ATK → stamina comfort |
| Iori flow | Let Iori maintain pressure while you control range and wait for a clean thrust window |
| Gear direction | Bandage Guards-style speed support can fit aggressive routes; use defense or stamina gear when pressure becomes unsafe |
| Boss loop | Bait attack → dodge or guard → low-cost skill → normal pressure → reset |
| Farming adjustment | Favor shorter cooldowns and fast chains instead of committing to the most expensive burst every pack |
| Avoid | Playing Rapier like a no-shield Dagger and ignoring the defensive option that makes the build safer |
Rapier Sword Skill Loadout
| Sword Skill | SP | Cooldown | Proficiency | Build role |
|---|---|---|---|---|
| Pyre Dance | 35 | 20s | Lv.3 | Low-cost, short-cooldown pressure for frequent safe openings |
| Tri Slash | 50 | 40s | Lv.6 | Three quick thrusts for reliable single-target burst |
| Rumble Horn | 80 | 70s | Lv.7 | Four-hit wide-range Crush sequence for a larger punish window |
Pyre Dance is the repeatable tool; Tri Slash is the middle-cost burst; Rumble Horn should be saved for an opening long enough to justify its cost and cooldown.
Dagger Mobility Build
Dagger is the no-shield mobility build.
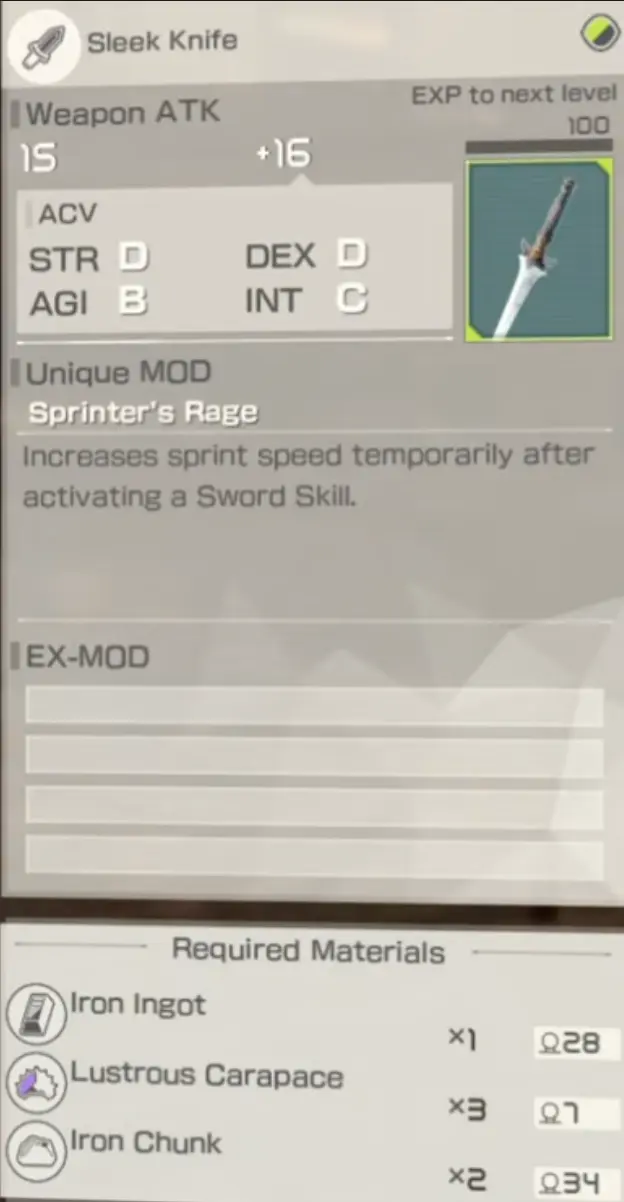
Choose it for short attack chains, thrown-blade flexibility, quick recovery, and repositioning. Sleek Knife supports movement after Sword Skill use, while Iron Tooth supports normal attack speed for a more committed pressure route.
| Build piece | Recommendation |
|---|---|
| Weapon | Sleek Knife for movement; Iron Tooth for faster normal attacks after you accept the no-shield route |
| Stats | AGI and END first, then enough VIT to survive one failed exit |
| Unique MOD direction | Sprinter’s Rage for movement; Fast Master for normal-attack pressure |
| EX-Mod priority | Stamina reduction → attack speed → ATK or final-hit value → Sword Skill damage |
| Iori flow | Use partner pressure before entering instead of asking Dagger to trade in place |
| Gear direction | Stamina, recovery, status resistance, and survival are more valuable than a pure glass-cannon setup |
| Boss loop | Reposition → short entry → one skill or short chain → leave before recovery ends |
| Farming adjustment | Use wider or mobile skills and sprint support to move between targets faster |
| Avoid | Extending a combo only because stamina remains; the safe exit matters more than one extra hit |
Dagger Sword Skill Loadout
| Sword Skill | SP | Cooldown | Proficiency | Build role |
|---|---|---|---|---|
| Incision | 45 | 30s | Lv.6 | Jumping strike that launches the target and creates a control opening |
| Disorder | 70 | 50s | Lv.8 | Chargeable moving spin that maintains mobility while attacking |
| Rising Helix | 55 | 35s | Lv.9 | Aerial spinning burst for a confirmed stagger or launch window |
Do not press all three in one sequence by default. Incision can create the opening, while Disorder or Rising Helix should be chosen according to space, target recovery, and remaining SP.
Mace Guard Break Build
Mace is the shield-compatible control build.
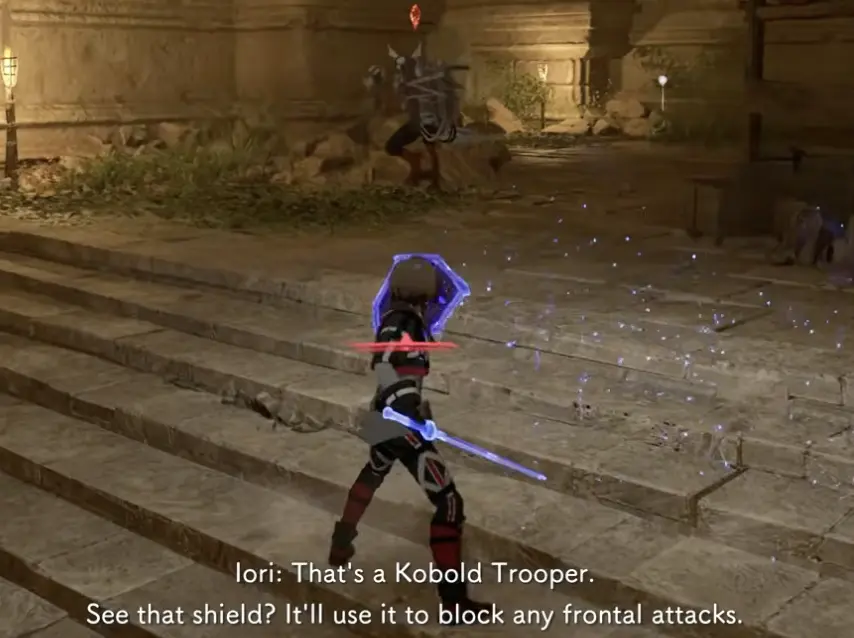
It is strongest when normal attacks keep bouncing off guarded enemies or when stagger and knockdown create better openings than raw speed. Read weapon tradeoffs carefully: Iron Hatchet lowers Support SP gain, while Wild Edge lowers maximum stamina.
| Build piece | Recommendation |
|---|---|
| Weapon | Iron Hatchet when lower Support SP gain is acceptable; Wild Edge only when its stamina penalty does not break the route |
| Stats | Panel-supported STR, then enough END and VIT for safe guard-break sequences |
| Unique MOD direction | Treat Isolation and Stamina Recession as real build costs, not flavor text |
| EX-Mod priority | Down rate → damage to downed enemies → stamina comfort → ATK |
| Iori flow | Let Iori extend stagger, knockdown, or Guard Break openings instead of spending partner pressure before control is established |
| Gear direction | DEF and stamina first; Iron Bangles-style Slash support only fits when the actual attack and skill damage types benefit |
| Boss loop | Guard or bait → break or stagger → down punish → reset before stamina is empty |
| Farming adjustment | Favor wider control and lower cooldowns when several enemies can be staggered together |
| Avoid | Choosing the highest-ATK Mace without calculating the stamina or partner-flow cost of its Unique MOD |
Mace Sword Skill Loadout
| Sword Skill | SP | Cooldown | Proficiency | Build role |
|---|---|---|---|---|
| Clashbang | 30 | 20s | Lv.1 | Cheap early pressure and a repeatable control tool |
| Beatdown | 55 | 35s | Lv.2 | Heavier two-hit punishment after defense is opened |
| Spiritfall | 40 | 25s | Lv.7 | Launch the enemy, then strike it back down for control and follow-up value |
This loadout keeps one inexpensive skill available while reserving Beatdown or Spiritfall for real stagger, knockdown, or Guard Break opportunities.
Two-Handed Sword Punish Build
Two-Handed Sword is a patience build built around single-target recovery windows.
It gives up shield comfort and punishes premature swings. Build enough stamina and survivability to land one committed attack and still roll away.
| Build piece | Recommendation |
|---|---|
| Weapon | Annealed Longsword or Decapitator as earlier checks; Mithril Saber as a higher-list target when available |
| Stats | END and VIT first, then the weapon’s strongest useful ACV damage stat |
| Unique MOD direction | Heavy-punish damage, ATK, stamina comfort, or safer recovery |
| EX-Mod priority | ATK → Sword Skill damage → stamina comfort → damage reduction or recovery safety |
| Iori flow | Use partner pressure to create time before the committed attack, not after you are already trapped in recovery |
| Gear direction | DEF, stamina, and damage reduction are stronger than fragile burst while learning the weapon |
| Boss loop | Wait for commitment → roll or space correctly → use one punish skill → reset |
| Farming adjustment | Use the wider or faster skill in the loadout instead of charging every minor enemy |
| Avoid | Treating the build as a trading weapon or spending SP before the enemy’s attack is committed |
Two-Handed Sword Skill Loadout
| Sword Skill | SP | Cooldown | Proficiency | Build role |
|---|---|---|---|---|
| Brave Leap | 55 | 35s | Lv.2 | Launching multi-hit sequence with a mid-range shockwave |
| Cascade | 70 | 60s | Lv.3 | Chargeable mid-range Severing attack for a large punish window |
| Piercing Blast | 60 | 45s | Lv.7 | Charged thrust and follow-up sequence with strong guard pressure |
Brave Leap is the earlier general tool. Cascade and Piercing Blast require longer openings, so choose one major punish rather than spending both into an uncertain boss window.
Two-Handed Axe Area Build
Two-Handed Axe is the heavy group-pressure build.
It performs best when enemies are clustered, stamina is controlled, and one wide commitment solves more of the fight than repeated precise attacks. Quakemaker is a strong target because Mental Enrichment rewards keeping stamina above 50%.

| Build piece | Recommendation |
|---|---|
| Weapon | Quakemaker as the stamina-aware target; Annealed or Battlewise Sledgehammer as high-ATK comparisons |
| Stats | Panel-supported STR, then enough END and VIT to preserve a safe roll after every commitment |
| Unique MOD direction | Mental Enrichment-style stamina value, ATK, damage reduction, or effects that improve heavy recovery |
| EX-Mod priority | ATK → stamina comfort → damage reduction → cooldown or area-pressure support |
| Iori flow | Let Iori split attention or hold a target before you begin a slow area attack |
| Gear direction | DEF, stamina, and damage reduction; avoid building only for the largest possible number |
| Boss loop | Wait for recovery → commit once → keep stamina above the safe reset point |
| Farming adjustment | Group enemies first, then use Fierce Shock or another wide option instead of chasing targets individually |
| Avoid | Emptying stamina for damage while using a weapon whose best MOD may require staying above 50% stamina |
Two-Handed Axe Skill Loadout
| Sword Skill | SP | Cooldown | Proficiency | Build role |
|---|---|---|---|---|
| Fierce Shock | 40 | 30s | Lv.1 | Ground-slam shockwave for early area pressure |
| Meteor Strike | 75 | 50s | Lv.8 | Jumping Crush attack for a confirmed group or boss window |
| Serpent Strike | 130 | 90s | Lv.10 | Expensive charged wide sweep for a major late-proficiency punish |
Fierce Shock is the practical repeatable tool. Meteor Strike and Serpent Strike are high-commitment options; do not equip or use both as though SP and recovery are unlimited.
Best Death Game Build
The safest early Death Game template is Sword with shield, not an experimental glass-cannon route.
This is a survival template rather than a final speed-clear build. The goal is to reduce the number of mistakes that can delete the save.
| Death Game slot | Recommendation |
|---|---|
| Best first weapon style | Sword with shield |
| Safer alternatives | Rapier for speed with shield access; Mace when guarded enemies are the larger risk |
| Stats | VIT and END until failures stop coming from survival or stamina, then the weapon’s ACV damage stat |
| Sword Skills | One low-cost reliable punish, one boss-safe burst, one control or emergency slot |
| EX-Mod priority | Damage taken down, stamina comfort, healing value, then reliable damage |
| Iori flow | Use partner pressure to make entries safer, not simply to raise damage |
| Gear direction | Leather Shirt-style shield defense, healing support, stamina, and status resistance |
| Consumables | Enter major encounters with healing and recovery items prepared rather than relying on perfect execution |
| Avoid | First-time Dagger testing, greedy heavy swings, or dividing upgrades across several unfinished weapons |
EX-Mod and Early Gear Priorities
Build pages should tell you which effects support the plan. Detailed synthesis and donor management belong in the Weapon Upgrade Guide.
| Build | Boss EX-Mod priority | Farming adjustment | Useful early gear example |
|---|---|---|---|
| Sword with Shield | Damage taken down, stamina, Sword Skill damage, ATK | Add ATK or farming utility after survival is comfortable | Leather Shirt: DEF-focused top with Bulwark, which gains extra value with a shield |
| Rapier | Dodge value, Sword Skill damage, ATK, stamina | Add attack speed and shorter-loop pressure | Bandage Guards: lower DEF gloves with Speedy Strike for normal attack speed |
| Dagger | Stamina reduction, attack speed, ATK, final-hit value | Add sprint and route-speed utility | Bandage Guards for speed, or a higher-defense piece when no-shield risk is the problem |
| Mace | Down rate, downed damage, stamina, ATK | Add wider control and farming utility | Iron Bangles: higher DEF gloves with Master of Slashing when the build benefits from Slash support |
| Two-Handed Sword | ATK, Sword Skill damage, stamina, damage reduction | Add cooldown or route utility after recovery is safe | Use the highest practical DEF and stamina support rather than sacrificing all safety for damage |
| Two-Handed Axe | ATK, stamina, damage reduction, cooldown | Add area-pressure and farming utility | Favor DEF and stamina gear so one wide attack still leaves a safe roll |
Common Build Mistakes
| Mistake | Why it hurts | Better habit |
|---|---|---|
| Only leveling damage stats | You die before the extra damage matters | Fix VIT or END when survival and stamina are the real bottlenecks |
| Copying a stat spread without reading ACV | The equipped weapon may reward a different damage stat | Build from the actual weapon panel |
| Equipping three expensive Sword Skills | The loadout has no repeatable low-cost option | Mix one low-cost skill with one or two larger punish tools |
| Using skills before an opening exists | SP and cooldowns are wasted into blocks, whiffs, or enemy attacks | Spend after parry, stagger, Guard Break, Iori pressure, or boss recovery |
| Ignoring Unique MOD costs | High ATK can hide stamina or partner-flow penalties | Treat negative MOD effects as part of the build cost |
| Changing weapons too often | Proficiency, upgrades, and muscle memory never develop | Finish one usable build before funding several experiments |
What to Read Next
Use the rest of the Echoes of Aincrad cluster based on the next part of the build you need.
- Read the Beginner Guide for route basics, stamina, Iori modes, Growth Points, safe areas, and early preparation.
- Read the Weapon Types Guide to compare Sword, Rapier, Dagger, Mace, Two-Handed Sword, and Two-Handed Axe before committing to a build.
- Read the Best Weapons Guide for named candidates such as Bronze Sword, Wind Fleuret, Iron Tooth, Iron Hatchet, Mithril Saber, and Quakemaker.
- Read the Weapon Upgrade Guide for Smithy crafting, enhancement, synthesis, Unique MODs, EX-Mods, Col, materials, and donor weapons.
- Read the Prologue Boss Guide when a specific early boss is blocking the build.
- Return to the Echoes of Aincrad Guide Hub for the full guide route.
FAQ
What is the best build in Echoes of Aincrad? +
For most players, the best first build is Sword with shield, enough VIT and END to survive mistakes and preserve stamina, then the damage stat your current Sword rewards through ACV. It is the safest build for learning bosses, parry timing, Iori openings, Sword Skills, and Smithy upgrades.
What stats should I level first? +
Start with VIT and END while deaths or stamina are limiting progress. After survival feels stable, add the damage stat shown by your weapon's ACV. Do not assume every weapon type or every weapon panel wants the same stat spread.
What does ACV mean? +
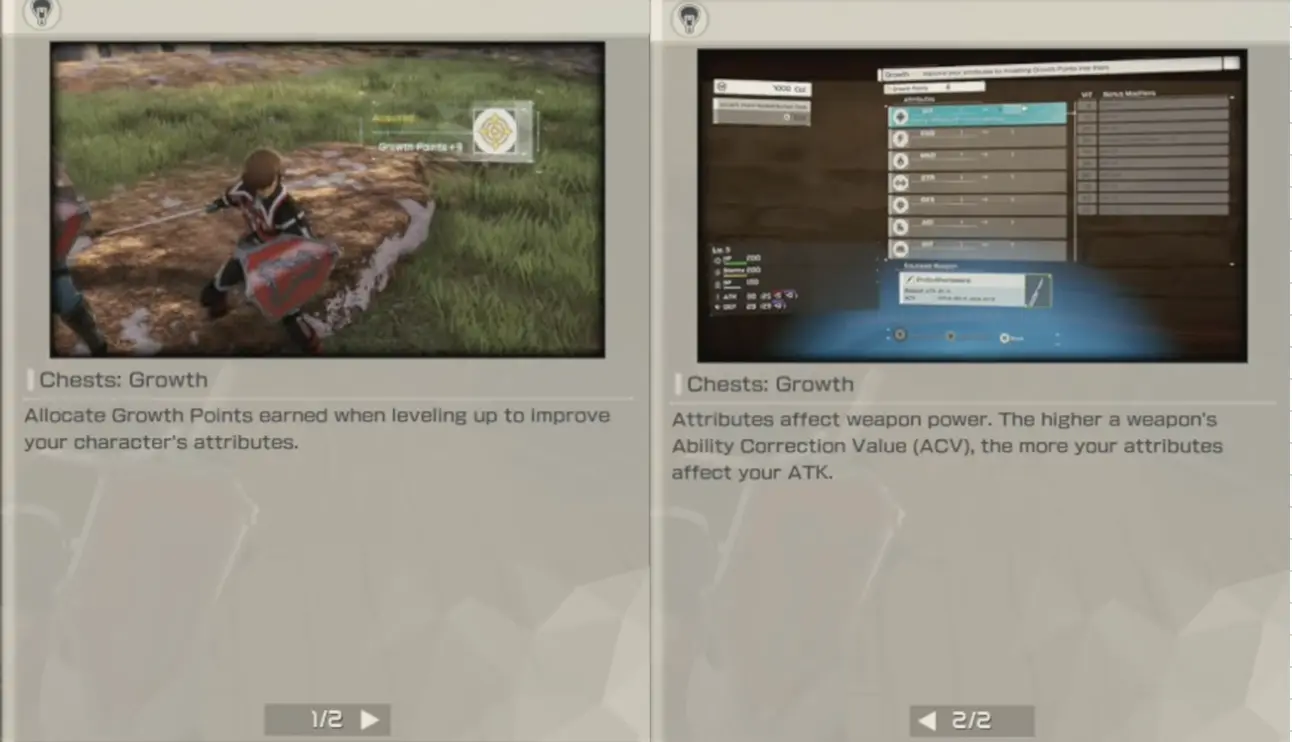
ACV means Ability Correction Value. It shows how strongly your attributes affect a weapon's attack value. Read the equipped weapon panel before spending Growth Points.
What is a good Sword Skill loadout for Sword? +
A practical Sword loadout to grow into is Sharp Nail for ranged multi-hit punishment, Breakrift for a low-cost knockback option, and Horizontal Arc for mid-range pressure followed by a step back. Equip substitutes until the required Weapon Proficiency levels are reached.
What is the best Rapier build? +
Use Rapier for speed with shield access. Wind Fleuret supports dodge-focused pressure, while Bronze Rapier supports a Sword Skill follow-up rhythm. Pyre Dance, Tri Slash, and Rumble Horn form a useful progression from low-cost pressure into heavier burst.
What is the best Dagger build? +
Use Dagger for no-shield mobility, quick recovery, and hit-and-run pressure. Sleek Knife supports movement after Sword Skill use, while Iron Tooth supports normal attack speed. Incision, Disorder, and Rising Helix give the build launch, mobile pressure, and aerial burst options as proficiency increases.
What is the best Mace build? +
Use Mace for Guard Breaks, stagger, and knockdowns. Prioritize STR when the panel rewards it, then maintain enough END and VIT for safe control. Clashbang, Beatdown, and Spiritfall give low-cost pressure, heavier punishment, and launch-to-slam control.
What is the safest Death Game build? +
Use a shield-compatible build first: Sword with shield, Rapier, or Mace. Prioritize VIT, END, defensive EX-Mods, healing value, and one upgraded main weapon instead of testing unfamiliar no-shield weapons during a permadeath route.