Echoes of Aincrad Beginner Guide
Follow the real Echoes of Aincrad opening route from the tutorial and Town of Beginnings to Horna, the first field checkpoints, town prep, combat basics, and boss readiness.
Updated:
Quick Answer
The real opening route is tutorial ruins → Death Game transition → Town of Beginnings prep → Horna route → first field safe area → objective and boss preparation. Do not leave town just because the next marker appears. Spend Growth Points, refill healing, compare your current weapon and armor, equip Sword Skills you understand, then follow the northwest route toward Horna while using roads, terrain, the minimap, and blue safe-area lights to find the actual path.
First-Stage Route at a Glance
Use this route order during the opening hours.
| Stage | Main objective | What to do before moving on | Common mistake |
|---|---|---|---|
| Opening ruins | Complete the combat tutorials | Learn short attack strings, stamina recovery, guarding, heavy attacks, Sword Skills, and Iori prompts | Treating the opening like a damage race |
| Shield-enemy lesson | Break guarded enemies correctly | Stop normal attacks when the enemy blocks and use the taught guard-break answer | Emptying stamina into the shield |
| Death Game transition | Reach the first real progression phase | Treat future routes as persistent progress rather than a disposable tutorial | Rushing the next marker immediately |
| Town of Beginnings | Convert progress into preparation | Check the Inn, item seller, Smithy, Equipment, Sword Skills, Main Terminal, and healing | Leaving with unspent Growth Points and weak gear |
| Route toward Horna | Follow the first major field objective northwest | Read roads, slopes, cliffs, the minimap, and blue safe-area lights | Walking directly at the marker |
| First field checkpoint | Activate the next safe area | Rest, reveal the local route, refill recovery, and decide whether to continue | Passing the blue light and losing the route anchor |
| First serious objective | Clear the quest branch or boss-class fight | Enter with healing, armor, upgraded gear, three understood Sword Skills, and a stamina plan | Forcing the fight without returning to town |
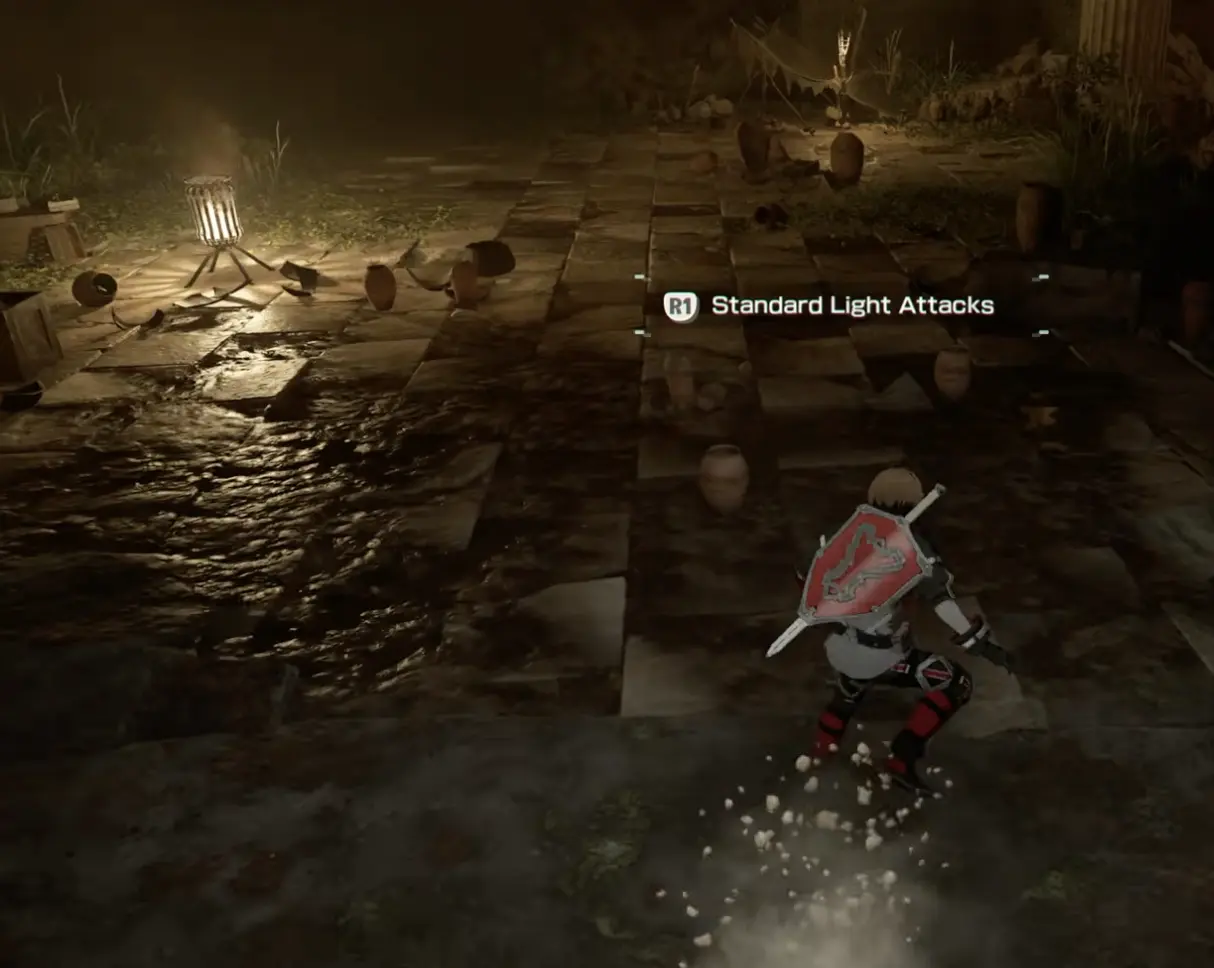
Step 1: Clear the Opening Without Learning Bad Habits
The opening ruins teach the buttons, but the more important lesson is combat rhythm.
Use short attack strings. Watch what the enemy does next. Leave enough stamina to guard, dodge, or move away. The opening enemies are forgiving enough to let you practice, but later routes punish the habit of spending everything on offense.
| Opening lesson | Good beginner use |
|---|---|
| Light attacks | Learn range, recovery, and how many hits are safe before the enemy responds |
| Heavy attacks | Use them when the tutorial introduces defense breaking or when a safe finishing window appears |
| Guard | Use it when dodging would place you in a worse position |
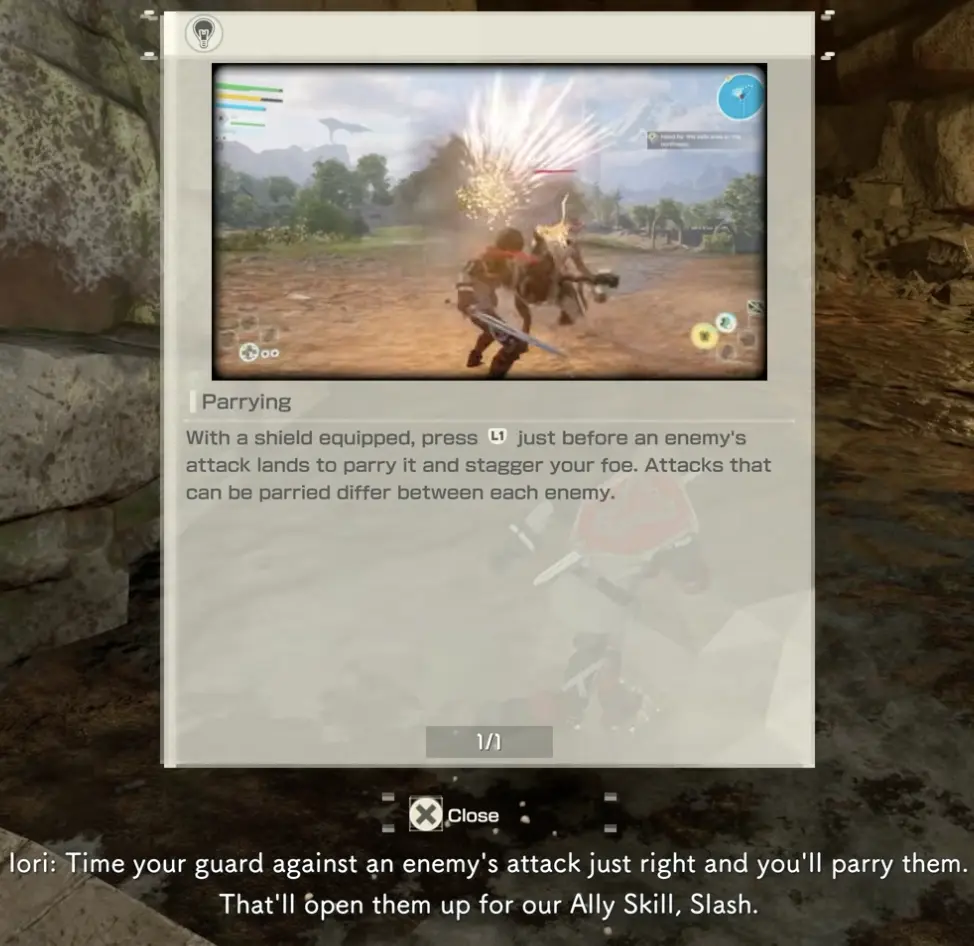
| Parry timing | Practice after recognizing the enemy animation instead of guessing |
| Dodge or roll | Use it after the enemy commits, not repeatedly before the attack starts |
| Sword Skills | Spend SP after a real opening rather than into active defense |
| Iori prompts | Treat partner follow-ups as part of the opening, not background damage |
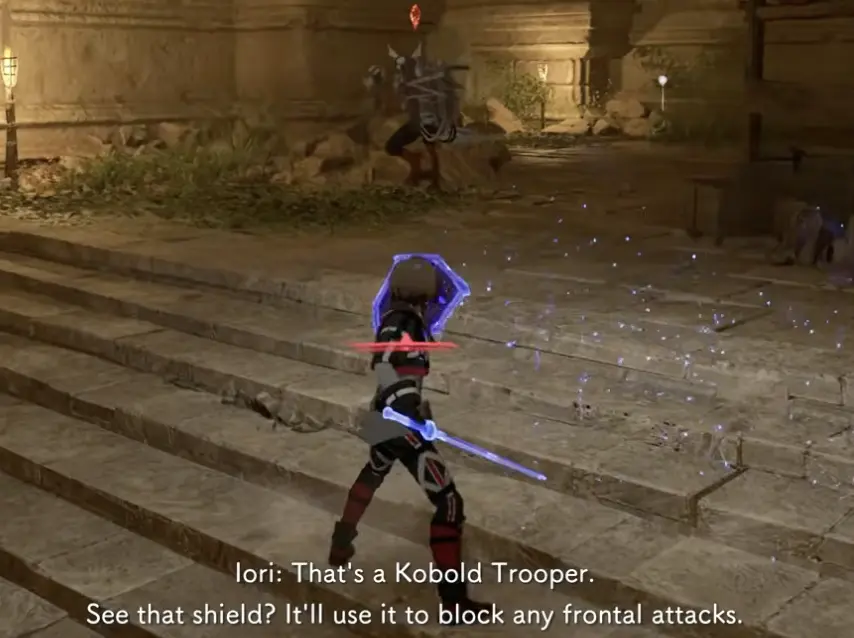
Stop Attacking When an Enemy Raises a Shield
The Cobalt Trooper lesson is the first important combat check.
Normal frontal attacks into a raised shield waste time and stamina. When the enemy blocks, stop repeating the same input. Use the heavier guard-break response the game teaches, then spend your damage during the opening.
| What the enemy does | Your response |
|---|---|
| Normal enemy remains open | Use a short light-attack string |
| Enemy raises a shield | Stop normal pressure and use the taught guard-break answer |
| Enemy begins a large attack | Defend or move before committing again |
| Enemy recovers after missing | Use the recovery window for damage |
| Enemy is nearly defeated | Finish only if the final attack will not empty your defensive stamina |
| Two enemies enter the same space | Reposition before continuing the combo |
Step 2: Treat the Death Game Transition as the End of the Tutorial
After the Death Game setup begins, the game stops being a sequence of isolated tutorial rooms.
From this point forward:
- levels create Growth Points that still need to be spent;
- equipment needs to be compared and upgraded;
- healing must be prepared before leaving safety;
- safe areas become route anchors;
- field objectives can lead into boss-class fights;
- a visible marker does not mean you are ready to leave town.
Your next major direction is toward Horna, but the correct move is not to sprint out immediately. Use the Town of Beginnings first.
Step 3: Complete One Town Loop Before Heading to Horna
The Town of Beginnings is your first preparation hub.
Use the same order every time:
Inn → healing and items → Smithy and equipment → Sword Skills → quest and travel check
| Town stop | What to check | Leave town when |
|---|---|---|
| Inn | Spend newly earned Growth Points | Your recent levels have been converted into useful stats |
| Item seller | Refill practical healing and route items | You can survive mistakes without depending on a perfect run |
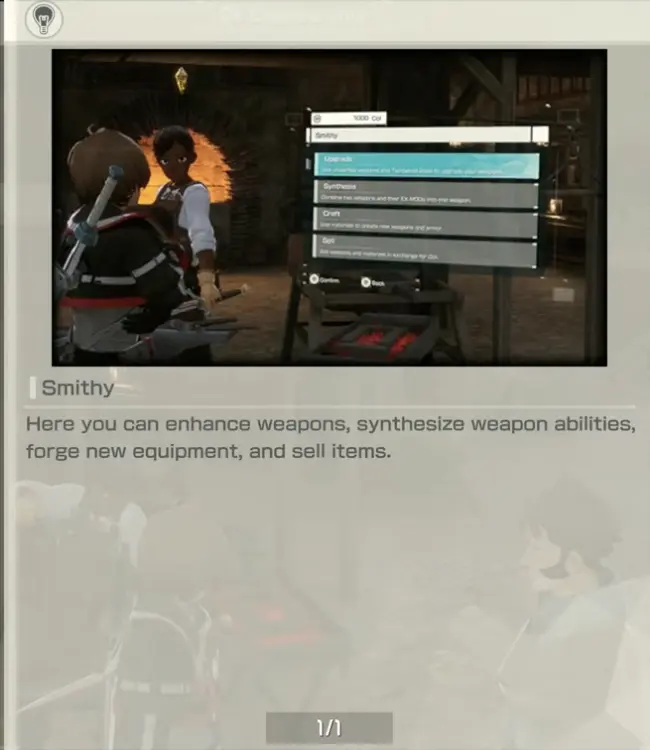
| Smithy | Compare enhancement, forging, materials, Col, Unique MODs, and EX-Mods | Your current main weapon is either upgraded or intentionally retained |
| Equipment | Check weapon, shield access, armor, and any newly acquired gear | The new setup is clearly better than the old one |
| Sword Skills | Equip up to three skills you know how to use | Each skill has a planned opening rather than being equipped only for damage |
| Main Terminal | Confirm the active objective and available progression | You know which quest is moving the first route forward |
| Travel points | Understand the teleport gate and activated warp points | You know how to return instead of walking every route again |
Spend Growth Points Before the Route Gets Harder
Leveling does not finish the job by itself.
Return to the Inn and spend Growth Points before forcing the next major route. The safest early distribution depends on the weapon you actually use, but the general rule is simple:
- support the weapon’s strongest scaling;
- add survival if normal mistakes are killing the run;
- add stamina comfort if every exchange ends with an empty bar;
- do not spread points across every stat without a reason.
| Your early problem | Growth direction to consider |
|---|---|
| Damage is low and the weapon scales clearly | Support the weapon’s strongest ACV stat |
| Small mistakes cause deaths | Add survival before chasing more damage |
| You cannot defend after attacking | Improve stamina comfort and shorten attack strings |
| You keep changing weapon types | Stop spreading points until you choose a main direction |
| A stat does not improve the current setup | Save the point instead of forcing a balanced spread |
Keep the Upgraded Weapon Until a New One Clearly Wins
The Smithy can make the first route easier, but it can also waste early materials.
Do not replace an upgraded starter weapon only because a new weapon has a higher base number or a more advanced name. Compare the entire panel:
- current upgrade level;
- Weapon ATK;
- ACV scaling;
- Unique MOD;
- EX-Mods;
- shield access;
- material and Col cost;
- weapon proficiency;
- how well the weapon solves the current route.
| Smithy result | Best decision |
|---|---|
| New weapon has higher base ATK only | Keep comparing; do not switch yet |
| Current weapon is already upgraded | Compare the new weapon at a realistic upgrade level |
| New Unique MOD fits the route | Consider switching if the material cost is reasonable |
| New weapon removes shield access | Treat it as a playstyle change, not a direct upgrade |
| Current EX-Mods are useful | Keep the old weapon until the replacement clearly wins |
| Materials are scarce | Upgrade one main route instead of testing every weapon |
For full weapon comparison, use the Weapon Types Guide. For named recommendations, use the Best Weapons Guide. For synthesis and EX-Mod planning, use the Weapon Upgrade Guide.
Step 4: Leave Town With a Simple First-Route Setup
You do not need a perfect build before Horna.
You do need a coherent one.
For most new players, Sword with a shield is the safest first direction because it gives you a defensive answer while learning enemy timing, stamina, parries, Iori follow-ups, and boss windows.
Use this minimum departure check:
| Check | Ready to leave |
|---|---|
| Weapon | One main weapon is equipped and you understand its shield rule |
| Armor | You are not relying on clearly weaker opening gear |
| Sword Skills | Up to three skills are equipped and each has a planned use |
| Growth Points | Recent points have been spent at the Inn |
| Healing | Recovery is prepared for the field and the next major fight |
| Iori | You know whether you want pressure or breathing room |
| Objective | The active route is confirmed before leaving town |
| Return plan | At least one town or field warp point is understood |
Step 5: Follow the Horna Direction, Not a Straight Line
After town preparation, follow the early route northwest toward Horna.
The quest marker gives the destination direction. It does not always provide the exact walking line.
When the marker appears to sit beyond a cliff, wall, valley, or blocked route:
- Stop walking directly at it.
- Rotate the camera and check for a road or slope.
- Read the minimap shape.
- Look for a bridge, lower path, or route around the terrain.
- Use the blue safe-area light as the next reliable anchor.
- Recheck the objective after the route bends.
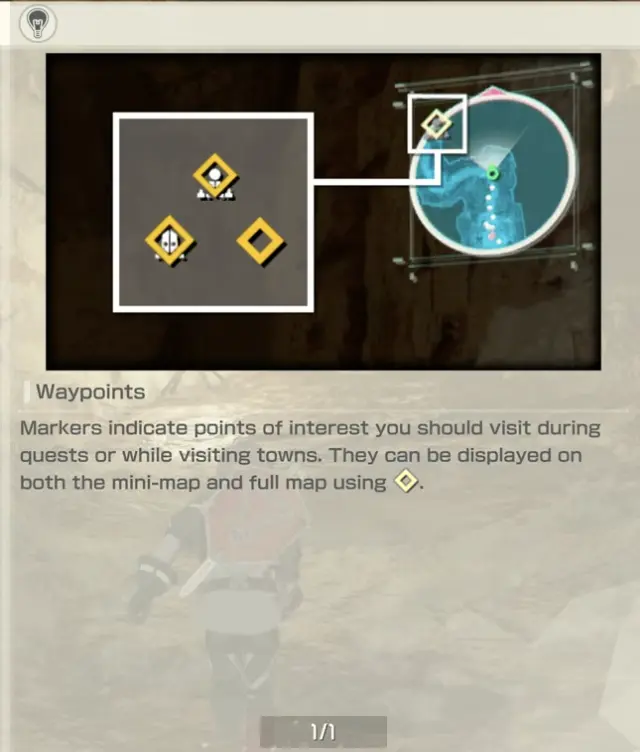
| What you see | What it means | What to do next |
|---|---|---|
| Yellow objective marker | General destination direction | Move toward it while respecting terrain |
| Blinking minimap icon | The active quest already has a target | Follow it until the objective updates |
| Blank map area | The region has not been anchored yet | Look for a blue safe-area light |
| Blue light pillar | A safe area is nearby | Reach and activate it before pushing deeper |
| Marker across a cliff | The goal is close but the route bends | Find the road, slope, bridge, or lower path |
| A blocked path or barrier | Another route condition is required | Stop forcing the obstacle and check the surrounding area |
| An unexplained side route | Optional exploration or a future path may be nearby | Mark it mentally, but finish the first objective before overexploring |
Step 6: Activate the First Field Safe Area Before Exploring
Safe areas are more than healing points.
They provide:
- a reliable checkpoint;
- HP and recovery restoration;
- a map and route anchor;
- a place to decide whether to continue;
- a safer return point before a boss or long branch.

Use the safe area to make one of three decisions:
| Current state | Best decision |
|---|---|
| Healing full, gear current, objective nearby | Continue to the objective |
| Healing low or armor behind | Return to town and repair the setup |
| Growth Points unspent | Return to the Inn before the next difficult route |
| New weapon or blueprint found | Check the Smithy before investing further |
| Boss-class route ahead | Rest, equip skills, decide the Iori mode, and enter deliberately |
| Map still unclear | Use the safe area as the anchor and explore one branch at a time |
Step 7: Use Iori to Control the First Difficult Fights
Iori is not passive background damage.
Use the partner mode according to the problem in front of you:
- Free Mode when you want Iori fighting actively and helping shorten the encounter;
- Switch Mode when the fight becomes chaotic and you need space to heal, reposition, or recover stamina;
- Ally Skills after clean openings such as a parry or stagger;
- stronger partner actions during boss punish windows instead of random moments.
| Fight state | Iori decision |
|---|---|
| Normal enemies are controlled | Use Free Mode for faster pressure |
| Several enemies surround you | Use Switch Mode to create breathing room |
| You need to heal | Let Iori draw attention before using recovery |
| A parry or break opens the enemy | Trigger the available Ally Skill |
| Boss enters a punish window | Use the strongest planned partner follow-up |
| Iori is not changing the fight | Check the selected mode instead of assuming the system is weak |
Step 8: Enter the First Serious Boss Route With a Clean Setup
The first boss-class fight should not begin as an accidental extension of exploration.
Before crossing the final approach, check:
| Boss-prep check | Good answer |
|---|---|
| Safe area activated | Yes, if one is available on the approach |
| Healing restored | Recovery is full or intentionally prepared |
| Growth Points spent | The latest levels have been converted into stats |
| Weapon checked | The current upgraded panel still fits the route |
| Armor checked | You are not entering with clearly outdated protection |
| Sword Skills equipped | Up to three known skills are ready |
| SP plan | Skills will be used after openings, not immediately |
| Iori plan | Free Mode, Switch Mode, and Ally Skill use are understood |
| Stamina plan | Every attack string leaves enough stamina to defend |
| Return decision | You will leave and prepare again if the setup is clearly underpowered |
When to Return to Town Instead of Continuing
Returning is not failure. It is how the first route converts exploration into progress.
Go back when:
- you gained levels and have unspent Growth Points;
- a meaningful weapon, armor piece, blueprint, or material became available;
- the current weapon needs enhancement;
- healing is low before a long branch;
- enemies are surviving too many clean openings;
- one mistake removes most of your HP;
- the next objective is clearly boss-class;
- your current build is split across too many weapon types.
| Field problem | Town fix |
|---|---|
| Damage feels low despite clean openings | Compare enhancement, scaling, MODs, and Sword Skills |
| You die in one or two mistakes | Check armor and survival stats |
| You cannot defend after attacking | Rework stamina habits and Growth Points |
| A new weapon looks stronger | Compare it against the upgraded current panel |
| You run out of healing early | Refill before repeating the same route |
| The boss feels chaotic | Prepare Iori mode, support actions, and a shorter punish plan |
| The route feels unclear | Return to the latest safe area and restart from one known branch |
Common First-Stage Mistakes
| Mistake | Why it fails | Better action |
|---|---|---|
| Leaving town as soon as the Horna marker appears | The route starts with unspent points, weak supplies, and unchecked gear | Complete one full town-prep loop first |
| Walking straight at every marker | Terrain often blocks the direct line | Follow roads, slopes, bridges, and safe-area lights |
| Passing a blue safe-area light | You lose the best recovery and navigation anchor | Activate it before exploring further |
| Emptying stamina on every enemy | You cannot defend against the next attack | Stop the combo one hit earlier |
| Attacking a raised shield repeatedly | Normal pressure is being blocked | Use the taught guard-break answer |
| Spending Sword Skills immediately | The enemy can block, move, or interrupt | Create the opening first |
| Using only one Iori mode | The partner system cannot adapt to changing fights | Use Free Mode for pressure and Switch Mode for control |
| Replacing an upgraded weapon by name or base ATK | The fresh weapon may have worse real performance | Compare the full panel and upgrade cost |
| Grinding instead of returning to town | Levels and drops are not being converted into useful power | Spend Growth Points and improve the setup |
| Entering a boss as part of normal exploration | Healing, skills, armor, and stamina planning are incomplete | Treat the approach as a preparation checkpoint |
First-Stage Checklist
Use this before leaving the Town of Beginnings and again at the first field safe area.
| Check | Ready |
|---|---|
| Objective | I know that Horna is the next major direction |
| Route reading | I will follow terrain rather than a straight marker line |
| Growth Points | I checked the Inn after leveling |
| Weapon | I am using one main type and understand its shield rule |
| Upgrade | I compared the current weapon at the Smithy |
| Armor | I am not relying on clearly weaker opening gear |
| Sword Skills | Up to three understood skills are equipped |
| Healing | Recovery is prepared before leaving safety |
| Iori | I know when to use Free Mode and Switch Mode |
| Safe area | I will activate the next blue light before exploring |
| Boss preparation | I will stop and recheck the setup before a boss-class objective |
| Return plan | I will go back to town when progress produces a meaningful upgrade |
What to Read Next
Use the next guide based on the first problem that remains:
- Read the Weapon Types Guide if you are choosing between Sword, Rapier, Dagger, Mace, Two-Handed Sword, and Two-Handed Axe.
- Read the Best Weapons Guide if you want named early and later weapon candidates.
- Read the Weapon Upgrade Guide if enhancement, synthesis, Unique MODs, EX-Mods, materials, Col, or proficiency is unclear.
- Read the Best Builds Guide if your Growth Points, ACV, Sword Skills, stamina, and partner setup do not work together.
- Read the Prologue and Early Boss Guide if Sentry Golem, Illfang the Kobold Lord, Snowcap Boar, Glenspore Grizzly, Dire Stife Wolf, or Wrathful Shreman is blocking the route.
- Return to the Echoes of Aincrad Guide Hub when the first-stage route is complete and you need the next progression problem.
FAQ
What should I do first in Echoes of Aincrad? +
Finish the opening combat route, then stop in the Town of Beginnings before pushing toward Horna. Spend Growth Points at the Inn, check healing items, compare your current weapon at the Smithy, equip Sword Skills you understand, and leave town only when the setup is ready.
Where do I go after the Death Game begins? +
The first major route pushes northwest from the Town of Beginnings toward Horna. Follow the objective direction, but use roads, slopes, safe-area lights, and the minimap to find the actual path instead of walking directly at the marker.
Why does the quest marker lead into a cliff or blocked route? +
The marker shows the destination rather than a guaranteed straight path. Stop at the obstacle, rotate the camera, read the minimap, and look for a road, slope, bridge, safe area, or route around the terrain.
When should I return to the Town of Beginnings? +
Return after gaining levels, finding a meaningful weapon or armor upgrade, running low on recovery, unlocking a new Smithy option, or reaching a boss-class route. Town visits convert progress into stats, upgrades, supplies, and a safer next attempt.
What is the safest beginner weapon in Echoes of Aincrad? +
Sword with a shield is the safest first direction because it gives you a real defensive option while learning stamina, guard timing, parries, Iori follow-ups, and boss punish windows.
Should I replace my starter weapon as soon as I find a higher-ATK weapon? +
No. Compare the current upgrade level, ACV, Unique MOD, EX-Mods, shield access, material cost, and actual route performance. An upgraded starter weapon can remain better than a fresh higher-base weapon.
What should I check before the first serious boss route? +
Activate the nearest safe area, refill healing, spend Growth Points, check armor, compare weapon upgrades, equip up to three Sword Skills, decide how you will use Iori, and keep enough stamina to defend after every attack string.