Belmont's Curse Prison Tower Walkthrough: How to Reach Joan
Climb Prison Tower, solve the ceiling ring puzzle, defeat Joan of Arc, unlock Holy Light, and collect weapons, Relics, and permanent upgrades.
Updated:
Quick Answer
From Burned District, follow the sign toward Prison Tower. Climb through Guard Level and Upper Tower until you reach the locked ceiling panel. Aim the Arcane Whip at the hanging ring and use it to open the passage above.
Continue upward to fight Joan of Arc (The Warrior). Defeat her to obtain another guardian key, then proceed to unlock Holy Light.
The route to Joan has two places where it is easy to lose time: the sealed ceiling near the top of Prison Tower and an alternate elevator passage that looks important before you know how the tower connects.
The first is a required mechanism. The second is a shortcut you can deal with later.
Rose reaches Prison Tower while searching for the guardians holding the keys to the Catacombs. The tower rises above Burned District, and the climb takes her through several floors before ending with Joan on the rooftop. You can collect permanent upgrades during the ascent, but you do not need to explore every side passage or activate the hidden elevator before confronting her.
The most useful preparation is to collect the upgrades already on your route and reach the upper save point with enough healing for the fight.
How to Get to Prison Tower from Burned District
After obtaining the Arcane Whip following The Fallen, continue through the Paris sewers and streets toward Court of Miracles and Burned District.
A directional signpost eventually separates the routes toward Prison Tower and Holy Innocents’ Cemetery.
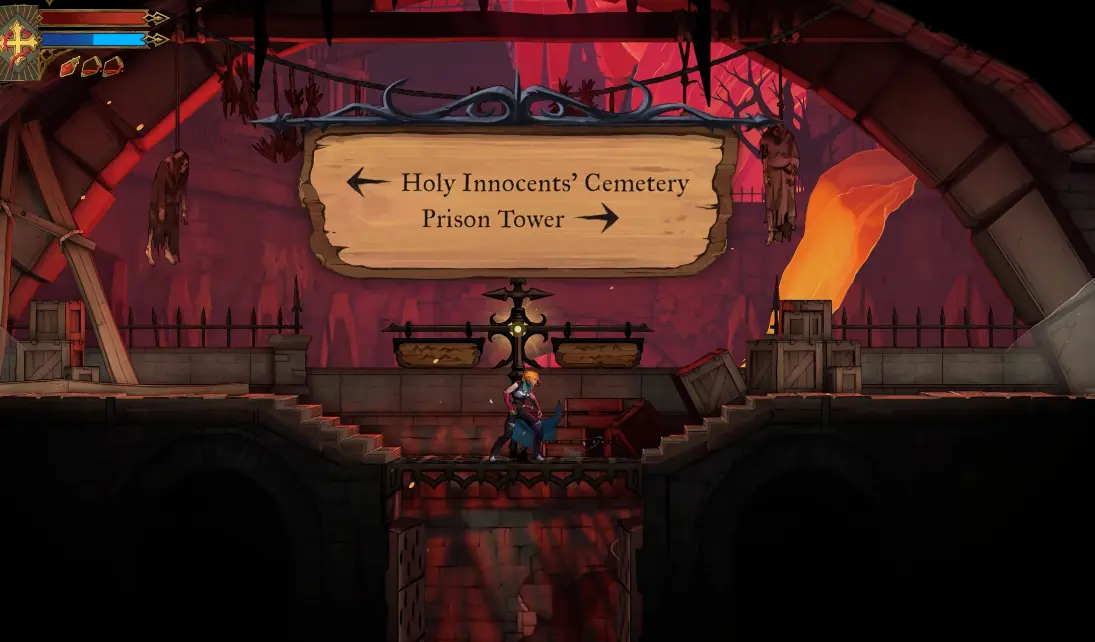
Take the right-hand route toward Prison Tower. Before entering the tower, check Burned District for a chest containing Crypt Key.
Crypt Key fully restores Rose’s health and mana whenever she opens a chest while the Relic is equipped. This makes it especially useful during a long exploration route with several unopened chests. If Rose is already at full health and mana, opening a chest provides little immediate recovery benefit.
Consider equipping Crypt Key before opening nearby chests when your resources are low. The Relic does not heal Rose merely by entering a room; the restoration happens when a chest is opened.
Burned District also contains XP statues and blocked side passages. If you encounter a rock barrier that Rose cannot destroy, mark its location and continue toward Prison Tower.
Climb Through Prison Tower, Guard Level, and Upper Tower
Prison Tower is divided into several named map sections. The route begins in Prison Tower, continues through Guard Level, and eventually reaches Upper Tower.
Several permanent upgrades appear before the rooftop fight, so there is a reason to examine the accessible side passages without turning the climb into a full exploration run.
First ascent: Brave Heart Fragment and ATK Up
During the lower ascent, collect the Brave Heart Fragment in Prison Tower.
The tower also contains a challenge room rewarding ATK Up. Completing that encounter strengthens Rose before Joan, making it a useful detour if the ordinary enemies are already taking several attempts.
These upgrades are worth collecting on the first trip because they lie along the tower’s progression. If you reach the rooftop without them and struggle against Joan, returning through several floors becomes an avoidable inconvenience.
You will encounter XP statues in both Prison Tower and Guard Level. Collect those you can reach naturally, then continue upward instead of searching every nearby room before reaching the next checkpoint.
Guard Level to Upper Tower
As Rose climbs, she eventually reaches another save point before the upper section. Use it to recover health and refill healing supplies.
Upper Tower contains a DEF Up pickup before the final ceiling mechanism. This is particularly useful preparation for Joan, whose sword attacks can punish repeated mistakes.
A spirit clue called Crane Sketch also appears in Upper Tower. It brings your attention to the machinery near the top of the climb.
At this stage, you should be looking for a way through the ceiling rather than another staircase leading around the outside of the building.
How to Open the Locked Ceiling Panel
Near the top of Upper Tower, Rose encounters a blocked ceiling. Attacking the panel with a sword or other ordinary weapon will not open the way forward.
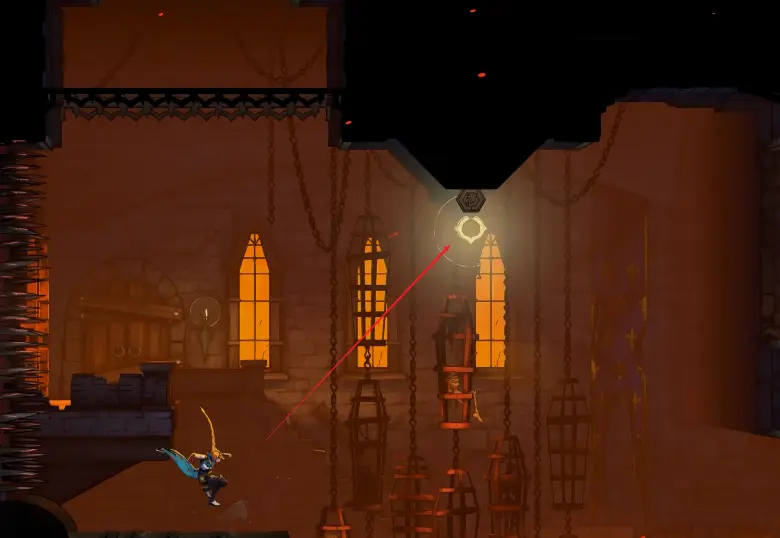
The mechanism is operated by a hanging ring above the room.
To get through:
- Move into position beneath the suspended ring.
- Aim the Arcane Whip at the ring overhead.
- Attach to it and hang from the mechanism.
- Once the ceiling panel opens, continue through the passage above.
Attach the Arcane Whip to the hanging ring above Rose and remain connected until the ceiling panel opens.
If you can see the ring but the passage remains closed, make sure Rose has actually connected to the mechanism rather than simply jumping beneath it.
The room also contains hanging structures that can make the layout look more complicated than it is. Concentrate on the ring associated with the ceiling opening.
Is the Secret Elevator Required to Reach Joan?
No. The sealed doorway near the upper section is connected to an alternate elevator route. It is not the entrance you need for the first rooftop encounter.
Use the hanging ring to open the ceiling panel and continue upward. The elevator provides another connection to this area when you return later.
How to Beat Joan of Arc
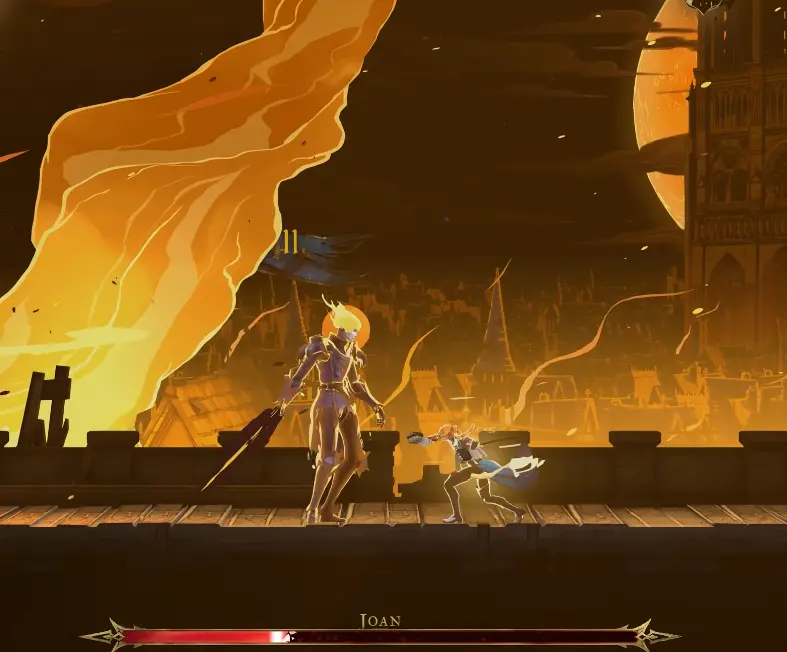
Joan of Arc (The Warrior) waits on the Prison Tower rooftop. She attacks with a flaming sword, can strike from behind Rose, and uses fireballs to threaten her at a distance.
Before entering the fight, use the upper save point and check whether you collected the Brave Heart Fragment, ATK Up, and DEF Up during the climb. All three are available before Joan, so they can help with your first attempt rather than only after defeating her.
How to Respond to Joan’s Sword Attacks and Fireballs
Joan is dangerous at both close range and across the rooftop. Watch the attack she is beginning rather than using the same escape movement every time.
- Flaming sword swipes: Move clear of the blade and watch for another strike before approaching. Staying beside Joan after avoiding the first swing can leave Rose within range of her next attack.
- Backstabs: Joan can threaten Rose from behind. If she changes position during an exchange, turn and reposition before continuing your attack instead of finishing a combo in the wrong direction.
- Fireballs: Create space and move out of their path. Avoid stopping to heal while a projectile is still approaching.
- Fire on the rooftop: Watch the ground around Rose when choosing where to land after an evasive movement. Escaping Joan’s sword is not enough if Rose finishes in a dangerous part of the arena.
The safest time to retaliate is after you have avoided the immediate attack and Joan is no longer threatening your position. Use an attack sequence short enough to leave Rose free to move when Joan begins another action.
What to Change if Joan Keeps Defeating You
If Joan catches Rose immediately after a dodge, check whether you are moving into her next sword strike or losing track of her position. If fireballs are interrupting your healing, wait until the projectile has passed and Rose has room to recover.
You can also return to the upper save point and collect any permanent upgrades missed during the ascent. Improving Rose’s attack or defense is useful if you are consistently surviving the mechanics but running out of resources before the fight ends.
Holy Light becomes available after Joan is defeated. You cannot rely on its Light Parade ability during this first encounter. Use the weapons, Arcana, healing, and movement options Rose already has.
Joan’s Rewards: Guardian Key, The Warrior, and Burnt Sword of Fierbois
Defeating Joan advances the search for the remaining guardians.
Rose obtains another guardian key, and Joan becomes associated with The Warrior Tarot card.
Joan also provides a useful lead. She explains that her patrols covered the streets and rooftops, while another guardian appears to watch the Cemetery and the passages beneath it.
That conversation identifies your next general destination once the tower is complete.
After defeating Joan, collect the Burnt Sword of Fierbois along the route away from the rooftop.
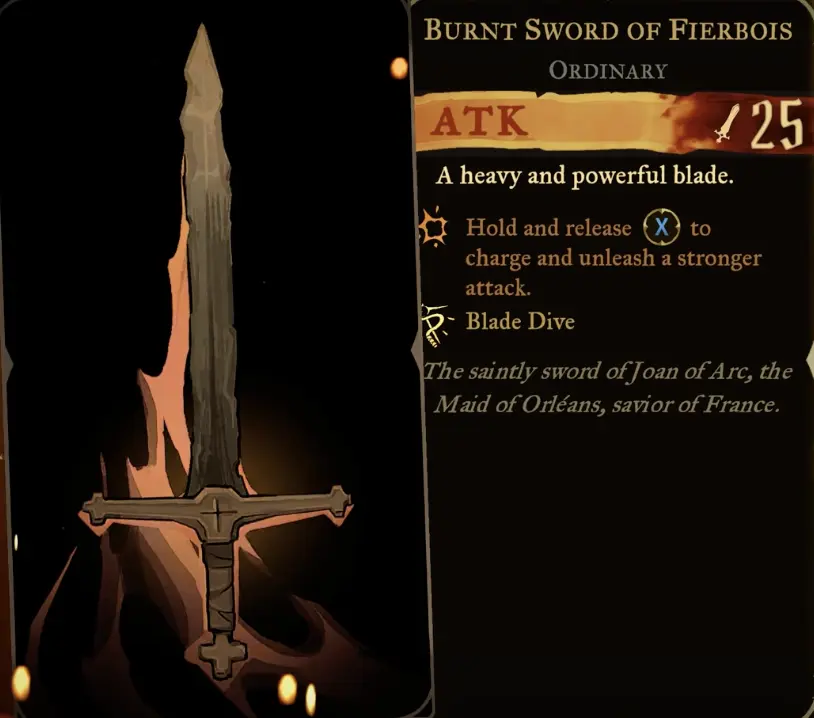
The Burnt Sword of Fierbois is a heavy blade with ATK 25. Hold the attack button to charge a stronger strike, then release it to attack. Its special action is Blade Dive.
The charge attack gives you another way to deal damage when an enemy leaves a clear opening. Against an enemy that attacks rapidly, however, committing to a longer charge can leave Rose exposed. Try the weapon during ordinary encounters before deciding whether it suits your approach.
The next major reward is Holy Light, acquired shortly afterward along Stairs to the Tower Roof.
How Holy Light Actually Works
Continue past Joan toward Stairs to the Tower Roof to obtain Holy Light.
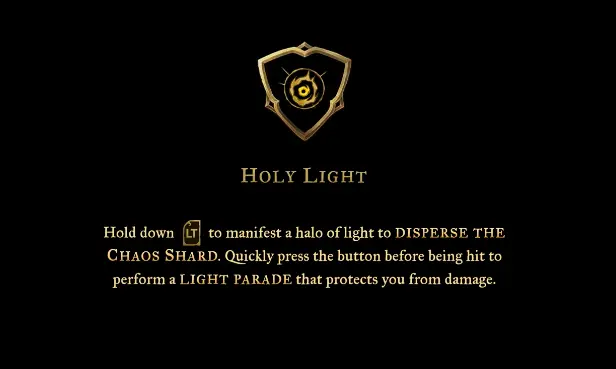
The ability has two distinct uses: removing Chaos Shards and protecting Rose with a precisely timed Light Parade.
Disperse Chaos Shards
Hold the assigned Holy Light input to manifest a halo around Rose.
The halo can disperse Chaos Shards, allowing her to deal with obstacles affected by this ability.
This provides a specific reason to reconsider certain blocked passages encountered earlier in Paris. A route obstructed by Chaos Shards may become accessible after acquiring Holy Light.
However, Holy Light does not automatically destroy every solid wall or rock barrier. If an obstacle is unrelated to Chaos Shards, repeatedly activating the halo will not necessarily remove it.
Look at the obstacle itself before deciding that Holy Light is the missing requirement.
Perform Light Parade Before an Incoming Hit
Holy Light also has a defensive action called Light Parade.
Press the assigned button shortly before an attack connects to protect Rose from damage.
The timing is different from holding the button to disperse Chaos Shards. Light Parade depends on responding to an incoming hit, so simply keeping the button held is not the same as performing a successful defensive counter.
A useful way to learn the timing is to practice against an ordinary enemy with an easily recognizable attack:
- Wait until the enemy begins an attack you can clearly see.
- Press Holy Light shortly before the hit reaches Rose.
- Watch for the protective response.
- Adjust the timing on the next attempt if Rose still takes damage.
The route away from Joan provides opportunities to become familiar with the ability before facing another major guardian.
Once you understand the timing, Light Parade gives you another defensive choice beyond ordinary dodging.
How to Use the Secret Elevator in Prison Tower
The secret elevator provides an alternate connection to the upper section of Prison Tower.
When you reach the suspended lift platform, step onto it and look for the Interact prompt.
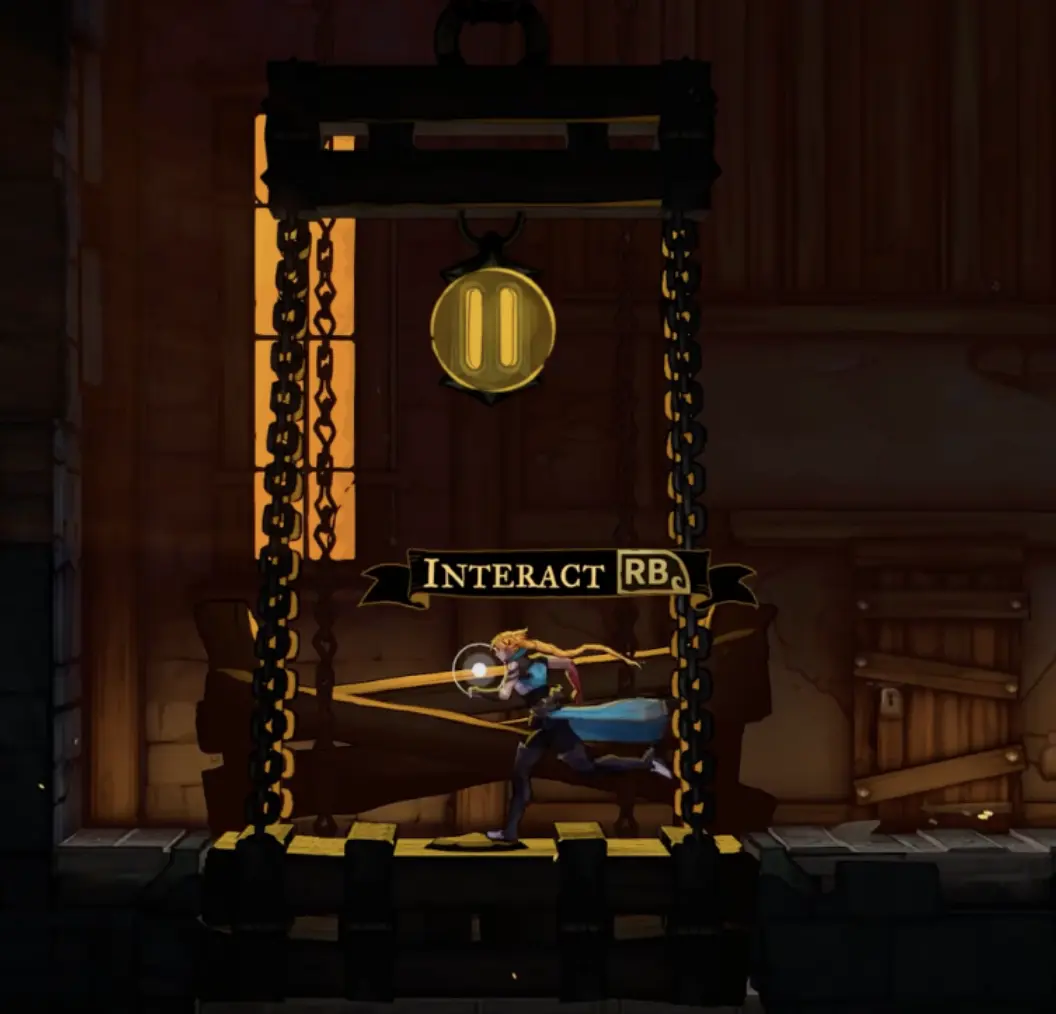
Press RB when the Interact prompt appears. The platform begins moving toward the connected upper section.
If the lift does not move, make sure Rose is standing in the correct interaction position and the prompt is visible before pressing the button.
After riding the lift, follow the upper connection to continue exploring Prison Tower.
Prison Tower Rewards: What to Collect Before and After Joan
The most useful pickups before Joan are permanent upgrades. After the rooftop encounter, Rose can revisit the tower’s lower areas for additional equipment and collect the rewards along the route away from the boss.
Before Joan
- Brave Heart Fragment, Prison Tower: found during the lower ascent.
- ATK Up, Prison Tower Challenge Room: earned by completing the local challenge.
- DEF Up, Upper Tower: available before the ceiling-ring mechanism.
- XP Statues, Prison Tower and Guard Level: provide additional experience during the climb.
Collect the permanent upgrades before the rooftop fight if you are having trouble surviving Joan’s attacks. They improve Rose without requiring a change to her equipped weapon.
After Joan
- Burnt Sword of Fierbois: ATK 25 heavy sword with a charged attack and Blade Dive, collected after the rooftop encounter.
- ATK Up, Stairs to the Tower Roof: a separate permanent upgrade from the earlier Prison Tower challenge reward.
- Wise Heart Fragment, Torture Level: found while exploring the lower tower.
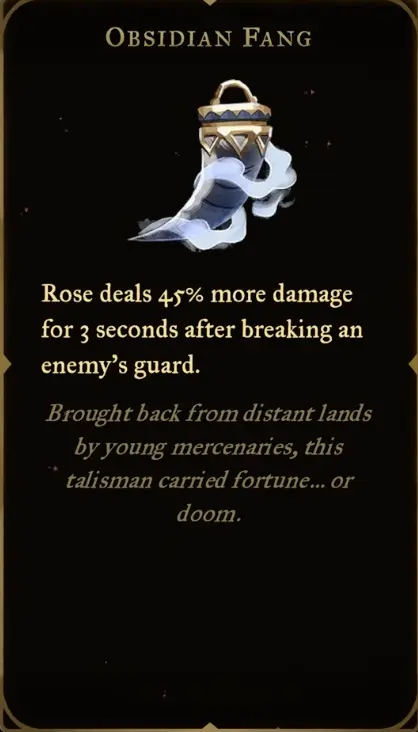
- Obsidian Fang, Guard Level: Relic that increases damage by 45% for 3 seconds after breaking an enemy’s guard.
- Shadow Veil, Burned District: challenge-room Relic that increases defense by 33% when Rose’s health falls below 33%.
Obsidian Fang is useful when you can break an enemy’s guard and attack immediately afterward. The bonus lasts only three seconds, making the opening after a guard break especially valuable.
Shadow Veil serves a different purpose. Its defense bonus activates only below the 33% health threshold, making it a defensive option when Rose is close to defeat rather than a constant source of protection.
Choose the Relic whose trigger matches how you fight. Players who regularly break guards can make deliberate use of Obsidian Fang, while Shadow Veil provides protection under a low-health condition.
With Holy Light acquired, you can also revisit previously blocked passages involving Chaos Shards as you travel through Paris.
Where to Go After Prison Tower
After defeating Joan and acquiring Holy Light, continue through Undercity, Ruined Market, and Street of the Tomb Masons toward Holy Innocents’ Cemetery.
There are several upgrades worth checking during this journey:
- Undercity: Brave Heart Fragment from a challenge room.
- Ruined Market: DEF Up.
- Street of the Tomb Masons: Wise Heart Fragment and XP statues.
Collect any nearby permanent upgrades you missed if you want additional health, defense, or attack strength before the next guardian.
Joan’s warning points toward another guardian watching the Cemetery and the passages beneath it. Continue into the Cemetery walkthrough to follow the clues toward Roman Baths and Medusa.