Castlevania Belmont's Curse Walkthrough: Where to Go Next
Follow Rose's journey through Paris, defeat The Fallen, find the three guardians, enter the Catacombs, and reach Dracula's Castle without losing your way.
Find Medusa through Roman Baths and Ancient Sewers, avoid her petrifying gaze, get the Lance, and locate the Fountain of the Lost and Hollow Tree shortcuts.
Follow the Death Mark through the Catacombs, find the Pair of Longswords and Whip, collect useful Relics, and discover what happens when Rose confronts Death.
Begin with Investigate the Streets of Paris. Find the hidden lever near the barrels, defeat The Fallen, and continue until Rose obtains the Arcane Whip.
From there, head toward Prison Tower and Holy Innocents’ Cemetery to defeat the remaining guardians. Collect all three keys, return to the Catacombs Gate, complete Stop the Resurrection, and reach Dracula’s Castle. To lift Dracula’s curse rather than merely defeat him, Rose must complete the four Bells of Virtue and overcome Shadow Rose.
Rose Belmont’s journey begins in the streets and sewers of Paris, where her mother’s Tarot cards reveal clues about the monsters terrorizing the city. The investigation soon expands into connected districts, underground passages, and areas that cannot be fully explored with Rose’s starting abilities.
The most important early discovery is that defeating The Fallen does not open the Catacombs. Two other guardians are holding the remaining keys, and reaching them requires traveling beyond the opening sewer network.
Prison Tower is a useful first destination after acquiring the Arcane Whip. The Cemetery leads to the final guardian, while the Catacombs and the journey toward Dracula’s Castle become accessible as the story progresses.
You can collect weapons, Relics, and permanent upgrades along the way, but every visible chest or blocked passage is not part of the current objective. Knowing when to continue and when to return with a newly acquired ability saves considerable backtracking.
Castlevania Belmont’s Curse Area Order: Where to Go Next
The first six stages take Rose from the Paris sewers to Dracula’s Castle. Once inside, her remaining journey leads toward three different endings, depending on how far she progresses in overcoming Dracula’s curse.
Prison Tower and Cemetery are connected to the same guardian investigation. The order below follows a practical route through the available areas rather than requiring Rose to clear every optional room before moving on.
1. Investigate Paris and Defeat The Fallen
The opening objective, Investigate the Streets of Paris, takes Rose through the first sewer passages.
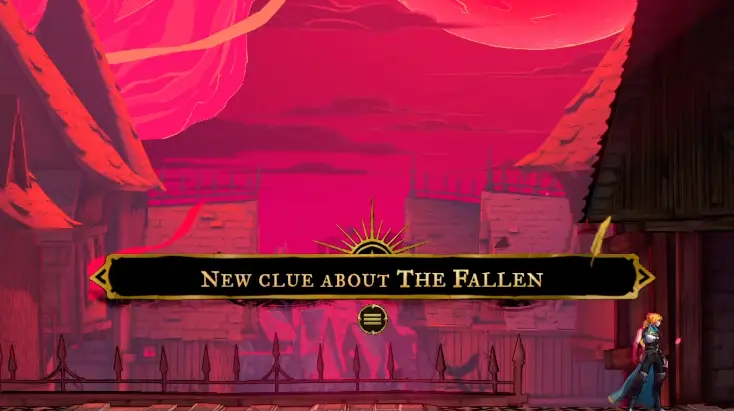
Follow the Tarot clue connected to The Fallen, locate the hidden lever near the barrels, and continue toward the next Mirror and the first guardian encounter.
Defeating The Fallen provides the first guardian key and unlocks new Arcana possibilities. The Arcane Whip becomes available shortly afterward, allowing Rose to reach traversal anchors that were previously inaccessible.
If the route remains blocked before Central Sewer Drain, return to the barrels in Ruined Market and check the cracked wall beneath the spirit.
2. Go to Prison Tower and Defeat Joan
Once Rose has the Arcane Whip, continue through the Paris streets toward Burned District.
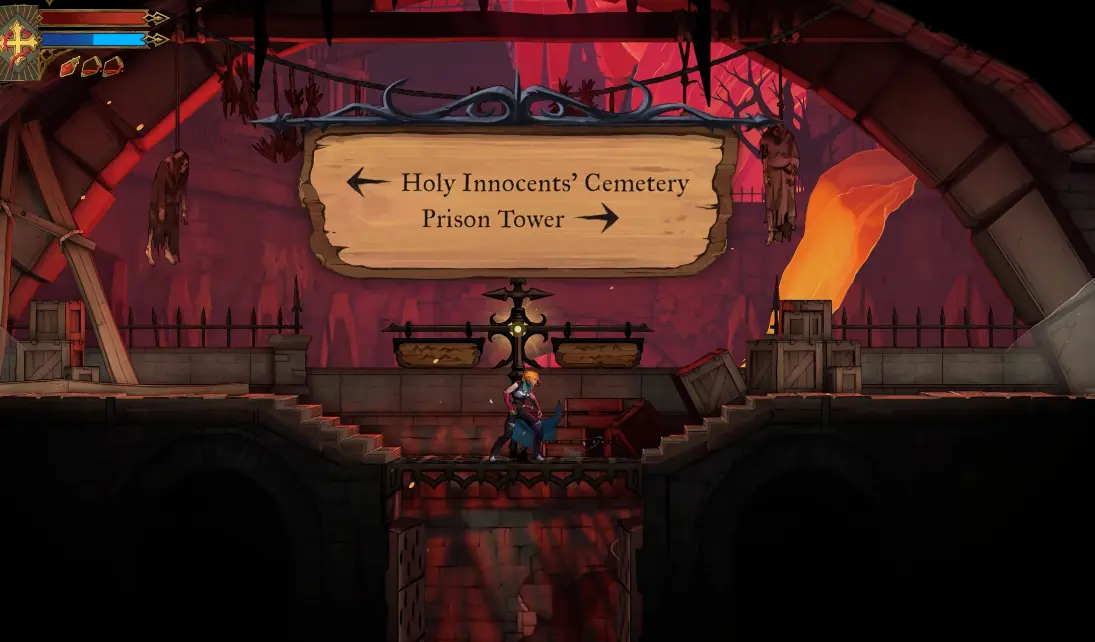
At the directional signpost, Prison Tower lies to the right, while Holy Innocents’ Cemetery lies to the left.
Take the right-hand route toward Prison Tower if you are following Joan's guardian objective first.
Joan of Arc waits near the top of Prison Tower. Defeating her provides another guardian key and leads to Holy Light, an ability used to disperse Chaos Shards and perform the defensive Light Parade.
Follow the Prison Tower walkthrough for the climb, ceiling mechanism, Joan encounter, Holy Light, and secret elevator.
3. Explore the Cemetery and Find Medusa
The final guardian is Medusa (The Prophetess).
Enter the Cemetery and follow the clues through Sepulcher of the Knight toward Roman Baths. The investigation continues into the deeper passages where Medusa waits.
Medusa’s encounter involves a dangerous petrifying gaze, which is foreshadowed by a spirit clue in Roman Baths. Defeating her provides the final guardian key.
Follow the Cemetery walkthrough for the complete route, the response to Guardian’s Gaze, and the area’s weapons and hidden shortcuts.
4. Return to the Catacombs Gate
With all three guardian keys collected, return to the sealed entrance Rose encountered earlier beneath Paris.
If you cannot remember the way back or the gate remains closed, follow How to Open the Catacombs Gate for the exact sewer route and the key requirements.
5. Enter the Catacombs and Stop the Resurrection
Opening the sealed gate begins Stop the Resurrection. Rose follows the souls collected by the guardians into the Catacombs, where the passages lead toward the ritual beneath Paris.
A spirit clue called Death Mark becomes important to finding the way forward. The investigation eventually brings Rose face to face with Death, and the confrontation changes the direction of her journey.
The Catacombs walkthrough covers the underground route, the Death Mark clue, the weapons and Relics found along the way, and what happens when Rose reaches the ritual.
6. Reach Dracula’s Castle
After the resurrection events, Rose must find a way out of the underground passages. Her journey continues toward Collapsed Path of Orpheus, where she encounters the Ferryman.
The crossing leads toward Justice District and eventually the Palace of Justice. An encounter with Isaac stands between Rose and her destination.
Follow How to Reach Dracula’s Castle for the Ferryman crossing, the route through Justice District, and how to proceed after meeting Isaac.
Entering Dracula’s Castle completes the route through Paris, but Rose still has to confront Dracula and the curse threatening her family.
7. Get the Bad, Normal, or True Ending
The Bad Ending follows the Clock Tower trap. Defeating Dracula leads to the Normal Ending, but lifting his curse requires ringing the four Bells of Virtue and overcoming Shadow Rose.
Follow How to Get All 3 Endings for the different outcomes and the complete True Ending progression.
Where Is the Hidden Lever Near the Barrels?
The hidden lever is in Ruined Market, before Rose enters Central Sewer Drain.
When you reach the upper section of Ruined Market, speak to the spirit to obtain A Lever for the Well, a clue connected to The Fallen. The spirit mentions a lever hidden near barrels.
To find it:
Return to the platform directly below the spirit.
Look for the barrels and the cracked wall on the left.
Attack the cracked section until the hidden passage opens.
Enter the opening and activate the lever.
Drop down through the well to continue into Central Sewer Drain.
The Fallen's clue points to the barrels. Break the cracked wall on the lower platform in Ruined Market to reach the lever.
The lever opens the way down from Ruined Market. Once activated, continue into Central Sewer Drain and follow the route toward the first Mirror of Life.
If you can see the barrels but cannot find a lever to interact with, check the wall beside them. The passage is concealed behind destructible masonry, not an ordinary doorway.
How to Beat The Fallen: Cross, Claw Combo, and Whip Attacks
The Fallen waits in Path of the Rat near the sealed Catacombs entrance. The fight becomes much easier once you recognize which attacks Rose can interrupt and which ones require her to move away.
The biggest mistake is treating every successful dodge as a chance to attack. Some of The Fallen’s moves continue after the first strike, while others leave a clear opening once the animation finishes.
Destroy the Returning Cross
When The Fallen throws his Unholy Cross, the projectile travels away from him and then returns.
Rose can destroy the cross by striking it with her weapon.
If you keep getting hit by the returning projectile, stop trying to avoid it only by moving across the arena. Watch its approach and attack it when it enters weapon range.
Destroying the cross removes that immediate threat and gives Rose more freedom to approach The Fallen without worrying about the projectile returning from behind her.
Wait for the Third Claw Strike
The Fallen’s close-range claw attack is a three-hit combination.
Moving behind him can avoid the opening strikes, but he can turn toward Rose for the final hit. This is why standing behind the boss after the first dodge does not always keep you safe.
Watch the entire combination before committing to another attack. If Rose gets hit immediately after moving behind him, the likely problem is that you attacked before the third strike finished.
A short counterattack after the sequence is safer than extending a combo while The Fallen is still turning.
Handle the Whip Attacks Differently
Later in the fight, The Fallen begins using his whip to attack across a much larger area.
The long-reaching whip strike is especially dangerous when Rose is standing at a distance that looks safe but is still within the attack’s reach. Watch for the whip attack and move clear of its path instead of relying on a small backward step.
The other useful opening occurs when The Fallen swings overhead and descends toward Rose. Move away from the area where he is about to land. After he comes down and the immediate attack has finished, approach for a counterattack.
Do not chase him around the arena while he is swinging above Rose. Wait for the landing, avoid it, and use the opening afterward.
How to Prepare for Another Attempt
Use the nearby Mirror of Life before entering the fight. It restores Rose’s health and healing supplies, although ordinary enemies previously defeated in the area can return.
If you keep dying to The Fallen and want to retry without running back from the Mirror of Life, open System > Settings > Gameplay and enable Allow Respawn in Front of Boss Doors.
After losing the fight, select Retry to restart at the boss entrance. You can attempt the fight again without repeating the entire sewer approach.
Keep your healing for moments when The Fallen is not actively attacking. If you repeatedly lose while trying to heal, concentrate on surviving the current attack sequence before using a potion.
Defeating The Fallen gives Rose The Fallen’s Key and the Holy Cross Arcana. The Arcane Whip becomes available shortly afterward as the story continues beyond the encounter.
Holy Cross, Arcane Whip, and Holy Light: Which Ability Do You Need?
These three abilities solve different problems, despite their similar names.
Holy Cross — Hit Enemies on the Outward and Returning Paths
Holy Cross is the Arcana Rose obtains after defeating The Fallen. Each cast costs 50 MP and sends a cross through enemies before it returns to Rose.
Casting it sends a cross forward through enemies. The projectile returns after reaching its travel limit or encountering an obstacle, allowing it to threaten enemies along both parts of its journey.
This makes positioning important. When several enemies occupy the same passage, a single throw can hit more than one target, and the returning cross may catch enemies that survived the initial attack.
Holy Cross uses MP and belongs to Rose’s Arcana equipment. It does not replace the Arcane Whip, which is used to reach traversal anchors and hidden areas.
The spell also has three Works of Mercy and several upgrades that change how it behaves. If you regularly use Holy Cross, completing these tasks can provide more practical benefits than simply casting the unmodified spell.
Arcane Whip — Reach Traversal Anchors and Hidden Areas
The Arcane Whip becomes available shortly after The Fallen.
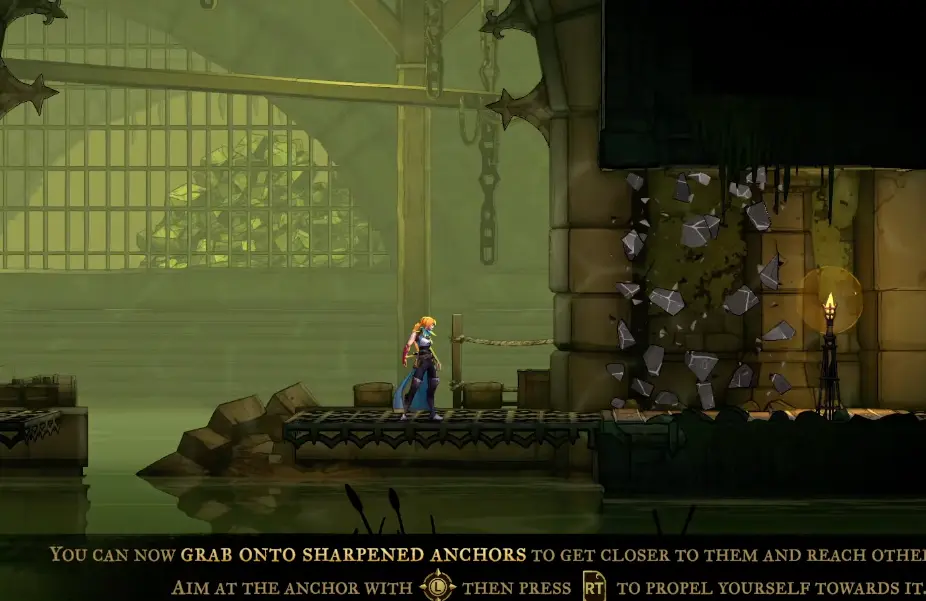
Rose can use it to interact with luminous anchors and certain enemies, giving her additional movement options for crossing gaps and reaching locations that were inaccessible during the opening exploration.
The Arcane Whip lets Rose use luminous anchors to cross gaps and reach previously inaccessible sections.
If a passage contains a visible anchor above Rose, ordinary jumping may not be the intended solution. Use the Arcane Whip to interact with the anchor instead.
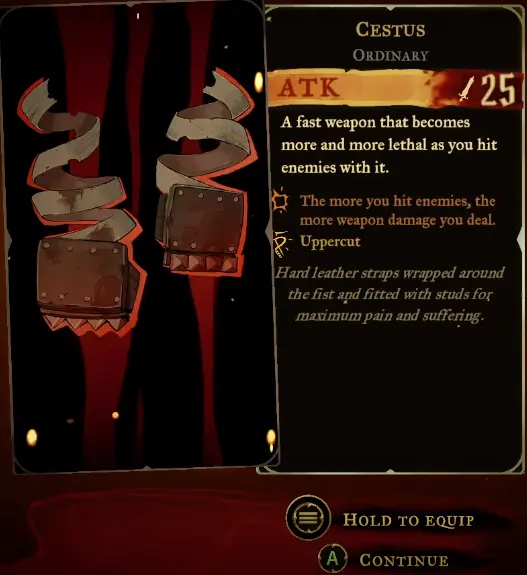
It is also the ability needed to uncover the early hidden Cestus weapon.
Holy Light — Disperse Chaos Shards and Defend Against Attacks
Holy Light is acquired after defeating Joan in Prison Tower.
It can disperse Chaos Shards and allows Rose to perform Light Parade, a defensive action timed shortly before an incoming hit.
Holy Light is not the same as Holy Cross and is not a substitute for the Arcane Whip’s traversal function.
When an earlier route remains blocked after acquiring a new ability, identify the obstacle before returning. A luminous traversal anchor and a Chaos Shard require different responses.
How to Get the Hidden Cestus Weapon in Sewer Reservoir
The Cestus is hidden in Sewer Reservoir, the area immediately after the first Mirror of Life in Central Sewer Drain. Return here once Rose has acquired the Arcane Whip. Rose needs the Arcane Whip to reach it, so the secret becomes accessible after defeating The Fallen.
The entrance is easy to miss because the final anchor is hidden above a platform rather than displayed like the ordinary anchors used throughout the sewers.
Find the Hidden Anchor Above the Staircase
Travel to the first Mirror of Life in Central Sewer Drain, then enter the adjoining Sewer Reservoir. The hidden Cestus route is in the tall reservoir chamber, not in the Mirror room itself.
Look for the large staircase visible in the background. Your destination is the elevated grate platform near its center.
To reach the weapon:
Enter Sewer Reservoir after acquiring the Arcane Whip.
Use the available anchors to climb toward the raised grate platform in front of the large background staircase.
Stand near the center of that platform.
Aim the Arcane Whip straight upward to reveal a hidden Sharpened Anchor.
Grapple to the anchor, follow the passage above, and open the large chest to obtain the Cestus.
From the raised platform near the large background staircase, use the Arcane Whip overhead to reach the hidden Cestus room.
Why the Hidden Anchor Does Not Appear
If the Arcane Whip does not connect to anything above Rose, first check where she is standing.
The hidden anchor is reached from the elevated platform near the staircase. Whipping upward from the wrong level or aiming too far forward can leave the secret undiscovered.
Once Rose reaches the room above, open the chest. Be ready for enemies to appear after collecting the weapon.
Is the Cestus Worth Using?
The Cestus is a close-range fist weapon that rewards sustained attacks. Its damage increases as Rose continues landing punches, making it different from weapons that rely on a single powerful strike.
This favors situations where Rose can remain close enough to keep attacking. Against enemies that frequently force her to retreat, maintaining that pressure becomes more difficult.
You can collect the Cestus before continuing toward Prison Tower, but it is not required to obtain another guardian key. The main reason to return for it is to gain a different combat option.
When Should You Return for Missed Weapons and Upgrades?
Not every blocked passage in Paris can be opened during Rose’s first visit. The quickest way to decide whether to return is to identify what prevents her from continuing.
Permanent upgrades such as ATK Up, DEF Up, and heart fragments are worth collecting when they lie near your route, especially before a difficult guardian encounter.
Optional weapons and Relics are different. Collect them when their effects match your combat style or when you want another option for a difficult fight. You do not need to clear every chest and challenge room before progressing through Paris.
How to Complete Holy Cross Works of Mercy and Unlock Gifts
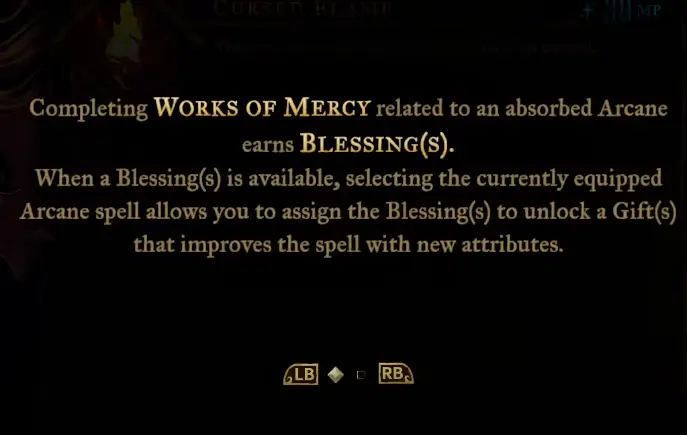
Each Arcana has Works of Mercy, tasks that Rose can complete to improve its abilities.
Completing a Work of Mercy earns a Blessing. Assigning the Blessing allows Rose to unlock a Gift for that Arcana.
Complete an Arcana's Works of Mercy, then assign the earned Blessings to obtain its Gifts.
Holy Cross: All Three Works of Mercy
The Holy Cross has three tasks:
Find three different whip-type weapons.
Kill five enemies with the same Holy Cross.
Kill ten enemies using a whip attack.
The second task is the easiest to misunderstand. It does not mean using Holy Cross five times or accumulating five kills across unrelated throws.
You need one thrown cross to kill five enemies. Those enemies do not have to die at exactly the same moment, since the projectile can continue moving and hit targets on its return.
How to Get Five Kills with One Holy Cross
Look for an area with several weak enemies close enough to group together.
The bat-filled passages around Path of the Rat are a useful place to attempt this. Move through the passage to draw several bats toward Rose, then wait until enough of them occupy a line where the cross can travel through them.
Throw Holy Cross through the group and allow its return path to reach any remaining enemies.
If the task does not complete, check whether the cross actually killed five targets. Hitting five enemies is not the same as defeating them, and kills spread across separate casts do not satisfy the requirement.
For the whip-attack task, finish enemies with a damaging whip attack. Merely moving toward an enemy with the Arcane Whip is not the same as defeating it with the attack.
Holy Cross Blessings and Gifts: Which Upgrades Should You Choose?
Completing a Work of Mercy earns a Blessing. Assigning that Blessing unlocks its corresponding Gift, which improves the Holy Cross.
The three available Holy Cross Blessing effects are:
Additional Cross: throw a second cross to cover more space.
Long-Range Damage: deal more damage as the cross travels farther from Rose.
MP Recovery: regain 10% of the spell’s MP cost for each enemy hit when catching the returning cross, up to 60%.
Choose an upgrade that matches how you use the spell. The additional cross helps when several enemies occupy different positions, while distance-based damage rewards attacking from farther away.
MP recovery is especially useful when the cross hits multiple enemies and returns to Rose. With a base cost of 50 MP, recovering mana can make repeated casts less expensive.
Does Demo Progress Carry Over to the Full Game?
Yes. Progress from the Castlevania Belmont’s Curse demo can be transferred to the full game.
To carry over your progress:
Launch the full game on the same platform used for the demo.
Use the same account that contains your demo progress.
Keep the demo save data rather than deleting it.
Update the full game to its latest version before transferring your save.
If your demo progress is not available, check the platform, account, and saved data first.
The demo covers the opening chapter, including The Fallen and the early Arcane Whip progression. Once you continue in the full game, the Prison Tower walkthrough follows the next major guardian route.