Embrujo Weapon Guide
A practical Blasphemous 2 The Third Sin Embrujo guide explaining where to get the new whip weapon, how Wail of the Flame works, and which upgrades to buy first.
Updated:
Quick Answer
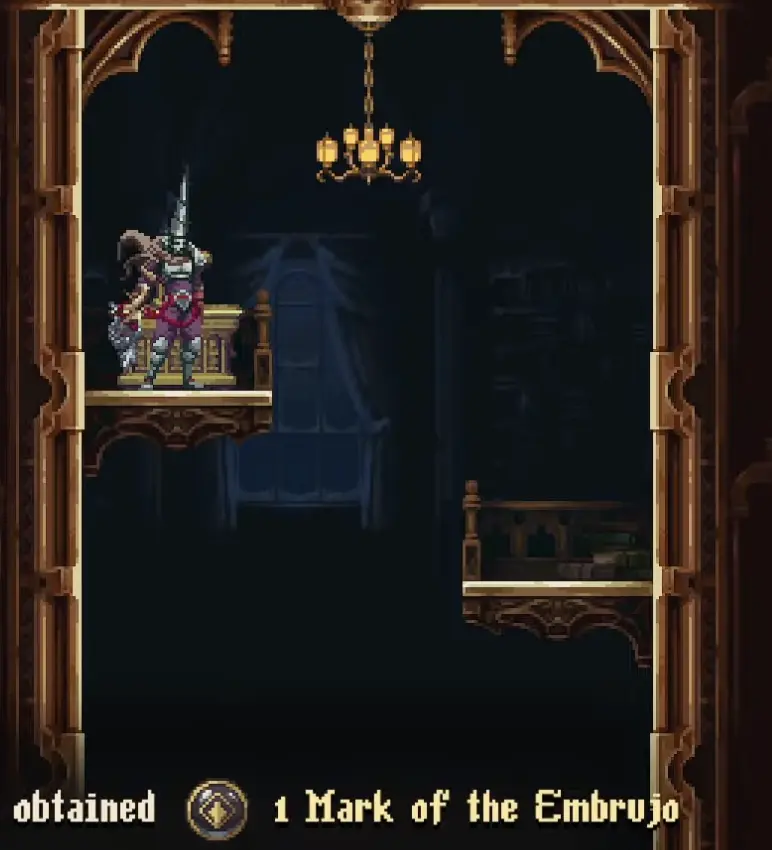
Embrujo is the new whip-style weapon in Blasphemous 2: The Third Sin. You get it inside Castle of the Mist, after the route pushes you through Geometry of Knowledge and toward the Usurped Halls / weapon statue path. Embrujo gives you long-range attacks, directional control, Wail of the Flame, blue mirror-ring movement, lit emblem grapples, and bell interaction. There are 19 Marks of the Embrujo to collect for its upgrade page.
Embrujo Quick Facts
| Question | Answer |
|---|---|
| Weapon type | Long-range whip-style weapon |
| Damage type | Unholy damage |
| Best use | Range, air control, bells, blue mirror rings, and Castle route traversal |
| Gauge mechanic | Wail of the Flame |
| Traversal tool | Grabs blue mirror rings and lit Castle of the Mist emblems |
| Bell interaction | Can hit chiming bells |
| Parry? | No |
| Upgrade currency | 19 Marks of the Embrujo |
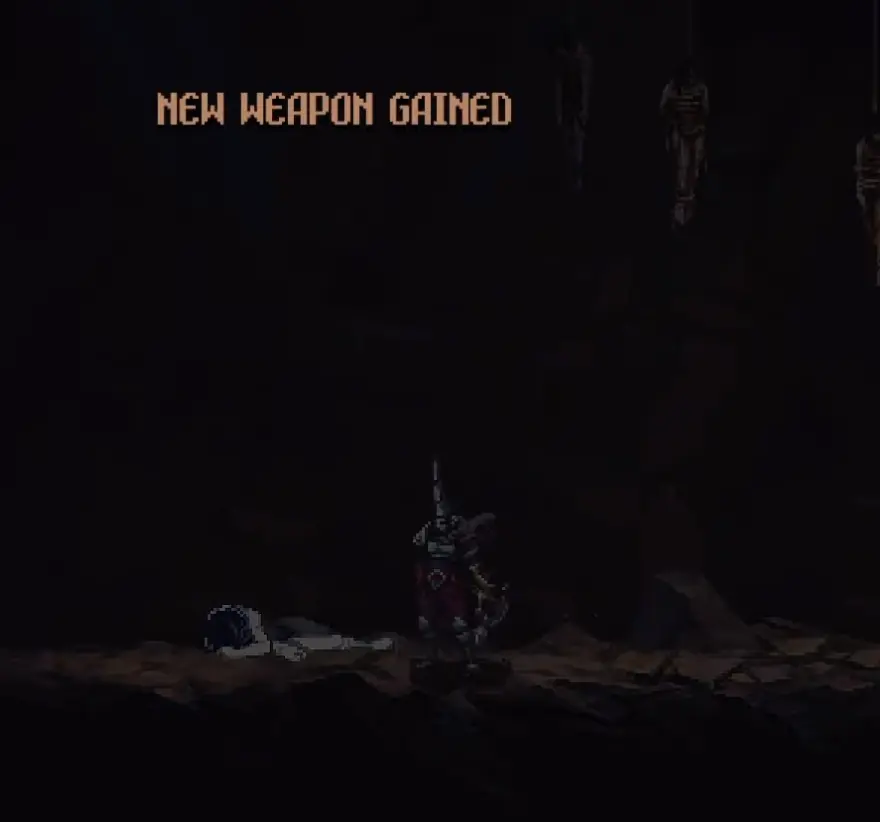
How to Get Embrujo
You get Embrujo by following the early Castle of the Mist route until it leads you toward the weapon statue room. The important part is not to brute-force every blocked path before the weapon. Many of those rooms are deliberately showing you what Embrujo will solve later.
| Route checkpoint | What to do | What not to do |
|---|---|---|
| Castle of the Mist entrance | Follow the open route after entering the DLC area | Do not chase every sealed side room yet |
| Geometry of Knowledge | Work through the library-style rooms, ladders, and vertical connections | Do not treat every whip point as reachable before Embrujo |
| Moveable ladder / vertical rooms | Use ladder positions and room exits to keep pushing through the available path | Do not leave the area just because one side route is blocked |
| Usurped Halls route | Follow the objective path toward the weapon tied to the castle | Do not waste time on half-face doors or mist blockers yet |
| Weapon statue room | Pick up Embrujo and start backtracking through whip and bell routes | Do not begin full collectible cleanup before testing the weapon |

Embrujo vs Ruego Al Alba, Veredicto, and Sarmiento
Embrujo is strongest when the room asks for reach, air control, blue mirror rings, bells, or safe ranged pressure.
| Weapon | Best use | Switch to it when… |
|---|---|---|
| Embrujo | Long-range hits, air control, blue mirror rings, bells, Castle traversal | Enemies or route targets are above, across, or behind gaps |
| Ruego Al Alba | Safer close combat and parry-focused pressure | You need defensive timing or safer melee exchanges |
| Veredicto | Heavy grounded hits and slower burst windows | You can punish a long recovery animation without needing quick reach |
| Sarmiento and Centella | Fast close-range pressure and mobility | You want speed and aggression more than range or route utility |
A good rule for The Third Sin is simple: solve rooms with Embrujo, fight with the weapon that gives you the safest rhythm.
Basic Embrujo Inputs and Combos
Exact button names can change if you remapped controls, so use the action names your game shows in the control menu. The patterns below describe the action sequence rather than one fixed layout.
| Move / use case | Input pattern | When to use it |
|---|---|---|
| Ground whip hit | Face the target → Attack | Safe poke against enemies across a gap or just outside melee range |
| Upward / downward whip hit | Hold direction → Attack | Hit enemies, bells, or targets above / below you |
| Dodge punish | Dodge → Attack as you recover | Quick ranged punish after avoiding a close attack |
| Air whip hit | Jump → Aim direction → Attack | Hit flying enemies or start a blue-ring chain |
| Bell route starter | Hit bell → immediately jump / dash toward the new route | Use when platforms or targets appear only after the bell |
| Blue mirror-ring chain | Jump → aim at ring → pull → jump / dash → aim at next ring | Cross long air routes without touching the ground |
| Downward control hit | Jump or fall → hold down → Attack | Control landings or punish enemies below |
The most common route combo is:
Jump → aim at blue ring → pull → jump or dash immediately → aim at next ring → pull againFor combat, keep it simpler:
Stand outside melee range → land one or two Embrujo hits → dodge away → repeat when the enemy recovery is clearHow Embrujo Works in Practice
Embrujo is designed around one idea: it lets you interact with targets outside normal melee range. That includes enemies above or below you, bells across a gap, blue mirror rings in the air, and Castle of the Mist routes that older weapons cannot comfortably solve.
Its value is not only damage. In many rooms, Embrujo is the key that turns a dead end into a route. Use it when the room gives you glowing targets, unreachable bells, vertical shafts, or enemies positioned where close-range weapons feel awkward.

Wail of the Flame Explained
Wail of the Flame is Embrujo’s flame-gauge mechanic. As you land Embrujo hits, the gauge builds. Once the weapon enters its powered state, Embrujo hits harder during that window.

Do not rely on a fixed hit count. Use the visible Wail gauge in the lower UI as your real trigger. Build it on enemies you can hit safely, then spend the powered window when you know you can land several clean attacks.
If you swap weapons, change rooms, heal, or spend time platforming, check the gauge again before committing. Treat Wail of the Flame as active only when the UI clearly shows that the Embrujo state is ready or active.
| Situation | How to use Wail of the Flame |
|---|---|
| Large enemies | Build gauge from range, then spend it during long recovery windows |
| Crowded rooms | Use Embrujo reach to clear space before committing to powered hits |
| Elite enemies | Save the powered window for moments when the enemy is locked into a pattern |
| Boss windows | Wait until the boss finishes a long action, then land a short burst and reset |
| Cleanup routes | Use it to end dangerous rooms faster once you know the room layout |
How to Use Blue Mirror Rings and Lit Emblems
The most important non-combat use for Embrujo is grabbing glowing targets inside Castle of the Mist. These can appear as blue mirror rings or lit castle emblems.
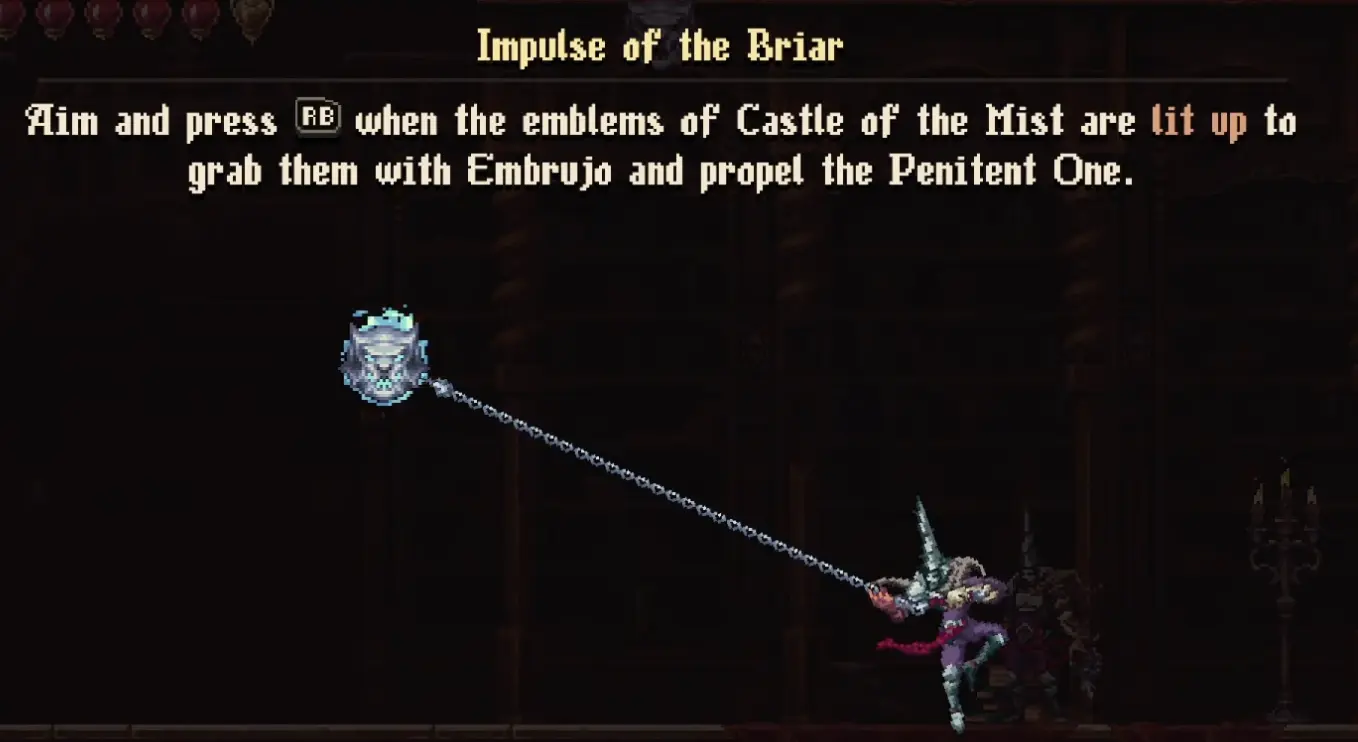
Use this rhythm:
- jump or stand where the glowing target is clearly in range;
- aim toward the ring or emblem;
- pull with Embrujo;
- immediately input your next jump, dash, or aim after the pull;
- chain the next ring before you lose height.
| If you fail the route… | Fix it this way |
|---|---|
| You fall short | Jump or dash immediately after the pull, not after you start dropping |
| You hit an enemy instead | Clear the enemy first or aim from a safer position |
| The ring feels too high | Start the pull from a jump instead of from the ground |
| The route disappears | Hit the bell first, then move without pausing |
| The target is not active | Continue progression and return after more Castle routes open |
How Embrujo Works With Bells
Embrujo can hit chiming bells, which makes it important for puzzle rooms and route opening.
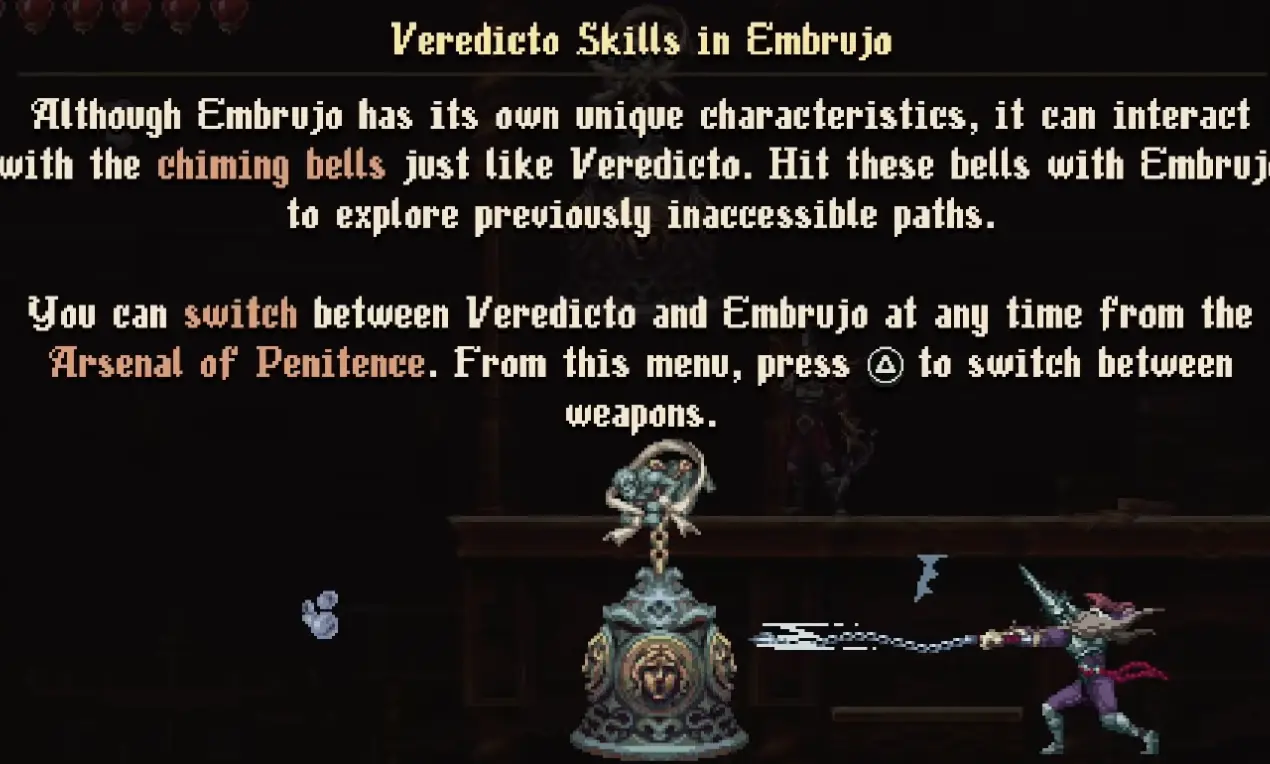
Some rooms combine bells with Embrujo movement. A bell may create temporary platforms, activate a route, or make a path possible only for a short window.
When a room has a bell and whip points:
- hit the bell first;
- watch what changes in the room;
- move immediately if platforms or targets appear;
- use Embrujo to grab the next glowing target;
- repeat if the route requires another bell hit.

Best Embrujo Upgrades to Buy First
Embrujo uses 19 Marks of the Embrujo for its upgrade page. You do not need all 19 before using the weapon, but you should spend Marks as you go instead of saving everything for the end.
Prioritize upgrades that make Embrujo reliable before buying style-specific or air-only nodes.
| Priority | Upgrade / node type | Why it helps |
|---|---|---|
| 1 | Base Embrujo damage node | Makes every normal room and cleanup route smoother |
| 2 | Blood Skirmish | Gives Embrujo better follow-up value after basic hits |
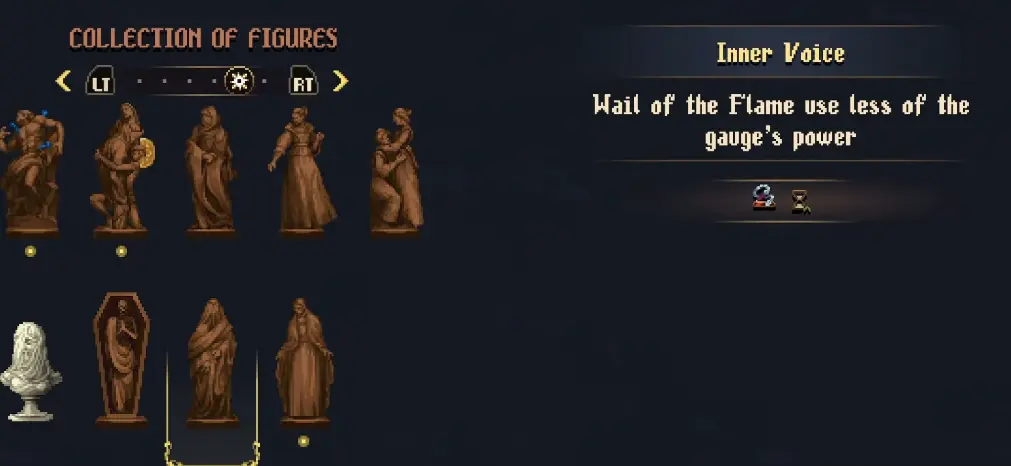
| 3 | Wail of the Flame support | Improves your strongest burst windows once you can keep landing hits |
| 4 | Embrace of the Briar | Useful if you spend Fervour aggressively near enemies |
| 5 | Burning Star | Strong air option, but better after you are comfortable with Embrujo movement |
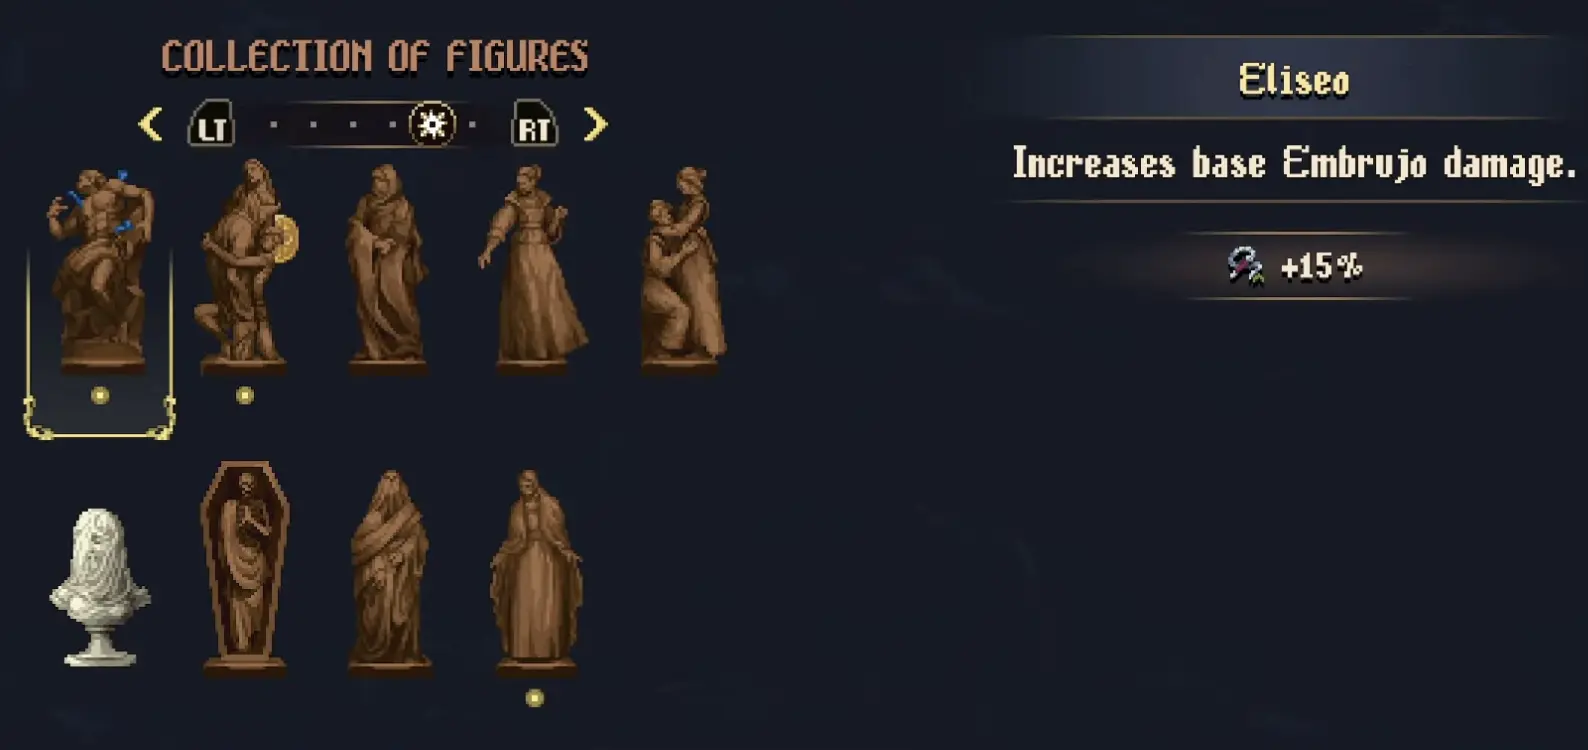
For an Embrujo-focused build, pair these upgrades with support that improves base Embrujo damage, safe burst windows, or recovery during long Castle routes. One key figure to check is Eliseo in the Altarpiece of Favours menu, because it increases base Embrujo damage. Do not confuse this with Eliseo the NPC in the story route.
For the exact map locations of all 19 upgrade pickups, use the All Mark of the Embrujo Locations guide. For the full collectible checklist, including the 9 Altarpieces of Favours, use the All Collectibles & 100% Cleanup guide.
Embrujo Boss Windows
Embrujo is safest in boss fights when you use it during clear recovery windows, not while the boss is moving through the screen. Use short bursts, then reset your spacing.
| Boss situation | Embrujo plan |
|---|---|
| Boss finishes a long swing or dash | Land one or two Embrujo hits, then step back |
| Boss stays at mid-range | Use Embrujo reach instead of forcing close melee |
| Boss enters a projectile or movement pattern | Stop attacking and focus on dodging until the pattern ends |
| You have Wail of the Flame ready | Spend it only when the boss is locked into a recovery window |
| You need healing space | Use Embrujo range after healing instead of immediately rushing in |
Against Crescencia, Embrujo is useful when you can punish from a safe distance after a finished pattern. Do not overcommit during movement-heavy attacks. A short Embrujo burst is usually safer than trying to force a full combo.
Common Embrujo Mistakes
Starting Full Cleanup Before You Get Embrujo
If a room clearly shows whip-style targets, blue rings, or bell-created routes, leave it until Embrujo is unlocked. The weapon is part of the route logic, not just a combat reward.
Treating Every Bell Room Like a Normal Platforming Room
Many bell rooms are timing puzzles. Hit the bell, watch what changes, then move immediately. If you wait to plan the route after hitting the bell, the temporary platforms may disappear.
Using Embrujo to Fight While Ignoring the Room Hazard
Embrujo’s range is useful, but it does not replace route awareness. In rooms with mist, spikes, projectiles, or moving platforms, solve the room hazard first instead of trying to whip enemies through the danger.
Not Spending Marks
Marks only help after you spend them. Return to the upgrade page after collecting several Marks, especially before boss attempts or long cleanup routes.
Forcing Mist or Half-Face Doors Too Early
Embrujo opens many routes, but it does not solve every blocker by itself. If a path is blocked by mist, lift progression, or half-face doors, continue the main route and return later.
Leaving Vertical Rooms Too Quickly
Embrujo rooms often have upper and lower exits. Before leaving, check the top, bottom, and side ledges, not just the direct exit.
Full Embrujo Upgrade Cleanup
Once you are ready to finish the weapon, collect every Mark of the Embrujo and return to the upgrade page.
For the full map checklist, use the dedicated Mark guide:
| Need | Guide |
|---|---|
| Every upgrade pickup | All Mark of the Embrujo Locations |
| DLC entrance | How to Start The Third Sin DLC |
| Blocked lift / mist / half-face doors | Lift, Mist & Half-Face Doors Guide |
| Main route order | The Third Sin Walkthrough |
FAQ
Where do you get Embrujo in Blasphemous 2 The Third Sin? +
Embrujo is found along the early Castle of the Mist route after you pass through Geometry of Knowledge and push toward the Usurped Halls / weapon statue path. If you keep seeing whip points, bells, and unreachable platforms, continue the main route until you reach the Embrujo weapon room.
What kind of weapon is Embrujo? +
Embrujo is a long-range whip-style weapon with unholy damage. It attacks in multiple directions, builds Wail of the Flame, grabs blue mirror rings and lit castle emblems, and can hit chiming bells.
How many Marks of the Embrujo are there? +
There are 19 Marks of the Embrujo in The Third Sin. They are used to unlock Embrujo's upgrade page and finish the weapon's damage, movement, and Wail-related nodes.
Is it Wail of the Flame or Whale of the Flame? +
Use Wail of the Flame. It is the Embrujo flame-gauge mechanic that powers up the weapon after you keep landing Embrujo hits.
Can Embrujo parry? +
No. Embrujo is not a parry weapon. Use it for range, movement, bell routes, Wail of the Flame damage, and Castle of the Mist traversal.
Is Embrujo better than Ruego Al Alba or Veredicto? +
Embrujo is better for range, air control, blue mirror rings, bells, and Castle of the Mist traversal. Ruego Al Alba is safer for parry-focused close combat, while Veredicto is better for heavy grounded burst windows.
Which Embrujo upgrades should you buy first? +
Buy reliable damage and follow-up tools first, then improve Wail of the Flame and movement-friendly nodes once you are using Embrujo often.