All Mark of the Embrujo Locations
Find every Mark of the Embrujo in Blasphemous 2 The Third Sin, with area routes, map-room clues, upgrade tips, and missing-Mark checks.
Updated:
Quick Answer
There are 19 Mark of the Embrujo pickups in Blasphemous 2: The Third Sin. They are used for Embrujo weapon upgrades, so collect them while you explore, then spend them before difficult route rooms or boss attempts. The cleanest route is to get Embrujo, learn the bell and blue mirror-ring movement, clear the mist / lift / half-face door blockers, then sweep the Marks by area: Geometry of Knowledge → The Vibrating of the Organs → Castle of the Mist → Stone Entrails.
Before You Start: Embrujo Route Mechanics
This guide uses three route terms often:
| Mechanic | What it means | Why it matters for Marks |
|---|---|---|
| Chiming bells | Embrujo can hit bells like Veredicto | Some temporary platforms only appear after a bell is struck |
| Blue mirror rings / lit emblems | Aim Embrujo at the lit target and pull yourself through the air | Many Marks sit at the end of long air chains or vertical shafts |
| Wail of the Flame | Repeated Embrujo hits fill a gauge and empower later attacks | Not required for every Mark, but useful while clearing dangerous rooms |
If a room says to use a bell, hit the bell first and move immediately. If a room says to use blue mirror rings, look for glowing blue targets in the air and chain your pulls before you lose height.
Which Embrujo Upgrades to Buy First
If you have only a few Marks, do not spend them randomly. Buy upgrades that make Embrujo reliable before chasing style-only attacks.
| Priority | Upgrade type | Why it is worth buying early |
|---|---|---|
| 1 | Basic Embrujo damage / first damage node | Makes normal rooms safer and gives every later upgrade more value |
| 2 | Blood Skirmish | Adds a stronger follow-up after a basic Embrujo hit, which helps during normal combat and cleanup |
| 3 | Wail of the Flame support | Makes sustained Embrujo pressure better once you can keep hitting enemies |
| 4 | Embrace of the Briar | Good if you use Fervour aggressively near enemies |
| 5 | Burning Star | Strong air option, but better after you are comfortable with Embrujo movement |
Best Order to Collect the Marks
| Order | Area | Why this order works |
|---|---|---|
| 1 | Geometry of Knowledge | Easiest first cleanup block and good early Marks for upgrades |
| 2 | The Vibrating of the Organs | Many Marks are in shafts and traversal rooms, but the routes become easier after Embrujo practice |
| 3 | Castle of the Mist | Only one Mark, but the route is easy to miss if the eastern exterior is not open |
| 4 | Stone Entrails | Most confusing area for cleanup, with several lower rooms and spike / bell routes |
All 19 Mark of the Embrujo Locations
Mark of the Embrujo #1 — Geometry of Knowledge
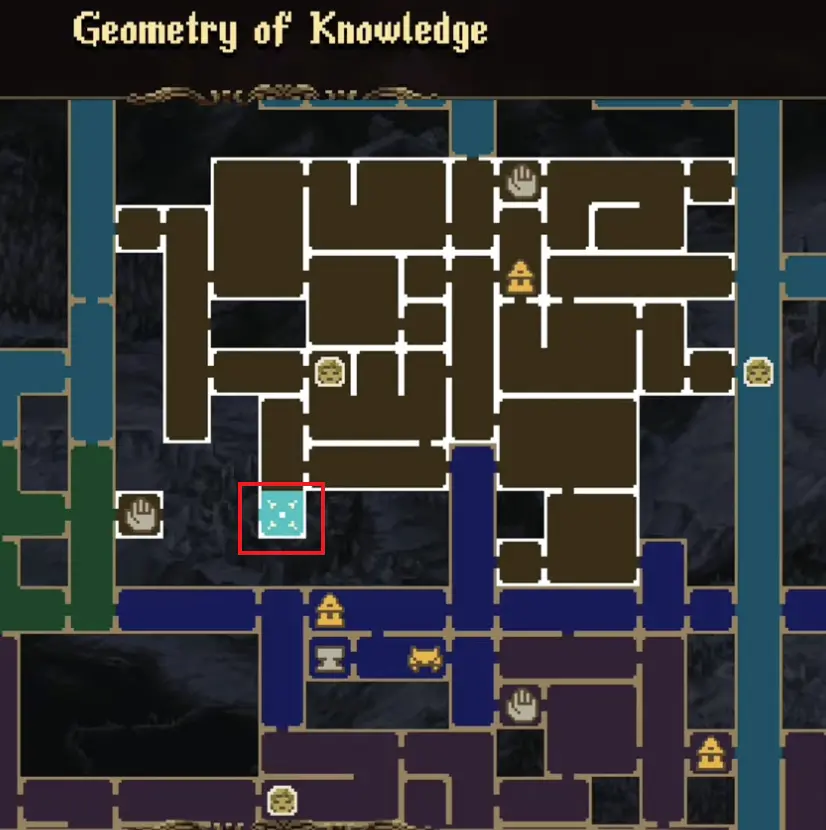
Start from the nearby Prie Dieu in the central-lower part of Geometry of Knowledge. Move left into the adjacent library room and break the trophy on the left-side platform.
Mark of the Embrujo #2 — Geometry of Knowledge
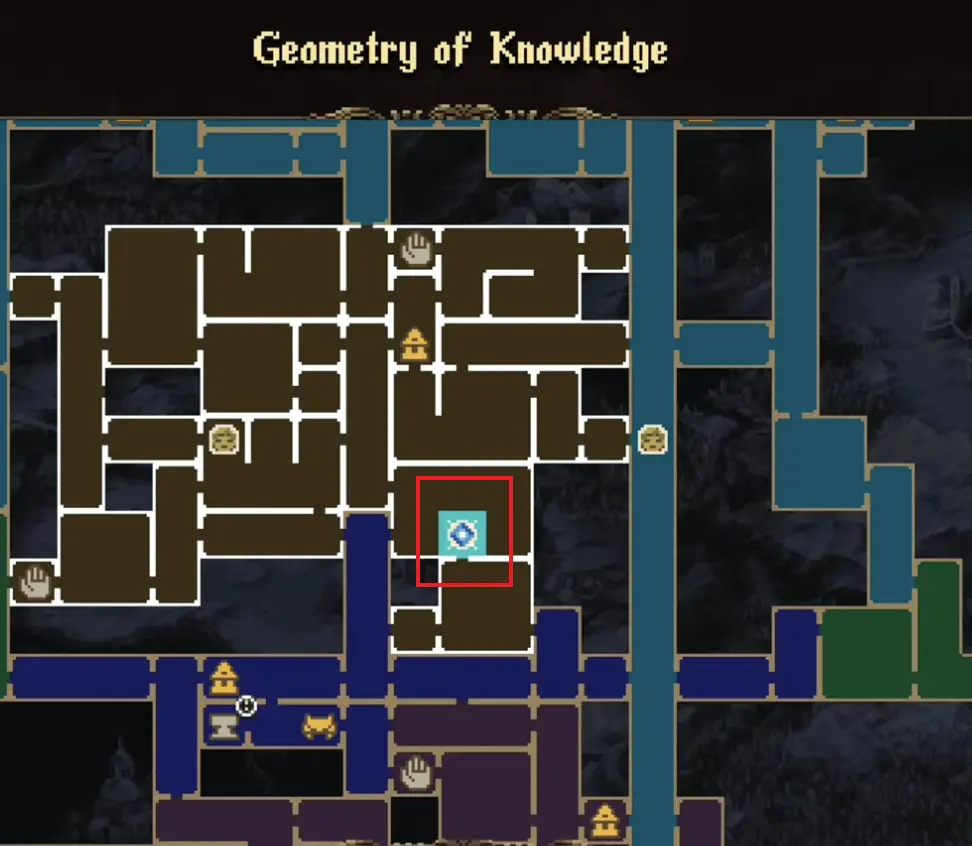
This one sits in the southeast side of the brown library section, below the central Prie Dieu corridor. Drop down from the rooms above, then use the Embrujo air route to reach the lower-right room. Inside the room, look for the pickup on the higher right-side platform rather than the bottom path.
Mark of the Embrujo #3 — Geometry of Knowledge
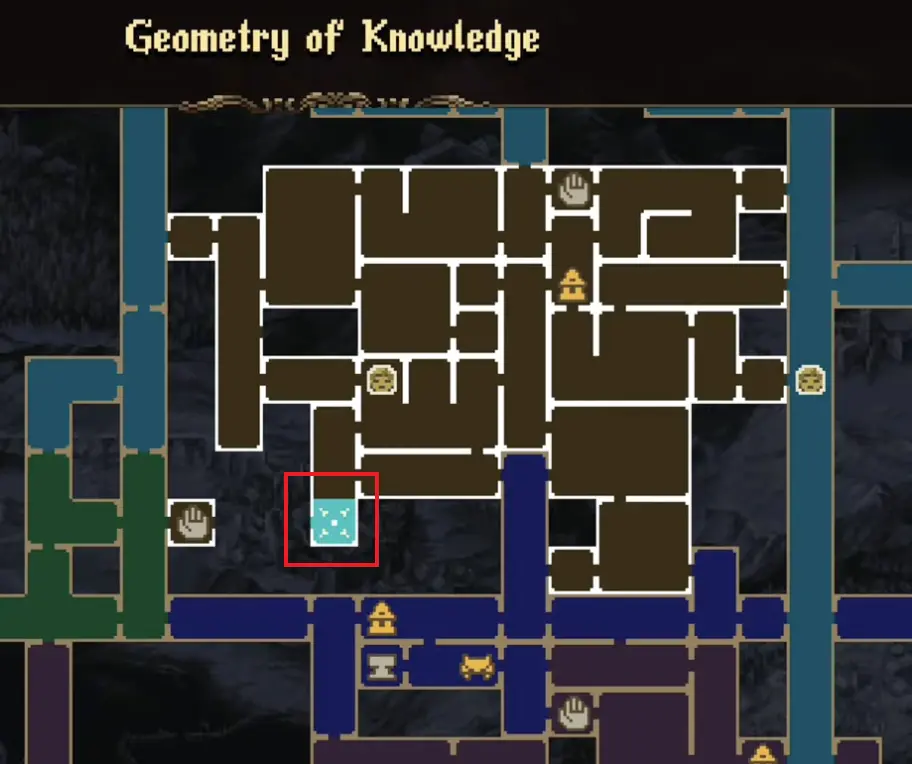
From the nearby save room, enter the vertical hall to the right. This room has ladders, floating enemies, and a long drop. Clear the enemies first, then descend toward the bottom of the shaft. The Mark sits low in the room, near the long table / fireplace area, not near the top entrance.
Mark of the Embrujo #4 — Geometry of Knowledge
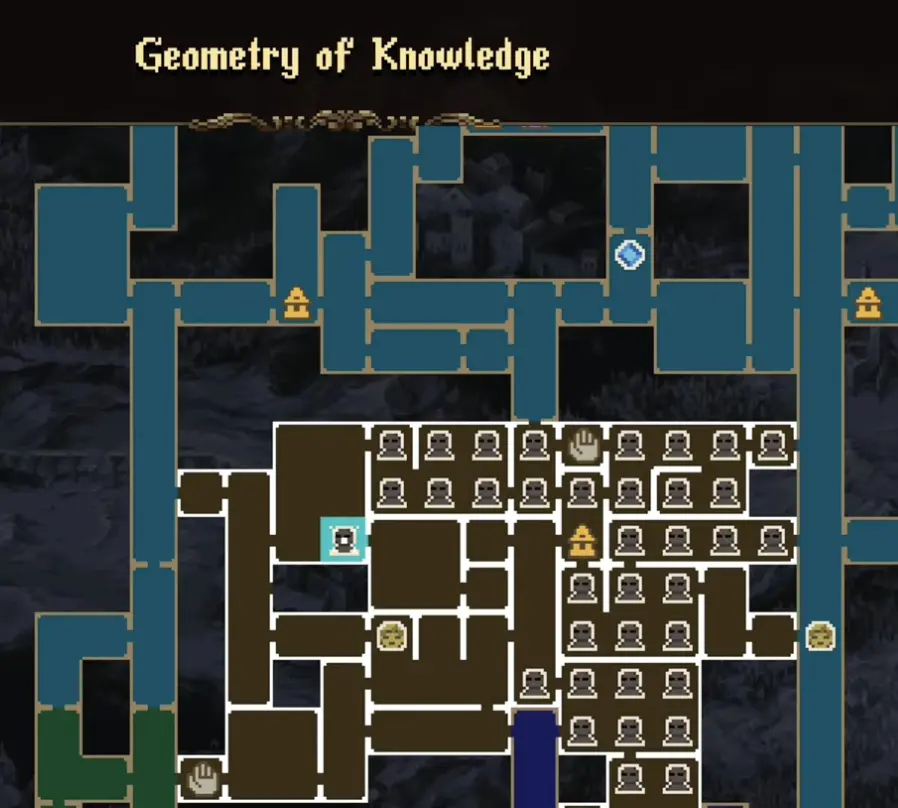
This is the trickiest Geometry of Knowledge Mark. Go to the large library room east of the main vertical route. Hit the hanging golden bell, then use the temporary platform and blue mirror-ring movement to climb toward the upper-left bookcase ledge. The Mark is above the normal route, so do not only check the ground floor.
The Vibrating of the Organs Marks
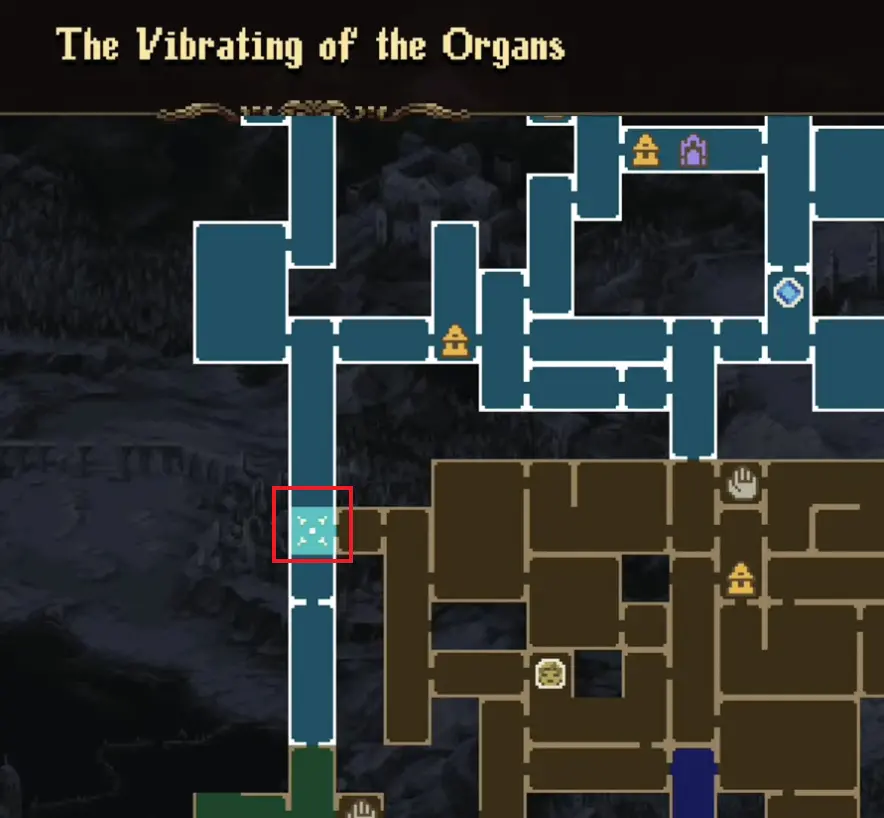
Mark of the Embrujo #5 — The Vibrating of the Organs
Enter the lower-left organ route. Move through the corridor with the large organ background, climb down the right-side ladder, then work left across the lower path while avoiding the floor spikes. The Mark is on a stone platform near the left-side ladder.
Mark of the Embrujo #6 — The Vibrating of the Organs
This Mark is in the far-right vertical section of The Vibrating of the Organs. Start from the right-side route near the save / travel cluster and enter the tall shaft. Use the blue mirror rings, hanging chains, and floating stone platforms to climb through the room. The pickup is not on the direct vertical path; look for the upper-right tower balcony at the end of the air chain.
Mark of the Embrujo #7 — The Vibrating of the Organs
This is one of the simplest Marks in the area. From the right-side Prie Dieu, move left into the long corridor. The Mark is on a visible chalice-style pedestal near the start of the room. If you are rushing through the corridor, it is easy to pass without breaking it.
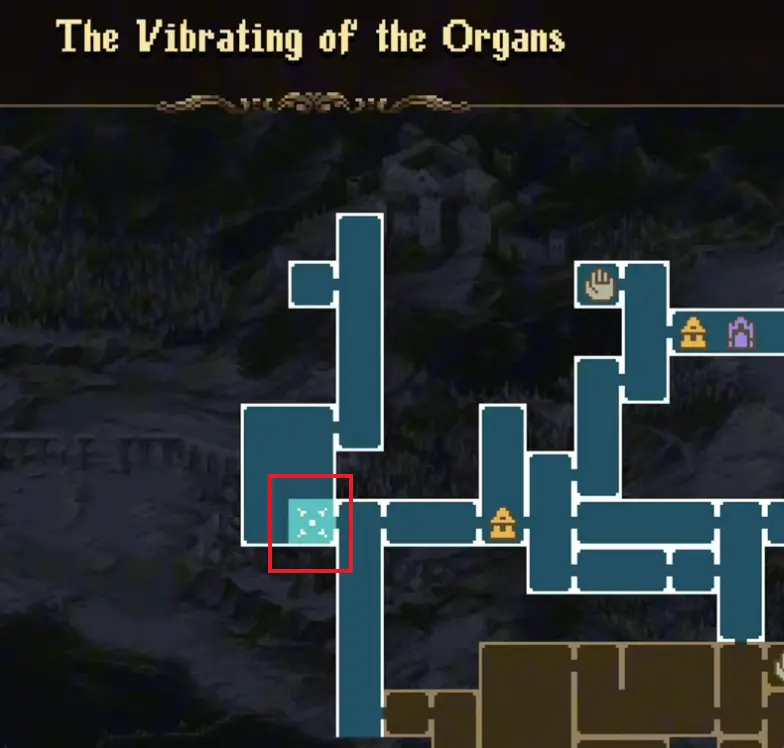
Mark of the Embrujo #8 — The Vibrating of the Organs
From the left-side route, enter the organ corridor and descend to the lower balcony. The Mark sits on the left side of the lower platform, close to the room transition. Check below the main walkway rather than staying on the top path.
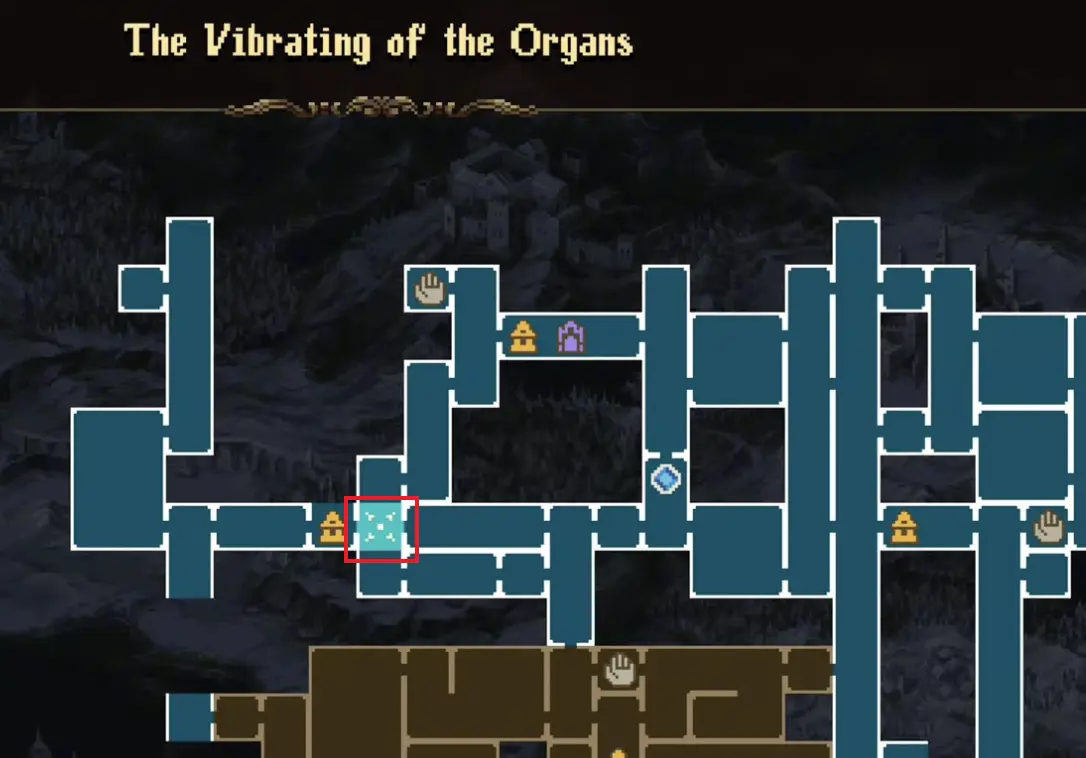
Mark of the Embrujo #9 — The Vibrating of the Organs
Start from the right-side save route and move left into the arched corridor. This Mark is placed near the middle of the room on an obvious pedestal. It is not mechanically difficult; the main risk is overlooking it while heading toward the next route connection.

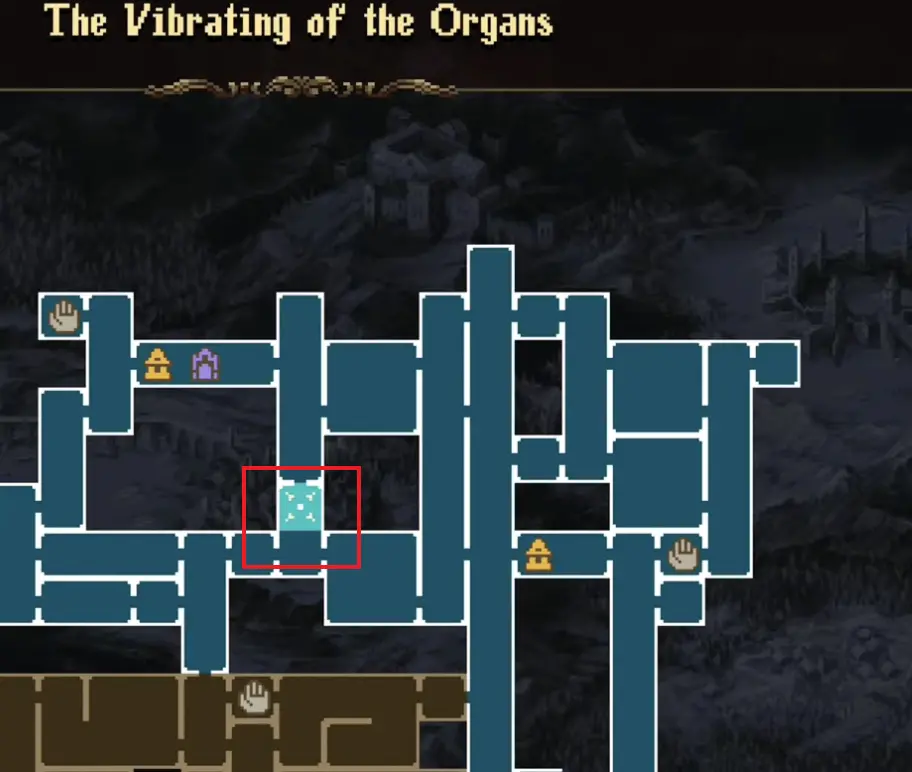
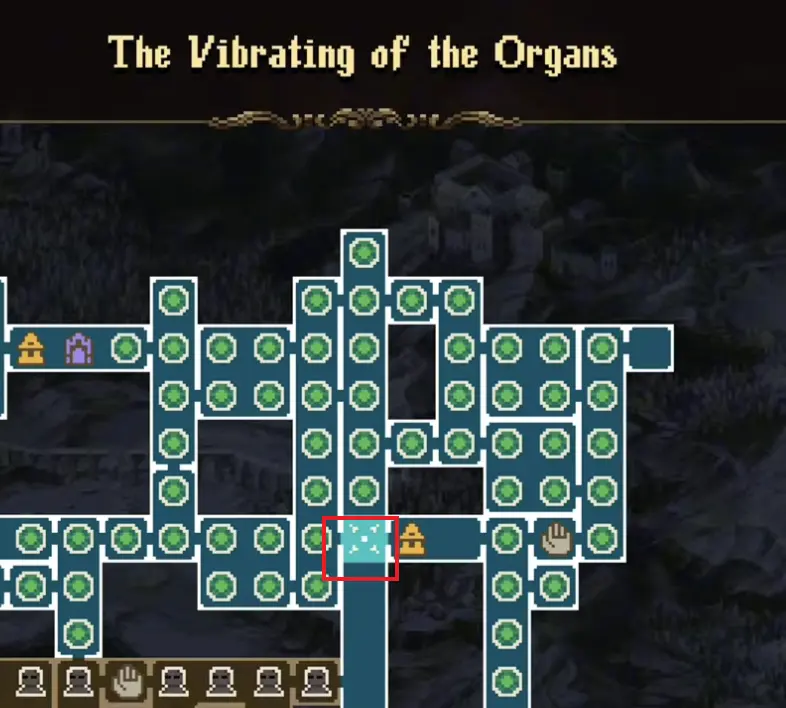
Mark of the Embrujo #10 — The Vibrating of the Organs
This Mark sits in an open night-sky traversal room. Use the hanging cages to move across the gap toward the left. Keep your jumps controlled; if you overshoot or drop too low, restart the crossing. The Mark is on the far-left stone edge at the end of the cage route.

Mark of the Embrujo #11 — The Vibrating of the Organs
Enter the dark vertical room with two large hanging chains. A heavy axe knight guards the right-side platform. Defeat the enemy first, then move behind it. The Mark is on the stone altar behind the guard, so do not leave after clearing the enemy.
Mark of the Embrujo #12 — The Vibrating of the Organs
This pickup is in a large open temple-style room. Use the moving ring and blue mirror-ring chain to cross the wide gap toward the right. The Mark is on the high right-side platform, so commit to the full traversal instead of dropping to the lower route.

Castle of the Mist Mark
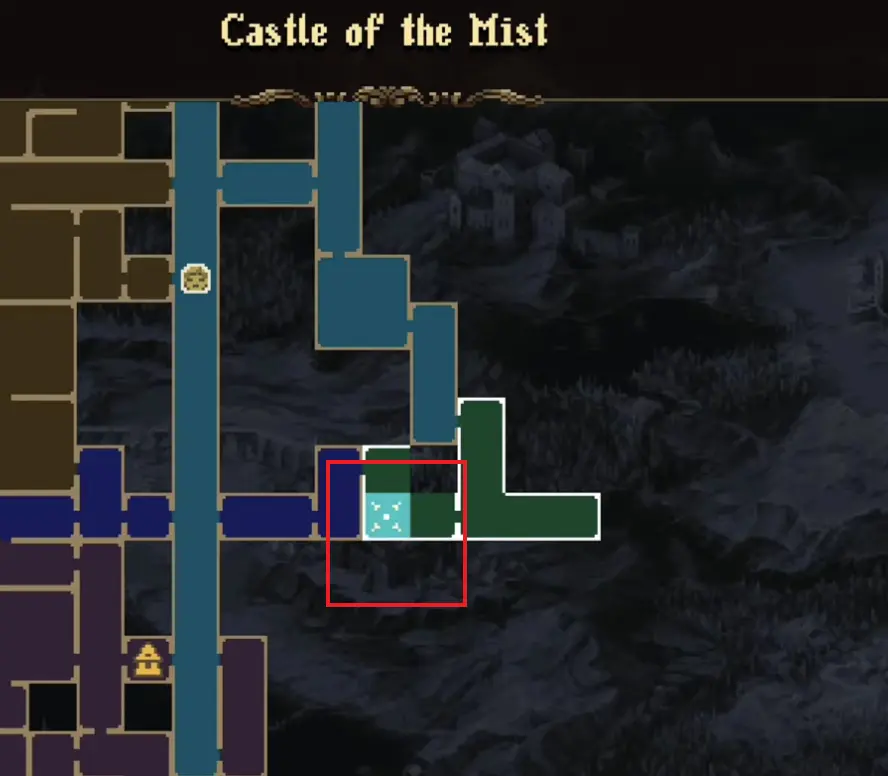
Mark of the Embrujo #13 — Castle of the Mist
Castle of the Mist only has one Mark, but it is easy to miss because it is away from the central castle rooms. Do this after the eastern routes are open and you can use Embrujo movement comfortably.
Start from the eastern side of the Castle route, near the right-side travel / connected path. Move toward the separated green exterior section on the far east of the map. In the room, use the floating platforms and Embrujo movement to push toward the far-right cliff. The Mark is on the upper-right exterior ledge, not in the central castle interior.
Stone Entrails Marks
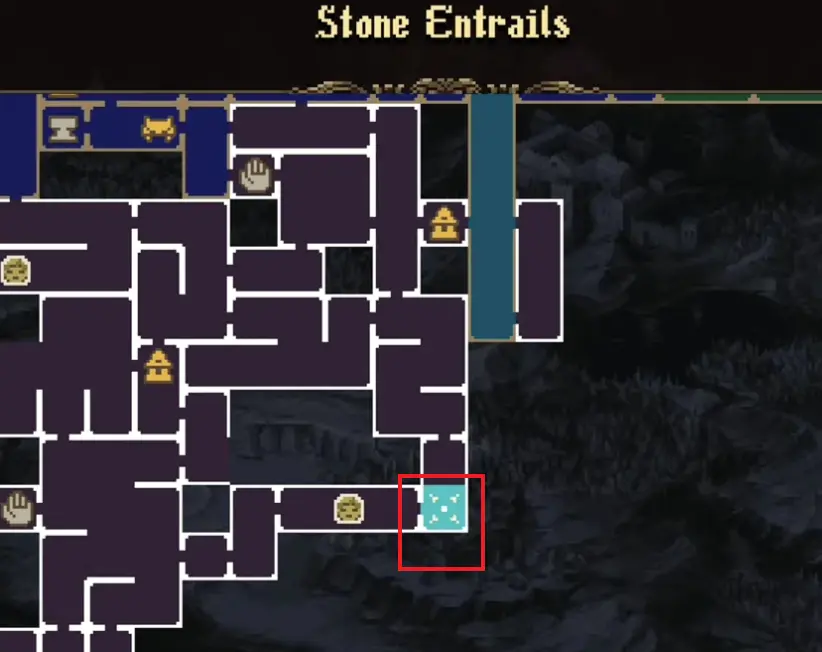
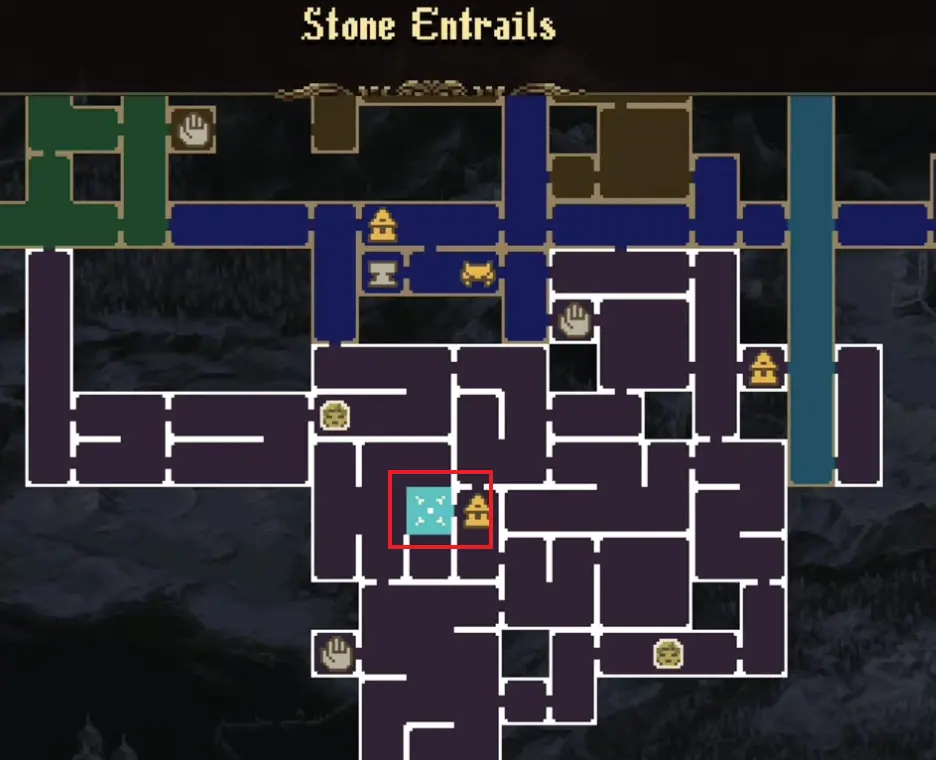
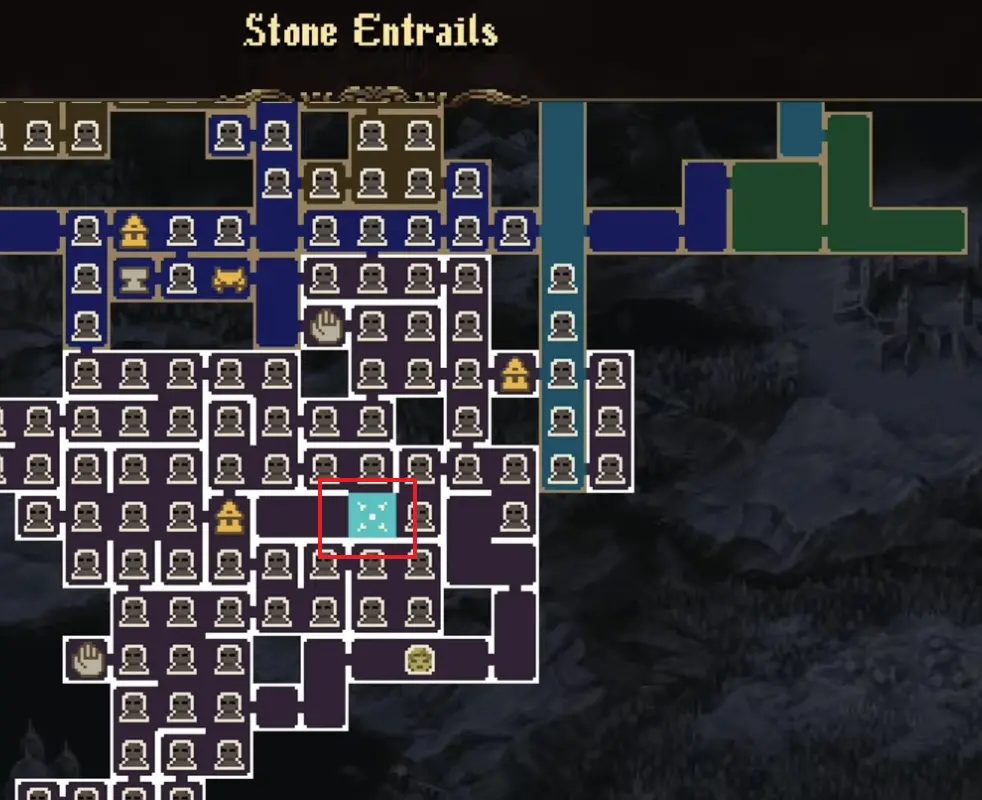
Mark of the Embrujo #14 — Stone Entrails
This Mark is in the central Stone Entrails cluster, below the upper blue corridor. Enter the marked room from the connected central route and slow down once you are inside. The pickup is not in the middle of the main path. Check the side wall and the right-hand stone recess; this room can hide the trophy in a small alcove rather than placing it on the obvious floor route.
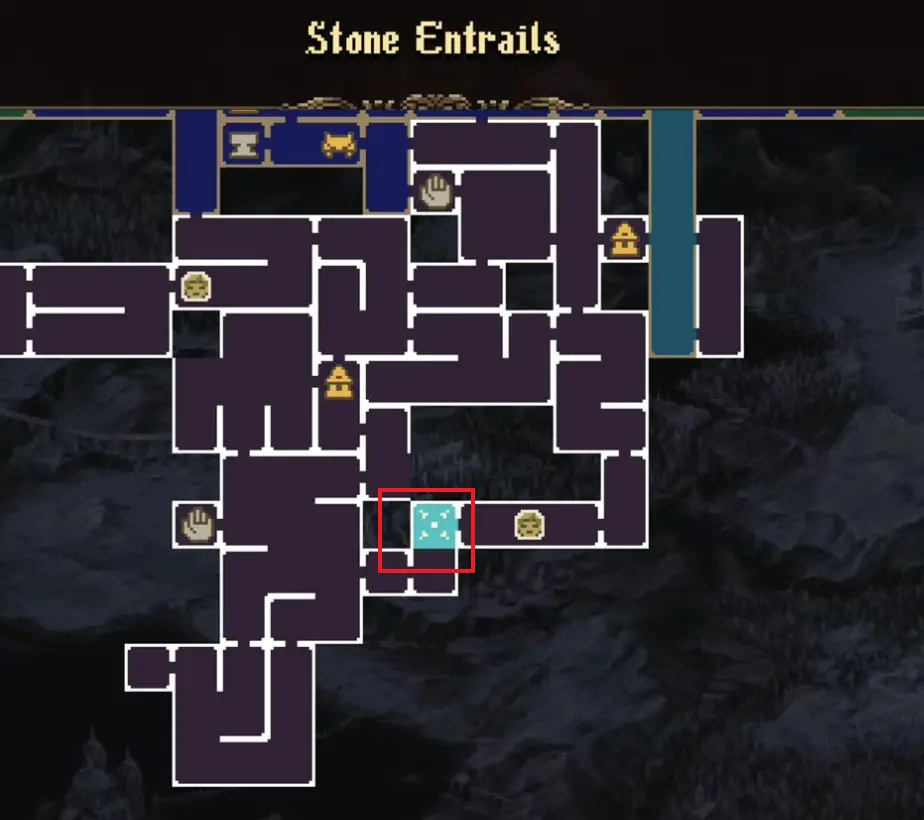
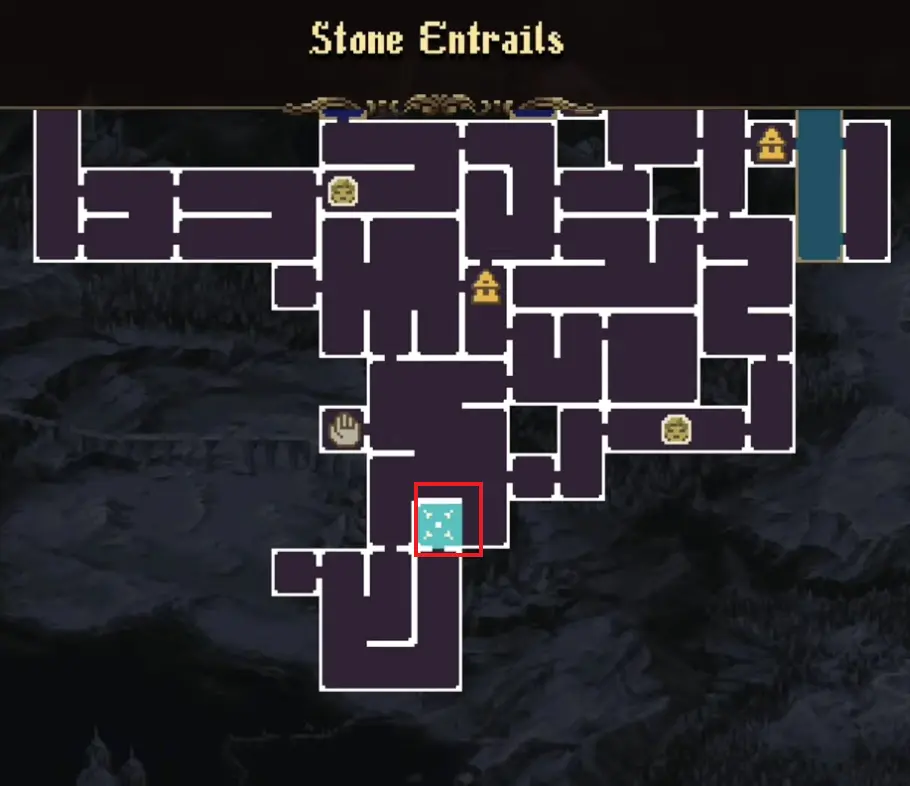
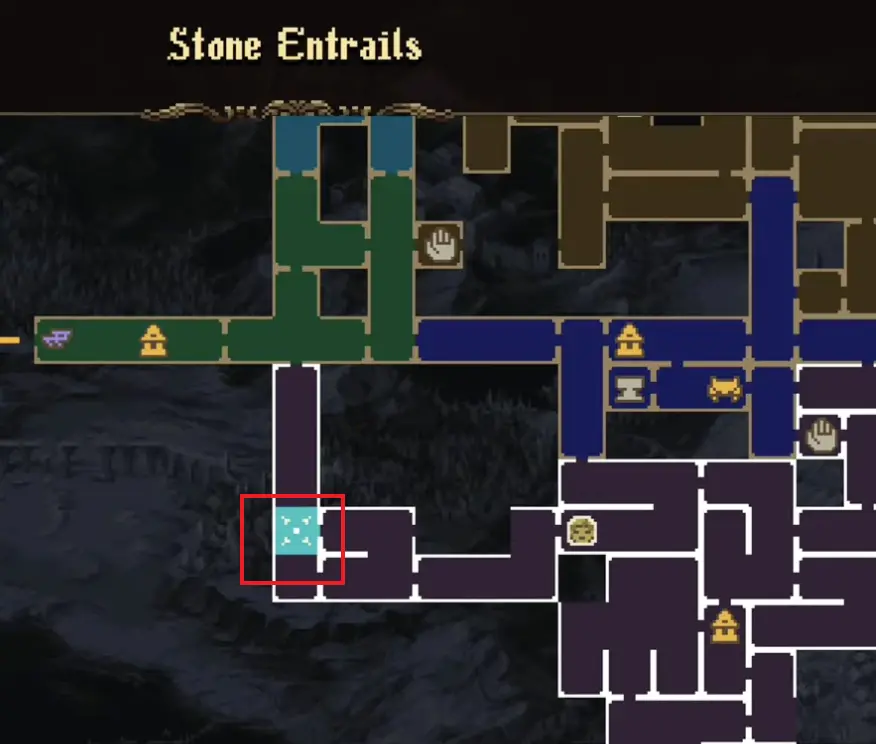
Mark of the Embrujo #15 — Stone Entrails
Go to the lower-west Stone Entrails route near the area border. Enter the long stone room and look for the main vertical ladder / shaft inside the chamber. The Mark is on a stone platform beside that central route, slightly off the straight path. If you only cross the corridor from left to right, you can pass it without looking down and inward.
Mark of the Embrujo #16 — Stone Entrails
This is one of the more demanding Stone Entrails Marks. Enter the lower-central route with spike hazards and a hanging bell. Hit the bell first, then use the temporary route and blue mirror rings to cross the spike pit. The Mark is on the left-side platform at the end of the bell-and-ring sequence. If the platforms disappear, return to the bell and restart the crossing.
Mark of the Embrujo #17 — Stone Entrails
Start from the nearby upper save route, then drop into the spike-filled stone room below. Move carefully across the safe platforms and do not rush the lower jumps. The Mark sits on a central safe stone platform between spike sections.
Mark of the Embrujo #18 — Stone Entrails
This Mark is in the lower-right Stone Entrails route near a round map marker. Enter from the west side and clear the caster / lightning enemy before attempting the platform route. Hit the hanging bell to activate the temporary platforms, then move through the spike and projectile section. The Mark is near the far end of the route, close to the last platform on the right side.
Mark of the Embrujo #19 — Stone Entrails
The final Mark is at the far-eastern lower branch of Stone Entrails. Look for the room that feels like an old shrine / ruin route with a large gap. Use the blue mirror rings above the spike pit to move right and upward. The trophy is on the high shrine platform at the end of the traversal chain, not on the lower floor.
Missing One Mark? Check These First
If your counter is stuck at 18/19, check these rooms before doing a full map sweep.
| Check | Why it is commonly missed |
|---|---|
| Geometry of Knowledge #4 | The pickup is above the normal library path and requires bell timing |
| The Vibrating of the Organs #6 | The upper-right balcony is off the main vertical shaft |
| The Vibrating of the Organs #10 | The cage route leads away from the obvious forward path |
| The Vibrating of the Organs #11 | The Mark is behind an enemy, so it is easy to leave after the fight |
| Castle of the Mist #13 | It is isolated in the eastern exterior route, not in the central castle rooms |
| Stone Entrails #14 | The pickup can blend into a side wall / recess inside the room |
| Stone Entrails #16 | The bell-and-ring route over spikes is easy to skip if you fail the first attempt |
| Stone Entrails #18 | The Mark is near the far end of a dangerous lower-right room |
| Stone Entrails #19 | The pickup sits high above the lower shrine route after a blue-ring chain |
FAQ
How many Mark of the Embrujo pickups are in The Third Sin? +
There are 19 Mark of the Embrujo pickups in The Third Sin. They are spread across Geometry of Knowledge, The Vibrating of the Organs, Castle of the Mist, and Stone Entrails.
What are Marks of the Embrujo used for? +
Marks of the Embrujo are used to unlock Embrujo weapon upgrades. They improve your damage, combo options, air attacks, Wail of the Flame usage, and some route-combat flexibility.
Should I collect every Mark as soon as I see it? +
No. Some Marks sit behind Embrujo movement routes, bell routes, mist-cleared rooms, lift access, or late Castle paths. Open the castle routes first, then clean by area.
Which Embrujo upgrades should I buy first? +
Prioritize upgrades that improve basic Embrujo damage and reliable follow-up attacks before spending Marks on optional style or air-only nodes. Blood Skirmish, Embrujo damage, and Wail of the Flame support are strong early choices.
Where should I check if I am missing one Mark? +
Recheck Geometry of Knowledge #4, The Vibrating of the Organs vertical shafts, Castle of the Mist #13, and the lower Stone Entrails rooms. Those are the easiest Marks to pass while following the main route.