WARDOGS Vehicles Guide: Kodiak, Ural, Cargo & Logistics
Compare WARDOGS ground vehicles for cargo, logistics and combat, including Kodiak storage, Pickup crates, Ural pallets, armed crews, repair, fuel and route planning.
Updated:
Quick Answer
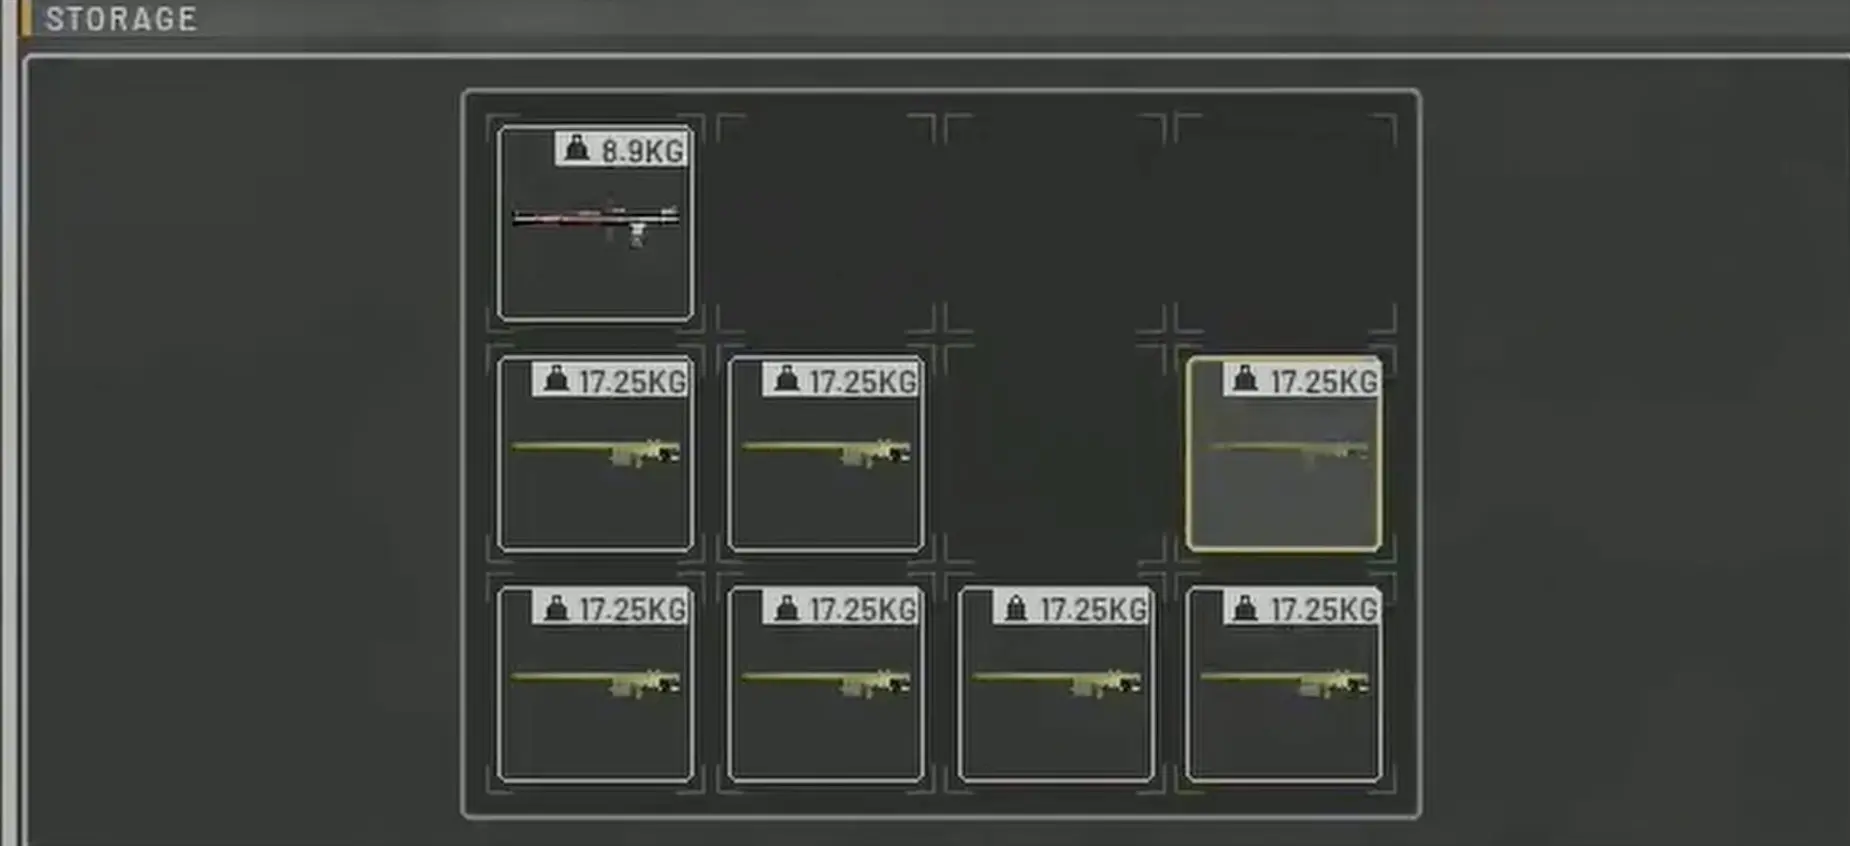
For individual weapons, launchers and specialist equipment, the standard Kodiak is the most useful ground vehicle I have tested because all 12 item slots remain attached to the vehicle.
For FOB resources, the Ural is the real logistics truck because it carries two resource pallets. I use those slots for the resources the destination is actually consuming—usually Supply, Fuel or Ammo—rather than treating the Ural as a larger equipment inventory.
The Kodiak Pickup trades some permanent mobility for a larger field cache: 6 vehicle slots plus an 8-slot deployable crate. Armed Kodiaks and Humvees become much more convincing when there is a second player available to stay on the gun.
WARDOGS ground vehicles are easiest to choose by looking at the job before looking at the chassis.
A Kodiak full of launchers, a Pickup carrying a deployable rocket cache and a Ural loaded with Fuel and Supply can all leave base at the same time, yet they are solving completely different problems. One is moving equipment, one is creating a temporary operating position, and one is moving the bulk resources that keep a FOB functioning.
So I choose the cargo and destination first, then pick the chassis that can actually complete that job.
Which WARDOGS Vehicle Should You Use?
| Vehicle / setup | What it does best | Tested capacity / advantage | Main limitation |
|---|---|---|---|
| Kodiak | Mobile weapons and specialist equipment | 12 item slots that stay with the vehicle | Does not replace pallet logistics |
| Kodiak Pickup | Equipment delivery followed by a field cache | 6 mobile slots + 8-slot crate | Eight slots become stationary after deployment |
| Ural | Supply, Fuel and Ammo logistics | 2 resource pallets carried at the same time | Large, valuable load with more route exposure |
| Armed Kodiak / Humvee | Mobile infantry fire support | Driver and mounted weapon can operate simultaneously with two players | Much weaker when one player must drive and gun alone |
| Kodiak with AA equipment | Relocating anti-air ambushes | Large number of disposable launchers can move with the vehicle | Cargo value rises very quickly |
| Pickup with rockets | Semi-static anti-vehicle position | Vehicle inventory plus deployable reserve | Bad crate placement leaves much of the load stranded |
Helicopters sit outside this comparison because their controls, braking, landing and passenger work create a completely different operating problem. Those are covered in the WARDOGS Helicopter Guide. Driver and Pilot unlock paths are handled in the WARDOGS Progression Guide.
Kodiak and Kodiak Pickup Solve Two Different Storage Problems
The normal Kodiak became much more interesting once I stopped thinking of the rear inventory as luggage space.
It has 12 vehicle item slots, and large equipment that occupies several backpack squares still uses only a single vehicle slot.
That makes the Kodiak particularly effective for equipment that is awkward to carry on foot. Portable AA launchers were the clearest example from my runs.
Portable AA launchers were the clearest example of why the Kodiak’s storage matters. Bulky launchers still consume only one vehicle slot each, so the truck can move a large reserve of replacement shots without forcing the driver to carry all of that equipment personally.
The real advantage appears after the first firing point becomes known. Instead of abandoning a static pile of launchers, I can move the remaining stock to another tree line, road or side of the current Control Zone.
Expensive specialist cargo changes how I equip the driver
Once most of the value in the life is sitting inside the vehicle, I stop adding unnecessary cost to the driver. A high-end rifle and oversized infantry kit do little for a job built around transporting and firing specialist equipment.
I would rather keep the personal loadout modest and protect the cargo that makes the vehicle useful. The broader question of how much cash to expose in one life is covered in the WARDOGS Money Guide.
Mobile AA works because the firing point can move
A good mobile-AA position usually sits near the edge of cover rather than in the deepest concealment available.
Parking too far inside trees can hide the Kodiak while also blocking the launcher sight line. Parking completely in the open produces the opposite problem: the aircraft is visible, but so is the vehicle.
The useful middle ground gave me a firing lane and somewhere to disappear immediately afterward.
After the first missile launch, the vehicle’s most important advantage is often not another launcher. It is the ability to make the next missile come from somewhere else.
The Pickup gains storage by giving up permanent mobility
The Kodiak Pickup looks better on pure slot count:
6 vehicle slots + 8 crate slots = 14 total item positions
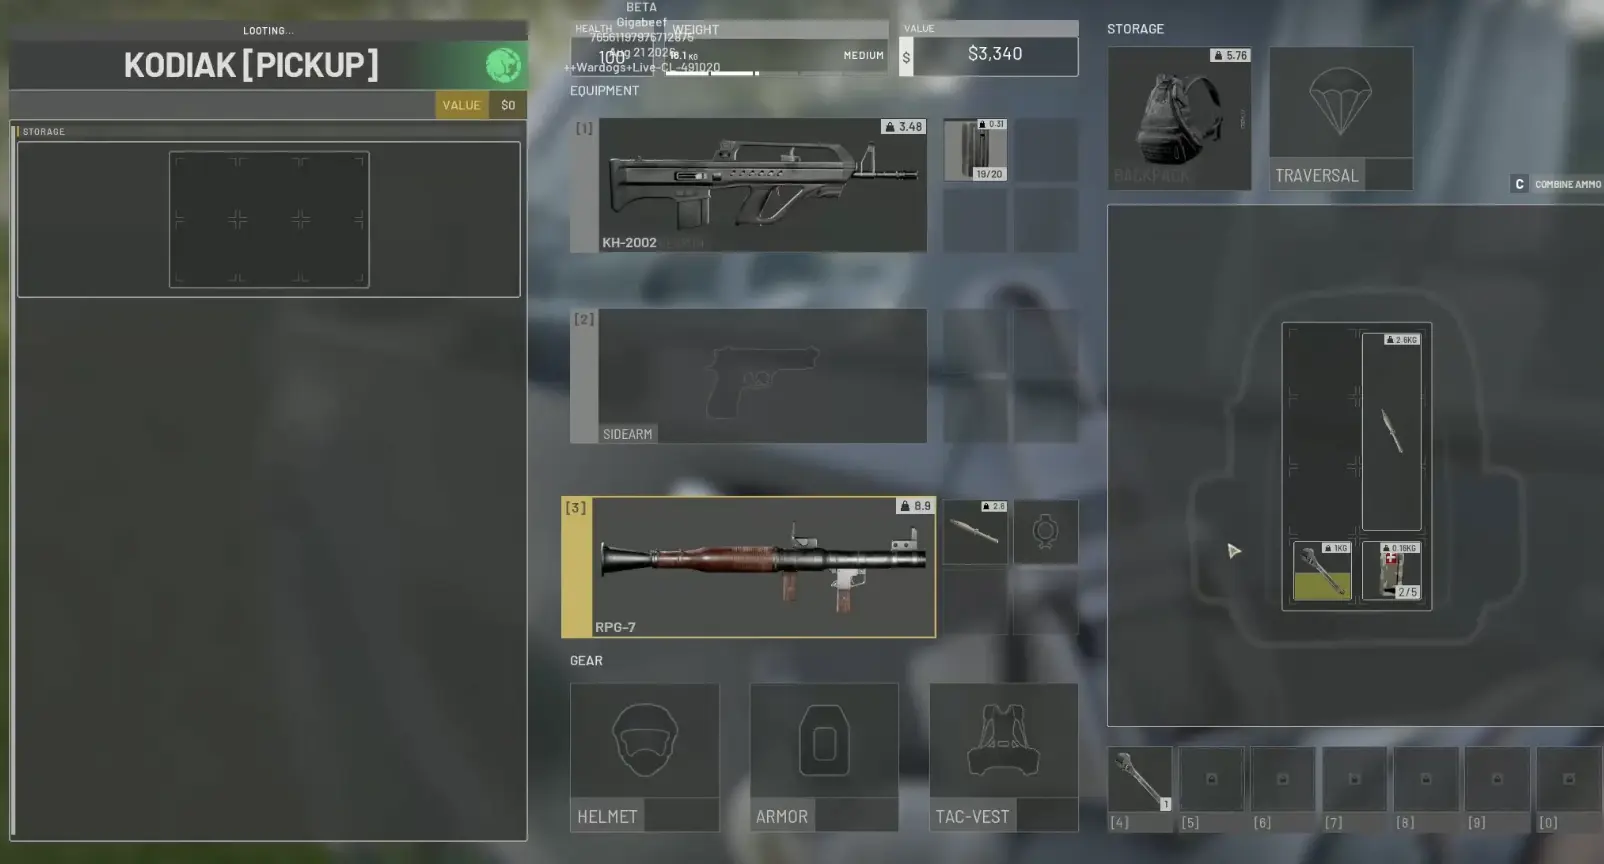
The number is slightly misleading because only six of those slots stay attached to the truck after the crate is deployed.
That makes the Pickup less like a larger Kodiak and more like a transport vehicle that can turn part of its inventory into a small field depot.
For a life built around constant relocation, the normal Kodiak’s twelve permanently mobile positions are easier to use. The Pickup becomes more attractive when the route is expected to end at a position worth supporting for a while.
The Pickup crate is most valuable before it touches the ground
I normally work from the six vehicle slots first and leave the crate undeployed until the battlefield has shown me where a cache is actually useful.
A first stop may look promising and become irrelevant minutes later. The Hot Zone can move, enemy armor can enter the road or another faction can make the area impossible to hold. As long as the crate stays on the vehicle, those eight item positions can still move with the plan.
A hidden anti-vehicle point is a better reason to deploy it. So is a staging position behind a fight that has remained active long enough to justify leaving equipment there.
A rocket Pickup can sustain a fight far longer than infantry inventory
A dedicated anti-vehicle load showed the extreme end of the Pickup model.
The setup could combine approximately:
- 6 rockets in the vehicle;
- 8 rockets in the deployable crate;
- another couple carried by the player;
- one already loaded.
That puts the position near 17 rockets.
An ordinary vehicle encounter rarely needs that much ammunition. The value appears when the Pickup is being used to establish a position expected to fight several vehicles over time rather than chase one target.
The downside is equally large: if the location fails, a substantial share of the ammunition may now be sitting in a crate that no longer moves.
The Ural Is a Pallet Truck, Not a Bigger Kodiak
The Ural solves a different problem from the Kodiak because its useful cargo is not individual equipment. It has two rear pallet positions built around bulk FOB logistics.
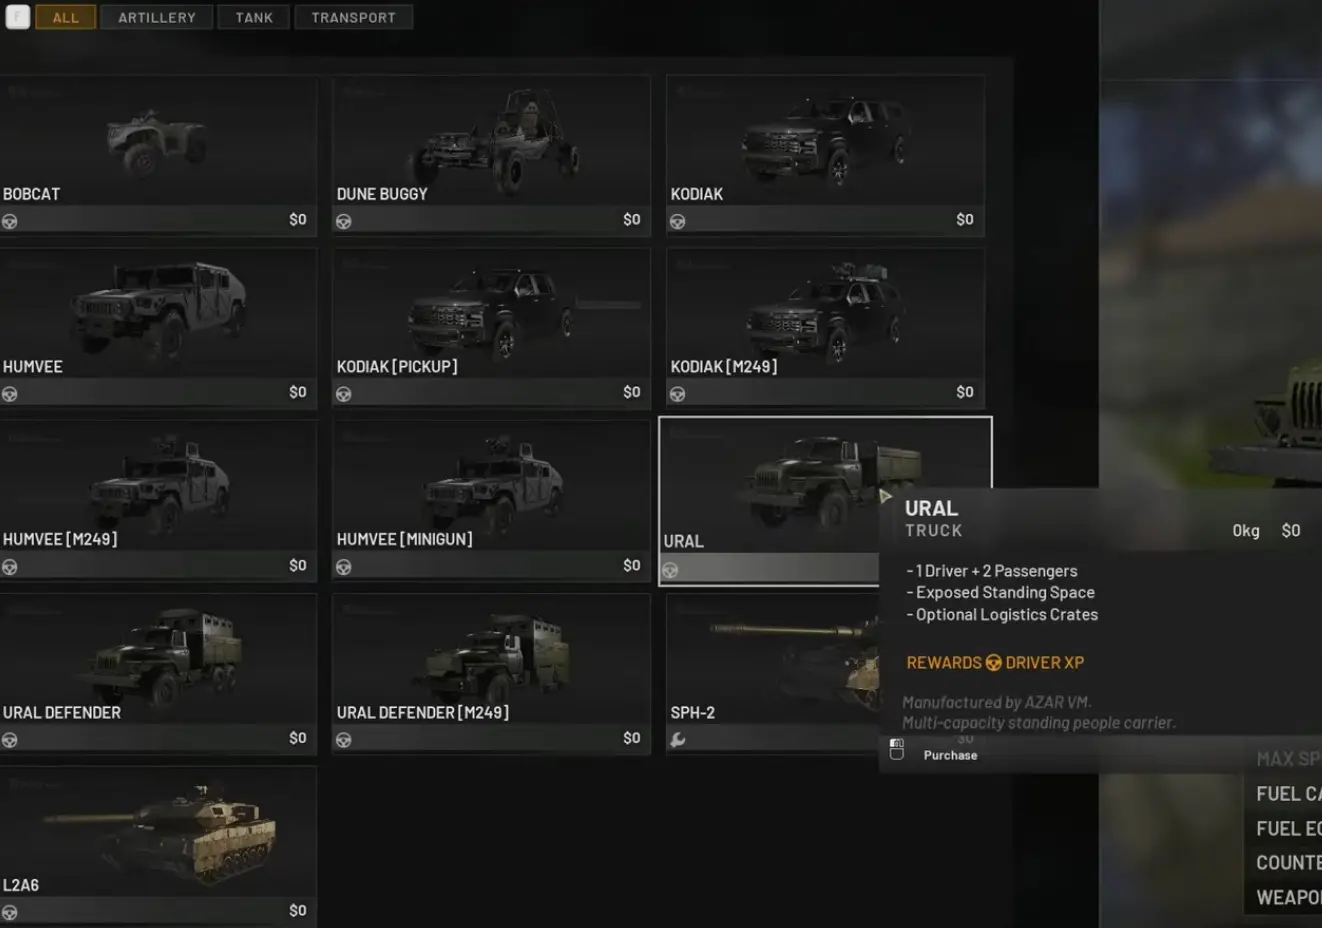
That lets one trip combine two different needs, such as Supply + Fuel, or double up on one resource when a position is consuming it quickly.
The WARDOGS FOB Guide covers transfer, Drill construction and resource use after the truck arrives. From the driver’s side, the decision happens earlier: what should occupy those two pallet positions before I leave base?
Two pallet slots can also double the mistake
A full Ural can still arrive with the wrong cargo.
A Drill site may need Fuel. An anti-air position may be burning Ammo. Another FOB may already have plenty of one resource while construction has stalled for lack of another.
Before buying the second pallet, I check what the destination is actually consuming instead of automatically duplicating the first load. The value of the Ural comes from moving the right bulk resource, not merely filling both pallet positions.
A loaded Ural is a moving investment
The Ural itself is only one part of what can be lost.
A full run also contains the two pallets, the time required to move them and the building or specialist system waiting for the delivery. That makes me much less willing to force a road simply because most of the journey has already been completed.
If a bridge turns into a choke point, armor arrives on the road or the destination is overrun, the original route has changed.
The pallets still have value while they remain on the truck.
They can go to another FOB, use another crossing or return toward safety. That flexibility disappears after they are dumped beside a position that is no longer usable.
Turning around does not waste the previous five minutes
One of the easiest logistics traps is letting time already spent on the route decide what happens next.
A bridge can become unsafe when the Ural is almost there. Continuing feels attractive because the truck has already spent several minutes driving toward that destination.
But the previous driving time does not make the cargo any less valuable.
Reversing, redirecting or waiting for another route can still preserve two intact pallets that would otherwise be driven directly into the bottleneck.
I treat the final exposed approach as a second route check rather than the inevitable end of the first one.
The original FOB can disappear while the Ural is still moving
The same logic applies near the destination.
FOBs are lost, Hot Zones move and enemy vehicles can reach the road before the truck finishes its approach. A Ural carrying two untouched pallets does not become useless just because the original delivery point vanished.
The load is still portable.
That is a useful distinction between transporting resources and committing resources.
Armed Ground Vehicles Are a Crew Decision Before They Are a Weapon Decision
Mounted-gun Kodiaks and Humvees are much more convincing when two players have already agreed on the roles.
The working arrangement is simple:
driver + gunner
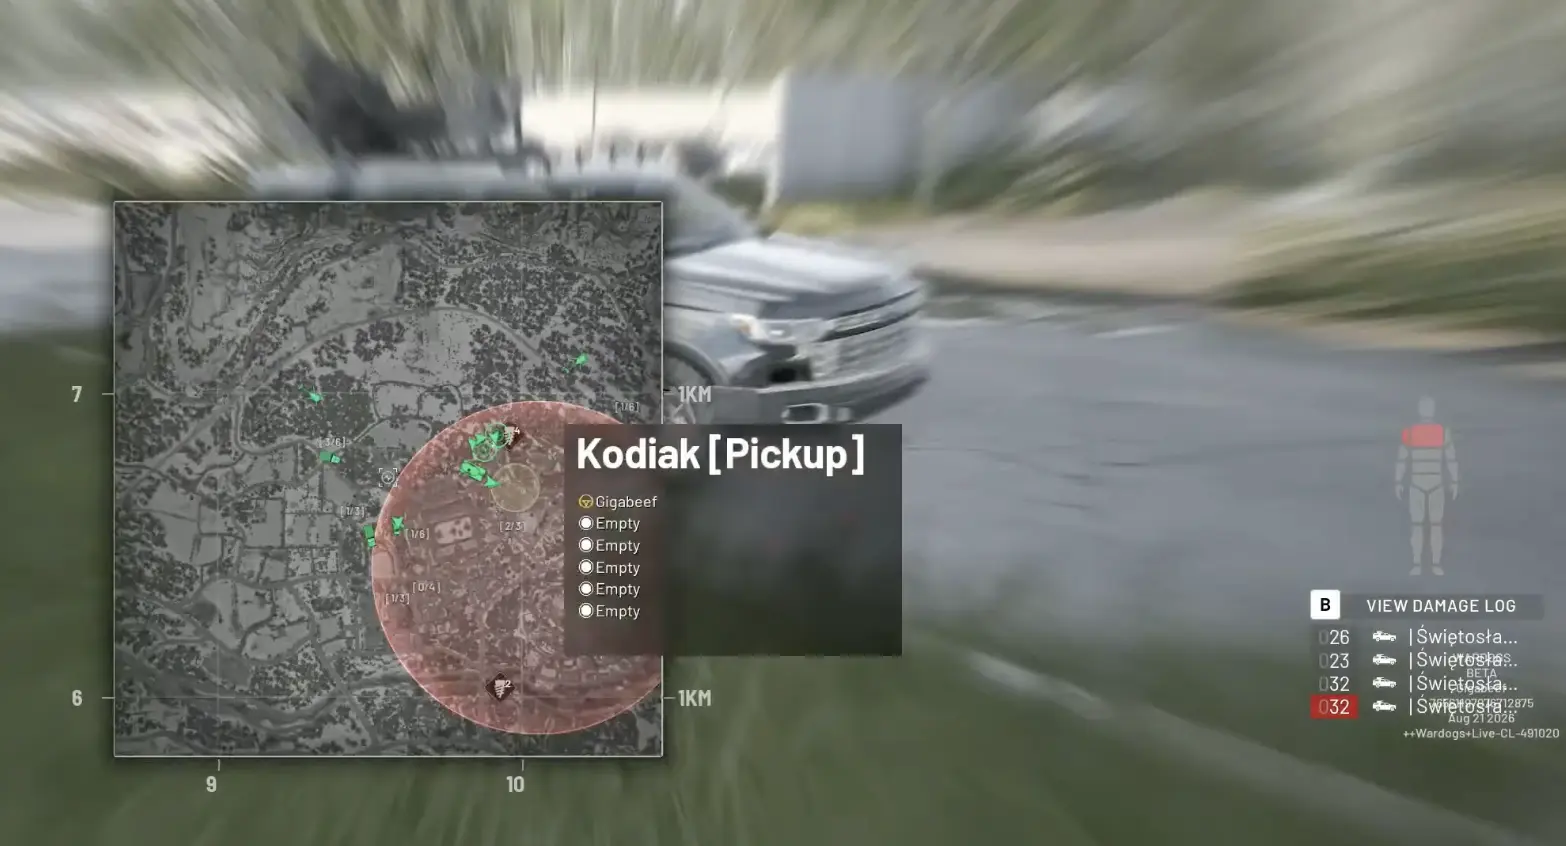
The driver can keep moving, rotate the vehicle, use terrain and decide when to disengage. The gunner can stay on the weapon and keep watching threats.
A solo player has to stop, change seats and surrender the mobility that makes a light armed vehicle difficult to deal with.
Because of that, the gunner seat influences the purchase more than the weapon model does.
If nobody is going to use the mount, a standard Kodiak can be the better platform simply because its storage and mobility remain useful for the entire life.
Light armed vehicles are more dangerous before the roads become organized
Early in a match, the road network often has fewer established counters.
FOBs are still appearing, Recon has not necessarily settled into every useful observation point, dedicated anti-vehicle players may still be moving out and the important approaches are less predictable.
That gives armed light vehicles room to disrupt infantry and exposed logistics.
Later, a road that was easy to bully can contain spotters, RPGs, heavier vehicles and defensive positions. The vehicle itself has not lost damage or speed; the environment has accumulated answers to it.
At that stage I would rather change the approach than keep repeating the early-match route.
Mounted ammunition should reflect survival time
Buying maximum ammunition for a vehicle that is likely to make one dangerous push can simply make the wreck more expensive.
A light platform with a coordinated crew, a repeatable firing position and several successful engagements has a much stronger reason to carry deeper ammunition reserves.
I load for the expected life of the platform rather than the largest inventory number the menu will allow.
Damage, Repair and Fuel Decide Whether a Vehicle Gets a Second Job
A vehicle can survive an engagement and still lose the ability to perform the job it was bought for.
Smoke can obstruct the driver’s view. Engine damage can ruin the relocation plan. A platform that barely escaped the first fight may be too compromised to survive the third faction arriving minutes later.
The Ural felt more tolerant of RPG damage than the Kodiak in the encounters I had. In one case, a Ural was still moving after two RPG hits before eventually being destroyed.
I would not turn that into a fixed rockets-to-kill rule because hit location, prior damage and balance changes can all alter the outcome.
The useful takeaway is that surviving the first hit creates a decision window. It does not mean the truck should remain in the fight to discover its exact durability limit.
Carry a wrench when the vehicle is part of the strategy
I do not automatically put repair tools into every short vehicle run.
They become much more valuable when losing mobility would collapse the plan: an expensive mobile-AA Kodiak, an undeployed Pickup crate, a long flank, specialist equipment worth several thousand dollars or a Ural expected to make another logistics trip.
Repairing under active fire rarely solves the problem. Escaping first and repairing from cover can preserve a vehicle life that otherwise ends several minutes later from accumulated damage.
I also received money for vehicle repair during play, so maintenance can contribute economically as well as preserve the platform.
Vehicle fuel is not the same thing as FOB Fuel
The two systems share the word Fuel but are used differently.
A Fuel pallet is a bulk FOB resource.
A vehicle fuel can is the portable item used when a Kodiak, Ural or other ground vehicle needs manual refueling during a route.
A friendly FOB can also provide repair and refuel support if the appropriate infrastructure has been built and supplied there.
That becomes particularly useful on repeated routes because the vehicle does not need to spend personal cargo space on enough service equipment for the entire match.
For one short run, a fuel can may be unnecessary. For a long patrol, repeated logistics cycle or mobile specialist role, fuel planning matters much earlier.
Recheck the Route Before Every Valuable Vehicle Run
The road that worked five minutes ago may no longer be the road I want for the next delivery. Hot Zone movement changes traffic, new FOBs create fresh vehicle routes, and either enemy faction can begin using a crossing that was previously quiet.
Before committing expensive cargo, I check:
- where the Hot Zone has pulled players;
- which bridge or valley now concentrates traffic;
- whether friendly FOBs still support the route;
- whether hostile vehicles or infantry have appeared along the final approach;
- whether another road can reach the same destination with less exposure.
The important vehicle-specific lesson comes after contact. A long firefight advertises the road. Even after winning, the survivor may be damaged, low on ammunition and sitting in a location both enemy teams can now identify.
I normally relocate before repairing or reorganizing cargo unless the current cover is genuinely secure. Winning the vehicle fight is useful; staying parked where the fight just announced my position can give the next enemy an easy second attempt.
The return trip is part of vehicle value
A ground vehicle does not need to explode to finish a useful life.
Once most cargo is gone, fuel is low, damage is building or the current position has been discovered several times, bringing the platform home can create another run instead of forcing a replacement purchase.
A surviving vehicle can be:
repaired → refueled → reloaded → reassigned
That matters most for vehicles expected to work for a long time. A one-way disruption run does not need the same maintenance plan as a Ural that should return for another pair of pallets.
Picking the Next Vehicle From the Job That Failed
I find the ground vehicle menu easier to use when the previous run is treated as a diagnostic rather than starting from scratch every time.
| What limited the previous run | Vehicle or setup that addresses it |
|---|---|
| Large equipment overwhelmed personal inventory | Kodiak with 12 mobile item slots |
| A FOB needed bulk Supply, Fuel or Ammo | Ural with two pallet positions |
| More equipment was needed at one semi-static position | Kodiak Pickup and deployable crate |
| The mounted weapon was unused because there was no gunner | Standard vehicle, or wait for a second player |
| A long vehicle life was nearly ended by engine damage | Make room for a wrench or plan a service stop |
| The route ran short on fuel | Carry a vehicle fuel can or use FOB refueling |
| The destination disappeared while carrying pallets | Keep the Ural loaded and redirect |
| A good firing position became known after one engagement | Use the vehicle’s mobility and relocate |
| A formerly safe road became full of RPGs and spotters | Change the route or change the vehicle’s job |
Before the next spawn, I only need to answer two questions:
What failed last time?
Does the next job need mobile equipment, a field cache, bulk resources or a gun crew?
If I need equipment to stay mobile, I take the Kodiak. If the route ends at a position worth stocking, the Pickup becomes more useful. If the team is waiting for Supply, Fuel or Ammo at a FOB, I take the Ural. An armed vehicle only moves ahead of those choices when I already have someone who will use the gun.
After that, I check the route again. Changing vehicles without changing the road that destroyed the previous one usually solves the wrong problem.