Star Wars Galactic Racer Best Builds & Upgrades
Choose a safer survival build, pick the right speeder, manage Ramjet Redline, combine Parts well, avoid Faults, and prepare for Podracing.
Updated:
Quick Answer
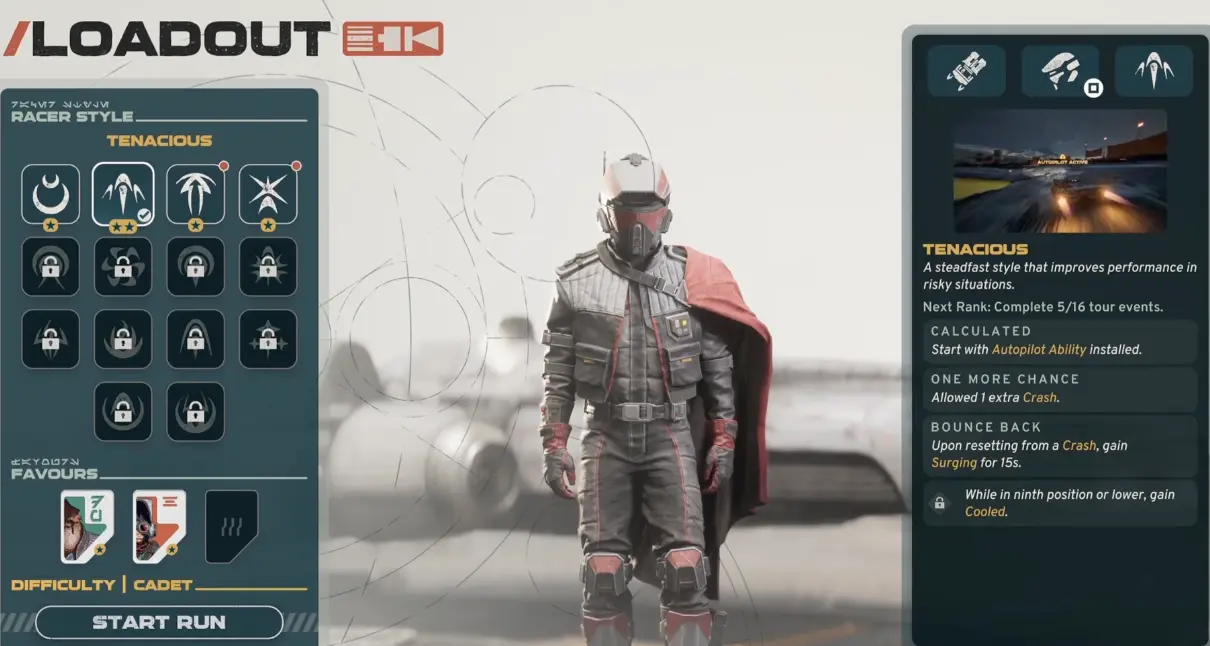
Start Act 1 with Survivor while the stronger survival options are still locked. Tenacious unlocks after participating in 4 Tour events, Mad Genius after completing 2 planets in Act 1, and Clandestine Aid after finishing Act 1.
That makes Tenacious + Clandestine Aid + Mad Genius an Act 2 survival setup, not a build available at the start of the game.
For speed builds, learn the Ramjet before pushing Redline. Redline already carries a random explosion risk, while filling the heat meter is normally fatal unless a Part specifically changes the overheat result.
The first useful build decision is not maximum speed. It is deciding which failure is actually ending the run.
A vehicle that is already reaching the front but repeatedly wrecking gains more from crash protection than another small speed increase. A vehicle finishing every race cleanly but losing on long straights has the opposite problem.
The available setup also changes as Act 1 progresses, so the strongest survival combination cannot be equipped immediately.
What to Use Before the Full Survival Build Unlocks
Survivor is available from the start, making it the natural opening Racer Style while the rest of the survival package is still locked.
The important unlock points are:
- Survivor — unlocked by default;
- Tenacious — participate in 4 Tour events;
- Mad Genius — complete 2 planets in Act 1;
- Clandestine Aid — complete Act 1.
Tenacious and Mad Genius therefore become available during the qualifying portion of the Campaign, but Clandestine Aid is the final piece. The full combination first becomes available when Act 2 begins.
There is no reason to delay Act 1 waiting for it. Use the strongest options currently unlocked, keep spending permanent Tuning Points, and let the complete survival setup come online naturally after qualifying.
Best Act 2 Survival Build: Tenacious + Clandestine Aid + Mad Genius
Once Act 2 opens, the strongest straightforward safety combination is:
Tenacious Racer Style + Clandestine Aid Favor + Mad Genius Favor.
Each part protects a different layer of the run.
Tenacious adds crash tolerance and gives access to Autopilot.
Mad Genius adds more crash allowance during events.
Clandestine Aid gives the Tour another League Token.
A basic setup may allow only 3 crashes before the event is lost. With the ranked survival combination shown above, that allowance reached 7.
Those extra crashes are not the same thing as an extra League Token. Crash allowance keeps a bad section from ending the current event immediately; Clandestine Aid gives the Tour another chance to survive a Token-costing failure.
For the exact Tour restart and League Token rules, use the Campaign Guide.
Clandestine Aid is specifically valuable in Act 2
Clandestine Aid does not unlock until Act 1 is complete, so it should not be treated as part of an opening qualifying build.
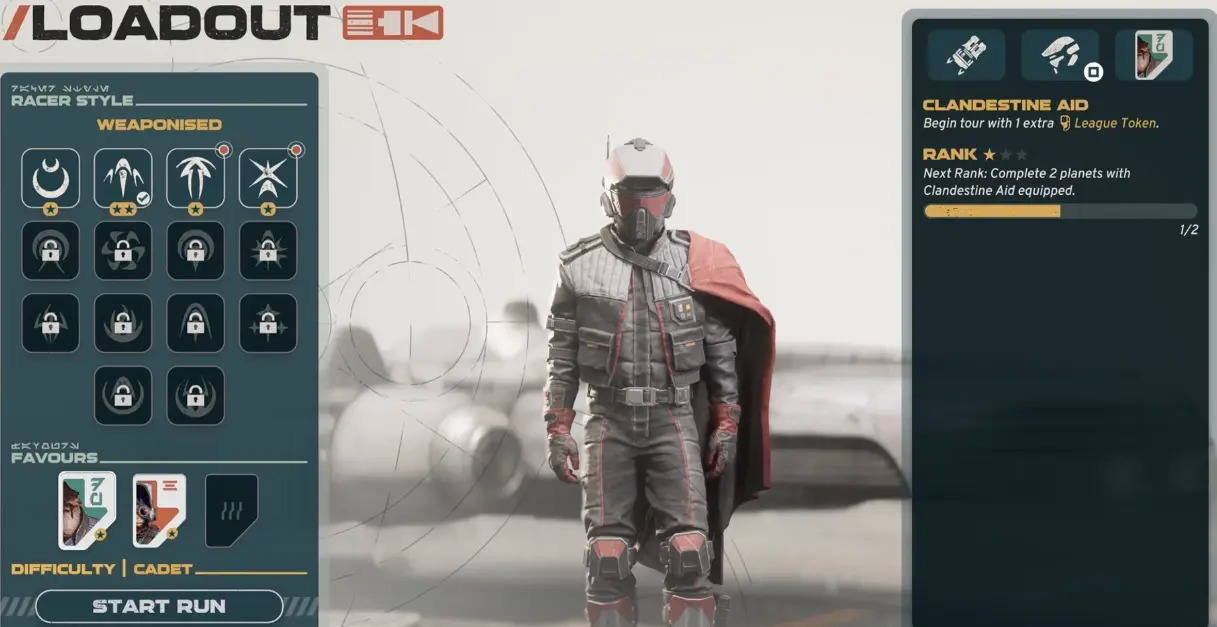
It is especially useful when one failed high-risk event would otherwise remove the final League Token.
There is another important limit: Clandestine Aid cannot be equipped in Act 3. The exact Tenacious + Clandestine Aid + Mad Genius trio is therefore best treated as an Act 2 survival build rather than something carried unchanged through the entire Campaign.
Mad Genius is for crashes, not a lack of pace
Mad Genius adds one extra crash per event at its base effect, with stronger versions increasing the safety margin further.
Use it when the vehicle has enough speed to compete but repeated contact with walls, hazards, or other racers ends the event before recovery is possible.
Once races are consistently clean and the problem becomes lap time rather than survival, that Favor slot can start contributing to performance instead.
Which Vehicle Should You Build Around?
The three regular speeder types reward different driving habits.
Landspeeder has strong handling, good stability through corners, and more durability than the other regular speeders. It gives up some outright pace, so it is the safest choice while finishing races consistently is still difficult.
Speeder Bike trades protection for speed and agility. Kinetic Burst provides another short burst of pace, but the lighter construction leaves much less room for collisions. It becomes more attractive once high speed no longer turns into repeated wrecks.
Skim Speeder accelerates more slowly and rewards preserving momentum. Its Knife Edge maneuver helps carry the vehicle through sharp corners, so poor exits and unnecessary braking cost more than they do in a Landspeeder.
A practical choice looks like this:
- crashes and control are ending races → Landspeeder;
- clean driving needs more pace → Speeder Bike;
- momentum is easy to maintain and Knife Edge feels comfortable → Skim Speeder.
The selected regular vehicle class stays with the Tour, so make this decision before committing to the run rather than expecting to swap vehicle types after one difficult event.
Autopilot Helps Learn Sections You Cannot Read at Speed
In the setup used here, Autopilot remained active for 15 seconds and temporarily handled the vehicle through the section.

The Ability is most useful before a track has been memorized. A twisting cave, blind sequence of corners, or fast section with poor visibility can be watched once under Autopilot, then driven manually on the following lap.
That gives Autopilot value even when the vehicle no longer needs it purely for survival.
Ramjet Redline Can Explode Before the Meter Is Full
Ramjet offers a stronger sustained push than Afterburner, but the heat meter is not simply a countdown to one fixed explosion point.
The flashing upper portion of the meter is Redline.
Once the Ramjet enters Redline, continuing to hold it carries a random explosion risk. The vehicle may survive several more seconds, or the run can end before the heat bar reaches its absolute limit.
Filling the heat meter completely is normally fatal. Some later Parts can specifically modify an overheating result, so only rely on an exception when the installed Part clearly provides one.
That creates three distinct states:
- below Redline — build heat with no Redline explosion gamble yet;
- inside Redline — extra speed comes with an active chance of exploding;
- full heat — normally destroys the vehicle unless the current setup explicitly changes the overheat result.
Backing out early avoids pushing deeper into the danger zone, but releasing the Ramjet also means waiting for it to become available again. The useful decision is therefore not simply “hold as long as possible.” Spend the heat where the speed can actually be carried through the track.
Long straights, predictable exits, and sections with a known braking point are good places to push harder. Blind corners and unfamiliar technical sections give far less return for the same risk.
Planet Conditions Can Change Which Build Feels Safe
Track conditions matter enough that the same setup does not behave equally well on every planet.
Jakku is hot, so Ramjet heat becomes a bigger constraint. Long aggressive uses are harder to sustain, and overheating can destroy the vehicle if the meter is pushed too far.
Lantaana alternates between cooling water and extremely hot volcanic sections. Water can create a safer Ramjet window, while lava areas push the vehicle back toward heat pressure. Do not use one fixed Redline timing for the entire planet.
Ando Prime creates the opposite problem. The cold gives Ramjet more room before heat becomes critical, but freezing can make steering increasingly awkward. Heated sections are useful for removing that cold buildup before it starts costing control.
Sentinel One shifts the problem away from pure heat management. Acid can punish an exposed vehicle, while heavy fog can cut visibility by roughly 60%. On those events, stability, shielding, and a setup that can survive one misread corner can be more useful than another small speed increase.
The environment should therefore influence the build before the next event: heat support matters more when the planet is fighting the Ramjet, while defensive or control-focused effects gain value when visibility and hazards are the larger threat.
Tuning Points Are Meant to Be Reassigned
Tuning Points provide permanent vehicle progression, but allocated points can be reset and moved elsewhere.
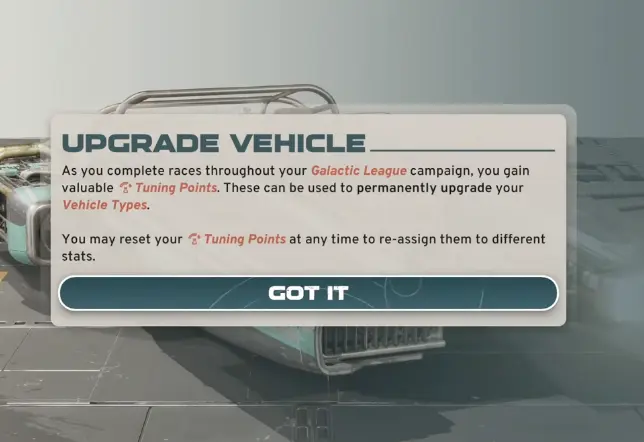
One Act 1 run reached the post-Act upgrade screen with 23 Tuning Points. Different routes and results can change the amount earned, so that number is an example rather than a guaranteed Act 1 total.
Allocate them according to the current problem:
- struggling to hold the racing line → improve handling first;
- clean laps but poor straight-line pace → move more points toward speed;
- crashes keep ending strong runs → strengthen the attributes helping the vehicle survive those mistakes.
There is no requirement to spread the points evenly. A noticeable improvement to the stat currently deciding races is more useful than several small upgrades that do not change the outcome.
Four Part Slots Reward Synergy
A vehicle can have 4 Parts installed at once.
A higher-level version of the same Part can replace the existing version in its slot rather than requiring another slot, so the useful question is not how many Parts have been collected. It is whether the four active effects support the same plan.
Examples include:
- combining Afterburner bonuses for frequent shorter boosts;
- pairing Ramjet bonuses with cooling or heat control;
- keeping defensive effects together while collisions remain dangerous;
- removing conditional effects that rarely trigger on the current route.
Check the upcoming events before finalizing the loadout. A Part that is strong on a long open course may contribute very little to a route dominated by tight corners or environmental heat.
Faulty Parts Can Lock a Bad Effect Into the Build
The Scrap Dealer can offer unusually strong Parts at a discount, but a Fault can turn an attractive stat increase into a much larger problem.
One Afterburner Part offered 200% longer burn duration but carried a Frosted Injector Fault. Afterburner use could then freeze the vehicle, making steering and braking much harder.
The more dangerous mistake is assuming the Part can simply be removed if the Fault becomes inconvenient.
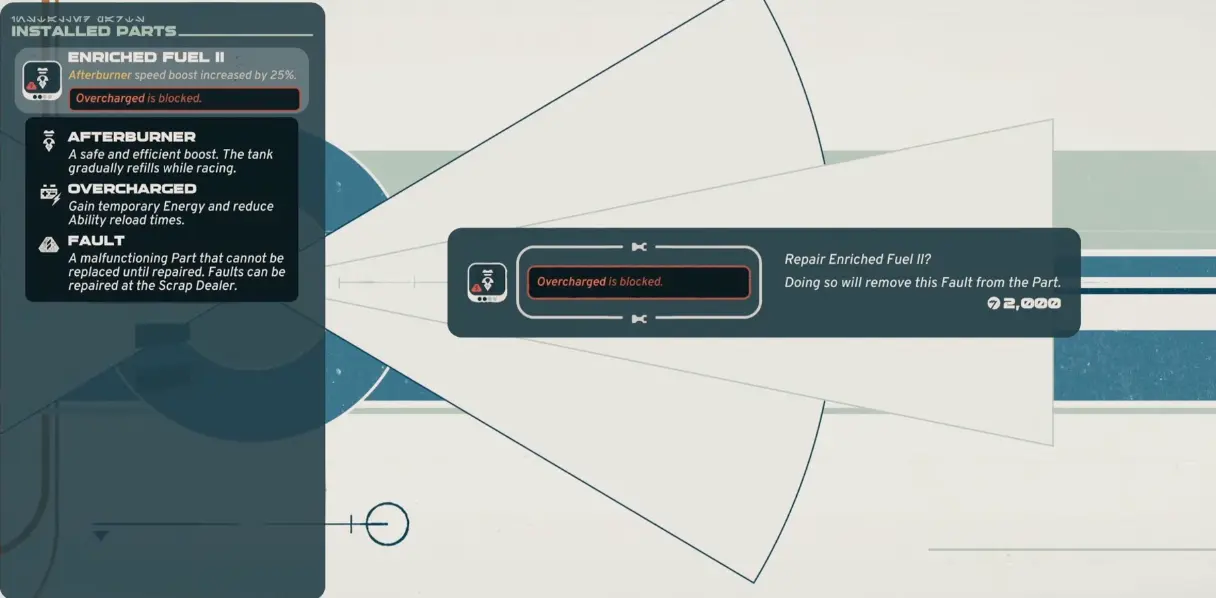
A Faulty Part can remain fixed to the vehicle until repaired. In the example above:
- Overcharged is blocked;
- repair costs 2,000 Credits;
- the affected Part cannot simply be swapped out.
A new Fault may also have to remain through another event before a repair opportunity appears.
Before buying, check:
- whether the bonus matters on the next important race;
- whether the vehicle can tolerate the Fault until repair becomes available;
- whether the repair cost will interfere with another purchase that matters more.
A powerful Part is a good bargain when the downside attacks something the build can work around. It is a poor bargain when the Fault damages the exact system already causing failures.
Backer Contracts Should Fit the Current Vehicle
Backer Contract objectives can pull the same vehicle toward very different behaviour.
One selection offered:
- 7 takedowns;
- 33 overtakes;
- 14 Ability uses.
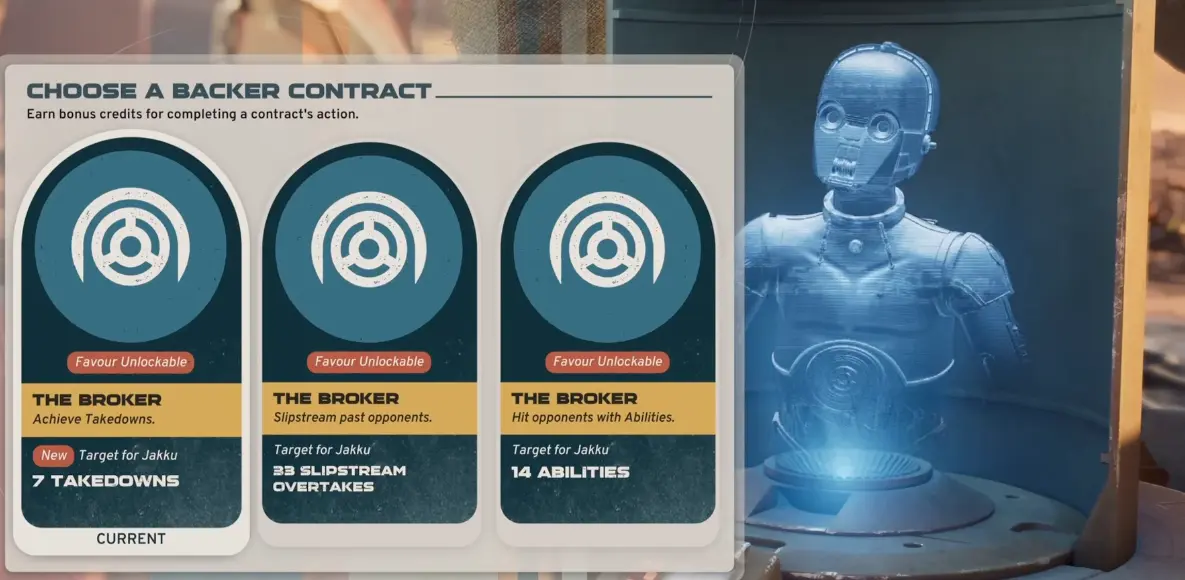
A contact-heavy setup already scoring takedowns has a natural route to the 7-takedown target. A race with frequent position changes makes the overtake objective more realistic. Ability-focused builds can progress 14 uses without changing how every corner is driven.
Contract progress belongs to the current planet, so choose with the events ahead in mind rather than assuming unlimited opportunities will appear later.
Partial progress can still return Credits, but when the Favor itself matters, take the objective that is realistically finishable before leaving the planet.
Existing Parts Carry Into the Podracer Transition
When the Campaign eventually gives Shade a Podracer, the work already invested in the build is not discarded.
Hibi can adapt existing Parts for the Podracer and later installs the familiar go-to Parts while adding stabilizers to make the machine easier to control.
The Podracer is still much faster and harder to handle than the regular speeders, so the safest transition is not automatically to maximize speed.
Carry over the effects that solve the real problem:
- retain stability while learning the Podracer’s response;
- keep Ramjet or heat support if Redline is limiting the run;
- move defensive slots toward performance only after the machine can be driven consistently.
The progression that unlocks Shade’s Podracer and leads into the final Championship is covered in the Campaign Guide.