A practical Forgotten Path route for choosing branches, managing camp threat, spending Food, thinning weak cards and reaching the final encounter in good shape.
A Janitor route through the Facility focused on Data, Gunk, cleaning, Machines, Foresight choices and surviving the final stretch without losing the deck's engine.
For an active run, the Forgotten Path walkthrough handles route and camp decisions, while the Facility walkthrough is for Janitor, Data, Gunk and Machines. If the Forgotten Path boss is the wall, go straight to the final boss guide. If the route is fine but the deck is not, use the builds guide.
Shroom and Gloom clicked for me when I stopped thinking of the dungeon as downtime between card battles.
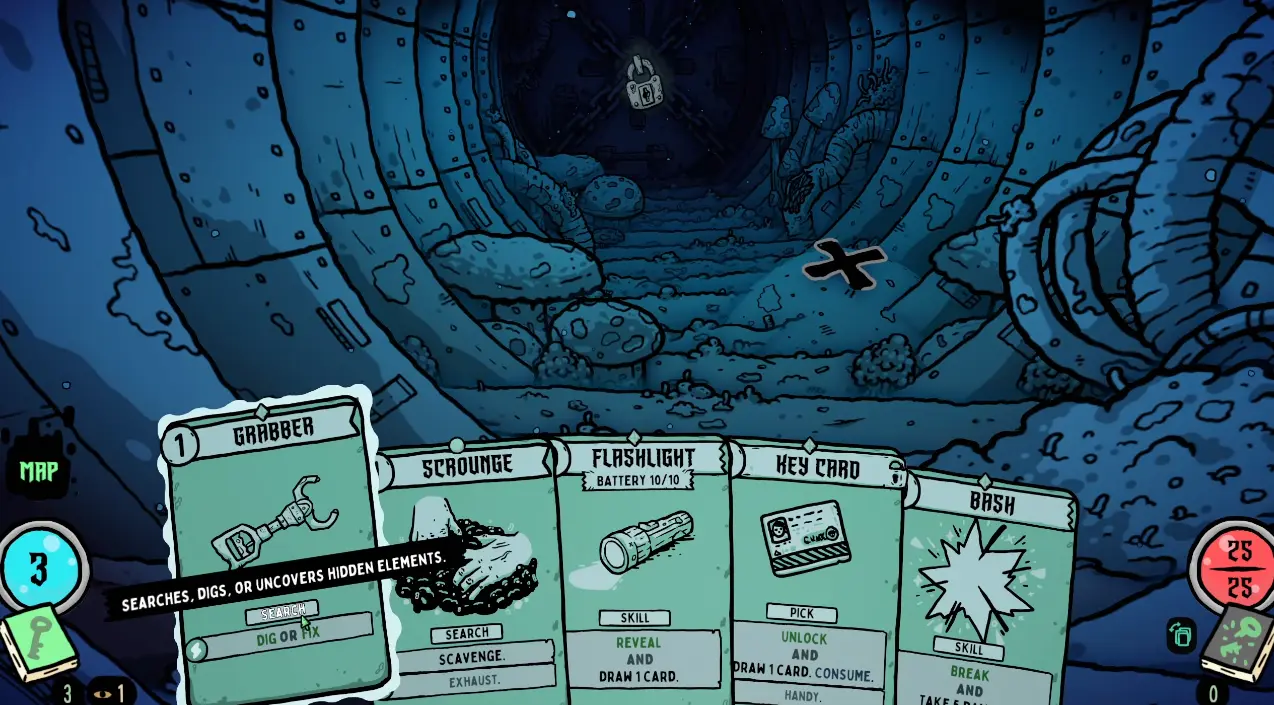
The combat deck is only half of the run. I am also carrying an exploration hand that decides whether I can Search, Dig, Fix, Reveal, Unlock or Break what I find between fights. On top of those two active decks, Foresight can add persistent passive effects that keep shaping the run after the choice is made.
That combination changes why a run succeeds or fails. Sometimes the combat deck is strong and the exploration hand cannot reach the room’s best reward. Sometimes the route goes perfectly and the combat deck arrives at the boss with several good cards but no real engine.
This page is the starting point for figuring out which problem you actually have.
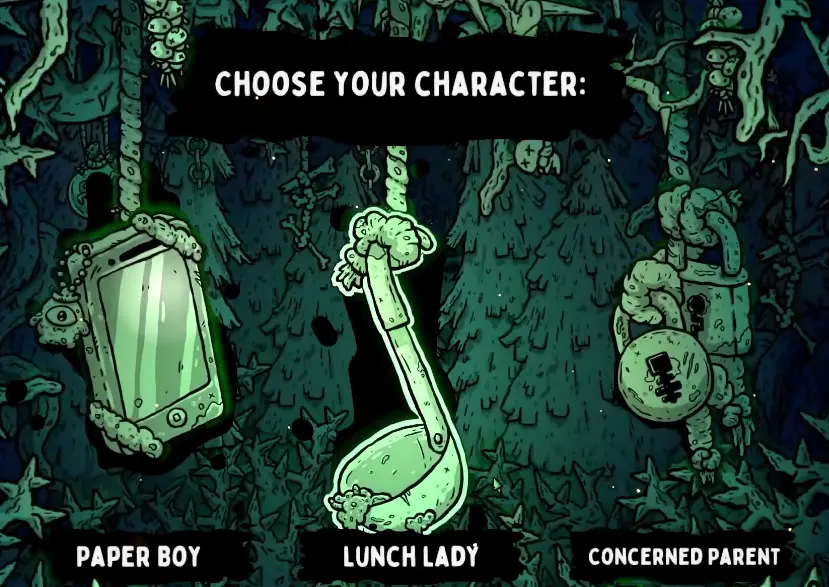
Characters change the starting deck and the kind of synergies I look for, so choosing a new explorer can make a familiar pathway feel like a different run.
Where Should I Go Next?
If the Facility is still locked, the important progression route is still in the Forgotten Path. The progression and unlocks guide covers the verified chain into the Gloom and the character and pathway unlocks that follow.
Once Janitor and the Facility are available, the forward objective changes. At that point I stop replaying the Forgotten Path simply because I already know it and start pushing the Facility instead.
The game is much easier to read when I follow the current quest requirement rather than treating every successful run as equal progress.
Forgotten Path: The Run Keeps Falling Apart Before the Boss
That includes branch choices, escalating camp threat, Food decisions, Toad removal, Max HP routes and knowing when a room has already given enough value. There is no permanent left-or-right answer because the useful branch changes with the state of the deck.
If I reach the end consistently, I stop treating it as a route problem and move to the boss itself.
Forgotten Path Final Boss: The Hand Stops Working
The final boss guide covers the point where normal combat sequencing starts to break.
That fight introduces Cosmic Horror, limb decisions, Guts and a late damage check, then ends with the Mushroom Key and Gloom Door. I keep those mechanics together because they form one continuous encounter rather than separate progression problems.
If the deck looks strong in ordinary fights but suddenly becomes too expensive or awkward to play at the end, this is the guide I would use first.
Facility: Janitor Changes the Rules
The Facility is where my Forgotten Path habits stopped transferring cleanly.
Janitor has to deal with Data, Gunk, cleaning and Machines, and the route rewards a much more deliberate choice of engine. Gunk can make a card harder to use, but the right setup can also add Gunk intentionally and turn cleaning into a payoff.
The Facility walkthrough covers those Facility-specific decisions, including Data spending, Decontaminator use, Foresight choices and why strong-looking Janitor runs can still collapse once forced discard appears near the end.
Why the Explore Deck Matters So Much
This is the system that gives Shroom and Gloom its own identity.
Grabber, Scrounge, Flashlight, Key Card and Bash are solving exploration problems rather than combat ones. The order I use them can decide what the room is worth.
In the hand above, the cards are not competing to deal more damage. They are deciding what I am allowed to interact with.
That means I usually read a room before spending the first exploration action. A Flashlight used on the wrong object can matter later if the structure I really wanted also needed Reveal. A Bash can open something immediately but may carry a health cost. A Key Card can be much more valuable when it preserves a route that would otherwise require another Rest.
The detailed camp logic belongs in the Forgotten Path and Facility walkthroughs, but the principle carries across both: the exploration deck determines how much of the dungeon the combat deck is actually able to use.
Foresight Is the Passive Layer Behind a Lot of Strong Runs
Foresight does not replace the Combat or Explore deck. It sits alongside them as a persistent passive layer.
Some choices are minor support. Others can materially change what I want to draft afterward.
A Foresight such as Hard-Headed becomes useful when Bash is already part of the run. Data Miner makes much more sense when Janitor is leaning toward Data and Machines. Clean Freak is much stronger when the hand is already carrying enough Gunk for cleaning to become part of the engine.
That is how I evaluate Foresight now: I prefer the passive that strengthens something the run already does well rather than the one that asks me to build an entirely new plan around it.
The builds guide shows how those passive choices fit into the tested Paperboy, Lunch Lady and Janitor engines.
Which Character Should I Use?
For a first progression push, Paperboy is still the character I understand best as a baseline. His Food, healing and growth interactions can become very forgiving once the engine starts producing extra draw and energy.
Lunch Lady feels better when I want stronger sustain with the option to turn that stability into a big finisher. Her best runs for me started with Food and healing already working, then let Hot Poker become the payoff instead of forcing the entire deck around it from the first room.
For the Facility, I use Janitor. His Machine route is the easier version to learn, while Gunk and Sparkling Clean have a higher ceiling once I understand how to add and remove Gunk deliberately.
Concerned Parent and Activist have their own unlock conditions, but I have not run either character enough to pretend I have a reliable build recommendation for them yet. Their verified unlock requirements are in the progression guide.
The strongest runs I have tested were not collections of individually powerful cards. They reached a point where the next card, heal, Food effect, Machine trigger or cleaning action continued the same engine.
Paperboy can loop healing, energy, growth and draw. Lunch Lady can build a stable Food shell and turn it into burst. Janitor can lean into Machines or deliberately cycle Gunk through cleaning.
If a deck keeps drawing good cards that want four different things, the problem is often structure rather than card quality.
Is Shroom and Gloom Like Slay the Spire 2?
There is enough overlap that a Slay the Spire player will recognize the basic instincts: build around synergy, avoid filling the deck with cards that do not serve the plan, choose routes around the run’s current weakness and expect bosses to expose fragile engines.
The largest difference is what Shroom and Gloom asks from me outside combat.
Slay the Spire 2 puts most of the run’s tactical pressure into combat deckbuilding and route selection. Shroom and Gloom adds a separate Explore deck, so I am also playing through the individual room with actions such as Search, Dig, Fix, Reveal, Unlock and Break.
Foresight adds another layer on top of that by giving the run persistent passive effects that can reinforce the engine I am already building.
If you are also playing Slay the Spire 2, I keep its dedicated card, relic, mechanic and build tools at SpireGenius.
What About Achievements and Full Completion?
I treat completion as a later-run objective rather than something that has to be forced into the first clear.
Some achievements happen naturally while learning the game, while others ask for things such as full tunnel mapping, hidden interactions or unusual conditions. A successful pathway clear can still leave branches undiscovered, so progression and full exploration are not the same goal.
For now, I focus first on reaching the Gloom, opening the available characters and getting at least one dependable build through each route. Once those runs are stable, going back for missing tunnels and stranger conditions becomes much less disruptive.
The Rule That Improved My Runs Most
The game constantly offers another card, another object, another branch or another reason to stay in the room.
The useful skill is not extracting all of it.
A run becomes much more stable once I can recognize that I already have the thing I came for: the route is open, the build has a direction, the important resource is secured, or the next fight is more valuable than one final camp interaction.