How to Unlock Acolyte in Risk of Rain 2: Hallowed Concepts
Unlock Acolyte through A Broken Ritual. Get the N'Tormat, activate Shrine of Descent, defeat Anima Harvester, and revive her.
Updated:
Quick Answer
Get the N’Tormat and enough Pages (1 solo; 4, 9, or 16 for parties of 2, 3, or 4), then activate a Shrine of Descent before the Teleporter. Enter Soulbound Threshold through the Ritual Portal, complete four challenges, and defeat both phases of the Anima Harvester. Find the fallen Acolyte where the boss died and give her an eligible healing or food-related item to complete A Broken Ritual.
Acolyte is the unlockable Survivor in Risk of Rain 2: Hallowed Concepts. Unlike Enforcer, who is available when the expansion is enabled, she must be rescued during a run.
The rescue comes after a special Teleporter encounter and a separate ritual inside Soulbound Threshold. You do not unlock Acolyte simply by killing the final boss, and you do not need to defeat the additional boss hidden beyond the realm’s sealed door.
The important preparation is straightforward: secure the N’Tormat and the required Pages, bring an item you can give away, and make sure your build can survive two consecutive encounters. Losing your intended offering before the final interaction can turn a successful boss kill into a failed unlock attempt.
Get the N’Tormat and Enough Pages
Start a run with Hallowed Concepts enabled. Your first requirement is the N’Tormat Curio, together with enough of its Pages to make the Shrine of Descent eligible to appear.
You can obtain the N’Tormat and its Pages through Wake events or N’kuhana Trials. For a more deliberate route, enter the Bazaar Between Time through a Blue Portal, descend into its lower area, and activate the Trial Gong.
Complete the Winnowing objective, collect the N’Tormat and your Page rewards, then use the return portal to continue your run. The Hallowed Concepts Trials walkthrough explains the different objectives, reward choices, and return routes.
How Many Pages Do You Need in Multiplayer?
The Shrine of Descent currently uses a much higher Page requirement when multiple players are present.
- Solo: 1 Page
- 2 players: 4 Pages total
- 3 players: 9 Pages total
- 4 players: 16 Pages total
These are team totals, not requirements that every player must meet individually.
Previously consumed Pages still contribute to the requirement, but Shredded Pages do not count. The Shrine checks the team’s qualifying Pages rather than simply counting every Page-related object that has passed through your inventory.
This distinction matters most in co-op. Collecting the N’Tormat and one Page is enough for a solo attempt, but it is not enough to make the Shrine appear for a two-player party.
You do not need a specific Page such as Reincarnation to rescue Acolyte. That ability serves a different purpose after the Soulbound Threshold encounter.
Find the Shrine of Descent
Once you meet the Page requirement, continue through the regular stages and search for the Shrine of Descent.
It resembles a Shrine of the Mountain, but its distinctive eye-like orb makes it recognizable at a distance. Read the interaction prompt when you approach it to distinguish it from an ordinary Shrine.
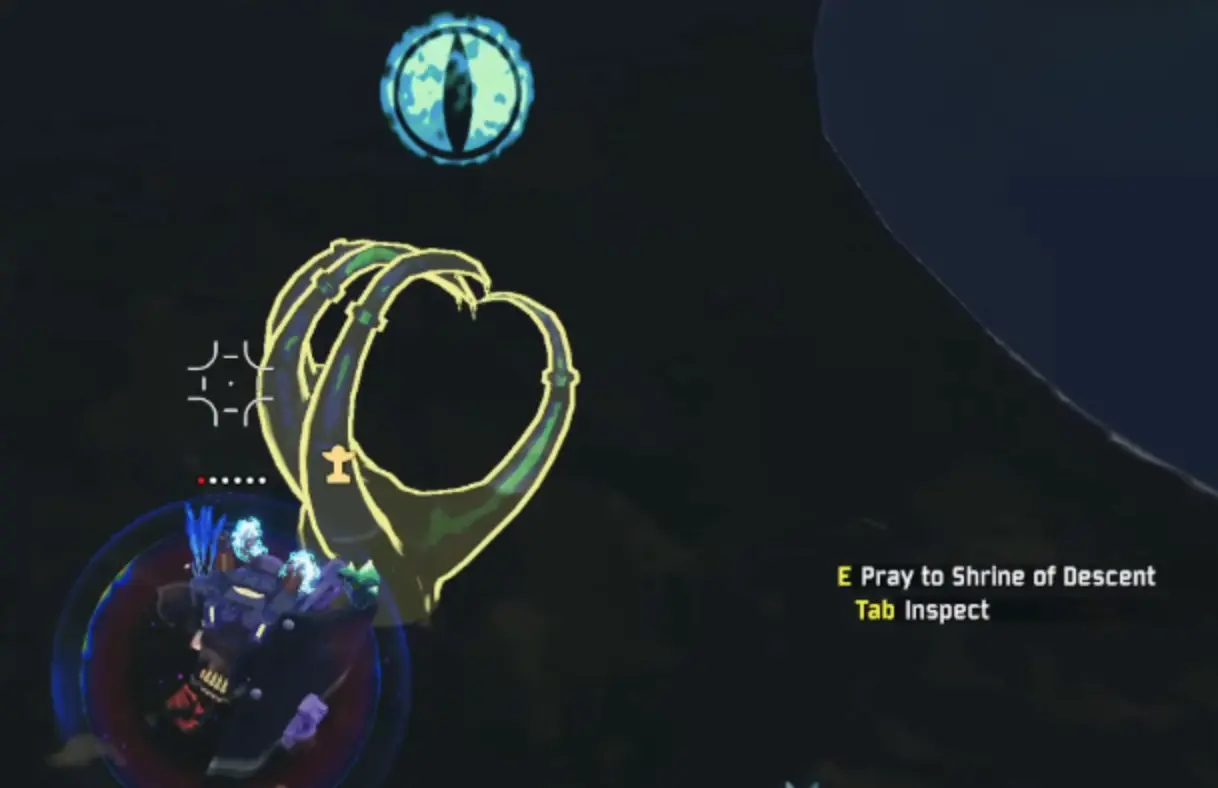
The Shrine is placed when a stage is generated. If you obtain your first qualifying Page partway through a stage, do not spend the rest of that stage repeatedly searching for a Shrine that was not eligible to spawn when you arrived. Advance to the next stage and search there.
Its location is random, and having enough Pages does not mean it will be beside the Teleporter.
Other restrictions also matter:
- The Shrine appears in standard or Eclipse runs.
- The Soul-binding trial must not have already occurred during the current run.
- The team must satisfy the Page requirement when the stage is generated.
If your Page count is correct but the Shrine still does not appear, continue into another eligible stage. If you have already triggered the major Soul-binding trial during this run, you cannot start a second one.
Activate It Before the Teleporter
Interact with the Shrine before activating the stage’s Teleporter.
The confirmation message is:
“The soul-binding trial awaits…”
Once this appears, the upcoming Teleporter fight is prepared for the Soul-binding encounter.
The timing is important. If you start the Teleporter first, you cannot activate the Shrine afterward and retroactively change that event. You must find another opportunity in a later run or eligible stage, provided the Soul-binding trial has not already been used.
You can prepare your build before triggering the Shrine, but do not activate the normal Teleporter until you are ready for the extended fight.
Complete the Soul-binding Teleporter Event
After activating the Shrine, start the Teleporter as usual.
The fight initially resembles a normal Teleporter event, but reaching 100% charge is not the end. The charge continues toward 667%, and an additional boss encounter takes place during the overcharge.
Keep fighting until the extended event is complete and the remaining required boss enemies have been defeated.
Completing the Soul-binding encounter opens a Ritual Portal near the Teleporter. Look around the surrounding terrain if it does not appear directly beside the device.
Before entering, check that you still have a qualifying healing or food-related item. You will need to give one away after defeating the Anima Harvester.
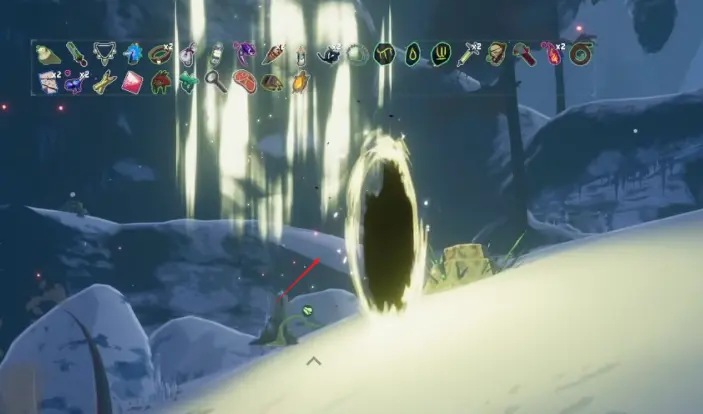
Enter the Ritual Portal to continue toward Acolyte’s rescue.
Complete the Four Challenges in Soulbound Threshold
Follow the ramps toward the central chamber and interact with the Altar of N’kuhana.
Choose “Begin the ritual” to start the encounter.
The ritual contains four timed challenges. Each takes place inside an active arena, with enemies and champion monsters that must be defeated to advance.
Unlike an ordinary boss rush, you cannot safely ignore the arena boundaries. The ritual starts a countdown, and the dangerous fog outside the active dome damages and heavily slows players.
For the Acolyte rescue, focus on three things:
- Follow the active arena. Watch where the ritual moves rather than remaining in an inactive section of the realm.
- Finish the required enemies. Killing the largest monster does not necessarily clear the challenge if another required target is still alive.
- Keep the countdown moving in your favor. Clearing a challenge adds more time, but letting the timer expire kills the party regardless of remaining revival items.
If the next encounter does not begin, inspect the current arena for surviving enemies before wandering into the fog. A monster left behind can prevent the challenge from advancing.
Completing all four challenges triggers the Anima Harvester encounter.
Defeat Both Phases of the Anima Harvester
The Anima Harvester is the final boss you must defeat before Acolyte can be rescued.
There are two phases, and the first defeat is not enough.
During the opening phase, additional champion enemies can remain active in the arena. The Harvester has a soul-draining attack that can restore its health, so a build that only clears groups of weaker enemies may struggle to finish the boss.
Maintain enough movement to avoid repeated hits while keeping reliable damage on the Harvester. Be especially cautious if it begins recovering health instead of steadily losing it.
When the first phase is defeated, the remaining monsters are cleared and the second phase follows.
The second phase also applies three random Hexes to each player, which can make the fight more dangerous by changing movement, healing, visibility, or survivability. Do not assume your character will handle exactly the same way it did during the opening phase.
Keep enough distance to react to the Harvester’s attacks and finish its second form.
Acolyte becomes available to revive only after the second phase dies.
You do not need to enter Terminal Lucidity, complete a Reincarnation encounter, or defeat the boss beyond the sealed door for A Broken Ritual.
Find the Fallen Acolyte Before Leaving
After the Anima Harvester’s second phase is defeated, a Fallen Acolyte appears where the boss died.
Do not immediately run back toward the altar or leave the realm.
Look around the Harvester’s final position for the body on the ground and approach it until the interaction prompt becomes available. Depending on where you finished the fight, the body may be away from the central altar or the eventual exit portal.
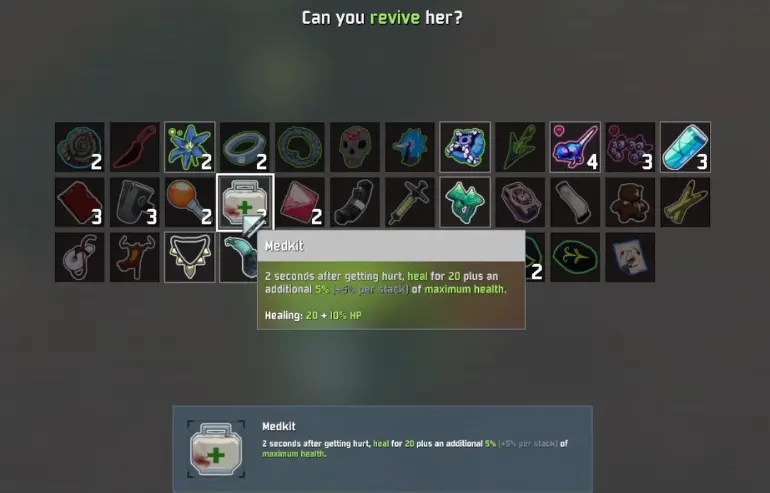
Interact with the fallen Acolyte. When “Can you revive her?” appears, select an eligible item from your inventory. The item you choose is consumed when you complete the rescue.
A successful offering completes A Broken Ritual, and Acolyte becomes available from the Survivor selection screen in subsequent runs.
Which Items Can You Give Acolyte?
The rescue interaction accepts permanent items with the appropriate Healing or Food-related classification.
You only need one qualifying item. It does not need to be rare or particularly powerful.
Examples include:
- Medkit: A common healing item and a straightforward offering.
- Cautious Slug: Another common choice that you can keep until the rescue.
- Bison Steak: Qualifies through its health-related item classification even though its normal effect increases maximum health.
- Harvester’s Scythe: A healing-related item that can be offered.
- Leeching Seed: Qualifies as a healing item.
- Power Elixir: Can be offered while it remains unused in your inventory.
For a simple attempt, Medkit or Cautious Slug is a sensible choice. Neither requires a particular damage build, and you can preserve one specifically for the final interaction.
Power Elixir is less dependable as a reserved offering. If your health falls below its activation threshold during the run, the Elixir is consumed automatically and becomes an Empty Bottle. That no longer gives you the item you intended to offer.
The revival check is not the same as asking whether an item helps you survive. Shields, barriers, damage reduction, and extra-life effects should not be treated as substitutes for a qualifying item.
In particular, Dio’s Best Friend does not replace the healing-item offering.
If you approach the fallen Acolyte and cannot select anything, inspect your current inventory rather than relying on items you collected earlier. A qualifying item may already have been consumed, scrapped, or otherwise removed.
Artifact of Command can make this preparation easier by allowing you to choose a suitable pickup during the run, but it is not required for the unlock.
Finish the Ritual and Return to the Mortal Plane
Once Acolyte has been revived, return to the Altar of N’kuhana.
After the Anima Harvester is defeated, the altar offers the interaction “Beseech the orb”. This completes the ritual and opens the Mortal Portal for returning to the regular stages.
The altar interaction and Acolyte’s revival are different actions. Completing the ritual or opening the exit does not replace the item offering needed for A Broken Ritual.
If you interacted with the altar first, check that you have revived Acolyte before stepping through any exit.
When the unlock notification appears, the rescue objective is complete. You can continue the run or leave through the available route.
What to Do After Unlocking Acolyte
Acolyte begins with her default skills and a distinctive health mechanic: ordinary healing is converted into recoverable health rather than restoring her health normally. Her abilities allow her to reclaim that health while fighting and eventually transform into the Anima Harvester.
Her alternate skills are earned through separate challenges, including Bloodbath, Not Even Close, and Hit List. The Enforcer and Acolyte skill unlocks explain the individual requirements and how to complete them.
Acolyte also has separate appearance challenges. Her Monsoon Mastery and Memento Mori objectives require playing as the unlocked Survivor, not merely rescuing her during another character’s run. Check the Hallowed Concepts skin unlock requirements before attempting those rewards.
For the base character unlock, the decisive result is A Broken Ritual. Once you have defeated the Anima Harvester and successfully revived the fallen Acolyte with an eligible item, no additional boss or hidden encounter is required.