How to Unlock All 18 Hallowed Concepts Skins in Risk of Rain 2
Find all 18 Hallowed Concepts skin names, their Survivor challenges, the Reincarnation hidden boss route, and how to finish with 10 Hexes.
Updated:

Quick Answer
To unlock all 18 Hallowed Concepts challenge skins, complete the matching objective while playing as each Survivor. Six require clearing Soulbound Threshold before the fourth Teleporter event, six require defeating Echo of Providence beyond the Reincarnation door, and six require finishing a run with at least 10 Hexes. Enforcer and Acolyte also have separate Monsoon Mastery skins.
Risk of Rain 2: Hallowed Concepts adds 20 alternate Survivor skins: 18 earned through character-specific challenges, plus two Monsoon Mastery skins for Enforcer and Acolyte.
The important distinction is that these are not shared unlocks. Completing Memento Mori as Engineer earns Nautilus, but does not unlock Bandit’s Plagued or Acolyte’s Vessel. All six Survivors in that group must defeat the hidden boss in their own runs.
The three challenge groups also require very different preparation. The early Soulbound Threshold clear is a race against Teleporter progression. The hidden boss allows a longer run but requires Reincarnation. The 10-Hex challenge rewards survival with a heavily penalized build rather than an early boss clear.
All 18 Hallowed Concepts Skin Names and Unlock Requirements
Use this list to identify the exact skin you want before starting a run. Each row names the Survivor, the appearance unlocked, and the challenge that awards it.
| Survivor | Skin Name | Challenge | Unlock Requirement |
|---|---|---|---|
| Commando | Lacerated | Dying to Meet You | Clear Soulbound Threshold before the fourth Teleporter event |
| Huntress | Vesper | Dying to Meet You | Clear Soulbound Threshold before the fourth Teleporter event |
| Acrid | Primal | Dying to Meet You | Clear Soulbound Threshold before the fourth Teleporter event |
| Seeker | Vengeance | Dying to Meet You | Clear Soulbound Threshold before the fourth Teleporter event |
| CHEF | KIL-N | Dying to Meet You | Clear Soulbound Threshold before the fourth Teleporter event |
| Enforcer | Impasse | Dying to Meet You | Clear Soulbound Threshold before the fourth Teleporter event |
| Bandit | Plagued | Memento Mori | Defeat the boss beyond the Reincarnation door |
| Engineer | Nautilus | Memento Mori | Defeat the boss beyond the Reincarnation door |
| Artificer | Andradite | Memento Mori | Defeat the boss beyond the Reincarnation door |
| REX | Indurate | Memento Mori | Defeat the boss beyond the Reincarnation door |
| Captain | Adrift | Memento Mori | Defeat the boss beyond the Reincarnation door |
| Acolyte | Vessel | Memento Mori | Defeat the boss beyond the Reincarnation door |
| MUL-T | Yellowcap | Against All Odds | Complete a run while holding at least 10 Hexes |
| Mercenary | Rhizine | Against All Odds | Complete a run while holding at least 10 Hexes |
| Loader | Truffle | Against All Odds | Complete a run while holding at least 10 Hexes |
| Railgunner | Crypsis | Against All Odds | Complete a run while holding at least 10 Hexes |
| Void Fiend | Justified | Against All Odds | Complete a run while holding at least 10 Hexes |
| False Son | Envoy | Against All Odds | Complete a run while holding at least 10 Hexes |
The skin name is different from the challenge name. For example, False Son: Against All Odds unlocks Envoy, while Acolyte: Memento Mori unlocks Vessel.
Several appearances substantially change how a Survivor looks. Engineer’s Nautilus gives the character a nautical-themed design that also carries over to the turrets. Acrid’s Primal replaces much of the familiar body appearance with a rocky, moss-covered look and small flowers. False Son’s Envoy has a prominent red fungal growth against the character’s pink body.
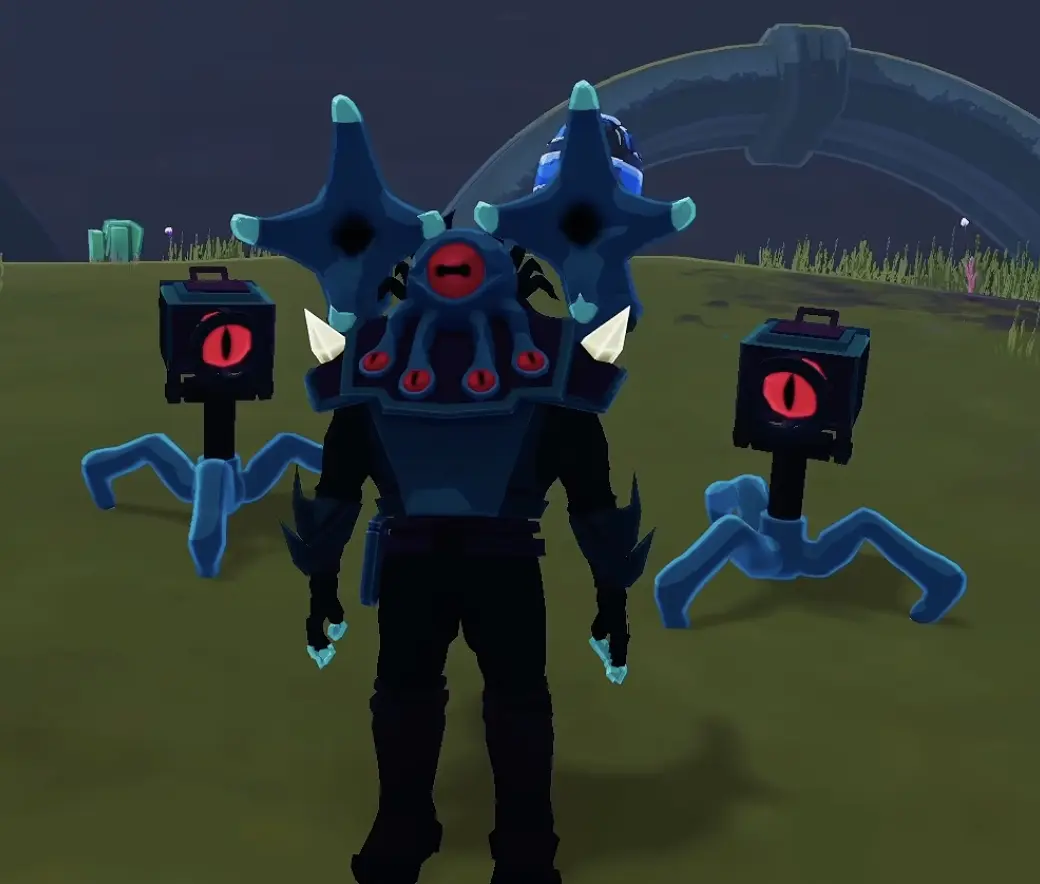
None of these skins is unlocked by finding an ordinary chest cosmetic. The relevant challenge must be completed with its named Survivor.
Dying to Meet You: Unlock Lacerated, Vesper, Primal, Vengeance, KIL-N, and Impasse
The defining requirement is to complete Soulbound Threshold before the fourth Teleporter event. Reaching the hidden realm is not enough; you must also survive the ritual and defeat the Anima Harvester within that deadline.
Because the challenge ends at Soulbound Threshold, you do not need to defeat Mithrix or complete the rest of the run afterward.
Enter Soulbound Threshold Early Enough
You need access to the N’tormat, a usable Page, and a Shrine of Descent. Pages can come from N’kuhana Trials, Shrine of Compulsion rewards, or Wake events.
For the full Shrine entrance sequence, including the Teleporter alteration and Ritual Portal, follow the Acolyte unlock walkthrough.
The critical decision for these six skins is when to activate the Shrine.
Stage 2 is usually the safer timing choice if you already have enough damage and recovery. Stage 3 is an alternative when your build needs more equipment, but it leaves no comfortable margin for another ordinary Teleporter event.
Once you are ready:
- Find and activate the Shrine of Descent before starting that stage’s Teleporter.
- Complete the Soul-binding Teleporter event, including its additional boss.
- Enter the Ritual Portal leading to Soulbound Threshold.
- Follow the ramps to the central ritual chamber and begin the encounter.
- Survive the successive fights and defeat the Anima Harvester before the fourth Teleporter event.
The altered Teleporter is more demanding than a normal boss encounter. Saving a little time during stage exploration is not useful if you arrive without the damage or movement needed to finish the ritual.
If you are attempting the challenge on Stage 3, do not continue through another normal stage first. Complete Soulbound Threshold while the deadline is still open.
Why Dying to Meet You Does Not Unlock
The most common failure is treating the fourth Teleporter as a checkpoint you can reach and then finish the hidden realm afterward. The challenge requires the Soulbound Threshold completion before that event.
A second issue is selecting the wrong Survivor. Every skin belongs to its own character-specific challenge; an early clear with Commando cannot award Huntress’s Vesper.
If you enter the hidden realm but fail to defeat the Anima Harvester, you have not completed the requirement either.
For your next attempt, correct whichever condition was missed:
- Too late: obtain a Page earlier and take the Shrine of Descent route on Stage 2 or 3.
- Died during the ritual: improve boss damage, movement, or sustained recovery before activating the Shrine.
- Wrong skin still locked: check that the run was completed with the Survivor named in that skin’s challenge.
You can check the corresponding skin on the Survivor selection screen after the unlock has registered.
Memento Mori: Unlock Plagued, Nautilus, Andradite, Indurate, Adrift, and Vessel
Memento Mori requires defeating Echo of Providence, the hidden boss reached through the door in Soulbound Threshold.
Unlike Dying to Meet You, there is no fourth-Teleporter deadline. That changes the approach: gathering a stronger build and obtaining the correct N’tormat Page are more important than entering the realm as early as possible.
The required Page is Reincarnation. Simply carrying the N’tormat, completing the Anima Harvester fight, or reviving Acolyte will not satisfy Memento Mori.
Get Reincarnation Before Starting the Hidden Boss Route
Reincarnation is one of the N’tormat Pages. You can obtain Pages through N’kuhana Trials and Shrine of Compulsion rewards, but an individual reward does not guarantee Reincarnation.
If you have not collected it, continue acquiring Page rewards rather than entering Soulbound Threshold with no way to open the hidden route.
The Hallowed Concepts Trials walkthrough covers Trial entrances, objectives, and rewards.
Be careful when testing Reincarnation. Its normal ritual involves sacrifice, and casting it in the wrong location can kill you. The special Soulbound Threshold door interaction works differently.
Open the Door to Terminal Lucidity
First complete the Soulbound Threshold ritual and defeat both phases of the Anima Harvester.
After the fight, interact with the altar using “Beseech the orb”. This enables the exit and activates the Reincarnation interaction associated with the large door.
Do not take the ordinary return portal yet.
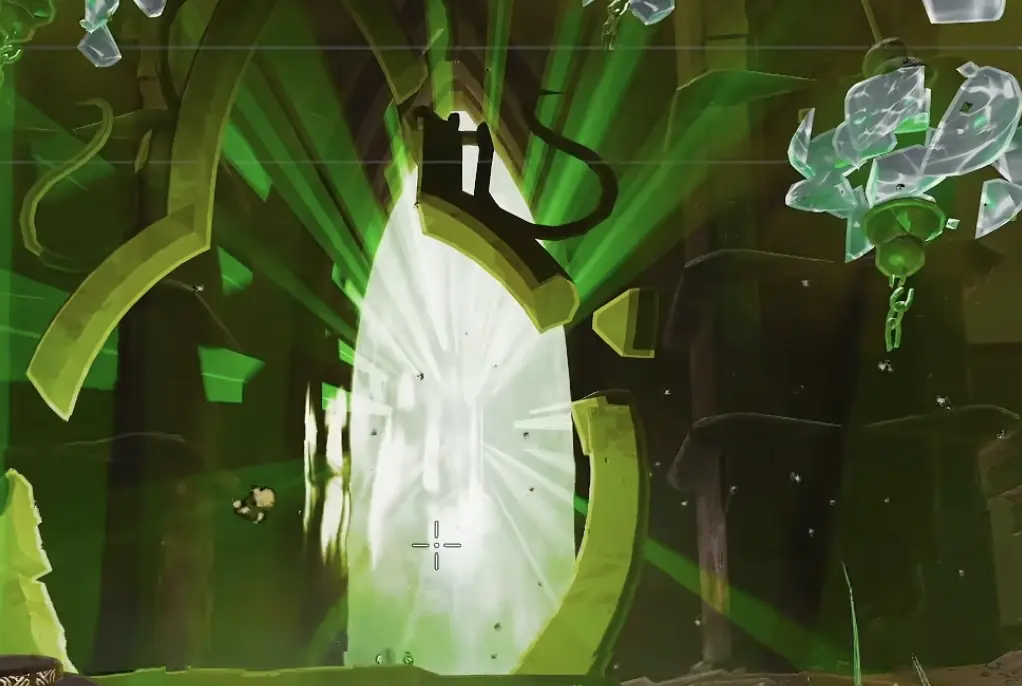
The sequence for the hidden route is:
- Defeat the Anima Harvester and complete the Soulbound Threshold ritual.
- Interact with the altar to finish the ritual sequence.
- Move to the large door near the ordinary exit portal.
- Stand within the door’s Reincarnation sacrifice zone.
- Select and cast Reincarnation with the N’tormat.
- Pass through the opened route into Veil of Memory and continue to Terminal Lucidity.
The door’s valid Reincarnation zone has an 18-meter radius. When you enter a valid sacrifice zone while carrying the appropriate Page, the game can display:
“N’tormat shudders in anticipation”
That reaction helps distinguish a valid location from an ordinary area where Reincarnation would trigger its usual dangerous effect.
The Soulbound Threshold door’s Reincarnation interaction does not kill players in the sacrifice circle. Do not assume the same protection applies to Reincarnation zones elsewhere.
Beyond the door, follow the path across the water toward Echo of Providence. Defeating that boss as the selected Survivor completes the corresponding Memento Mori challenge.
Why Reincarnation Does Not Open the Door
If Reincarnation fails to give you access, check the state of the encounter before using another Page.
The Anima Harvester must be defeated. Reaching Soulbound Threshold or clearing only part of the ritual is insufficient.
The altar interaction matters. After the boss dies, complete the “Beseech the orb” interaction rather than immediately attempting Reincarnation or entering the return portal.
Your position matters. The special interaction is tied to the door’s sacrifice zone. Casting elsewhere can trigger Reincarnation’s usual effect instead.
If the N’tormat displays “For some reason, you can’t make out the words on the page…”, do not assume you must discard it. Check the ritual state and location first.
Prepare for Echo of Providence
The ordinary Soulbound Threshold encounter and Echo of Providence are separate fights. A build that only just survives the Anima Harvester can be in poor shape for another boss.
Since Memento Mori has no early-clear deadline, collect enough equipment to handle both encounters before committing.
Reliable movement and sustained boss damage are particularly valuable when your run will continue beyond the initial ritual. Avoid exhausting important resources on the Anima Harvester if you still need them for the hidden fight.
For Acolyte’s Vessel skin, Acolyte must already be playable. Unlock her through A Broken Ritual, then start a run as Acolyte and defeat Echo of Providence. Rescuing her during another Survivor’s run does not complete Acolyte: Memento Mori.
Against All Odds: Unlock Yellowcap, Rhizine, Truffle, Crypsis, Justified, and Envoy
These six skins have a different condition: complete a run while holding at least 10 Hexes.
You do not need Soulbound Threshold or Echo of Providence. You do, however, have to survive the accumulated penalties until the game registers a successful ending.
A run that collected 10 Hexes earlier but finished with only eight does not qualify.
Collect Hexes From Concept Reliquaries
Concept Reliquaries are free interactables that normally drop one random Hex when opened.
They are useful early in a run because they let you begin accumulating Hexes without first clearing another Teleporter event.
If you have the Seekers of the Storm DLC enabled, Sale Star can make the first eligible Concept Reliquary opened on a stage drop an additional Hex. This gives you two Hexes from that interaction instead of the usual one.
Sale Star is not required for Against All Odds, and you should not depend on finding it. Treat it as a useful acceleration when the relevant DLC and item are available.
Pick up the dropped Hexes before starting the Teleporter. Leaving Hexes on the ground does not add them to your held total.
Use Hallowed Shrines to Reach 10 Hexes
After a qualifying Teleporter event, a Hallowed Shrine appears near the Teleporter when Hexes or N’tormat Pages have brought the shrine’s mechanics into play.
The Hallowed Shrine offers two different interactions:
- Hand of Death (Embrace Death): Grants three additional Hexes. This interaction can only be used once per shrine.
- Hand of Life (Embrace Life): Exchanges up to seven Hexes for a blessing. Offering more Hexes improves the rewards, and this interaction can be used multiple times.
For Against All Odds, choose Hand of Death to increase your Hex count. Hand of Life is useful for removing penalties, but exchanging too many Hexes can leave you below the required ten.

A simple route to the required count is:
- Obtain an N’tormat Page or an initial Hex so Hallowed Shrines can begin appearing.
- Complete a Teleporter event and choose Hand of Death (Embrace Death) when the Hallowed Shrine appears.
- Use Hand of Death at later Hallowed Shrines until you have nine Hexes from three successful selections.
- Collect one more Hex from a Concept Reliquary, another available source, or a later Embrace Death selection.
- Keep at least 10 Hexes until your run ends successfully.
Each Hand of Death interaction grants three Hexes per player. It does not multiply the Hexes already held, and the same Hand of Death cannot be used repeatedly.
You can take more than 10, but extra Hexes are not necessary for the skin and may make the remaining run harder.
Avoid Hex Penalties That Ruin Your Build
Each Hex carries a drawback. The danger comes from how those effects interact with your Survivor and existing items.
For example, Hex of Famine reduces healing, which can undermine a build that depends on frequent recovery. Hex of Blindness limits visibility, while Hex of Pain reduces maximum health. Hex of Loss can temporarily disable items, making otherwise strong equipment combinations less dependable.
For a 10-Hex finish, the timing of collection matters. Build enough damage, mobility, and recovery to clear later stages before deliberately adding several difficult penalties.
If a Hex makes your main survival mechanism unreliable, consider whether your current run can still reach its ending. Against All Odds does not reward collecting ten as fast as possible; it rewards completing the run while still carrying them.
Do Not Cleanse Your Hexes Before Finishing
The other Hallowed Shrine interaction, Hand of Life (Embrace Life), exchanges up to seven Hexes for a blessing. Offering more Hexes improves the rewards, but using it during Against All Odds can invalidate the attempt if your held total drops below ten.
Once you reach the requirement, keep checking your inventory total before making further Shrine choices.
There are two ways to finish:
Mithrix and escape: Defeat Mithrix and complete the escape sequence with at least 10 Hexes still held.
Obliteration: Continue through the required later stages, enter the Celestial Portal, and obliterate while carrying at least 10 Hexes.
Obliteration avoids the Mithrix fight, but you still have to survive the stages needed to reach the Celestial Portal.
Whichever ending you choose, the skin unlock is tied to the Survivor you selected. Completing the requirement as Loader earns Truffle, not Mercenary’s Rhizine.
Enforcer Palisade and Acolyte Twilight: The Two Monsoon Mastery Skins
In addition to the 18 challenge skins, Hallowed Concepts includes two alternate appearances for its new Survivors.
| Survivor | Mastery Skin | Requirement |
|---|---|---|
| Enforcer | Palisade | Beat the game or obliterate as Enforcer on Monsoon |
| Acolyte | Twilight | Beat the game or obliterate as Acolyte on Monsoon |
Enforcer is playable immediately with the DLC, so you can pursue Palisade without first completing the Acolyte rescue.
Acolyte must be unlocked before you can attempt her Twilight Mastery appearance.
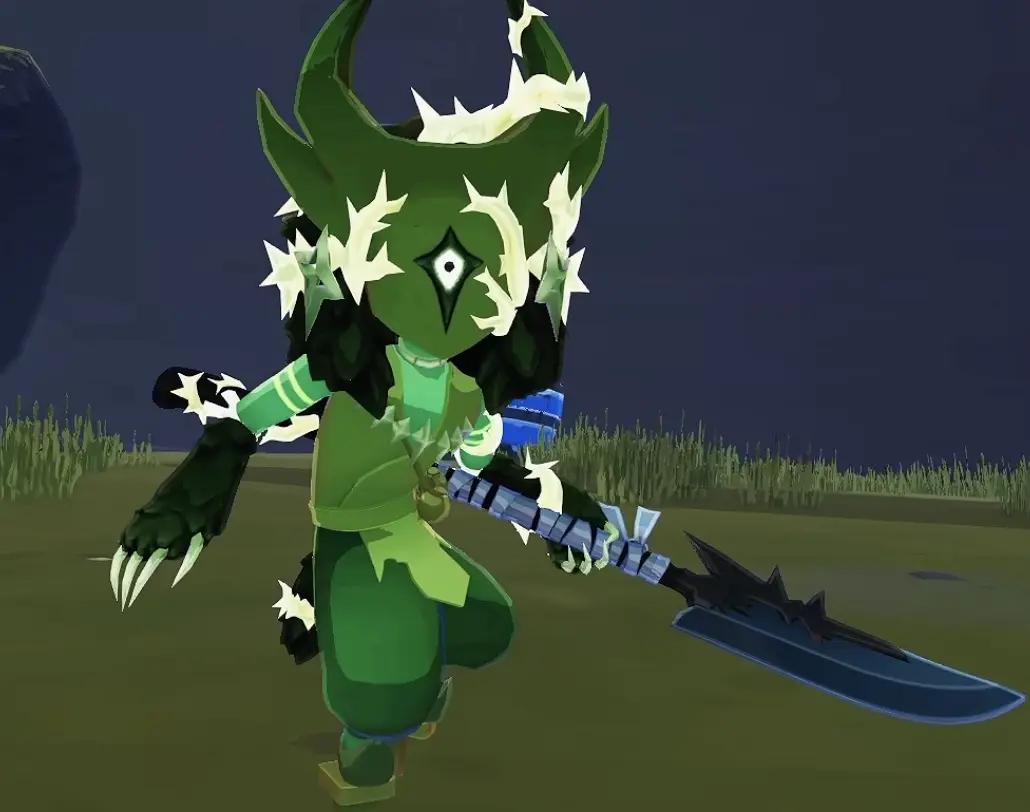
The difficulty requirement is important. Completing a run on Drizzle or Rainstorm does not satisfy the Monsoon Mastery challenge.
These are also independent of the other skin objectives:
- Enforcer: Dying to Meet You awards Impasse, not Palisade.
- Acolyte: Memento Mori awards Vessel, not Twilight.
You can check the unlocked appearance in the Survivor selection menu after completing the matching achievement.
What to Do If You Still Have a Locked Skin
Before repeating a long run, identify which of the three completion conditions belongs to the locked appearance.
For Dying to Meet You, check whether Soulbound Threshold was actually completed before the fourth Teleporter event. If you arrived too late, the solution is an earlier Shrine of Descent attempt.
For Memento Mori, confirm that you defeated Echo of Providence beyond the Reincarnation door. Defeating the Anima Harvester alone is not enough.
For Against All Odds, make sure the ending counted as a completed run and you still held at least 10 Hexes when it finished.
If the objective was completed with the wrong Survivor, the appearance remains locked for the character you intended to use.
To track the associated character challenges alongside the rest of the expansion’s unlocks, use the Hallowed Concepts achievements checklist. It includes the skin challenges, skill unlocks, and other new achievements.