How to Unlock All 6 New Free Update Skills in Risk of Rain 2
Unlock Sabotage, Laser Cyclone, Laser Cutter, Tectonic Blast, Proliferation, and Cloying Breath through six new Survivor challenges.
Updated:
Quick Answer
The free update adds six alternate skills without requiring Hallowed Concepts. Complete Retribution for Commando, Tomb Raider for Huntress, Mad Scientist for Engineer, One Giant Leap for Artificer, Invasive Growth for REX, and Miracle for Acrid. Huntress, Engineer, and Artificer do not need to win their runs; the other three have final-boss or game-completion requirements.
The October 8, 2026 update gives six existing Survivors new abilities. Each is tied to a separate challenge, and you must play the corresponding Survivor to earn it.
The rewards and their loadout slots are:
- Commando: Sabotage — Special, unlocked by Retribution.
- Huntress: Laser Cyclone — Secondary, unlocked by Tomb Raider.
- Engineer: Laser Cutter — Primary, unlocked by Mad Scientist.
- Artificer: Tectonic Blast — Utility, unlocked by One Giant Leap.
- REX: Proliferation — Utility, unlocked by Invasive Growth.
- Acrid: Cloying Breath — Special, unlocked by Miracle.
None of these challenges requires Monsoon. Drizzle is a reasonable choice when your priority is completing an unlock rather than testing a difficult build. The required actions range from a short interaction with an Equipment Drone to finishing the game with an unusual inventory.
Commando: Retribution — How to Earn 8 Karma
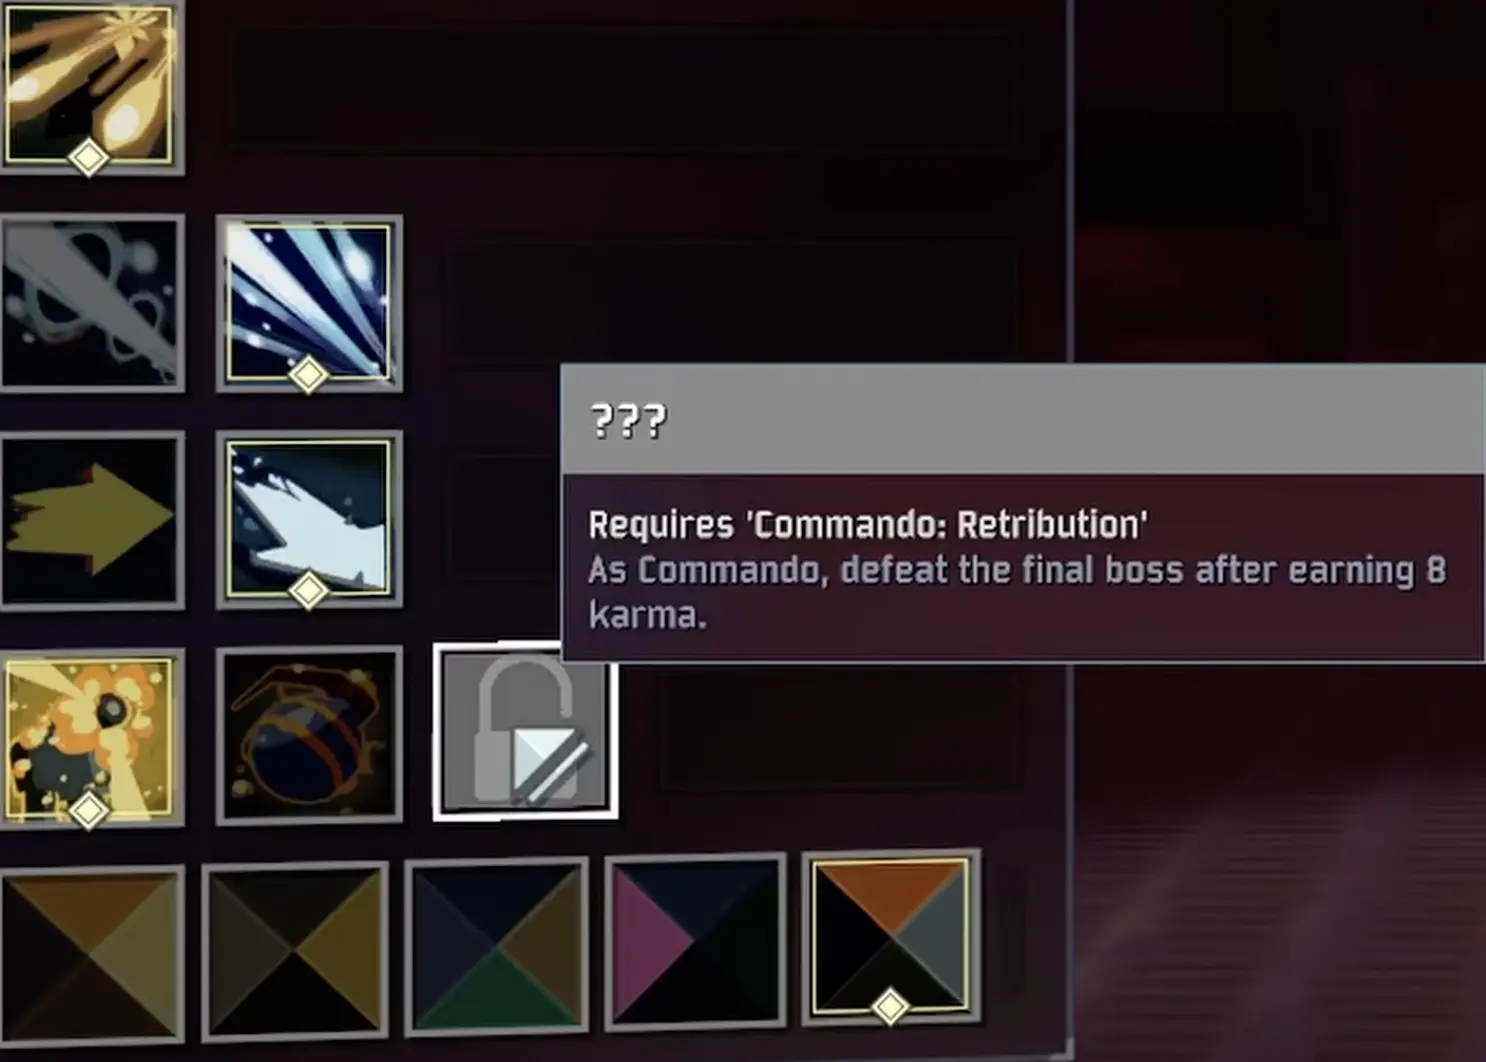
Requirement: As Commando, defeat the final boss after earning 8 Karma.
Unlock: Sabotage — Special
Retribution uses the optional Karma system introduced with the free update. Karma adds difficulty to the final confrontation with Mithrix, and Commando’s challenge requires you to reach the specified level before defeating him.
Enable Karma in the pre-run options. Once the run begins, follow the displayed Karma level as you complete milestones instead of relying on your stage count.
Activities That Can Increase Karma
Karma increases when you reach certain milestones during a run. If you are working toward Retribution, useful activities to try include:
- Bazaar Between Time: Attack Newt until he expels you.
- Lunar items: Carry at least three Lunar items.
- Halcyon Shrine: Complete the encounter and defeat the Halcyonite.
- Void Fields: Complete the Void Fields challenge.
Additional progression milestones, including item collection and looping, may also contribute to Karma.
These activities are not a guaranteed eight-step route. Check the Karma indicator after each milestone rather than assuming every encounter or repeated interaction awards another point.
Your goal is to reach 8 Karma before defeating Mithrix. If the indicator is still below eight, continue gathering Karma before committing to Commencement.
If you are approaching the end of a loop with fewer than eight Karma, consider continuing through additional stages and optional encounters instead of immediately traveling to Commencement.
At Sky Meadow, decide whether you are ready for the moon before activating the Primordial Teleporter. Once you have committed to Commencement, you cannot simply return to ordinary stages to collect missing Karma.
Defeat Mithrix After Reaching 8 Karma
When the Karma indicator reaches eight, prepare Commando for the final fight.
A higher Karma level can make Mithrix more challenging than the ordinary encounter. Give yourself enough damage to complete the fight and enough movement or defensive equipment to survive his attacks.
The achievement requires defeating the final boss after earning eight Karma. Reaching Commencement with the correct level does not finish the challenge by itself.
After completing Retribution, check Commando’s loadout for Sabotage, his alternate Special ability.
Huntress: Tomb Raider — Get an Artifact Within 25 Minutes
Requirement: As Huntress, obtain an Artifact from Bulwark’s Ambry within 25 minutes.
Unlock: Laser Cyclone — Secondary
Tomb Raider is a timed unlock, but the challenge does not finish when you enter the Artifact Portal. The Artifact must actually be obtained before the time limit expires.
The main objective is to reach Sky Meadow quickly enough to leave time for the Bulwark’s Ambry encounter.
Reach the Sky Meadow Compound Generator
Start as Huntress on Drizzle.
Movement and damage items are useful, but collecting every chest on each stage is likely to cost more time than it saves. Prioritize reaching the Teleporter and completing stages efficiently.
Proceed until Sky Meadow, then find the Artifact Compound Generator.
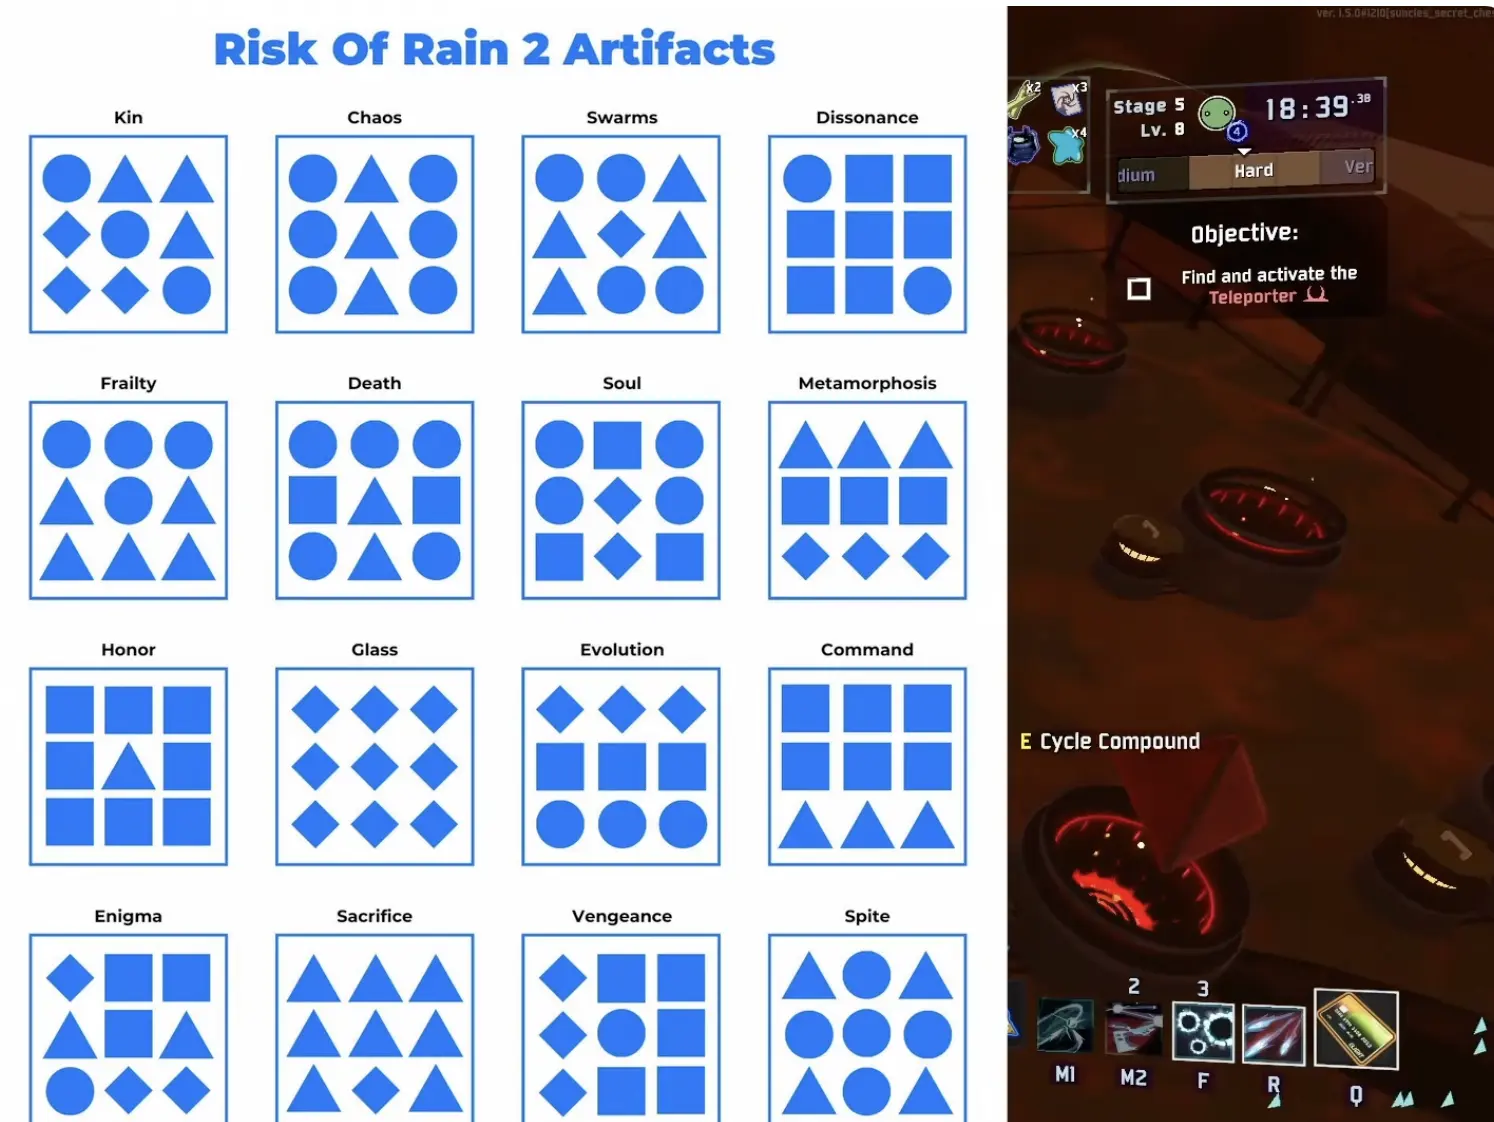
The generator requires a nine-symbol code. A convenient choice for this attempt is the Artifact of Command code.
Activate the generator after entering the code and take the portal to Bulwark’s Ambry.
You do not need to use Artifact of Command specifically. Another valid Artifact code can also open an encounter, provided you complete it and obtain the Artifact within the deadline.
Finish the Encounter and Claim the Artifact
Inside Bulwark’s Ambry, complete the Artifact Trial and collect the reward.
The timer still matters after entering the arena. You need enough remaining time to finish the encounter, not just to reach its entrance.
Common reasons for missing Tomb Raider include:
- Spending too long collecting optional items on the early stages.
- Reaching Sky Meadow without enough time left for the Artifact encounter.
- Searching around the generator area when you could already activate the portal.
- Completing the encounter too late to obtain the Artifact within 25 minutes.
If you reach the portal with very little time remaining, a fresh attempt with a faster early-stage route may be more practical than trying to rush an entire Artifact Trial.
Once the Artifact is obtained within the limit, Tomb Raider unlocks Laser Cyclone, Huntress’s alternate Secondary ability.
You do not need to defeat Mithrix or complete another ending afterward.
Engineer: Mad Scientist — Repair an Equipment Drone With a Fuel Array
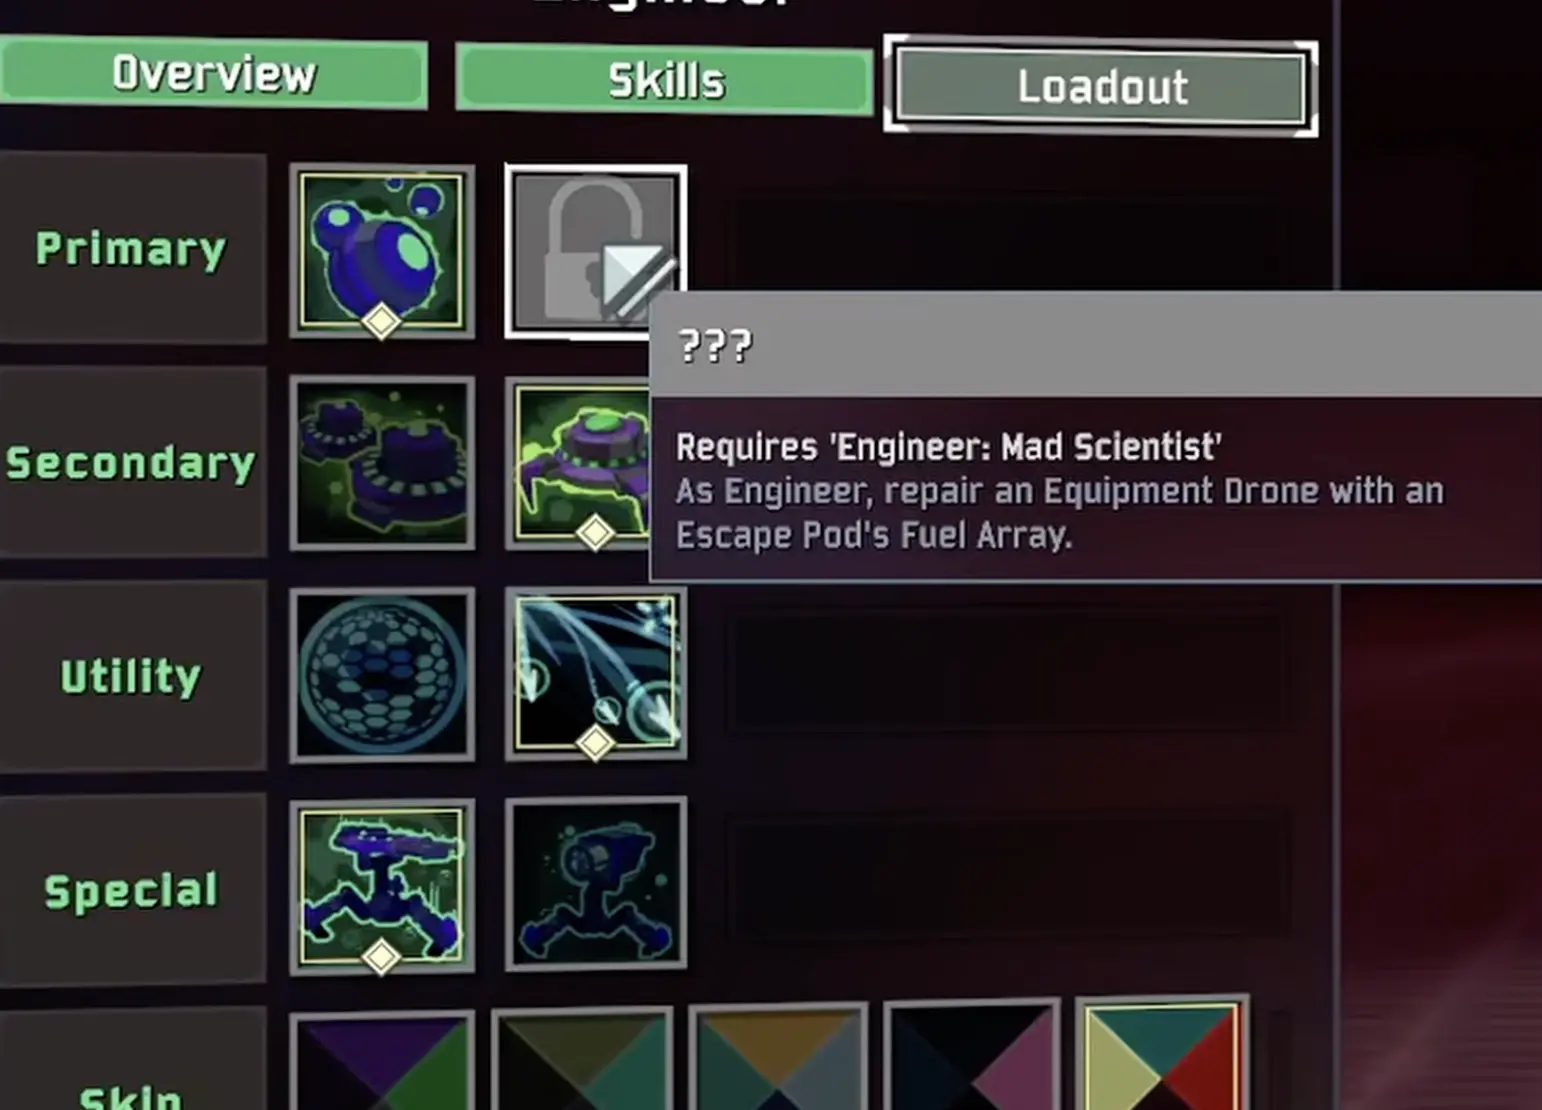
Requirement: As Engineer, repair an Equipment Drone using an Escape Pod’s Fuel Array.
Unlock: Laser Cutter — Primary
Skill effect: Laser Cutter can heal allied turrets and drones, giving Engineer another way to support his deployed allies.
Mad Scientist requires a particular equipment item and a particular type of Drone. The interaction itself is straightforward; carrying the Fuel Array safely until you find the Drone is the difficult part.
Take the Fuel Array From Your Starting Escape Pod
Begin a run as Engineer with an Escape Pod.
At the start of the first stage, move to the back of the pod and interact with its panel to obtain the Fuel Array.
The Fuel Array occupies your equipment slot. It is not used like ordinary equipment and cannot be activated manually.
Its dangerous effect is automatic: when your health falls to 50% of maximum health, the Fuel Array begins a 3-second countdown before exploding. The explosion deals severe damage and destroys the Fuel Array.
Once it has exploded, you no longer have the equipment required to complete Mad Scientist.
Keep the Fuel Array Intact
While carrying the Fuel Array, avoiding sudden damage is more important than building for maximum offense.
Useful precautions include:
- Keep your distance from Stone Golem lasers and other high-damage attacks.
- Avoid unnecessary close-range fighting during Teleporter events.
- Collect armor, health, and survivability items when available.
- Do not exchange the Fuel Array for another piece of equipment.
- Avoid activating Shrines of Blood while carrying it.
The explosion threshold is based on your maximum health. An ordinary encounter can become dangerous if one attack takes you from a comfortable health total to half health or lower.
Healing helps you survive regular combat, but it is not a reliable substitute for preventing the Fuel Array countdown in the first place.
Find an Equipment Drone
The required target is an Equipment Drone, not an ordinary Gunner Drone or Healing Drone.
Equipment Drones are interactables that normally receive the equipment you are carrying. Their appearance depends on the stage and its available interactable spawns, so there is no guaranteed Equipment Drone waiting at a fixed position in every run.
Search the environment for one while keeping the Fuel Array equipped.
When you find an Equipment Drone, interact with it while carrying the Fuel Array. The Drone receives the equipment, fulfilling the action required by Mad Scientist.
This unlocks Laser Cutter, Engineer’s alternate Primary ability.
You do not have to finish the run. If an Equipment Drone does not appear on the current stage, continue looking on subsequent stages while protecting the Fuel Array.
Artificer: One Giant Leap — Reach Mithrix Without Charging Pillars
Requirement: As Artificer, reach the final boss on the moon without activating any pillars.
Unlock: Tectonic Blast — Utility
Skill effect: Tectonic Blast applies oil to enemies, offering an alternative to Artificer’s existing Utility abilities.
One Giant Leap is a movement challenge. You must reach Mithrix without using the standard pillar-activation route, but you do not need to defeat him to satisfy the unlock.
Artificer’s Ion Surge is useful because it provides substantial vertical movement and can help bypass the normal ascent.
Equip Ion Surge Before the Run
Select Artificer and equip Ion Surge in the Special slot.
During the run, prioritize reaching Commencement with enough mobility to complete the ascent. Additional movement items can make difficult gaps or vertical sections easier to cross.
Once you arrive at Commencement, do not activate the moon’s pillars.
This includes the Pillars of Mass, Blood, Design, and Soul. Activating even one conflicts with the challenge’s requirement.
Bypass the Pillars and Reach the Boss
Instead of charging the pillars and using the normal launch sequence, look for a route that allows you to gain height toward Mithrix’s arena.
Use Ion Surge to rise, then take advantage of Artificer’s ability to remain airborne while positioning for another ascent.
The goal is to reach the upper arena without using a pillar. Movement items may help bridge gaps or recover from an unsuccessful ascent.
Take your time finding a workable path. One Giant Leap does not impose a short timer like Huntress’s Tomb Raider challenge.
Once you reach Mithrix without activating a pillar, One Giant Leap unlocks Tectonic Blast, Artificer’s alternate Utility ability.
Defeating the boss is optional for this challenge.
REX: Invasive Growth — Finish With 5 Different Lunar Items
Requirement: As REX, beat the game while carrying at least five different Lunar items.
Unlock: Proliferation — Utility
Skill effect: Proliferation deploys a flower that attacks nearby enemies and provides a location REX can teleport to. Unlike Engineer’s turrets, the flower does not inherit your items.
Invasive Growth is an inventory challenge tied to a successful ending.
You need five distinct Lunar item types, not five total Lunar item stacks. The required collection must still be present when you complete the game.
Choose Five Different Lunar Items
The Bazaar Between Time is a useful place to collect Lunar items because you can purchase them with Lunar Coins. Depending on what appears, multiple visits may be needed.
One possible five-item collection is:
- Gesture of the Drowned
- Beads of Fealty
- Brittle Crown
- Focused Convergence
- Corpsebloom
Beads of Fealty counts as a Lunar item, but carrying it when you obliterate at the Obelisk sends you to A Moment, Whole for an additional Twisted Scavenger encounter. If your goal is a straightforward victory, plan to finish through Mithrix instead.
These are examples rather than mandatory items.
Choose according to the drawbacks your REX build can handle. A combination that satisfies the item count but leaves you unable to defeat Mithrix is not a useful result.
Avoid Losing Your Survivor or Your Lunar Items
Two interactions can interfere with the achievement.
Heresy transformation: Individual Heresy items are distinct Lunar items, but collecting the complete transformation set changes your Survivor into Heretic. Do not rely on that transformation for an achievement that requires playing as REX.
Egocentrism: This Lunar item can consume other items over time. If it removes one of the Lunar types you need, your inventory may no longer satisfy Invasive Growth.
Once you have collected five different Lunar items, avoid inventory-changing effects that could reduce the count before the ending.
You can use ordinary items to improve damage and survivability without changing the number of different Lunar items.
Check the Final Inventory Before Completing the Run
Count the distinct Lunar item names still present in your inventory before committing to the ending.
Five stacks of Gesture of the Drowned count as one type. One each of five different Lunar items satisfies the diversity requirement.
Complete the game as REX while retaining at least five types to unlock Proliferation, his alternate Utility ability.
The achievement does not unlock merely because you picked up the fifth item. The successful ending is required.
Acrid: Miracle — Use a Shrine of Order and Beat the Game
Requirement: As Acrid, beat the game after sequencing your items at least once.
Unlock: Cloying Breath — Special
Skill effect: Cloying Breath leaves a lingering toxic cloud that deals 240% damage per second, making it particularly useful for Blight-focused builds.
Miracle requires one Shrine of Order interaction followed by a successful game completion.
A Shrine of Order reorganizes the items in your inventory by their rarity. It can turn a varied build into a much less flexible collection, which makes the timing of the interaction important.
Find the Shrine of Order on Commencement
A Shrine of Order is guaranteed to appear on Commencement, on a floating rock behind the area where the Pillars of Mass spawn.
From the Rescue Ship side of the stage, the Pillars of Mass area is toward the left.
Locate the Shrine before starting the Mithrix fight so that you know where to go if you decide to sequence your inventory afterward.

You can sequence your items before fighting Mithrix or during the escape after defeating him.
The two choices have different risks.
Sequence Before or After Mithrix?
Before Mithrix: Activating the Shrine before entering the final arena gives you more time to inspect the resulting inventory and adjust your approach. However, the new item distribution may make the boss much harder.
You could lose a useful balance of damage, healing, and movement and end up relying heavily on only a few item effects.
After Mithrix: Defeating the boss with your original build avoids weakening yourself during the fight. You can then visit the Shrine before returning to the Rescue Ship.
The problem is time. After Mithrix dies, the moon’s escape countdown begins, leaving only a limited period to reach the Shrine and return to the ship.
If you intend to use this approach, locate the Shrine beforehand and make sure you have enough mobility for the detour.
A slow or poorly positioned Survivor can lose the run by spending too much time reaching the Shrine, even after successfully defeating Mithrix.
Finish the Run After Sequencing
You only need to sequence your items once.
If you find a Shrine of Order earlier in a run and use it successfully, that interaction can also satisfy Miracle’s sequencing condition. You must still complete the game afterward.
For the Commencement approach:
- Reach the Shrine of Order before or after Mithrix.
- Activate it to sequence your inventory.
- If Mithrix is still alive, defeat him.
- Return to the Rescue Ship and finish the escape.
If the Shrine interaction succeeds but Acrid dies before completing the game, Miracle remains unfinished.
After the successful ending, check Acrid’s loadout for Cloying Breath, his alternate Special ability.