How Do You Progress in Once Human: Isles of Abyss?
Follow the Isles of Abyss main quest from Sunken Oath through Reefshadow Bay, Voyager, Gray Rock Mine Ruins, and Long Lament to Misty Marsh.
Updated:
Quick Answer
Finish the first warship objectives, equip a working cannon, and prepare for Sunken Oath. Defeat the tower, collect its reward, then follow the updated main quest marker toward Reefshadow Bay.
The first major stretch of Isles of Abyss connects two Calamity Towers through a series of quests that are easy to interrupt by exploring the wrong island or attacking the wrong ship. Sunken Oath opens the way toward Reefshadow Bay, the Voyager encounter provides a journal needed by Ran, and Gray Rock Mine Ruins leads into preparations for Long Lament.
The objectives are connected, but they do not always tell you exactly what is missing. A Voyager can be defeated without its treasure being collected. A new cannon technology can be learned without the required weapon being built on your ship. Even defeating a Calamity Tower does not finish its encounter until the reward has been claimed.
The practical route is to complete each objective before moving to the next region. Extra exploration is useful when you need materials or better equipment, but it should not replace the specific item, conversation, or construction step that advances the quest.
1. Build Your First Warship and Prepare for Sunken Oath
Your first major combat objective is the Sunken Oath Calamity Tower. Before approaching it, finish the water-territory construction tasks and make sure your ship can move, turn, and operate at least one cannon.
A basic vessel is enough for the first encounter. There is no need to spend your initial resources creating a large floating base when you still need ammunition, repairs, and equipment for the first major challenge.
Check the steering wheel, propulsion, and anchor before departure. A ship that remains stationary may simply have its anchor lowered or lack a working sail. Those issues are easier to correct while you are still near your construction area.
The Sunken Oath preparation objective recommends 60 cannonballs. That is preparation guidance rather than the number of hits required to win. Carrying more provides room for missed shots, particularly during your first attempt.
Once your weapon and ammunition are ready, track the Sunken Oath objective and sail toward its marked encounter.
Defeat Sunken Oath and Collect the Reward
Sunken Oath is fought aboard your ship. The tower attacks with large tentacles and area attacks that force you to maneuver while firing.
The basic sequence is straightforward:
- Approach the tower with enough space to turn your vessel.
- Attack the exposed tentacles with your ship’s weapons.
- Watch for the message indicating that the tower’s weak point is exposed.
- Fire at the vulnerable target to deal heavy damage.
- Continue clearing tentacles and attacking exposed targets until the tower is defeated.
Avoid remaining stationary while waiting for another shot. The tower’s attacks can cover a large area, and keeping the vessel moving makes it easier to avoid unnecessary damage.
When Sunken Oath falls, follow the new objective toward the beam at its base. Reach the reward location, open the Dusty Loot Crate, and claim its contents before leaving the encounter.
This step matters because destroying the creature and collecting its reward are separate actions. A player who sails away immediately can miss the encounter’s final objective.
Sunken Oath also unlocks Tier II Gear Crafting. Once the reward has been collected, leave the challenge and continue the main quest. The detailed tentacle mechanics and reward-collection process are covered in the Calamity Tower guide.
2. Speak to Malla and Travel to Reefshadow Bay
After Sunken Oath, continue the conversation with Malla. The recovered memory and her connection to the sea point toward Reefshadow Bay, the next important region.
Follow the new area objective rather than returning to Sunken Oath or searching for another tower immediately.
Once the regional exploration objective advances, the quest directs you to the Deepwind Shipping Company to meet Malla.
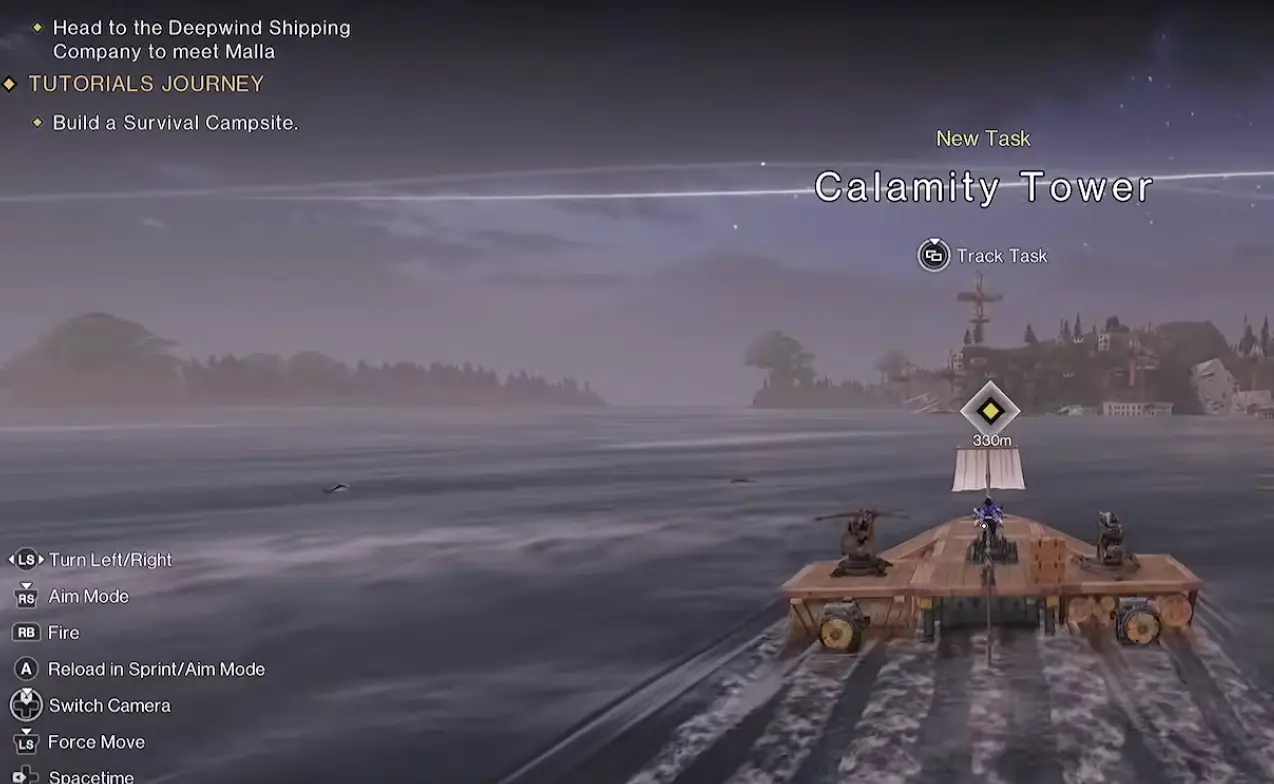
Sail toward the marked location, secure your vessel, and enter the company area. Speak to Malla and continue the conversation with Ran, who accompanies the investigation into the mist-covered sea.
This is also a useful place to activate the nearby Worldstone when you encounter it. Once available, fast travel can save you from sailing the same long route repeatedly while preparing equipment or returning to turn in an objective.
The area introduces a new environmental obstacle: Mist of Deceit.
Unlike ordinary bad weather, this phenomenon affects visibility and temperature. Running into a hostile area without the proper light can make it harder to find your objective, survive the cold, or recover after taking damage.
Before pursuing the next investigation, prepare the protective equipment requested by the quest.
3. Unlock and Use the Blaze Core Lantern
Ran’s investigation introduces the glowing resources found around Reefshadow Bay. The next preparation stage involves learning the appropriate technology and making a Blaze Core Lantern.
Return to your territory if necessary and check the current crafting and technology objectives. The quest includes equipment preparation and can require crafting a firearm rather than merely carrying a weapon you already owned.
Complete the displayed weapon preparation step, then locate the Blaze Core Lantern in the technology options and unlock the required recipe.
A Lantern crafting sequence has required Iron Ingots, making iron an immediate bottleneck when you have already spent most of your supply on weapons or base construction. Inspect the recipe before committing your remaining metal to optional facilities.
After crafting the Lantern:
- Put it in an accessible inventory or hotbar slot.
- Travel toward the marked Reefshadow Bay objective.
- Activate it when entering the Mist of Deceit.
- Monitor its remaining durability while exploring.
- Turn it off when the fog has cleared and protection is no longer needed.
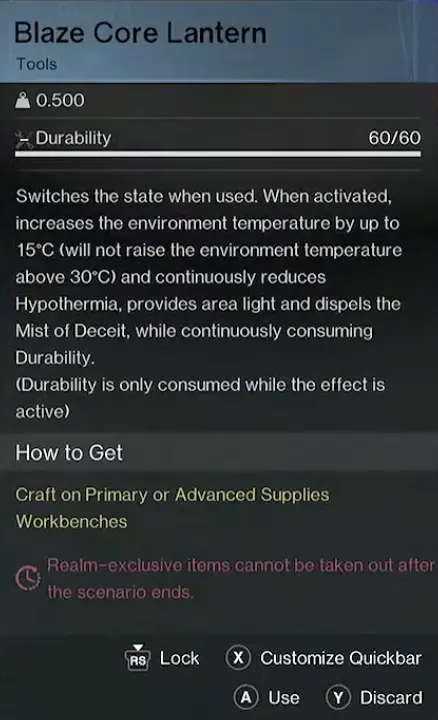
The Blaze Core Lantern has 60 durability and raises the surrounding temperature by up to 15°C, without increasing it above 30°C. While active, it reduces Hypothermia, provides light, and dispels Mist of Deceit.
Its durability is consumed only while the effect is active. Turn it off during calm weather to preserve the remaining durability for the next fog-covered area.
The Lantern can be crafted at a Primary or Advanced Supplies Workbench. Check that it is equipped and activated before entering the mist; simply carrying it does not provide the active effect.
Where Do You Get Mist of Deceit Wicks?
During active Mist of Deceit weather, look for Mist Core Grass and harvest it for Mist of Deceit Wicks.
A later ship preparation objective offers an optional task to gather 20 Wicks for improved cannonballs. Collecting them while exploring Reefshadow Bay can save another trip when you prepare for Long Lament.
Check the weather state before searching. Mist of Deceit alternates between active and dormant conditions, so the resources available during the active period may not appear during calmer weather.
4. Find a Voyager in Reefshadow Bay
The next major objective sends you into nearby waters to search for Voyagers and obtain the treasure aboard one of them.
This is one of the easiest stages to misunderstand.
A Voyager is an enemy ship that travels through the sea, not a stationary building or another Calamity Tower. Its position can vary because these ships patrol the surrounding waters.
The objective can appear with instructions to search for traces of Voyagers, stop or sink one, and obtain its treasure.
Finding the ship is only the first part of the mission. You still need its treasure.
How to Identify the Correct Ship
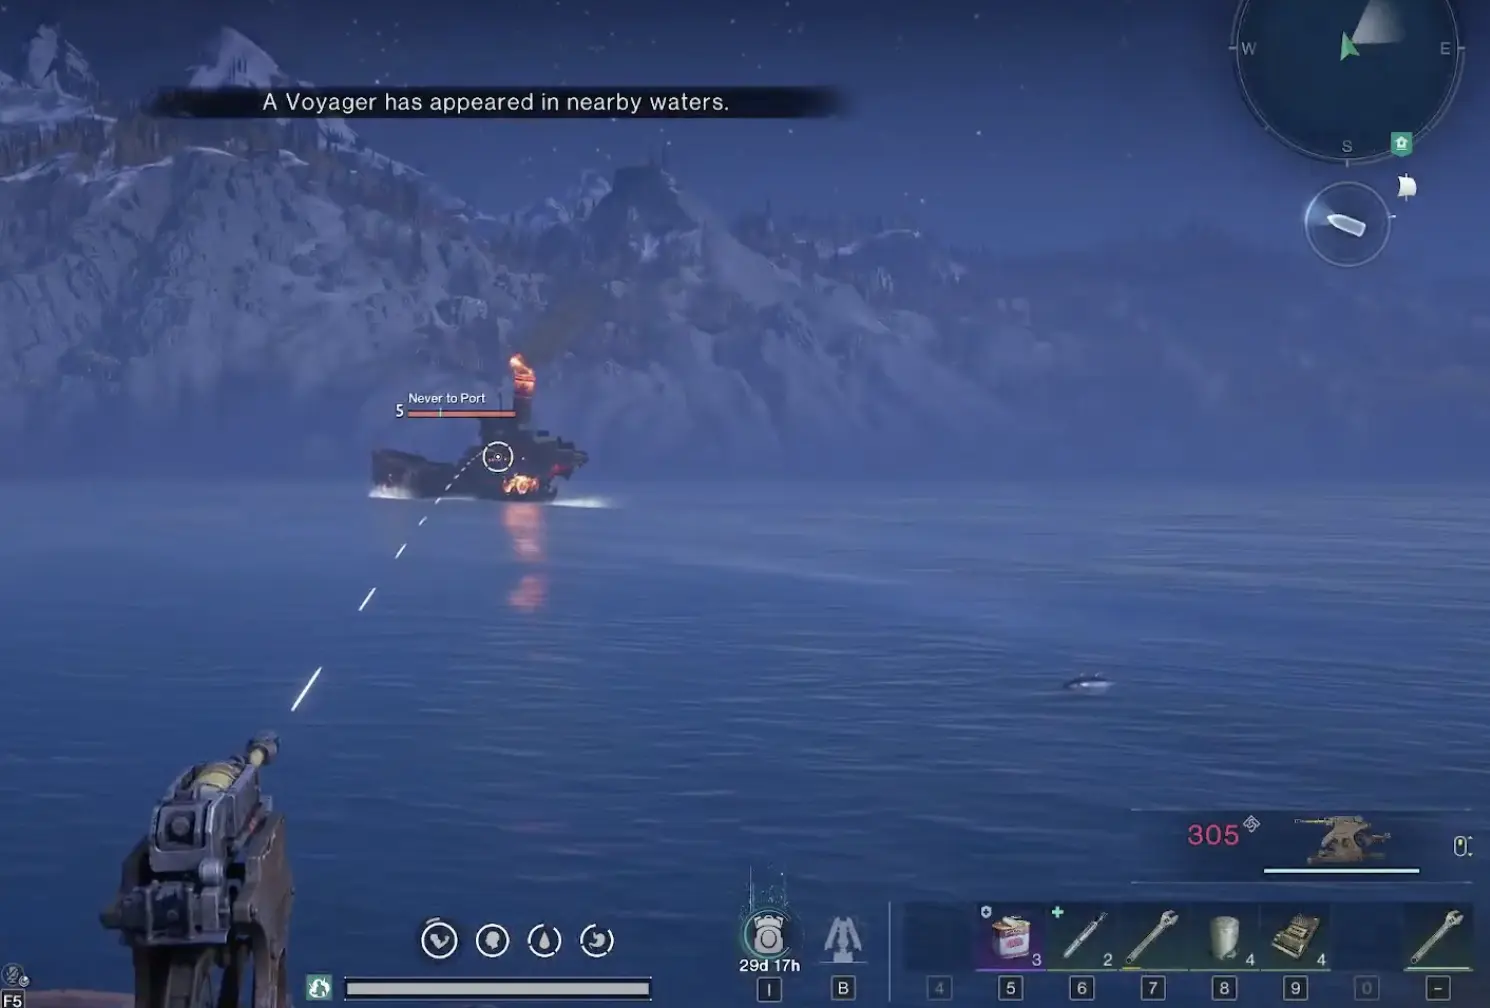
Track the Voyager objective and patrol the nearby waters. The game can display “A Voyager has appeared in nearby waters” when the encounter becomes available.
Use that notification to look for the enemy vessel, but do not rely on its displayed name alone to decide whether the mission is complete. The important confirmation comes later, when you recover the required treasure and the quest changes to returning the Voyager’s Journal to Ran.
Other hostile ships can appear in the same waters. A naval victory alone does not confirm that you have recovered the Voyager’s treasure, so keep checking the current quest objective before leaving the encounter.
Once the Voyager appears, approach with your ship’s cannons ready.
Stop the Voyager Without Losing Its Treasure
Attack the enemy ship until it is disabled and you can approach it safely.
During one successful encounter, the player damaged the Voyager with shipboard cannons, moved alongside it, and boarded to recover the quest treasure. The ship remained accessible long enough to enter and collect the required item.
The dangerous mistake is continuing to attack after you already have an opportunity to board.
A separate attempt ended with the target ship sinking before the treasure was secured. Although the enemy had been defeated, the required item was still missing, forcing another search for a Voyager.
Use the opportunity to board as soon as the enemy vessel is disabled and accessible. More damage is not useful when your real objective is inside its cargo area.
Board the Voyager and Recover the Journal
Bring your ship alongside the disabled Voyager and stop close enough to board.
The exact boarding angle may require repositioning. One successful attempt involved approaching the ship from another side to reach the cargo hold.
Once aboard:
- Enter the accessible part of the enemy ship.
- Clear hostile crew members blocking the cargo area.
- Find the ship’s treasure container.
- Open it and collect the quest item.
- Confirm that the objective now directs you to return the Voyager’s Journal to Ran.
The cargo hold may contain enemies even after the naval battle has ended. Enter with your weapon ready, especially if your ship took damage during the approach and you are already low on supplies.
Once the Journal has been collected, return to your vessel. Check its condition before traveling back to the Deepwind Shipping Company.
You do not have to continue searching for another Voyager when the quest item is already in your possession.
5. Return the Voyager’s Journal to Ran
Travel back to the Deepwind Shipping Company and speak to Ran.
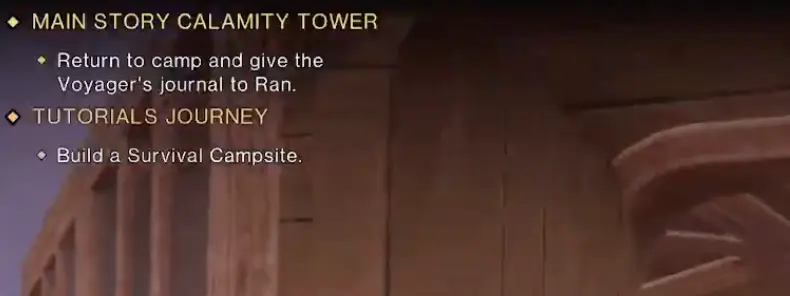
Hand over the Voyager’s Journal and continue the dialogue until the quest advances. Ran examines the account of the ship and discusses the dangers surrounding the next Calamity Tower.
The conversation establishes that heading straight into the next major confrontation without better equipment is dangerous. Ran identifies another place worth investigating before proceeding:
Gray Rock Mine Ruins.
Once this location appears as your next objective, collect any available quest rewards and prepare to leave.
The important distinction is that the Voyager’s defeat, the treasure recovery, and the Journal delivery are separate steps. A player who only completed the naval battle has not finished the investigation.
6. Explore Gray Rock Mine Ruins
After returning the Journal, follow the main quest marker toward Gray Rock Mine Ruins.
The objective sends you to investigate the ruins and prepare better equipment for the next stage of the story.
Bring your Blaze Core Lantern when the Mist of Deceit is active. The area can still expose you to fog, cold, and enemies while you are searching for supplies or completing local objectives.
Once you arrive, check the Worldstone. During the Gray Rock Mine Ruins investigation, a quest objective involves repairing the local Worldstone.
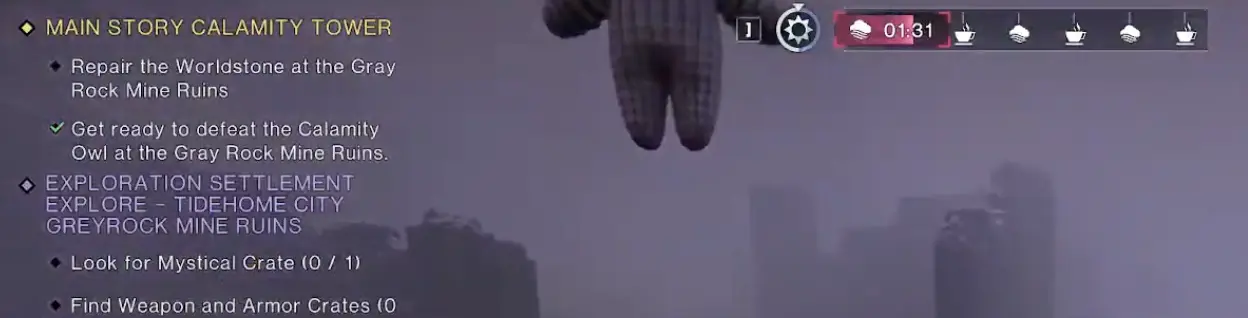
Complete the indicated interaction and continue exploring the marked location.
The ruins contain recoverable facilities and equipment as well as ordinary loot. A suitable Recycling Tool is useful here because machinery and other recoverable objects can contribute to your technology progression.
This is a good time to inspect equipment you cannot yet manufacture at home. Recovering a useful finished product may save Tech Points that would otherwise be spent on a direct unlock.
Keep the order of your current tasks in view. Optional crates and recoverable benches are worthwhile, but collecting every object on the island is not required to understand where the main story goes next.
Finish the Calamity Owl Preparation and Worldstone Objectives
The main story at Gray Rock Mine Ruins includes two important objectives:
- Get ready to defeat the Calamity Owl at the Gray Rock Mine Ruins.
- Repair the Worldstone at the Gray Rock Mine Ruins.
These objectives can have different completion states. The Owl preparation task may already have a checkmark while the Worldstone repair remains active.
Check the objective list before leaving the ruins. A completed preparation task does not mean the Worldstone has been repaired, and it does not by itself confirm that the Owl has already been defeated.
Follow the active Worldstone marker and complete its required interaction. When the main story advances to another objective, check your equipment and supplies before departing.
For a Calamity Owl encounter, keep ranged ammunition and healing supplies available. The Calamity Nest guide explains the Owl’s attacks, protective objectives, and solo combat mechanics.
Continue following the main quest after the Gray Rock objectives update. The next major ship preparation stage involves unlocking and building a new cannon.
7. Unlock and Build an Ice Cannon or Rapid-fire Cannon
Before Long Lament, the main quest requires an upgrade to your ship’s weapons. The preparation begins with a technology objective:
Unlock Rapid Fire Cannon or Ice Cannon via exploration or Tech Points.
You only need one of these technologies. Check your existing unlocks before spending points, since exploration may provide an alternative way to learn the required cannon.
Once the technology is available, check the updated objective. The next step requires:
Build an Ice Cannon or Rapid-fire Cannon on the ship.
Return to your vessel, enter Build Mode, and construct one of the required cannons. Learning its technology does not automatically place the weapon on your ship.
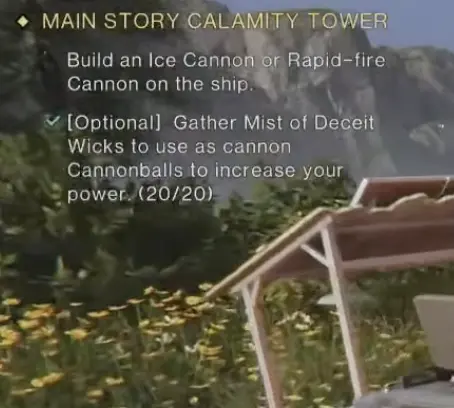
The objective list also includes an optional task to gather 20 Mist of Deceit Wicks for cannonball enhancement. Completing that collection can help with combat preparation, but the task is marked optional.
Do not delay the mandatory cannon construction solely because you have not collected all 20 Wicks.
After installing the cannon, confirm the main story has advanced. The weapon should be accessible from your ship’s combat controls before you sail toward Long Lament.
If construction is blocked by missing materials or technology, check the Tech Progression guide for the relevant unlock and crafting requirements.
8. Prepare Your Warship for Long Lament
Once your new cannon objective is complete, the next major challenge is Long Lament, a Level 20 Calamity Tower.
Do not head into the encounter merely because the new weapon is installed. Check your supplies first.
A Long Lament preparation sequence recommends at least 130 cannonballs. As with Sunken Oath, this is a preparation recommendation, not a guaranteed number of shots.
Before departing, make sure you have enough ammunition, repair any damage from previous Voyager encounters, and confirm that your newly installed cannon has a clear firing angle.
Before sailing, confirm that your installed cannon has a clear view past the sails and other deck structures. An obstructed firing angle can waste ammunition when Long Lament’s targets move.
A smaller, maneuverable warship can complete the challenge without requiring a large crew or a full rebuild. Reliable handling and a clear firing angle matter more than unused deck space.
Defeat Long Lament and Claim the Reward
Follow the quest marker to Long Lament and begin the naval encounter.
Defeat Long Lament and Claim the Reward
Follow the quest marker into the Long Lament encounter. Keep enough room to steer around the tower while destroying the active tentacles. When the exposed weak-point warning appears, redirect your attacks toward the vulnerable structure. Resume clearing tentacles as the encounter changes targets, and continue until Long Lament falls.
After the fight, follow the beam toward the tower’s base and collect the reward before exiting. Completing the encounter unlocks Tier III Gear Crafting and awards the Calamity – Memory Fragment: Long Lament.
If you cannot locate the exposed target or the reward after the battle, use the Calamity Tower combat instructions to finish the remaining encounter objective.
9. After Long Lament: Follow the Memory Toward Misty Marsh
Collect the Calamity – Memory Fragment: Long Lament and leave the encounter.
The recovered memory continues Malla’s investigation and introduces a new location: a swamp of dark water, tangled roots, and decay.
This points toward Misty Marsh.
Continue the conversation with Malla and Ran until your next objective appears, then check the world map for the newly indicated destination.

Before sailing into the new region, return to your territory if you need supplies or equipment repairs.
With Tier III Gear Crafting unlocked, check your available weapons and armor before entering Misty Marsh. A missing Weapon Body or Armor Lining can still prevent crafting, even after Long Lament is complete. Obtain the required component rather than repeating the tower; the Tech Progression guide covers the relevant material requirements.
Misty Marsh also introduces Black Tide, a different environmental hazard from Reefshadow Bay’s Mist of Deceit. Black Tide increases contamination and makes Sanity an important consideration when gathering certain resources.
The Blaze Core Lantern you used earlier should not be treated as a complete solution to every regional hazard. Check the environmental protection and supplies needed for the new area before entering a contaminated zone.
At this point, your immediate priorities are to follow the new main quest marker, carry the supplies needed for the next region, and take advantage of the Tier III equipment milestone.