How Do You Beat a Calamity Nest Solo in Once Human?
Find Calamity Nests, break the Owl's shield, survive Revenge, and earn rare ship tech without wasting time on a stronghold above your gear tier.
Updated:
Quick Answer
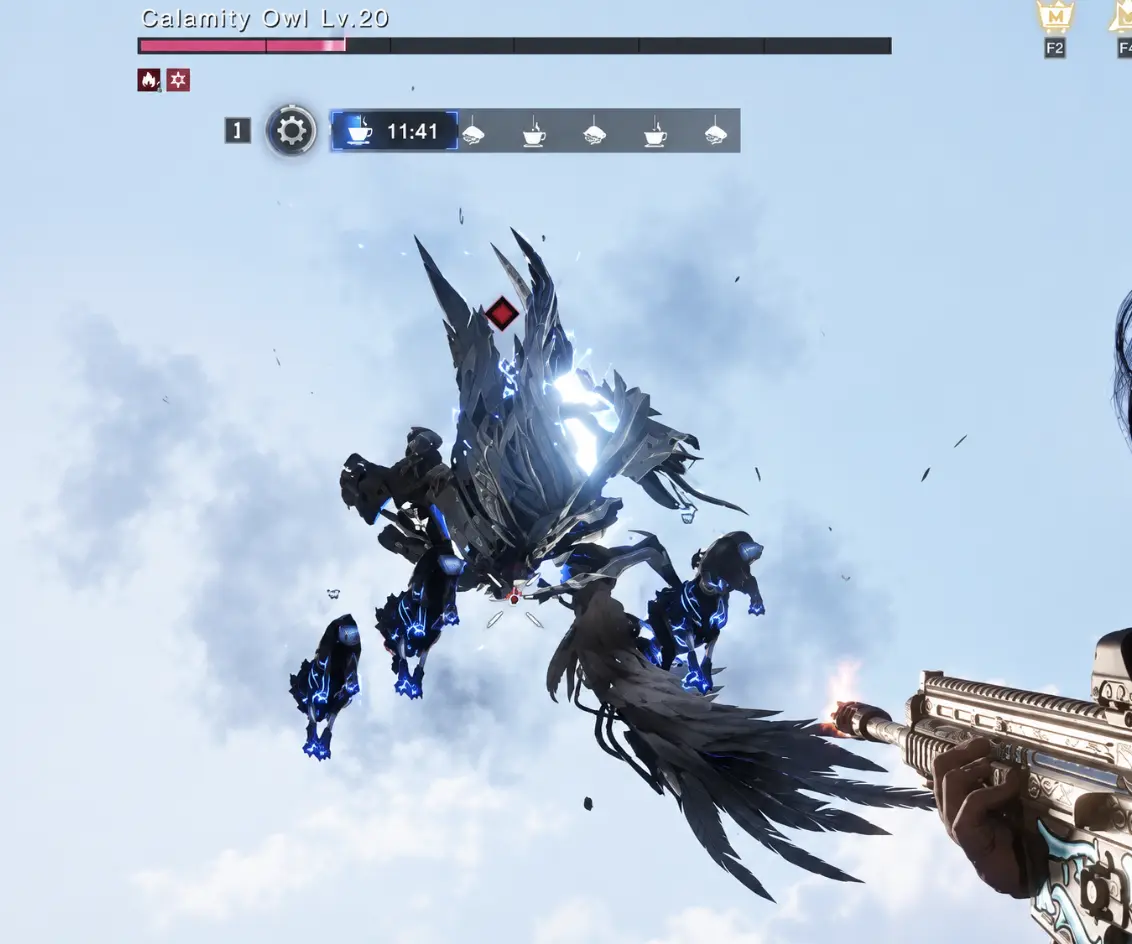
Find a Calamity Nest on the Isles of Abyss map and choose one close to your current combat level. Clear its defensive turrets and protection crystals, then fight the Calamity Owl. Dodge when Revenge disrupts your controls. If the Owl becomes immune and rises into the air, collect the fallen feathers and touch the floating light orbs to break its shield.
Calamity Nests are land strongholds scattered across the Isles of Abyss. Each is built around a Calamity Owl, but the enemies guarding it, the number of protective crystals, and the difficulty of the encounter vary. A small Nest is manageable alone with appropriate equipment. A higher-level one can overwhelm you before the Owl reaches its most dangerous phase.
The fight has two particularly punishing mistakes. The first is concentrating on the Owl while the Nest’s protection is still active. The second is continuing to shoot after the Owl becomes immune, instead of dealing with the objects suspended above the battlefield.
Both waste ammunition while enemies continue attacking. Once you recognize those states, the encounter becomes much more predictable.
Where to Find a Calamity Nest and Which One to Fight First
Open the world map and select a Calamity Nest marker before traveling. The encounter panel displays its Combat Level, Recommended Gear, and Partial Reward Preview.
One early Nest is marked Combat Level 5 with Recommended Gear: Tier 1. That gives you a much more useful starting point than judging difficulty from your character level alone. Compare both fields before choosing a harder Nest.
During Phase I, the map includes smaller and medium-sized Nests. Players have also encountered green and yellow markers, with green indicating the easier encounters and yellow the more demanding ones. The tougher variants bring additional enemies and defensive structures.
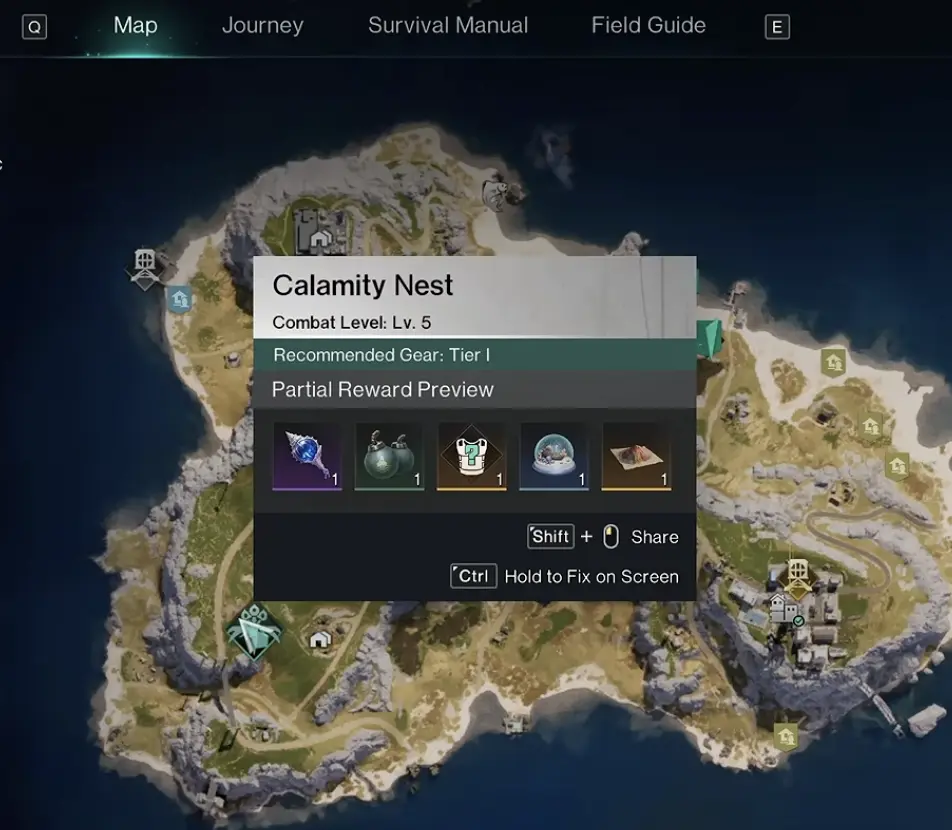
For an early solo attempt, choose a lower-level Nest instead of sailing straight toward the highest-level marker you can reach. The earliest encounters are available around Fragrant Cape, while higher-level Nests appear farther into the scenario, including the Skyfire region.
The difference matters most when you are still using low-tier weapons. Higher difficulty adds more enemies to manage, and clearing the defensive structures consumes ammunition before the actual Owl fight begins. A stronghold that takes several attempts to enter is rarely an efficient place to farm.
Match the encounter to the gear you can currently use, not your character level. Isles of Abyss begins with a high character level, but that does not mean every weapon tier is immediately available.
What to Bring for a Solo Calamity Nest
A Calamity Nest is fought on land with your own weapons. You do not need to assemble a heavily armed ship to damage the Owl, although you still need a vessel or another available travel route to reach the island.
Before entering, make sure you have:
- A usable ranged weapon: You need to hit protective crystals, defensive structures, summoned enemies, and the Owl without standing directly inside its attacks.
- Enough ammunition for the entire stronghold: The fight does not begin and end with the Owl’s health bar. Outer defenses and summoned enemies consume resources too.
- Healing supplies: Revenge and area attacks can make it difficult to recover once several enemies are attacking simultaneously.
- Appropriate gear durability: Repair damaged equipment before traveling to a difficult Nest rather than discovering a durability problem midway through the encounter.
Do not spend your remaining ammunition trying to finish a high-level Owl while ignoring its defensive structures. The encounter becomes more expensive the longer those defenses remain active.
A weapon that deals reliable damage without exhausting your ammunition supply is more useful here than a stronger weapon you can barely afford to fire. It is especially important during the opening portion of a Nest, where clearing enemies can take longer than the final damage phase.
How to Clear the Nest Before Fighting the Calamity Owl
The first objective is to disable the stronghold’s protection, not immediately empty your magazine into the boss.
Remove the Outer Defenses
Approach from a position where you can see the defensive turrets. Larger Nests can have several, and leaving them active makes movement around the battlefield much more dangerous.
Destroy the turrets that are covering your approach and eliminate nearby enemies when they prevent you from reaching the next objective. You can then move between structures instead of remaining exposed to several lines of fire.
The exact layout changes between Nests. Some are small enough to cross quickly; larger ones require more movement between defensive positions.
Destroy All Yellow Calamity Cores
Find the yellow Calamity Cores around the Nest and destroy them before committing to the Owl fight. Some are positioned beneath raised structures, where the surrounding platforms and defensive turrets can make them difficult to spot.
After destroying a core, the game displays “Destroyed 1 Calamity Core.” This confirms one target has been removed, not necessarily that the entire protection system is disabled. Continue checking the remaining structures and encounter objectives before attacking the Owl.
The number of crystals varies by encounter. Clearing only one does not necessarily disable the entire protection system. Check the remaining structures and the encounter state before assuming the Owl is ready to take normal damage.
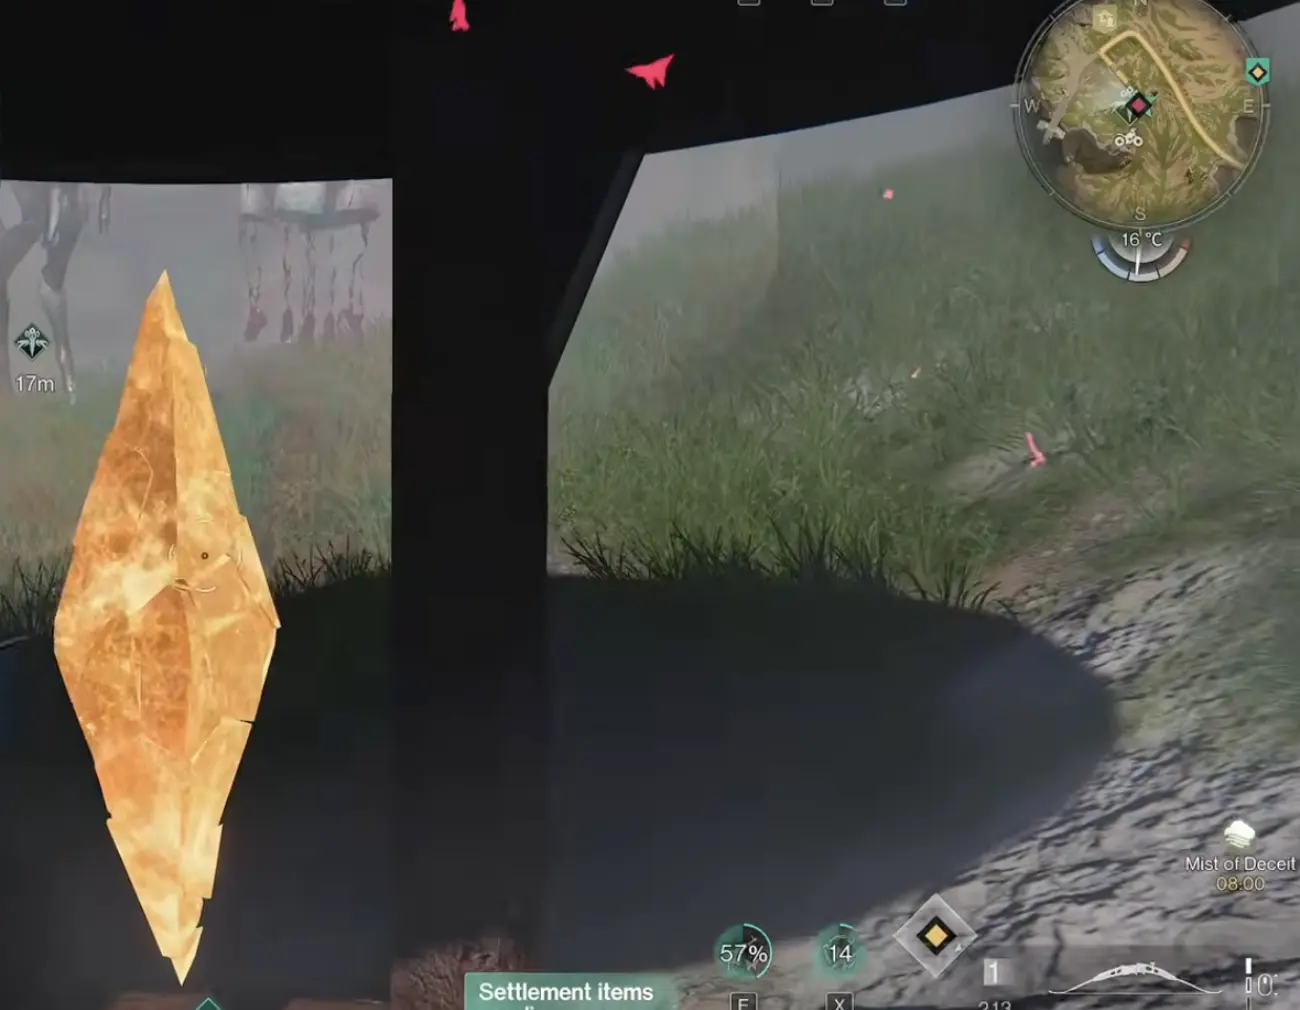
A common waste of time is staying in one firing position after the boss appears. If its protection is still active, more damage output will not solve the missing objective. Search the rest of the stronghold instead.
Once the protection is disabled, you can concentrate on the Owl itself.
How to Survive Calamity Owl’s Revenge Mechanic
The Calamity Owl summons additional enemies with its song and uses sound waves and area attacks to pressure players throughout the encounter. Fighting the boss without watching the surrounding enemies is particularly dangerous when playing alone.
Revenge changes which player the enemies concentrate on. The marked player becomes their main pursuit target and can suffer a disorienting effect that interferes with normal actions.
In a solo run, that means the pressure falls on you. When Revenge disrupts your movement or controls, dodge to remove the disorienting effect, then reposition before trying to resume damage.
The mistake is continuing to attack while surrounded. You may still have a clear shot at the Owl, but the additional enemies can interrupt your actions or force you into its next area attack.
Keep enough room to move around the stronghold, clear enemies that are immediately threatening you, and resume attacking the Owl during safer openings. Revenge also creates an opportunity to attack the boss, so its appearance is not simply a signal to retreat. The goal is to remove the control disruption and take advantage of the opening without remaining trapped among the summoned enemies.
With a group, teammates can protect the marked player and draw attention away from them. Solo players must handle that positioning themselves.
What to Do When the Calamity Owl Becomes Immune at Half Health
At approximately 50% health, the Calamity Owl can enter a different phase. It becomes immune while charging a shield, and some encounters extend the fight into the air.
This is the part of the fight where shooting harder accomplishes very little.
Watch for the fallen feathers and the glowing objects floating above the battlefield. The feathers provide a temporary zero-gravity or lift effect that lets you reach the airborne objectives.
To interrupt the shield:
- Stop concentrating fire on the immune Owl.
- Collect a fallen feather to gain the temporary lift effect.
- Use that movement to reach the floating light orbs.
- Touch the orbs to interrupt the shield charge.
- Resume attacking once the Owl becomes vulnerable again.
There is limited time to interact with these objects during the phase. Spending that window shooting at the Owl can leave its shield intact and prolong the encounter.
The aerial objects are the immediate priority. Move toward the nearest reachable one and continue until the protection is interrupted.
Lower-difficulty encounters may not present every mechanic in the same way. Watch the actual boss state and available interaction objects rather than assuming every Nest follows an identical sequence.
Why a Calamity Nest Solo Attempt Fails
Most frustrating attempts can be traced to the state of the stronghold rather than a single weak weapon.
The Owl is taking little or no damage. Check whether the protective crystals are still active. If it has already lost roughly half its health and risen into the air, look for the shield-interruption objects instead.
Enemies keep interrupting your attacks. Deal with the immediate threat, especially while Revenge is active. Dodging removes the disorienting effect, but you still need to move away from enemies that have surrounded you.
The shield phase seems to take forever. Collect the feathers and reach the floating orbs during the available window. Repeatedly firing at the protected boss does not end its charge.
The opening area is consuming too much ammunition. Leave the higher-level Nest for later if your equipment cannot clear the defensive turrets and enemies efficiently. Its reward potential is not helpful when you cannot reliably finish the encounter.
These are also the reasons a solo clear can feel substantially harder than a team clear. In multiplayer, one player can occupy the additional enemies while another completes an objective. Alone, the same player must do both jobs.
What Rewards Do Calamity Nests Drop?
Calamity Nests are worth revisiting because some of their rewards are not obtainable simply by spending Tech Points or discovering ordinary technology around the map.
Their reward pool includes:
- Exclusive technology: Examples include Black Tide Fuel, Alloy Ship Plates, and technologies associated with more powerful ship cannons.
- Progression and upgrade materials: Stardust Source, Mod Dust, Heart of the Ocean, and Armor Mod Selection Crates.
- Ship equipment: Cannon and turret rewards, with higher-tier variants among the valuable potential drops.
- Rare Deviations: Including Atomic Snail and the Snow Globe’s Sunken Treasure variant.
These are potential rewards, not a promise that every run will provide every item.
The Nest’s level and size affect its difficulty and reward opportunities. Larger encounters generally provide more loot, but also require clearing more enemies and defenses.
When to Return to a Harder Calamity Nest
After your first clear, check the next Nest’s Combat Level and Partial Reward Preview. A stronger encounter becomes worthwhile when it offers an item you need and your current equipment can clear its defensive turrets and Calamity Cores without exhausting your ammunition or healing supplies.
If you obtain a cannon technology but cannot build the equipment, inspect the remaining crafting requirements in Tech Progression before repeating the same fight.