How Do You Start Nomad Drive and Get Your First RV Moving?
Get your first vehicle running in Nomad Drive, find missing parts and coolant, survive the opening road trip, and decide when to switch to a larger RV.
Updated:
Quick Answer
Search the starting property for your vehicle’s missing parts, install the engine, radiator, battery, wheels, steering wheel, and handbrake as needed, then add fuel and coolant. Take food and drinking water, start the engine, release the handbrake, and follow the road toward your first supply stop.
Your first vehicle in Nomad Drive can look almost ready to drive while several essential components are still missing. You may have a working engine and a battery but no radiator installed, or find that three wheels are attached while the fourth is still somewhere inside the starting house.
The opening is easier once you separate the tasks that get the vehicle moving from everything you might eventually want to carry. The house contains furniture, food, equipment, and sometimes useful extras, but none of those decorations will help if the van cannot start.
The first objective is to leave with a functioning vehicle and enough supplies to reach another location. A larger RV, better equipment, and a proper storage arrangement can come later.
Set Up Your World Before Starting the RV
Nomad Drive lets you adjust the resource density when creating a world. Food, water, and vehicle parts can become easier or harder to obtain depending on those settings.
For a first attempt, Normal is a reasonable starting point. It allows you to learn vehicle assembly and scavenging without deliberately restricting supplies. A lower resource density can make the trip considerably less forgiving, especially when coolant or fuel becomes scarce before the next roadside stop.
The locations and available loot also matter. Starting with a particular world seed does not guarantee that every loose item will appear in exactly the same place on every new attempt. Two starts using the same seed produced different nearby supplies, including the number and type of backpacks.
Learn the assembly process rather than memorizing where one player found every object.
Multiplayer: Choose the Right Party Size Before Creating the World
If you plan to travel with friends, set the multiplayer capacity during world creation.
A two-player session could not simply accommodate an additional friend later by changing the player limit. The group had to create another world with more available places.
That is particularly inconvenient after you have already assembled the starter vehicle and driven away from the opening area.
For a group expecting three or four players, choose that capacity before starting. Use the session’s join code to invite friends, and make sure the intended players can connect before putting too much work into the vehicle.
Nomad Drive also has in-game voice chat. When you are already speaking through another voice application, check the audio settings to avoid hearing the same person twice.
Get the Starter Vehicle Running
Start by checking the vehicle itself. Walk around it and inspect the wheels, engine compartment, fuel tank, and driver controls.
Do this before moving furniture into the back. Finding out which parts are missing gives you a much shorter shopping list for the starting property.
The basic preparation can be handled in five passes:
- Inspect the outside. Look for missing wheels and any obvious gaps in the vehicle’s body or engine compartment.
- Check the engine area. Confirm that the engine, radiator, and battery are installed where required.
- Check the driver’s position. Locate the steering wheel and handbrake, and install any missing controls.
- Fill the vehicle. Check fuel and add coolant to the radiator.
- Load essential supplies. Take food, drinking water, and useful tools before attempting your first departure.
An early start included a vehicle that was still missing one rear wheel. The players initially believed they had searched everything outside, but continued checking the house and found more of the required components.
That is the first place to revisit when a part seems impossible to find.
Where Are the Missing Radiator and Handbrake?
Search the starting house carefully, including interior rooms, shelves, the floor, and upper storage areas where accessible.
In one start, both the radiator and handbrake were found inside the house after the players had already spent time looking around the vehicle.
Their exact positions should not be treated as permanent spawn locations, but the search pattern is useful: a missing component can be lying inside a room even when the starting vehicle is parked outside.
Bring the part to the vehicle and look for its corresponding installation slot.
One cooperative setup produced a confusing situation: a player thought the radiator had already been installed, while the other still saw an empty Radiator Slot.
They removed and repositioned the component until the installation could be recognized correctly.
The lesson is to check the vehicle’s actual slot after placing a part. A radiator resting on the ground or against the vehicle will not do the same job as one correctly fitted to its mounting point.
Where Does the Handbrake Go?
The handbrake may be mounted somewhere other than the location you expect.
In an Early Access starter vehicle, its installation position was on the dashboard, rather than between the driver and passenger seats.
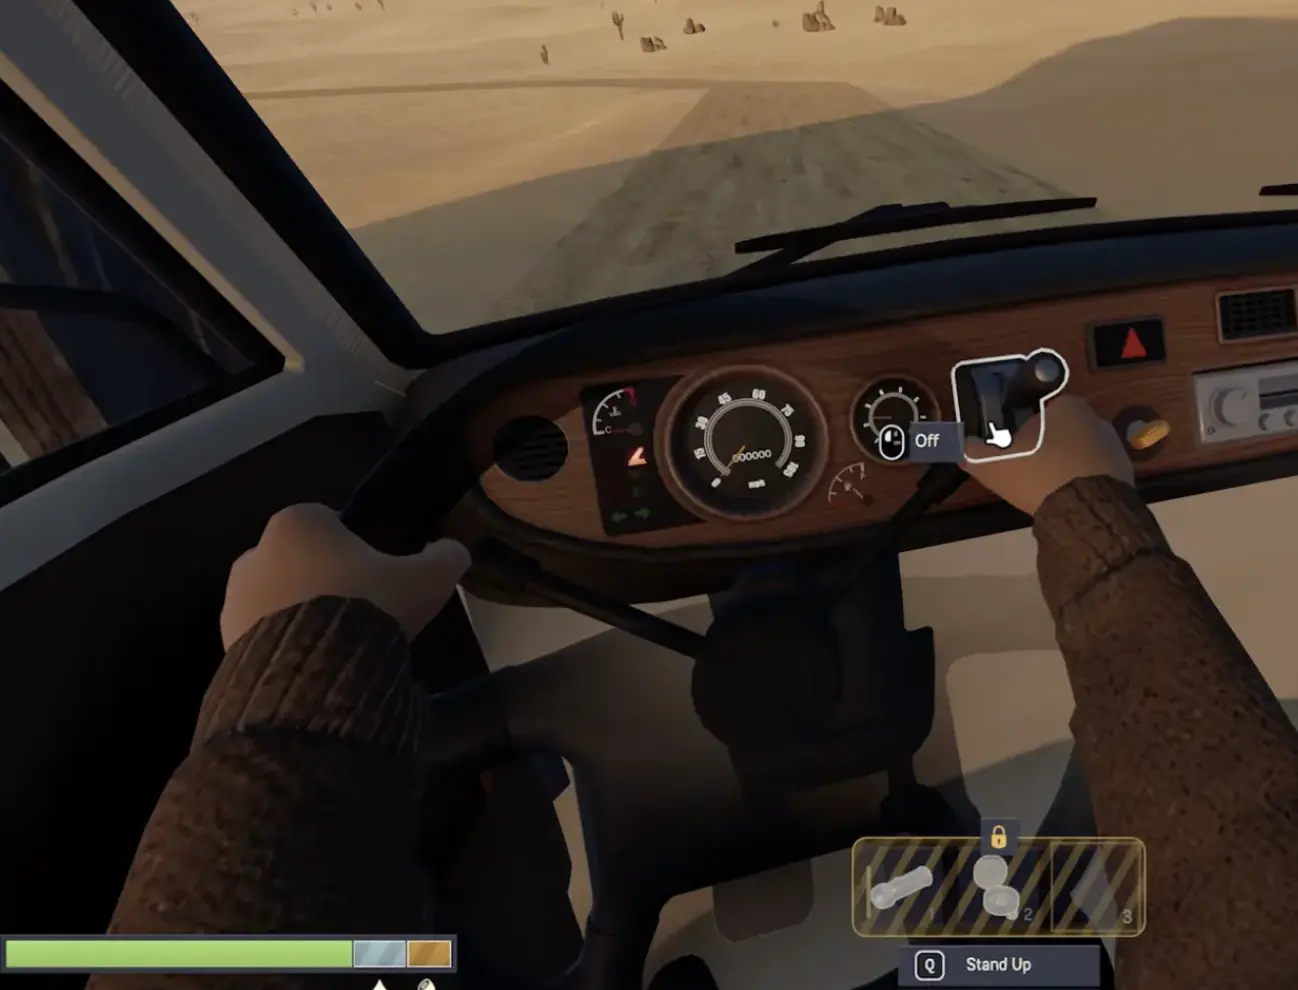
Search the front cabin for the attachment point before assuming that the part is incompatible.
This is especially important when you remember the interior arrangement from another vehicle or an earlier version of the game. The same control does not necessarily occupy the same physical position in every vehicle.
Headlights, decorative accessories, and extra interior equipment can be left until later. Get the controls required for driving into place first.
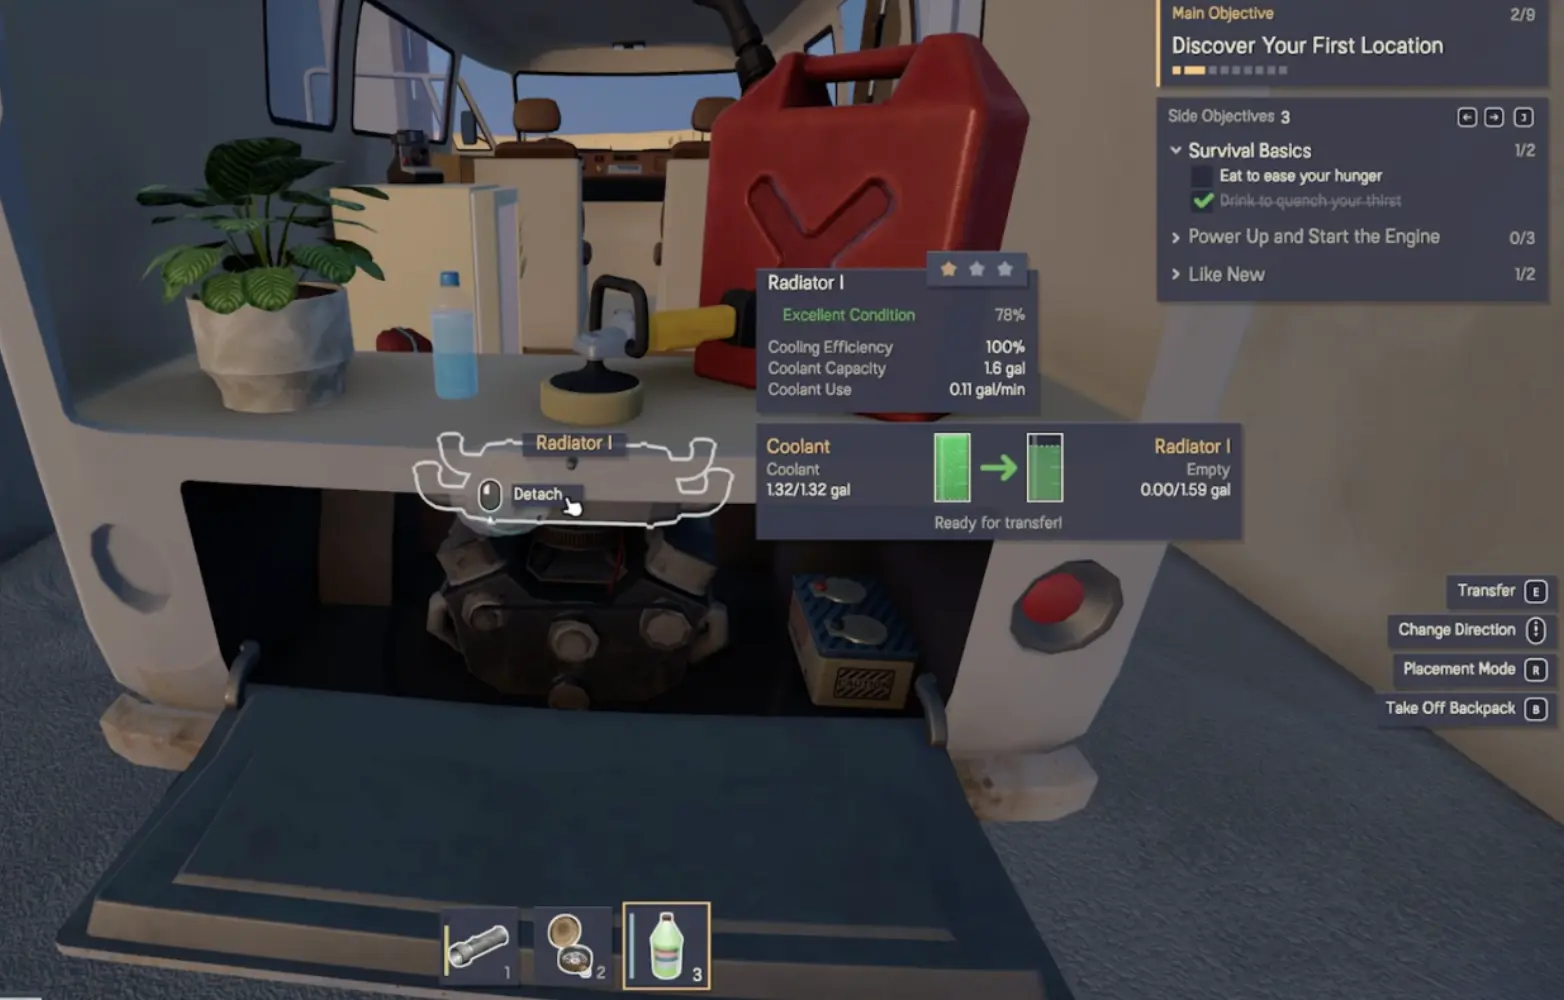
Fill the Radiator Before Your First Drive
A vehicle with an installed radiator is not necessarily ready for a long trip. Check what is inside it.
One first-day attempt began with only 0.44 L of liquid in a Radiator I after the players transferred a small amount of ordinary water. That was far below its 6 L capacity.
A green coolant container was then found nearby and used to fill the radiator before departure.
The two containers serve different immediate needs:
- Drinking water is important for the character’s survival.
- Coolant is the fluid to prioritize when preparing the radiator for normal vehicle operation.
Finding a dedicated coolant container is preferable to assuming a tiny amount of ordinary water will last for an extended drive.
Inspect the radiator after filling it. A successful transfer should increase the amount shown inside the installed component.
Be careful not to consume the coolant while trying to handle its container. Players have accidentally drunk coolant during the opening setup by using the wrong interaction.
The vehicle’s cooling system also needs attention after you start traveling. When overheating or damaged components become a problem, use the RV repair instructions to identify the failed part and recover without wasting repair supplies.
What Should You Take From the Starting House?
The house contains more than you can comfortably organize during your first few minutes.
Some starts provide refrigerators, backpacks, cabinets, food, drinks, and decorative objects. One opening property contained both a full-size fridge and a smaller one, while another provided a much more limited collection of useful equipment.
You can take furniture, but there is no need to turn the starter vehicle into a fully furnished home before your first drive.
Pack for the Next Stop, Not the Entire Journey
Prioritize supplies in roughly this order:
- Fuel and coolant: Keep the vehicle running long enough to reach another location.
- Drinking water and food: Maintain your character while exploring away from the vehicle.
- Backpack: Use the best available carrying capacity for collecting small items.
- Crowbar and useful tools: Some roadside containers require a tool to open.
- Compact storage: A convenient container can help keep smaller supplies together.
Food is not always suitable for indefinite stockpiling. Check its displayed condition when deciding what to keep, particularly before loading large amounts of perishable food.
A refrigerator is convenient if you find one, but carrying multiple fridges at the beginning can consume space better used for essential parts.
Backpacks also differ. An early backpack offered only one additional inventory slot. Compare the actual capacity before switching, because picking up another backpack does not guarantee a meaningful upgrade.
Can You Carry Large Objects in Your Inventory?
Not everything fits into backpack slots.
Larger furniture and vehicle components often need to be carried or physically placed in the vehicle. This makes loading more awkward than collecting a few cans of food.
Put heavy or bulky items somewhere accessible and avoid stacking your most important tools behind furniture. The first time you need a coolant bottle or crowbar, you should be able to retrieve it without unloading half the vehicle.
For a first trip, a modest load is easier to manage than a van packed tightly with objects you have not yet found a use for.
Start the Engine and Leave the Starting Area
Once the vehicle is assembled and supplied, enter the driver’s seat and use the available ignition control.
Release the handbrake before attempting to drive away.
A newly assembled vehicle may feel slow, especially when climbing away from the starting area. Avoid assuming that slow acceleration alone means an important component is missing.
Confirm that the engine is running and the vehicle responds to the controls before returning to the house to search for another part.
The road provides the natural route out of the starting area. It may branch, curve around the terrain, or pass signs and smaller roadside objects before reaching a larger building.
There is no need to leave the road immediately in search of a particular landmark.
Which Direction Should You Drive?
Nomad Drive does not require every player to make the same first turn.
The world and available roadside locations can vary. In one journey, the players chose a direction at the first junction and began looking for gasoline; in another, they followed the road through the desert and found only scattered objects before the first substantial settlement.
Follow the road and look for accessible locations where supplies can be collected. Side roads leading toward buildings are worth investigating when you have enough fuel to return.
A distant silhouette may turn out to be a billboard, rock formation, or abandoned vehicle rather than a settlement. Check what is actually there before committing to a long detour away from the main route.
How to Survive Your First Roadside Stops
The first useful stop is often a small group of containers, an abandoned vehicle, or a roadside building.
Fuel is usually the first thing worth looking for. Next come coolant, food, water, and tools that let you open more containers.
A stop may also contain a cassette, furniture, spray paint, or a better backpack. These are worth considering only after you have checked the supplies needed to continue traveling.
Check More Than the Inside of a Building
Useful objects can be located around the outside, inside containers, or on abandoned vehicles.
One early road trip included fuel and coolant found around roadside wrecks. Another stop offered a crowbar and additional supplies, but a second container was initially overlooked while the players concentrated on the main area.
Work around the location before departing:
- Inspect the abandoned vehicles and nearby containers.
- Check the building interior and accessible storage.
- Look around the outside for tools, fuel containers, or loose parts.
- Return to your vehicle with the most useful supplies.
- Check your fuel and coolant before leaving.
Crowbars are especially useful because some containers cannot be opened normally. They also have condition and wear, so a replacement can be worth collecting once the tool you are using is badly damaged.
A Metal Detector, shovel, or key can also turn a roadside stop into a treasure hunt. When you have those items, the buried treasure instructions explain how to locate and open hidden chests.
What If You Cannot Find Fuel?
Check the abandoned vehicles and portable fuel containers around your current stop before driving farther. If the tank is almost empty, a nearby container is more useful than another building that requires a long detour to reach.
Keep a jerry can if you find one, and transfer usable fuel into the vehicle before leaving. Avoid committing your last fuel to an uncertain destination. Once the van can reach another stop, return to following the road and its accessible supply locations.
Should You Replace Your Starter Van With a Larger RV?
A larger vehicle can become available surprisingly early.
In one road trip, a substantial RV was discovered at a roadside location not long after the first departure. The players decided to move into it rather than continue arranging all their furniture inside the original van.
The switch meant transferring useful equipment, choosing which vehicle components to keep, and reorganizing supplies inside a larger body.
That work takes time, but it becomes worthwhile when the new vehicle offers more useful space or a capability the starter van lacks.
Compare Fuel Capacity Before Switching
One early vehicle comparison showed a 35 L fuel tank on the smaller van and a 50 L tank on the larger RV.
That is an increase of 15 L in capacity for those two vehicles.
The larger tank can hold more fuel, although it does not prove that the new vehicle will travel farther on every liter. Engine specifications, vehicle weight, and driving conditions still matter.
Check the fuel tank reading on the vehicle you actually find. A larger exterior does not guarantee the same fuel capacity or performance as another player’s RV.
Interior access and storage can also influence the decision. A bigger vehicle may have more room for equipment, and some RV designs offer storage compartments that are much more convenient than carrying everything loose in the cabin.
Move the Useful Parts Before Leaving the Old Vehicle
Changing vehicles is more than moving your belongings.
Check the new RV’s wheels, engine, battery, radiator, and driving controls before trying to leave. Some parts may already be installed; others may need to be transferred from the old vehicle or replaced with parts found nearby.
The most reliable sequence is:
- Inspect the new vehicle and identify what it already has.
- Compare its available parts with those on your current van.
- Transfer necessary components and driving controls.
- Move the supplies you actually intend to keep.
- Confirm that the new vehicle has fuel and coolant.
- Start the replacement vehicle before abandoning the old one.
The final step matters because a larger vehicle without a working engine or the correct installed parts is not an upgrade you can drive away in.
Consider the amount of equipment you have accumulated. Moving a modest collection of food, tools, and a few accessories is manageable. Relocating a densely furnished vehicle can become a project of its own.
I would postpone major decorating until finding a vehicle I expect to keep for a while. The early road trip gives you several opportunities to discover something larger or more useful before committing to an elaborate interior.
What Should You Do With Your First Blueprints?
Some roadside locations contain Ladder and Roof Rack Blueprints.
These can improve how you use a vehicle. A ladder makes roof access convenient, while a roof rack provides an additional place for equipment.
The important decision is which vehicle should receive the upgrade.
In one early journey, players found roof-related blueprints while still using a temporary starter vehicle. They chose to carry some blueprints forward rather than immediately apply everything to a van they expected to replace.
That avoids investing useful upgrades in a vehicle you are about to abandon.
Later, a ladder blueprint was installed successfully on a larger RV, allowing access to the roof from the side of the vehicle.
If you have just found a promising replacement RV, finish the vehicle change before deciding where to use the blueprint. If the starter van is likely to remain your main vehicle for a long time, installing the upgrade earlier may be worth the convenience.
The benefit depends on what you need to carry and how frequently you access the roof.
What Should You Do After Your First Supply Stop?
Once you have collected fuel, coolant, food, and a few useful tools, check that the vehicle can continue before leaving the location. You do not need to furnish the van or collect every object before advancing.
Follow the updated Main Objective and continue along the road. If you find a larger RV, compare its condition and usable space before transferring your equipment. For the later Grassland and Winterland objectives, follow the Nomad Drive progression steps.