Lost Castle 2 Memory Shards and Hidden Mage Tower Guide
A practical Lost Castle 2 Memory Shards and Hidden Mage Tower guide explaining all 11 shards, Nightmare 3 routing, boss sources, camp shard checks, Frozen Cavern, Nia, and the final unlock trigger.
Updated:
Quick Answer
To unlock the Hidden Mage Tower in Lost Castle 2, collect all 11 Memory Shards, confirm them in the camp shard screen, then start the final route through Frozen Cavern. The route is mainly built around Nightmare 3, repeated boss clears, Nia progression, and the final Phantom of the Lost Swordsman sequence where Nia joins the hidden-route trigger.
What This Guide Solves
This guide is for the point where vague advice stops helping.
If you are searching for Lost Castle 2 Memory Shards, you probably want one of these answers:
- how many Memory Shards exist;
- which shard name you are missing;
- which boss or route source you should check next;
- how to trigger Hidden Mage Tower after collecting all shards.
| If you are stuck on… | Use this part of the guide |
|---|---|
| How many shards exist | All 11 Memory Shards Checklist |
| Which shard is missing | Camp shard screen and missing-shard diagnosis |
| Where to farm shards | Boss and route source table |
| Final route not triggering | Frozen Cavern and Phantom of the Lost Swordsman sequence |
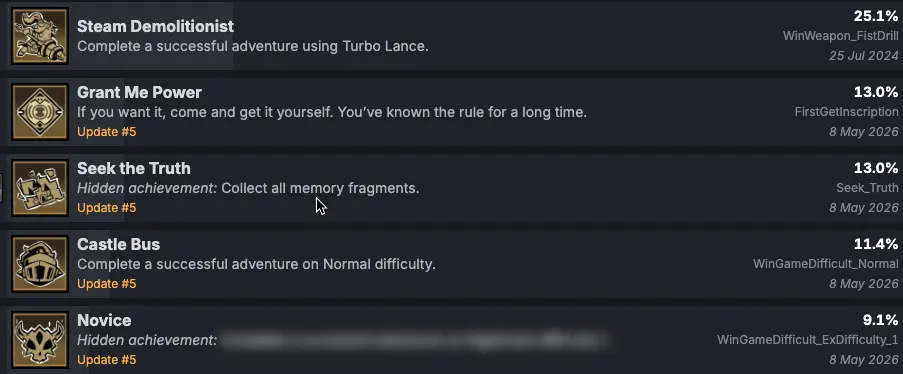
| Achievement cleanup | Seek the Truth, Open the Gate, Unknown Realm, and Mage Tower achievements |
All 11 Memory Shards Checklist
The Hidden Mage Tower route is built around 11 Memory Shards. You do not need to collect them in one run, but you should confirm each shard in the camp shard screen before starting the final Frozen Cavern trigger route.
| # | Memory Shard |
|---|---|
| 1 | Obsession Memory Shard |
| 2 | Fallen Memory Shard |
| 3 | Fearless Memory Shard |
| 4 | Despair Memory Shard |
| 5 | Luminous Memory Shard |
| 6 | Dark Icy Memory Shard |
| 7 | Malice Memory Shard |
| 8 | Warmth Memory Shard |
| 9 | Conviction Memory Shard |
| 10 | Fortitude Memory Shard |
| 11 | Fragrant Memory Shard |
Requirements Before You Start
Do not chase Memory Shards during early normal progression. This route belongs to later Nightmare play.
The clean baseline is:
| Requirement | Why it matters |
|---|---|
| Ethereal Nightmare unlocked | Memory Shards belong to late progression |
| Nia available in camp | Nia connects Nightmare, shards, and the final hidden route |
| Nightmare 3 is realistic | The main shard route is built around Nightmare 3 farming |
| Your boss damage is stable | Several shard checks are tied to boss and branch routes |
| You can survive cursed or branch rooms | Some sources are not simple main-path bosses |
| You check camp after runs | The shard screen tells you what actually changed |
Once these requirements are ready, your route is simple: farm Nightmare 3 boss and branch sources, check the camp shard screen after each successful run, then start the Frozen Cavern trigger only after all 11 Memory Shards are recorded.
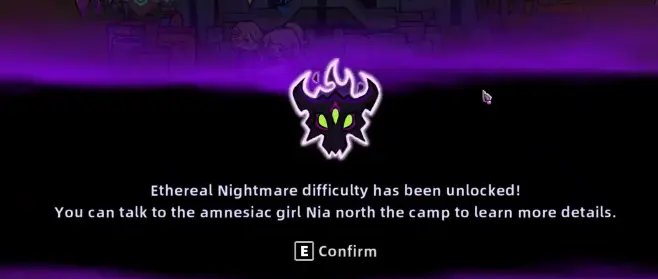
For the unlock path and Nightmare depth planning, use the Ethereal Nightmare Guide.
Where Memory Shards Can Drop
The most useful way to farm Memory Shards is to think in terms of priority sources, not random runs.
Some drops can depend on route state and Nightmare progress, so use this table as a source checklist. After each successful run, return to camp and check which shard was recorded.
| Priority source | Route note | What to do |
|---|---|---|
| Steward the Demon Sealer | Major repeated shard source | Clear him consistently and check camp after each successful route |
| Wandering Knight | Fourth-region boss source | Keep this route in your rotation if late shards are missing |
| Nightmare Maid | Fourth-region boss source | Check this route when your camp screen still lacks late shards |
| A Mysterious Shadow | Castle Dungeon / hidden boss source | Clear the route and check post-boss progress carefully |
| Mad Gardener | Early-region boss source | Do not ignore early-region boss checks during shard farming |
| Castle cursed-room route | Non-standard route source | Enter cursed rooms only when your build can survive them |
| Fourth-region entrance route | Route pickup / late-route source | Slow down when entering the region and check for route progress |
| Frozen Cavern route | Final trigger route | Use this after all 11 shards are recorded |
Steward the Demon Sealer Farming
If you only remember one source, remember Steward the Demon Sealer.
He is one of the most important shard-farming checks, and you should expect repeated clears rather than one clear solving the whole list.
| Steward farming rule | Why it matters |
|---|---|
| Repeat successful clears | Multiple shard checks can pass through this route |
| Check camp after each clear | The camp screen confirms whether the run changed your shard state |
| Bring boss damage | Long Steward fights make farming inefficient |
| Keep one survival answer | Failed runs slow shard progress |
| Do not overcommit during shield windows | Clean clears matter more than risky burst attempts |
For Steward and Demon Lord fight prep, use the Lost Castle 2 Boss Guide.
Use the Camp Shard Screen
After each successful shard route, return to camp and check the shard screen.
This is the most important habit in the whole route. It prevents you from repeating the wrong source and tells you exactly which Memory Shard is still missing.
| Camp check | What to confirm |
|---|---|
| A new shard appears | Mark that shard as complete before starting another run |
| The same shard list remains | Rotate to a different source |
| Only one shard is missing | Use the missing-shard table before farming again |
| All 11 shards are recorded | Start the Frozen Cavern trigger route |
| Final route does not trigger | Return to camp and confirm the full 11-shard list again |
Missing Shard Diagnosis
If you already have 8-10 Memory Shards and the route stops moving, do not keep running random low-value routes. First open the camp shard screen, confirm the exact missing name, then choose the next run based on the shard you still need.
| Missing shard | Best next check |
|---|---|
| Despair Memory Shard | Repeat deeper Nightmare boss routes, especially Steward and fourth-region routes |
| Luminous Memory Shard | Recheck the camp shard screen, then rotate late-route bosses instead of early bosses |
| Dark Icy Memory Shard | Prioritize Frozen Cave, cursed-room, and deeper Nightmare route checks |
| Malice Memory Shard | Repeat branch boss and cursed-route sources instead of only farming early areas |
| Conviction Memory Shard | Check late-route bosses and confirm the shard is recorded in camp before starting the final trigger |
| Fortitude Memory Shard | Rotate Steward, fourth-region bosses, and branch routes if your camp screen still shows it missing |
| Fragrant Memory Shard | Recheck route sources tied to branch bosses and non-standard rooms |
| Any single missing shard | Stop guessing. Confirm the name in camp, then rotate the boss and route sources that can still produce shard progress |
Final Trigger: Frozen Cavern and Phantom of the Lost Swordsman
After all 11 Memory Shards are collected and recorded, the final trigger does not happen by standing in camp.
Start a new Nightmare route and push to Frozen Cavern. The final sequence is tied to Phantom of the Lost Swordsman and Nia.
| Step | What happens |
|---|---|
| 1 | Collect all 11 Memory Shards |
| 2 | Confirm the full shard list in camp |
| 3 | Start a new Nightmare route |
| 4 | Reach Frozen Cavern |
| 5 | Enter the route with Phantom of the Lost Swordsman |
| 6 | Let the Nia sequence play out |
| 7 | Defeat Phantom of the Lost Swordsman |
| 8 | Move into the next room after the fight |
| 9 | Trigger the hidden-route dialogue |
| 10 | Continue into Hidden Mage Tower / Black Castle gate progression |
What Unlocks After the Shard Route
The Memory Shard route connects directly into hidden achievements and Mage Tower progression.
| Achievement / route | What it means |
|---|---|
| Seek the Truth | Collect all memory fragments |
| Open the Gate | Successfully open the gate of the Black Castle |
| Unknown Realm | First enter the hidden area of the Mage Tower |
| Sweet Dreams | Defeat the Source of the Nightmare in the Mage Tower |
| Mastermind | Defeat Lord Alfred in the Mage Tower |
| United Blades Against Chaos | Defeat The Deceitful Chaos God in the Mage Tower |
For achievement cleanup, use the Lost Castle 2 Achievements Guide.
Build Prep for the Shard Route
This page is not a full build guide, but the shard route still needs a stable build.
You need enough damage to repeat boss routes, enough safety to survive cursed or branch rooms, and enough consistency to finish Frozen Cavern without wasting the final trigger attempt.
| Build check | Why it matters |
|---|---|
| Boss damage is stable | Steward and branch bosses should not take forever |
| One survival layer is active | Repeated routes punish fragile builds |
| Weapon preferences are set | Random weapon pools waste shard attempts |
| Alchemy has a job | Save tools for bosses, cursed rooms, or Frozen Cavern |
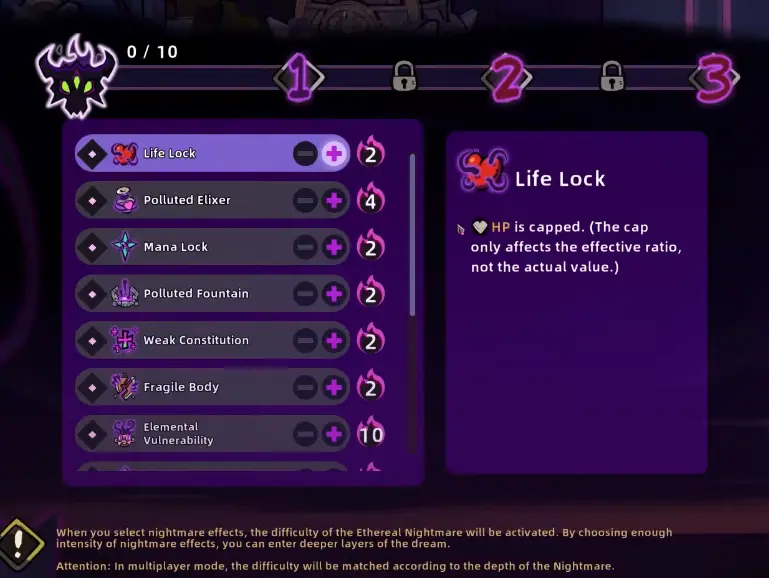
| Nightmare effects are manageable | Do not pick effects that attack your weakest point |
| The route is repeatable | Shard farming is about consistency, not one lucky clear |
For full build planning, use the Lost Castle 2 Builds Guide. For Nightmare effect choices, use the Ethereal Nightmare Guide.
Full Route Summary
Use this condensed route when you only need the checklist.
| Phase | Goal |
|---|---|
| Unlock Nightmare | Clear the required progression and talk to Nia |
| Push Nightmare 3 | Use a stable build and repeat boss routes |
| Collect 11 shards | Obsession, Fallen, Fearless, Despair, Luminous, Dark Icy, Malice, Warmth, Conviction, Fortitude, Fragrant |
| Check camp | Confirm shard names in the camp shard screen |
| Farm missing shards | Rotate Steward, fourth-region bosses, branch bosses, cursed rooms, and late-route checks |
| Start final trigger | Begin a new Nightmare route after all 11 shards are recorded |
| Reach Frozen Cavern | Continue to Phantom of the Lost Swordsman |
| Clear the sequence | Let the Nia sequence play out, defeat the boss, and move forward |
| Unlock Mage Tower | Follow the hidden dialogue and gate progression |
| Clean up achievements | Seek the Truth, Open the Gate, Unknown Realm, Sweet Dreams, and later Mage Tower boss goals |
FAQ
How many Memory Shards are in Lost Castle 2? +
There are 11 Memory Shards for the Hidden Mage Tower route: Obsession, Fallen, Fearless, Despair, Luminous, Dark Icy, Malice, Warmth, Conviction, Fortitude, and Fragrant.
Do Memory Shards need to be collected in one run? +
No. Memory Shards persist between runs. After each successful shard route, return to camp and check the shard screen to confirm which shards are already recorded.
What difficulty should I use for Memory Shards? +
The route is mainly built around Nightmare 3 progression. If your lower-depth runs stop giving useful progress, move your shard farming into Nightmare 3 with a stable build.
How do you unlock Hidden Mage Tower in Lost Castle 2? +
Collect all 11 Memory Shards, confirm them in the camp shard screen, start a new Nightmare route, reach Frozen Cavern, complete the Phantom of the Lost Swordsman sequence with Nia, move into the next room, and trigger the hidden route dialogue.
Which bosses should I check for Memory Shards? +
Priority shard checks include Steward the Demon Sealer, Wandering Knight, Nightmare Maid, A Mysterious Shadow, Mad Gardener, Castle cursed-room routes, fourth-region route checks, and the final Frozen Cavern sequence.
What is Seek the Truth? +
Seek the Truth is the hidden achievement for collecting all memory fragments. It confirms the Memory Shard collection part of the route.
What should I do if I am missing one Memory Shard? +
Open the camp shard screen, confirm the exact missing shard name, then rotate likely boss and route sources instead of farming random low-value runs.