Funnel Runners Solo Guide
Complete a solo run with a full-map search route, strict inventory priorities, practical Vitastation purchases, and clear return decisions.
Updated:
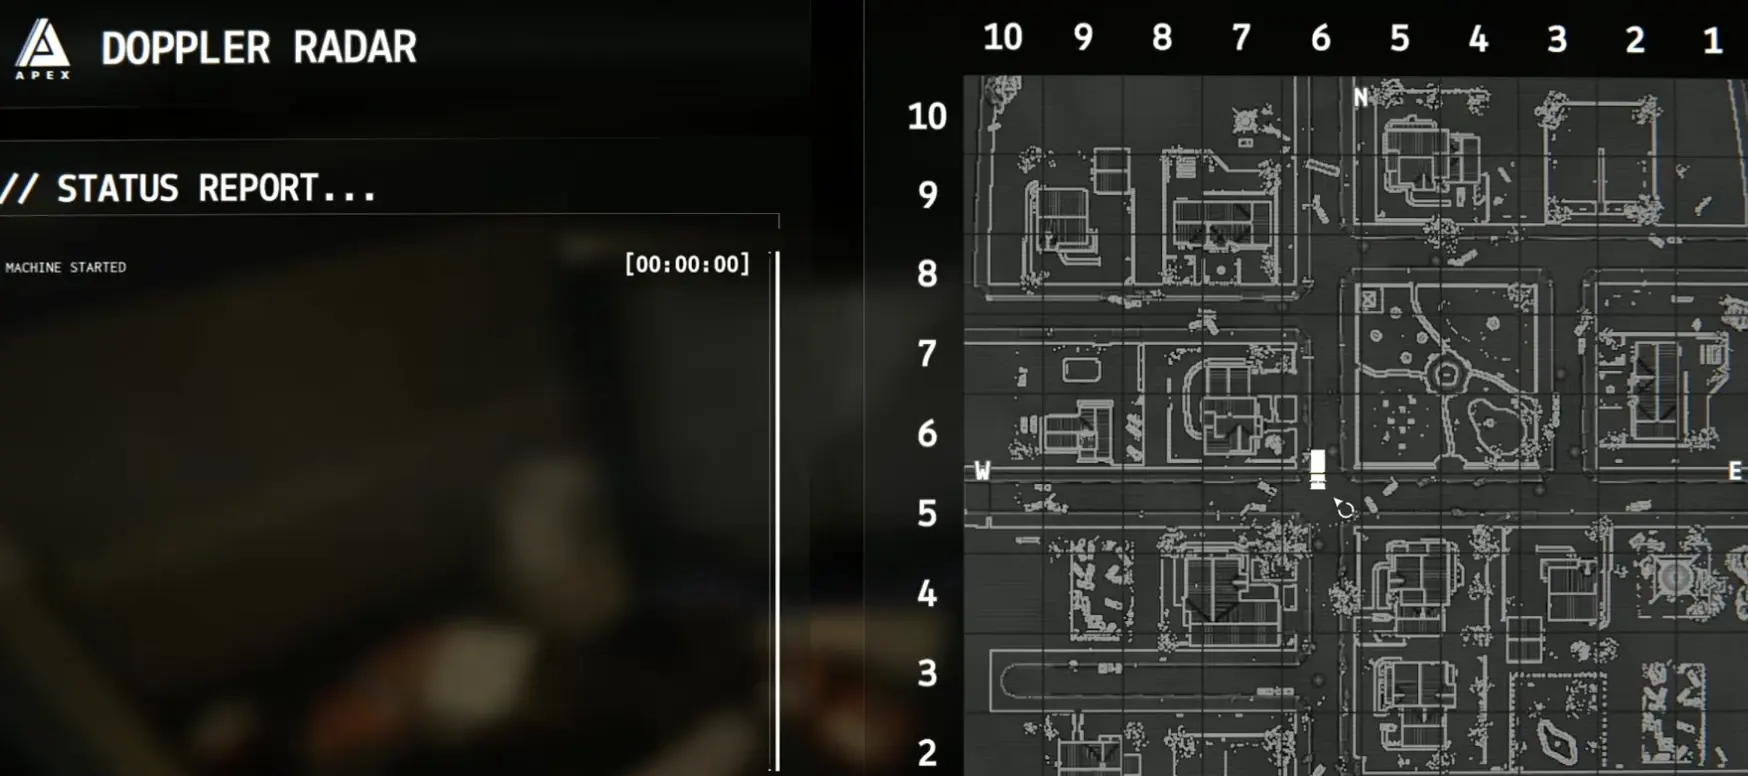
Quick Answer
Yes, Funnel Runners is viable solo, but the map does not shrink for one player. Smaller parties receive fewer Van problems and relatively more item spawns, while a solo player still has to cover the same full-sized search area, carry every part, complete every repair, and survive every return trip. For my first clear, I use Daytime Training, prepare the Van before leaving, and follow one short loop: nearest garage → landmark matching the missing part → Van. Optional objectives wait until the repairs are under control.
Can You Play Funnel Runners Solo?
Yes. Funnel Runners supports solo play as well as co-op teams of up to eight players.
The game adjusts some of the workload for smaller parties:
- fewer players can mean fewer Van problems;
- smaller parties receive relatively more item spawns;
- the search map itself remains the same size.
That last point is what makes solo play difficult.
A full team can split the map into separate streets, leave someone at the Van, and return several repair parts at once. Solo, I still need to cross the same neighborhood and perform every role myself:
diagnose → prepare → search → carry → install → recheck
The game reduces some of the required work, but it does not shorten the distance between the Van, the gas station, the junkyard, and the next useful garage.
For my first clear, I choose Daytime Training.
Daylight makes white pickup outlines easier to read and lets me see damaged roads, building entrances, and tornado direction earlier. Training also gives me more room to learn the repair loop before moving to Normal.
When a night option is available, I avoid it for the first solo clear. Lower visibility makes ordinary search mistakes more expensive:
- small Fuses are easier to miss;
- Oil and Coolant are harder to identify;
- damaged streets are harder to read;
- a safe-looking house may already be losing walls or its roof.
I move to night runs only after I can complete the daytime route without wasting trips.
First Solo Run Checklist
| Step | Solo action | Why it matters |
|---|---|---|
| 1 | Choose Daytime Training for the first attempt | Learn the route with better visibility and more forgiving pacing |
| 2 | Turn the key and read every required repair | The current Van problems define the search |
| 3 | Separate Mission Board bonuses from required repairs | Tokens and collectibles do not make the Van leave |
| 4 | Prepare the Toolbox and Scissor Jack when needed | The repair point is ready when the replacement returns |
| 5 | Search the nearest garage first | It offers several vehicle-related possibilities in one compact area |
| 6 | Extend toward a landmark matching the missing part | Fuel suggests a gas station; fluids and tools suggest garages or junkyards |
| 7 | Bring a required item back before opening a new route | The part is safer installed than carried across the map |
| 8 | Check the diagnostic after every installation | One container or interaction may not finish the requirement |
| 9 | Use Leave City when the repairs are complete | A finished escape is worth more than another optional objective |
Best Solo Search Route
The map layout and loose items change between runs, so there is no fixed street-by-street solution.
I use a repeatable decision pattern instead:
Van → nearest garage → location matching the missing part → Van
This route is short enough to remember without constantly reopening the map.
Prepare the Van Before Leaving
I spend the opening minute beside the Van.
My order is:
- Turn the key.
- Read the repair list and fluid progress bars.
- Check the Mission Board.
- Inspect the starter equipment.
- Prepare any Battery or Tire repair point.
- Identify the Van’s direction.
- Choose the first landmark.
If the Van needs a Battery or Tire, I keep the Toolbox beside it.
When a Tire is damaged, I place the Scissor Jack beside the correct wheel before beginning the search. This prevents the later return from turning into another tool hunt.
I do not automatically carry every starter item.
A Defibrillator has little opening value in a true solo run because there is no teammate to revive. A Crowbar only deserves space when it unlocks a useful route. An Umbrella can remain at the Van while the weather is clear.
The opening loadout should leave room for the part I am trying to find.
Search the Nearest Garage First
I check the garage before clearing the rest of its house.
My quick sweep covers:
- floor near the garage entrance;
- shelves and workbench;
- wall shared with the house;
- attached utility space;
- yard directly outside.
A garage does not guarantee Motor Oil, a Battery, or a tool. It is simply an efficient first stop because several vehicle-related objects can appear in a small area.
I enter the bedrooms or upper floor only when:
- the Pocket Radar points farther inside;
- a required object is visible;
- the garage connects to a small work area;
- I need shelter and can scan while waiting.
An empty garage is not a reason to search every room in the building.
Choose the Second Landmark From the Missing Part
After the garage, I use the remaining task to choose the next destination.
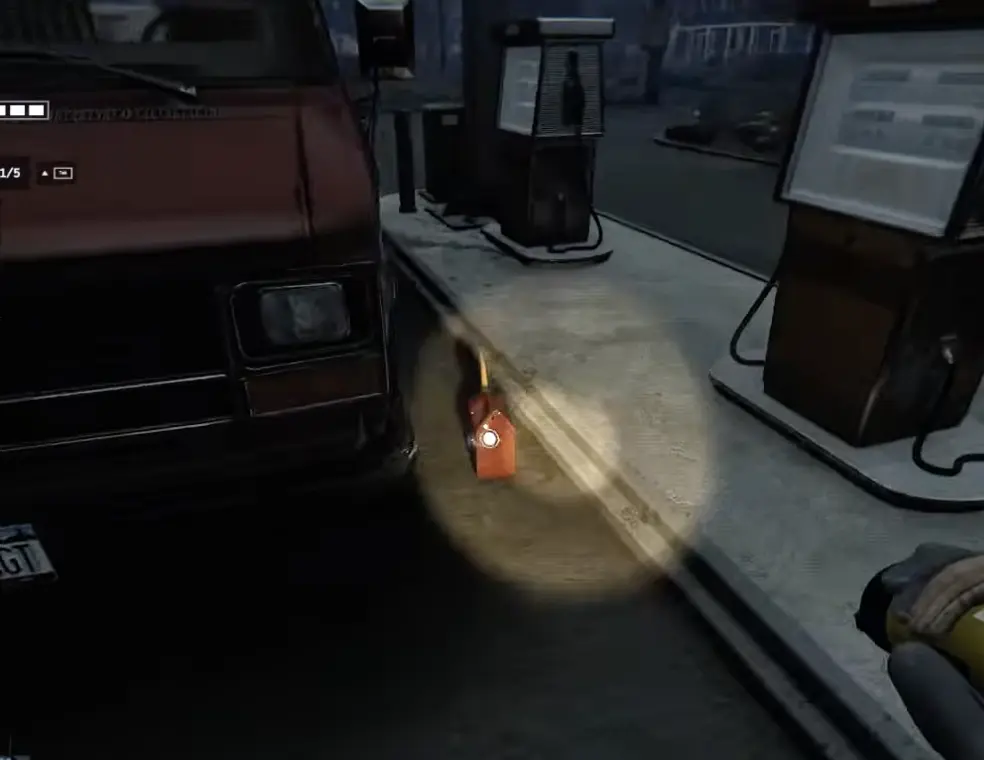
For Fuel, I look for a gas station.
For Oil, Coolant, a Battery, Tire, Fuses, Toolbox, or Scissor Jack, I prioritize another garage, a junkyard, abandoned vehicle beds, or a useful Pocket Radar marker.
The Fuel Can below was sitting beside the pumps. The location was easy to identify and easy to retrace from the Van.
Enter Ordinary Houses Only With a Reason
I search a normal house when:
- the Pocket Radar points toward it;
- a required item is visible through an opening;
- it lies directly on the return route;
- nearby vehicle-related locations are already clear;
- I need temporary cover from the weather.
Without one of those reasons, an ordinary house usually contains too many rooms, optional pickups, and possible dead ends.
The solo route breaks down when every open door starts looking like progress.
Solo Loadout Priorities
I build the loadout for the next trip, not for every possible event in the mission.
Clear Weather
For the first search loop, I usually take:
- a Pocket Radar or Flashlight;
- one directly relevant tool;
- as much empty inventory space as possible.
I do not carry an Umbrella during clear weather merely because rain may appear later.
Battery or Tire Required
The Toolbox stays at the Van.
The Scissor Jack is placed at the damaged Tire before I leave.
A Tire can consume most or all of a basic inventory loadout, so I clear optional items before picking one up.
Acid Rain or Hail Active
An Umbrella becomes useful when it protects a known required trip.
I carry or buy one when:
- the hazard is already active;
- a repair part is still outside;
- the return route crosses exposed ground;
- both the Umbrella and the required item fit.
I do not use inventory space on weather protection for a hypothetical future trip.
Crowbar
I carry a Crowbar when a useful marker or required item is blocked by a barred entrance.
I leave it behind while open garages, the gas station, and the junkyard remain unchecked.
Return, Recheck, Repeat
Once I pick up a required Oil container, Fuel Can, Coolant container, Battery, Tire, or Fuse pack, I end the current search trip.
I learned this after Lightning knocked a carried Fuel Can away during a return. The player survived, but the item had to be found again on dark ground while the route was becoming more dangerous.
The longer I carry a required part, the more chances the map has to:
- strike me with Lightning;
- pull me toward a tornado;
- destroy the return route;
- hide the item in debris;
- force me to drop it for another object.
After reaching the Van:
- I install or add the part.
- I complete the repair interaction.
- I read the diagnostic again.
- I define one remaining target.
- I start another short loop.
The next trip should be narrower than the first.
Examples:
- “Fuel is complete; I need one Oil container.”
- “The Battery is installed; only Fuses remain.”
- “One Tire is fixed; another wheel is still damaged.”
- “Coolant increased, but the task bar is not full.”
This prevents me from searching for an item that has already been completed or assuming that one fluid container was enough.
When to Buy From the Vitastation
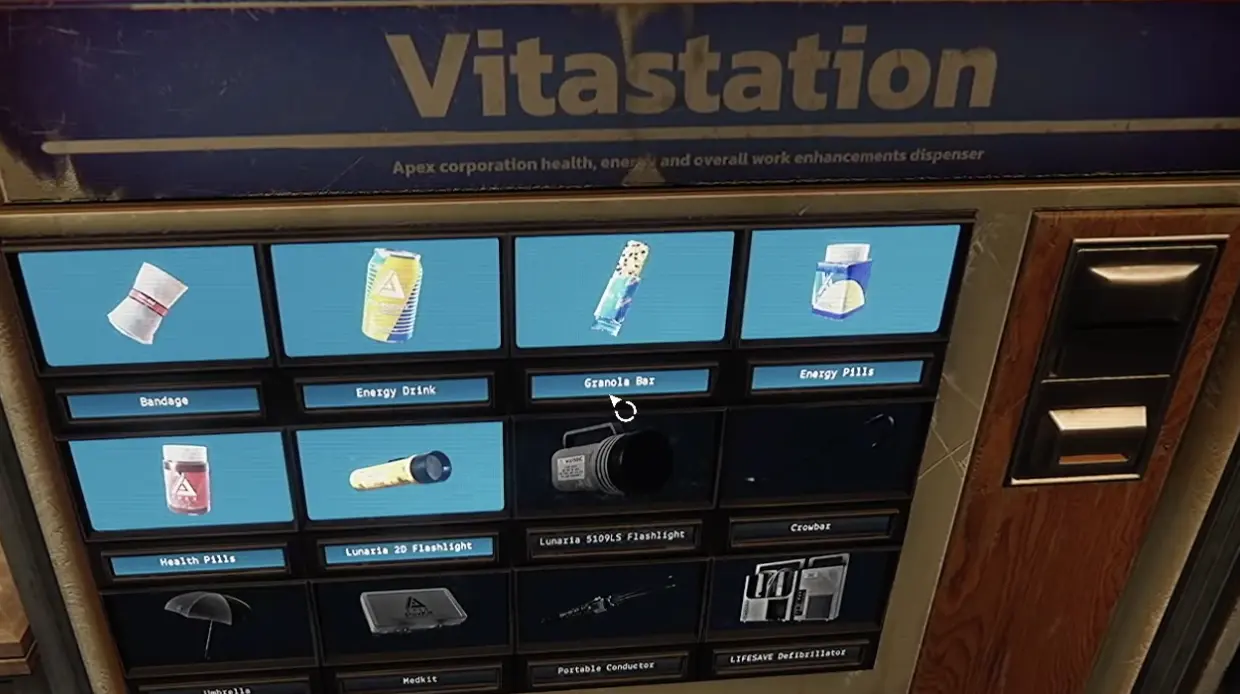
The Van’s Vitastation sells healing, stamina, lighting, and utility items.
I spend Apex Tokens when one purchase fixes a current route problem.
Umbrella
I buy one when Acid Rain or Hail is already blocking a required return and waiting would consume too much of the remaining escape window.
Healing
I buy Bandages, Pills, or a Medkit when I am already injured and another required trip remains.
I do not heal every small loss immediately because recovery items can also appear in houses.
Crowbar
The Crowbar becomes purchasable from the Vitastation at VA Station Level 10.
Before that, I only plan around one when it appears among the Van’s starter equipment or I find it somewhere in the map.
I buy one when:
- a required item is behind a barred entrance;
- a useful Radar marker is blocked;
- the Mission Board door objective is still realistic;
- the main repairs are already under control.
I do not buy equipment after the final repair is already in my hands.
Optional Objectives and Night Runs
I divide the mission into two phases.
Phase One: Make the Van Escape-Ready
I collect:
- required repair parts;
- tools needed to install them;
- survival equipment needed for a required return.
Phase Two: Take Nearby Bonuses
I consider Tokens, Documents, Tapes, Newspapers, or barred doors only when:
- the main repairs are complete or nearly complete;
- the objective is close to the Van;
- I already know the route;
- the weather is still manageable.
I do not begin a new street after the Van is ready.
The same rule applies to night runs. The lower visibility makes optional searching less forgiving, so I narrow the route earlier than I would during daytime.
Why a Safe Route Can Collapse
Road hazards are not simply static traps placed around the map.
They can be created by the interaction between weather and building destruction.
For example:
- strong wind can bring down power lines and create an electrified roadblock;
- a tornado can remove a roof and turn an interior room into exposed ground;
- debris can block the street used on the first trip;
- damaged structures can remove familiar landmarks;
- open manholes and fires can appear along a previously safe return.
This means I cannot assume the route back is unchanged just because I used it five minutes earlier.
Before crossing the final street to the Van, I check:
- whether the road is still open;
- whether a power line is down;
- whether a funnel is crossing the route;
- whether the building I planned to use as shelter still exists;
- whether another street offers a safer approach.
A known route is useful, but it still needs to be read again after each major weather event.
When I Turn Back
The mission is built around roughly a 20-minute escape window, but the full window is not safe search time.
I turn back when:
- I am carrying a required part;
- the current building begins losing walls or its roof;
- the road back becomes difficult to read;
- continuing requires a new distant section of the full-sized map;
- the next useful landmark is farther from the Van than my current position;
- the final warning begins.
In one tested run, the main storm displayed around 0.7 miles while the search route was still expanding. Acid Rain began shortly afterward and made the same return much more expensive.
I use that as a personal warning point:
Around 0.7 miles, I stop opening new routes.
It is not a guaranteed safe distance. A smaller tornado, Lightning, fire, or building collapse can close the route earlier.
When I Restart a Solo Run
An empty first garage is not a failed run.
Randomized spawns can still place the required item in:
- a gas station;
- junkyard;
- truck bed;
- second garage;
- Radar-marked house.
I restart when the route itself is no longer workable:
- the final warning is active with several repairs untouched;
- the only required tool was lost in a destroyed area;
- a required part was dropped and cannot be relocated;
- health is critically low with no realistic recovery;
- several hazards block the return;
- the remaining unsearched area is too far across the full map;
- there is no realistic sequence left before the final storm.
The difference is simple:
A bad opening still has another route.
A collapsed run no longer has a workable sequence.
Finish the Run Immediately
Once every repair clears:
- Return to the driver’s seat.
- Turn the key.
- Confirm the green success state.
- Use Leave City.
- Do not reopen the route.
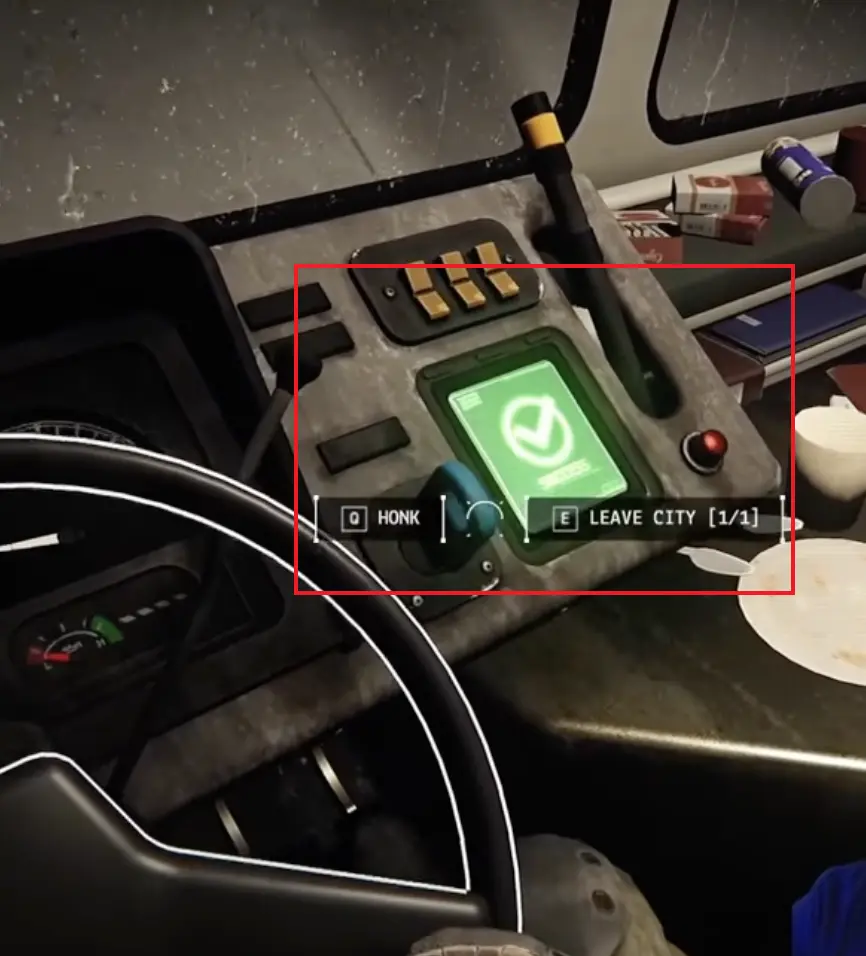
The purpose of the route is to make the Van leave.
Once it can, I leave.
What to Read Next
Use the Van Repair Guide for Battery, Tire, Fuse, Fuel, Oil, and Coolant installation steps.
Use the Repair Parts Locations Guide for garages, gas stations, junkyards, truck beds, and Pocket Radar search priorities.
Use the Tornado and Weather Survival Guide for Acid Rain, Hail, Lightning, tornado pull, shelter, damaged roads, and emergency return decisions.
Return to the Funnel Runners Guide Hub for the complete reading order.
FAQ
Can I get a Crowbar before VA Station Level 10? +
Yes. Level 10 unlocks the Crowbar as a Vitastation purchase, but a Crowbar can still appear among the Van's starting equipment or somewhere in the map before that.
What should I do if Lightning knocks a repair part away? +
Stop at the strike point and check your hands first. Then search the ground behind and beside you before moving on, because a Fuel Can or Coolant container can blend into dark pavement and storm debris.
Can I leave spare repair parts beside the Van? +
Dropped items can remain where they were placed, but I do not build the route around loose outdoor storage. Debris, darkness, and building damage can make a Tire, Battery, or tool difficult to relocate later.