Fortune Mill Midgame and Late-Game Rooms Guide
Push Fortune Mill through Pachinko, Sushi, Gacha, Shadow Realm, Poppy's Wheel, Goldfish Gacha, and Executor with route and stuck-point fixes.
Updated:
Quick Answer
After Room 2, Fortune Mill turns into a rotation instead of a straight line. Push Pachinko until Rimmington’s 1,000,000 ticket blocker is realistic, then build Sushi until Hivemind’s 1,000,000 ribbon blocker is realistic. Start Poppy’s Wheel in the Sushi stage, revisit Shadow Realm whenever your Darts damage improves, then use Gacha to build stuffing, unlock Bin Goosey and Gumball Goose, chase rare pulls, and pay Executor’s 1,000,000 stuffing blocker only after late-game cleanup is checked.
Fast Pachinko, Sushi, and Gacha Route
If you just left the scratcher room, do not try to finish every new system the moment it appears. The fastest route is to build each engine until it starts feeding the next one, then rotate back when older rooms have cheap multipliers, automation, or passive value waiting.
| Step | Route priority | What you are trying to avoid |
|---|---|---|
| 1 | Check older Darts and Lotto upgrades before hard-pushing Pachinko | Entering midgame with cheap cross-room value ignored |
| 2 | Build Pachinko ball flow, ticket value, Bubba, dice, and Poker Pirate | Grinding toward Rimmington with weak ball generation |
| 3 | Add Auto Drop only after ball income can support it | Draining your balls faster than the room can refill them |
| 4 | Pay Rimmington after Pachinko can still produce value | Leaving Pachinko completely dead after the bribe |
| 5 | Push Sushi fuel, merging, ribbon gain, Ghost Janitor, and Poppy | Treating Sushi as only a 1,000,000 ribbon wall |
| 6 | Start Poppy’s Wheel in the Sushi stage, then keep spinning during Shadow Realm and Gacha cleanup | Waiting until Lucky Spin is the last unfinished goal |
| 7 | Use Shadow Realm only when Darts damage, marks, and visit time can beat bosses | Repeating weak boss attempts that do not move the health bar |
| 8 | Build Gacha with capsule unlocks, animation skip, rare-rate support, stuffing value, and active items | Pulling slowly with bad odds, slow animations, or inactive pedestal items |
| 9 | Pay Executor only after late helpers, rare pulls, Poppy, jackpots, and Shadow Realm are checked | Ending the base run before cleanup is done |
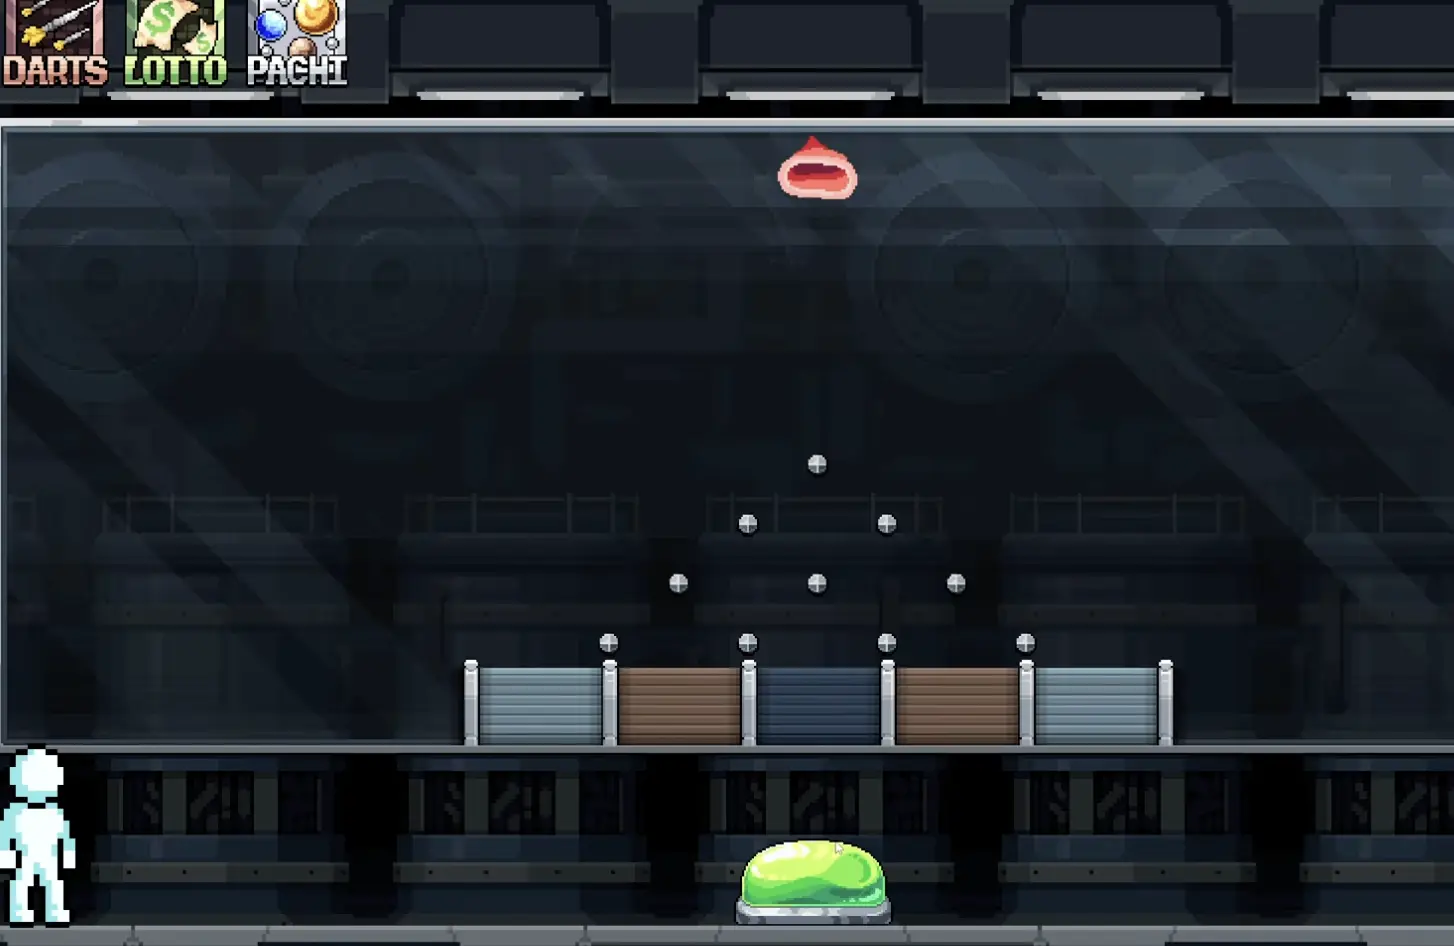
Pachinko Guide: Ball Flow, Dice, Poker Pirate, and Rimmington
Pachinko is the first major midgame engine after scratch tickets. The goal is not just to drop balls. The goal is to turn ball flow into enough tickets to pay Rimmington, who blocks the next stage with a 1,000,000 ticket bribe.
What to Buy First in Pachinko
Use your current bottleneck to choose upgrades. Pachinko feels slow when one part of the engine is ahead of the others.
| If this is happening… | Buy this first | Why it fixes the room |
|---|---|---|
| You are waiting between drops | Ball gain, fill speed, refill support | Pachinko cannot scale if balls are not entering the board |
| Balls drop but tickets barely move | Ticket gain and bucket value | Each ball needs to convert into meaningful tickets |
| Balls hit many pegs but value feels flat | Peg XP and leveled peg upgrades | Repeated hits become long-term scaling |
| Ball paths feel too simple | More peg rows and better buckets | More payout paths reduce dead drops |
| You have enough balls but hate manual drops | Auto Drop | Turns Pachinko into a steadier engine |
| Auto Drop drains everything | Ball generation and Poker Pirate | Auto Drop is only good when it has balls to spend |
| Rimmington still feels far away | Ticket gain, buckets, dice, and poker value | These move the 1,000,000 ticket target faster |
In the automation route, Auto Drop is strongest once your ball supply can keep up. A useful benchmark is the 2 balls per second / 120 drops per minute style of pacing: if your generation is below that, Auto Drop can feel like it turns the room on, empties it, and then leaves you waiting. Build ball income first, then buy Auto Drop as a way to spend that income efficiently.
Bubba, Dice, and Poker Pirate
Bubba, dice, and Poker Pirate are the systems that make Pachinko feel less flat.
| System | What it does | Why it matters |
|---|---|---|
| Bubba | Helps push balls toward better outcomes | Good when ball paths need more targeted value |
| Red Dice | Triggers after rolling a 6 | Covers Red Hot Roller and adds side rewards |
| Blue Dice | Triggers after rolling an 8 | Covers Ice Cold Roller and adds more midgame value |
| Green Dice | Triggers after rolling a 10 | Covers Mean Green Roller and is usually a later dice check |
| Poker Pirate | Gives card hands that can refill balls | Supports ball flow and I Had Trips! cleanup |
Poker Pirate is especially useful because better card hands can refill balls. A weak hand is only a small stabilizer, but 3 of a Kind or better is the first result I treat as genuinely valuable because it supports both ball refills and the I Had Trips! achievement. Keep Poker Pirate running while you build Pachinko instead of stopping the whole run to force one hand.
How Long Rimmington Usually Takes
Rimmington is where Pachinko proves whether it is actually working. On a first clear, do not expect to unlock Pachinko and pay the 1,000,000 ticket blocker a few minutes later. Treat it as a real midgame setup phase.
A good expectation is:
| Your Pachinko state | What the timing means |
|---|---|
| You just unlocked Pachinko | Rimmington should feel far away; build the engine first |
| Ball flow is weak | You are not ready to judge ticket speed yet |
| Balls are steady but tickets are low | Upgrade ticket gain, bucket value, peg XP, and dice value |
| Auto Drop runs smoothly | Now the room can start moving toward Rimmington faster |
| Poker Pirate refills are frequent | You can push more aggressively toward the blocker |
| You are close to 1,000,000 tickets | Buy only the upgrades that directly speed the final push |
If the room still feels slow after 20 to 30 minutes of focused Pachinko upgrades, the problem is usually not bad luck. It usually means one of three things is missing: ball generation, ticket value, or a refill system like Poker Pirate.
When to Pay Rimmington
Pay Rimmington when you have 1,000,000 tickets and Pachinko will not collapse the moment you leave.
Before paying, I like to check:
| Check | Why it matters |
|---|---|
| Stable ball generation | Prevents Pachinko from becoming idle downtime |
| Useful ticket gain and bucket upgrades | Keeps future returns valuable |
| Some peg XP / leveled peg value | Makes repeated drops scale better |
| Dice bonus games unlocked or moving | Covers dice achievements and side value |
| Poker Pirate hired if available | Helps refill balls and supports poker cleanup |
| A small ticket buffer beyond 1,000,000 | Makes the next stage feel smoother |
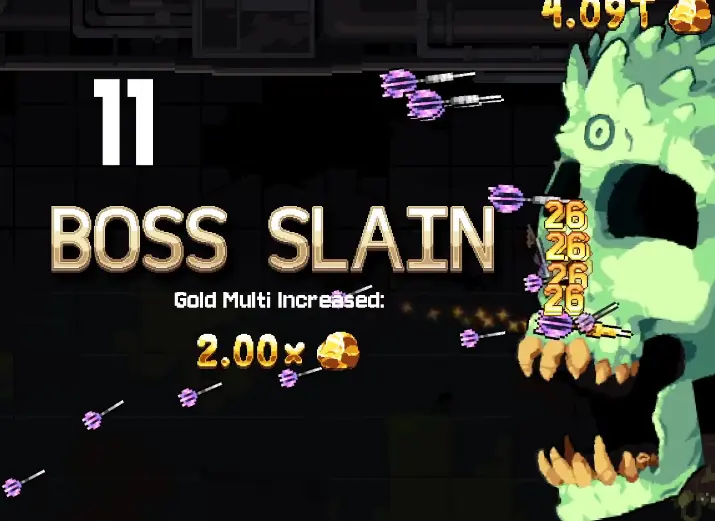
Shadow Realm Guide: When Boss Fights Are Worth It
Shadow Realm is not a normal room. It runs beside the main route. Enter, test your damage, leave if the boss barely moves, and come back after your Darts engine has improved.
Shadow Realm Readiness Check
| You have… | Why it matters |
|---|---|
| More darts | More chances to apply damage effects |
| Rattling Gunner speed | More passive hits during each visit |
| Special dart effects | Better boss damage scaling |
| Marks saved up | Higher burst damage during an attempt |
| Extended Stay | More time once your damage is already close |
| Permanent multiplier goals | The main reason to clear bosses |
The mistake is buying only duration when damage is still terrible. Extended Stay helps when you are close to a kill. If the boss barely takes damage, more seconds will not fix the attempt. Upgrade dart count, Rattling Gunner speed, special dart effects, and marks first.
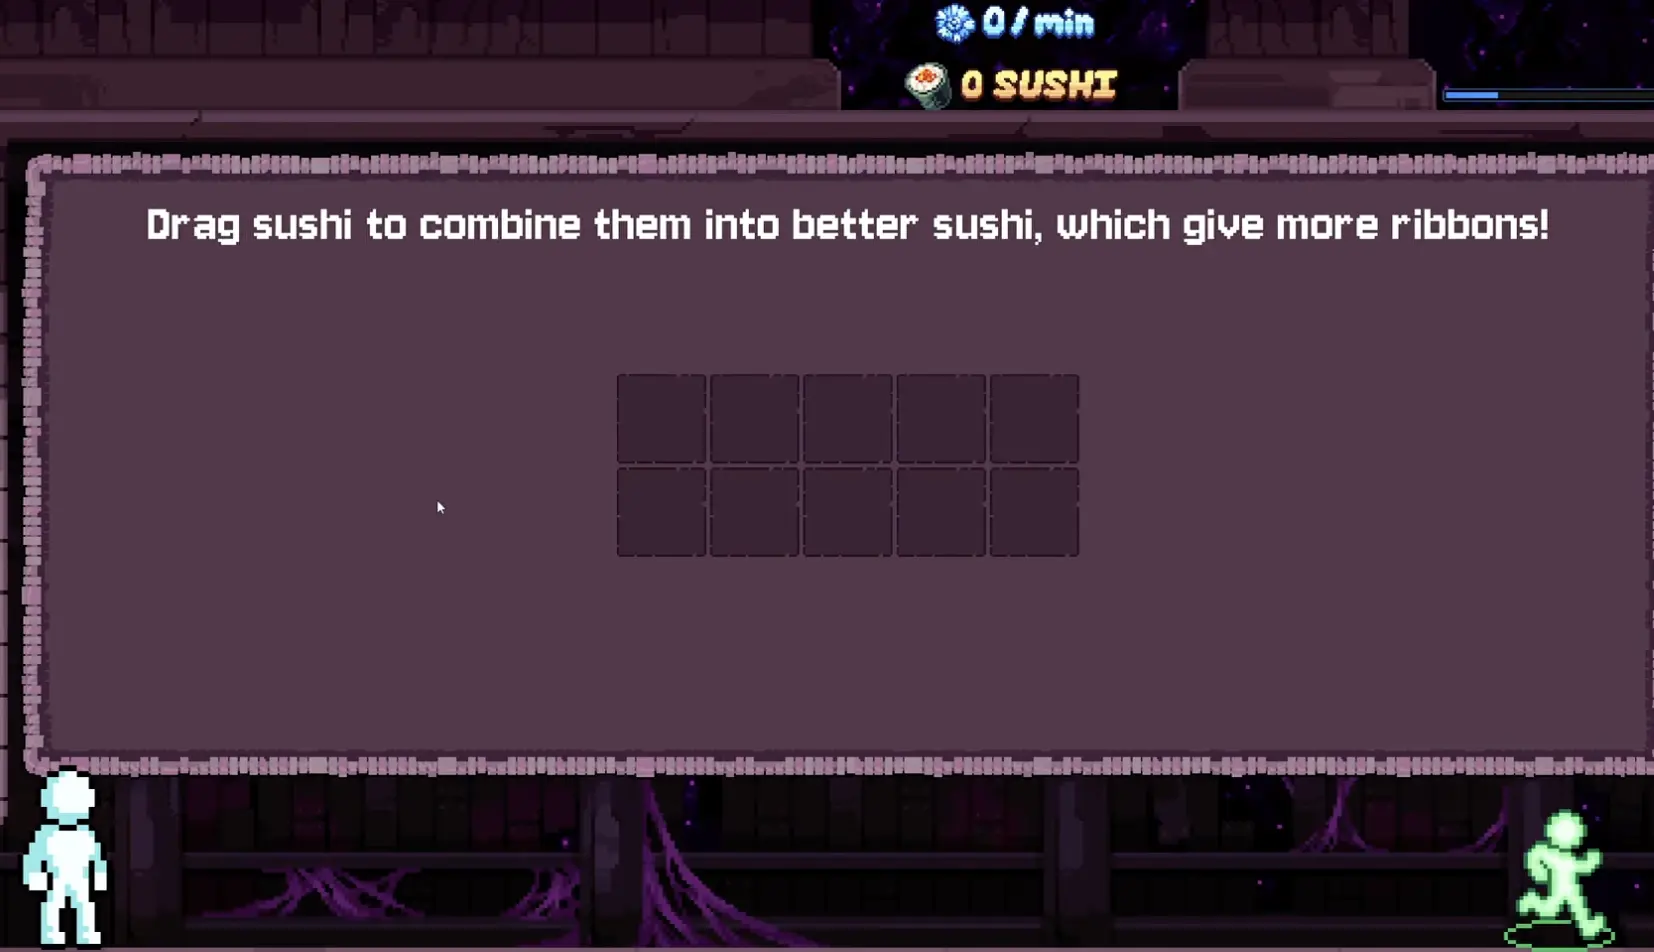
Sushi Guide: Fuel, Merging, Poppy, Ghost Janitor, and Hivemind
Sushi is the ribbon room. You generate sushi with fuel, then drag matching sushi pieces together to merge them into higher-tier sushi. Higher-tier sushi creates better ribbon progress, and ribbons are what you need for Hivemind’s 1,000,000 ribbon blocker.
Sushi Upgrade Priority
Sushi has two separate problems: piece flow and ribbon value. Solve the one that is actually slowing you down.
| If the problem is… | Upgrade this | Why |
|---|---|---|
| You are waiting for pieces | Fuel generation | More pieces means more merge attempts |
| Pieces arrive but feel weak | Sushi tier / starting sushi value | Better pieces create better ribbon output |
| Hivemind feels too far away | Ribbon gain | Converts Sushi progress into the 1,000,000 ribbon goal |
| The board gets messy | Merge support and planning | Keeps pieces moving into higher tiers |
| Older rooms need help | Cross-room Sushi bonuses | Lets Sushi feed Darts, Lotto, or Pachinko value |
| You are close to Hivemind | Short-term ribbon upgrades | Helps finish the blocker without overfarming |
How to Merge Sushi Better
The interface looks simple, but the mistake is treating Sushi like a passive income room. You still need to manage space. Drag matching pieces together, merge low-tier pieces before the board becomes messy, and save matches when you are close to a higher tier.
| Situation | What to do |
|---|---|
| You have many low-tier pieces | Merge quickly to clear space |
| You are close to a higher tier | Save matching pieces and combine carefully |
| Fuel is slow | Avoid wasteful merges that do not advance tiers |
| Ribbon gain is low | Focus on higher-tier sushi before brute-forcing ribbons |
| Hivemind is close | Merge for short-term ribbon progress |
| You are doing a longer push | Build toward higher tiers and cross-room bonuses |
Ghost Janitor and Poppy the Kangaroo
Ghost Janitor and Poppy the Kangaroo are not random late-game flavor. They are part of the Sushi-side helper path.
| Helper | Why it matters |
|---|---|
| Ghost Janitor | Helper unlock and achievement target around the Sushi stage |
| Poppy the Kangaroo | Leads into Poppy’s Wheel and the Lucky Spin achievement |
| Poppy’s Wheel | Gives repeated wheel attempts and useful timed prizes |
| Hivemind | Requires 1,000,000 ribbons to move toward the next stage |
Before paying Hivemind, check whether Ghost Janitor and Poppy are available. Missing Poppy can turn Lucky Spin into a last-minute cleanup grind.
How Long Hivemind Usually Takes
Hivemind is the Sushi version of the Rimmington wall: it is less about one lucky moment and more about whether the room engine is actually built. If you are still waiting for fuel, if your sushi tiers are low, or if ribbon gain is barely moving, the 1,000,000 ribbon target will feel much farther than it should.
Use this check before you decide the room is too slow:
| Sushi state | What it means |
|---|---|
| Fuel is the bottleneck | Buy fuel generation before ribbon upgrades |
| Pieces arrive but stay low-tier | Improve merging and sushi tier value |
| Higher-tier sushi exists but ribbons are slow | Buy ribbon gain upgrades |
| Poppy is unlocked | Start Poppy’s Wheel now, not after Gacha |
| Ghost Janitor is still missing | Check the Sushi helper path before leaving |
| Hivemind is close | Focus on short-term ribbon output and pay the blocker |
Poppy’s Wheel and Lucky Spin
Poppy’s Wheel starts after Poppy the Kangaroo is unlocked in the Sushi stage. This order matters: do not treat Poppy’s Wheel as something that exists before Sushi.
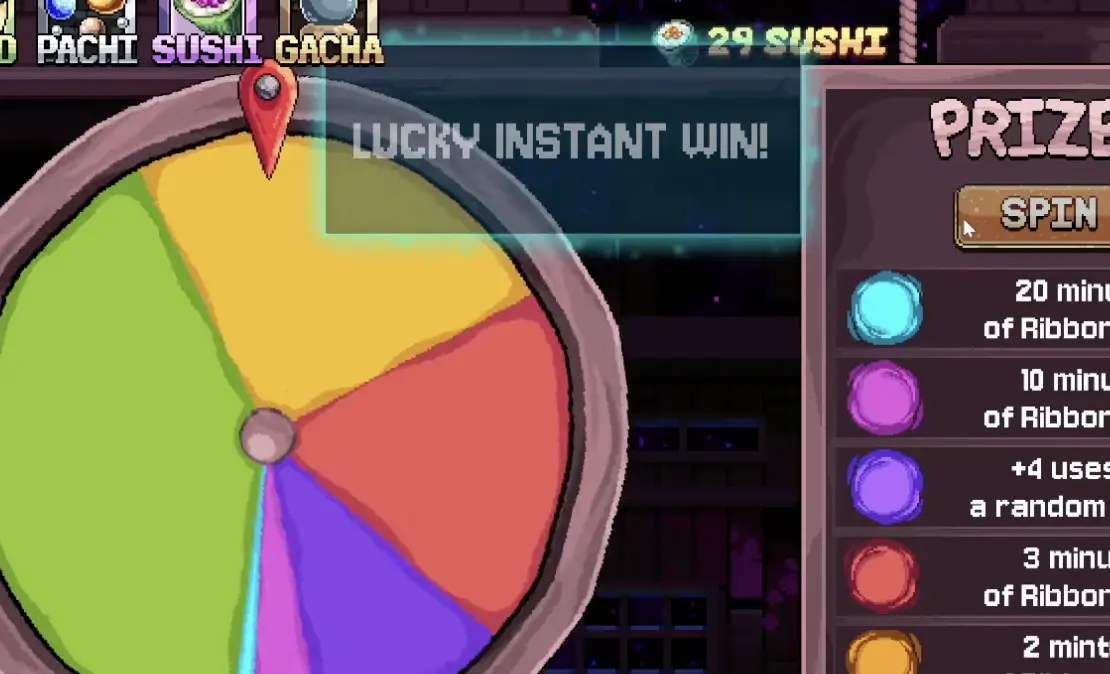
The wheel gives timed rewards, and the top prize is tied to Lucky Spin. The visible prize pool can include all-room money boosts, ribbon gain time, fuel time, and shaker uses.
| Wheel result type | Why it matters |
|---|---|
| Top all-money prize | The Lucky Spin target and a strong late-game boost |
| Smaller all-money prize | Still helps every room |
| Ribbon gain time | Helps Sushi and Hivemind progress |
| Fuel time | Generates more sushi pieces |
| Random shaker uses | Adds utility while you work on other systems |
How Long Lucky Spin Can Take
Lucky Spin is a repeat-roll cleanup achievement, not a fixed route step. Plan to use Poppy’s Wheel while you still have other goals left: Shadow Realm, Gacha, rare pulls, stuffing, and helper unlocks.
If your current build shows a pity or safety counter, follow that in-game behavior. Community discussion around current builds has pointed to a roughly 40-spin safety for the top prize, but the game screen is still the safest source. The practical advice is the same either way: start spinning in the Sushi stage and do not wait until everything else is finished.
| Poppy’s Wheel problem | Best response |
|---|---|
| You just unlocked Poppy | Start spinning during Sushi progress |
| You still need Lucky Spin | Keep spinning while doing Gacha or Shadow Realm cleanup |
| Wheel rewards feel random | Treat it as long-term cleanup, not your main engine |
| You have no other goals left | Expect the run to feel stalled until Lucky Spin hits |
When to Pay Hivemind
Pay Hivemind when you have 1,000,000 ribbons and Sushi is no longer your main bottleneck.
Before paying, check three things:
| Check | Why it matters |
|---|---|
| Fuel and ribbon income are stable | Sushi can still help later cleanup instead of going dead |
| Ghost Janitor and Poppy are checked | Avoids missing helper achievements and wheel progress |
| Useful cross-room bonuses are bought | Lets Sushi help older rooms before you move on |
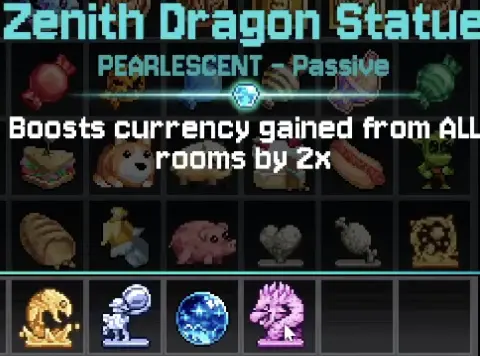
Gacha Guide: Capsules, Goldfish, Animation Skip, Stuffing, and Executor
Gacha is the late-game item layer. You unlock capsule machines, pull items, manage duplicates, convert items into stuffing, and use passive or pedestal bonuses to push the final escape.
Gacha Upgrade Priority
The best Gacha upgrades are not always the ones that make one pull look better. In practice, you want more useful pulls per minute and better value from every duplicate.
| Priority | Upgrade or system | Why it matters |
|---|---|---|
| 1 | Unlock capsule types | Opens more item pools and bonus paths |
| 2 | Token generation and pull volume | More pulls means more chances at Rare, Epic, Legendary, and Pearlescent items |
| 3 | Animation skip / faster pull flow | Saves real time once you are farming many pulls, even though odds do not change |
| 4 | Goldfish Gacha if its tooltip shows rare-rate support | A 1.5x rare-rate style bonus is valuable for Legendary and Pearlescent cleanup |
| 5 | Inventory and item handling | Prevents good items or duplicates from becoming messy |
| 6 | Pedestal slots and pedestal strength | Makes non-passive items actually work |
| 7 | Stuffing value | Turns duplicate pulls into faster Executor progress |
| 8 | Bin Goosey and Gumball Goose | Covers late helper unlocks and Gacha-side achievements |
Which Gacha Machine Should You Use?
For normal progress, unlock more capsule machines and keep your pull volume high. For Legendary Pull and Pearlescent Pull, prioritize the machine or path that gives the best rare-rate support in your current build.
If your build shows Goldfish Gacha with a 1.5x rare-rate tooltip, use it for rare cleanup instead of blindly pulling from any machine. That does not guarantee a cyan item, but it gives you a better cleanup plan than only saying “pull more.”
Passive Items vs Pedestal Items
The most important Gacha rule is that not every item works automatically.
| Item type | How it works | What to check |
|---|---|---|
| Passive item | Works without using a pedestal slot | Keep it if the bonus applies passively |
| Pedestal item | Needs placement before it does anything | Make sure it is actually on a pedestal |
| Duplicate item | Can become stuffing or cleanup value | Do not hoard duplicates forever |
| Collection item | Helps collection progress or set bonuses | Check Bin Goosey and collection systems |
| Currency booster | Improves one or more room currencies | Compare it against stuffing needs |
Bin Goosey, Gumball Goose, and Stuffing
Bin Goosey and Gumball Goose are late Gacha helper unlocks, achievement targets, and signs that your Gacha route has moved beyond basic duplicate farming.
| Goal | What to do |
|---|---|
| Bin Goosey missing | Improve capsule access, collection progress, and duplicate value |
| Gumball Goose missing | Keep improving Gacha progression and helper unlock paths |
| Stuffing too slow | Improve stuffing value and convert duplicates more efficiently |
| Rare pulls missing | Increase pull volume, use rare-rate support, and buy animation skip |
| Pedestal bonuses weak | Add or improve pedestal slots and check which items need placement |
Do not rush Executor if Bin Goosey, Gumball Goose, Legendary Pull, or Pearlescent Pull are still missing and you are aiming for 100%.
Final Push: Executor and Escape
The final blocker is Executor, and the payment is 1,000,000 stuffing.
Before paying Executor, do one final sweep:
| Final check | Why it matters |
|---|---|
| Rimmington paid | Confirms Pachinko progression is cleared |
| Hivemind paid | Confirms Sushi progression is cleared |
| Shadow Realm boss progress | Permanent multipliers may speed up final cleanup |
| Poppy’s Wheel / Lucky Spin | Can take time if left until last |
| Bin Goosey | Late Gacha helper achievement |
| Gumball Goose | Late Gacha helper achievement |
| Rare / Epic / Legendary / Pearlescent Pulls | Gacha rarity achievements may still be missing |
| Jackpot colors | One Lotto Scratcher color may still need cleanup |
| All 51 achievements if you are doing 100% | New Game+ adds extra achievement requirements after the base route |
For full achievement cleanup, use the dedicated Fortune Mill achievements guide. For earlier routing, use the Fortune Mill walkthrough, best upgrades guide, and automation guide.
Midgame and Late-Game Stuck Points
Rimmington Feels Too Far Away
If 1,000,000 tickets feels impossible, Pachinko is usually missing ball flow or ticket value. Improve ball gain, buckets, peg XP, ticket gain, Bubba, and Poker Pirate before grinding slowly.
Auto Drop Is Not Helping
Auto Drop helps only when the room has enough balls to spend. If it empties your supply and then stalls, turn your attention back to ball generation, refill speed, Bubba, and Poker Pirate before buying more drop speed.
Hivemind Feels Too Far Away
If 1,000,000 ribbons feels too slow, check fuel generation first. Then improve sushi tier value and ribbon gain. If helpers are available, make sure Ghost Janitor and Poppy the Kangaroo are not being ignored.
Shadow Realm Still Does No Damage
Stop repeating weak attempts. Upgrade dart count, Rattling Gunner speed, special dart effects, marks, and Extended Stay only when extra seconds can actually help.
Lucky Spin Is Still Missing
Start Poppy’s Wheel in the Sushi stage and keep spinning while doing Shadow Realm, Gacha, and stuffing cleanup. Do not save it for the very end.
Gacha Progress Feels Random
Buy animation skip once you are farming repeated pulls, increase pull volume, use the best rare-rate machine available, check Goldfish Gacha if your tooltip shows rare-rate support, improve stuffing value, and make sure pedestal items are actually active.
Executor Is Available but Cleanup Is Not Done
Do not pay Executor just because the button is available. If you want a clean base-route finish, check Poppy’s Wheel, rare pulls, Gacha helpers, Shadow Realm, and remaining jackpot milestones first.
FAQ
What should I do after Room 2 in Fortune Mill? +
After Room 2, build Pachinko until ball flow, ticket gain, dice bonuses, Bubba, and Poker Pirate are stable. Then pay Rimmington's 1,000,000 ticket blocker, move into Sushi, start Poppy's Wheel in the Sushi stage, and use Shadow Realm as a parallel damage-check system.
How long does Rimmington take in Fortune Mill? +
Rimmington is not usually a quick two-minute blocker on a first clear. If you just unlocked Pachinko, expect a real midgame setup phase: build ball generation, ticket value, buckets, Auto Drop support, dice, and Poker Pirate before the 1,000,000 ticket target feels comfortable.
How does the Sushi room work in Fortune Mill? +
The Sushi room uses fuel to generate sushi pieces. Drag matching sushi pieces together to merge them into higher-tier sushi, then use higher-tier sushi and ribbon gain upgrades to reach Hivemind's 1,000,000 ribbon blocker.
How long does Hivemind take in Fortune Mill? +
Hivemind usually takes a sustained Sushi setup phase rather than a short cash-out. If 1,000,000 ribbons feels far away, improve fuel generation first, then sushi tier value and ribbon gain, and make sure Poppy the Kangaroo and Ghost Janitor are checked before you leave Sushi behind.
When should I start Poppy's Wheel in Fortune Mill? +
Start Poppy's Wheel in the Sushi stage after Poppy the Kangaroo is unlocked. Do not leave it until the very end, because Lucky Spin requires the top wheel prize and can take repeated spins.
When should I do Shadow Realm in Fortune Mill? +
Use Shadow Realm when your dart engine is strong enough to damage bosses: more darts, Rattling Gunner speed, special dart effects, marks, and enough visit duration. If the boss barely moves, leave and upgrade first.
Which Gacha machine should I use for Legendary Pull and Pearlescent Pull? +
Use the Gacha machine with the best rare-rate support in your current build. If your tooltip shows Goldfish Gacha with a 1.5x rare-rate bonus, prioritize it for Legendary and Pearlescent cleanup, then keep improving pull volume, token flow, inventory, and animation speed.
When is Gacha animation skip worth buying in Fortune Mill? +
Buy animation skip when you are no longer just sampling Gacha and are actually farming Legendary Pull, Pearlescent Pull, Bin Goosey, Gumball Goose, or stuffing for Executor. It does not change odds, but it turns long cleanup sessions into much faster real-time progress.
When should I go for the final escape? +
Go for the final escape after checking Rimmington, Hivemind, Shadow Realm boss progress, Poppy's Wheel, Gacha helpers, rare pulls, jackpot milestones, and Executor's 1,000,000 stuffing payment.