How to Appraise Spoils and Farm Relics in Dark Arisen
Find Spoils in Norgan, appraise Relics with Jiera, manage Rift Crystal costs, compare special skills, and choose which equipment is worth keeping.
Updated:
Quick Answer
Collect Spoils from enemies, chests, and gathering points in Norgan, then return to Jiera in the Norgandian Settlement. Choose Appraise, select the unidentified items you want, and pay the displayed Rift Crystal (RC) cost to reveal their equipment, skills, or other rewards.
The first Relic you find in Norgan is not necessarily a piece of equipment you can wear immediately. It may be labeled Light Weaponry, Long Weaponry, or Abandoned Supplies, with its actual contents hidden until someone appraises it.
That matters when the enemies outside the settlement are already stronger than your old equipment can comfortably handle. A few early Spoils can produce weapons with much higher damage, additional knockdown power, or skills that change how a vocation fights. On the other hand, identifying every low-level item consumes Rift Crystals that you may need for something better.
Jiera handles that choice. She can reveal the contents of your Spoils or let you exchange them for RC, so the useful question is not just where to find more loot. It is which items to identify now, which to save, and when another expedition is worth the risk.
Find Jiera and Appraise Your First Spoils
Jiera is in the Norgandian Settlement, the village you reach shortly after entering the expansion.
You can speak with her before completing the long Norgan main quest. There is no need to reach Beorcan Stronghold or defeat the Fallen Dragon first.
After the villagers have introduced you to the settlement, find Jiera and ask about the Relics scattered throughout Norgan.
She explains that Spoils are remnants of ancient battles. Some contain ordinary items; others conceal equipment with considerable power.
Her first request is straightforward: bring her a Relic to appraise.
Where to Find Your First Spoils
Leave the settlement and search the surrounding area.
The nearby enemies, supply caches, and treasure chests give you opportunities to obtain unidentified items without immediately traveling into the most dangerous northern mountains.
You can find Spoils by:
- Defeating enemies and collecting their drops.
- Opening treasure chests in ruins and caves.
- Searching abandoned supplies and gathering locations.
- Investigating less obvious places along the snowfields and waterways.
A useful early example is a Level 1 Light Weaponry Spoil recovered during exploration outside the settlement.
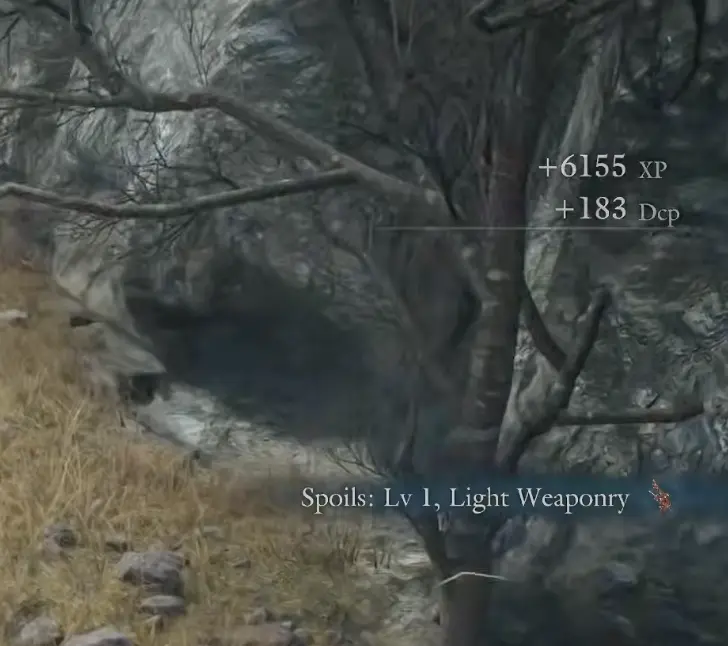
There is no reason to fight a distant boss just to obtain your first unidentified item. The surrounding area is enough to introduce you to the system.
Once you have collected a Spoil, return to Jiera.
Use Jiera’s Appraisal Menu
Talk to Jiera and choose Appraise.
Your unidentified Spoils appear in the appraisal interface. Select the item or batch you want identified, check the Rift Crystal cost, and confirm.
Jiera provides some Rift Crystals during the introductory interaction. This helps you experience the system without first needing a large RC reserve.
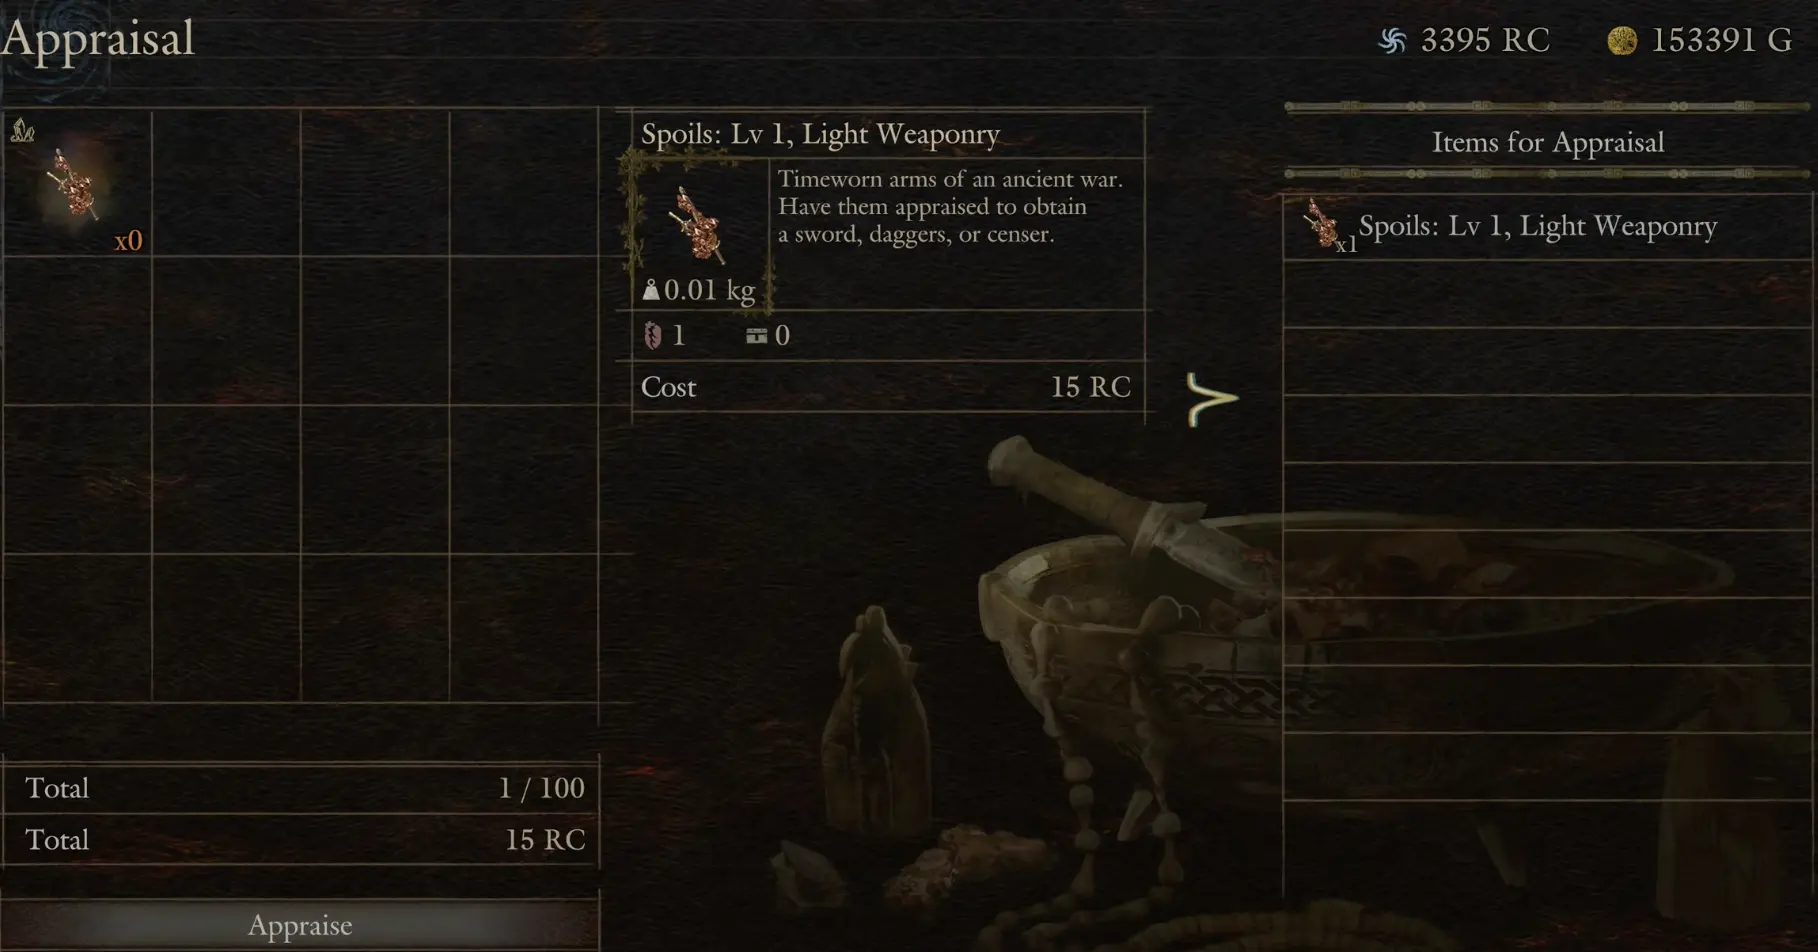
For example, appraising one Level 1 Light Weaponry Spoil costs 15 RC. Its item description lists three possible weapon types: sword, daggers, or censer. You choose the Spoil category, but not which of those weapons the appraisal will produce.
Future appraisals require you to provide your own currency.
Once an item is appraised, its identity and properties are revealed. A weapon may have improved attack power, an armor piece may offer resistances, and certain results carry additional skills or passive effects.
Inspect the result before deciding whether to equip it.
Appraisal is not the same as enhancing an existing weapon. You are revealing the contents of an unidentified Spoil, and the result may be either better or worse than what you already own.
Which Spoils Should You Appraise First?
The category matters because not every Spoil can produce equipment useful to your current party.
When your RC is limited, inspect the item type rather than selecting everything automatically.
| Spoils Category | Possible Equipment | When to Appraise |
|---|---|---|
| Light Weaponry | Fighter swords, Thief daggers, Trickster censers | One of these vocations needs a stronger weapon |
| Long Weaponry | Warrior, Sorcerer, Mystic Spearhand weapons | Your frontline or offensive caster needs an upgrade |
| Bowstaff | Archer, Mage, Magick Archer weapons | Your party relies on bows or staves |
| Aegis | Fighter shields | Your Fighter needs better protection |
| Plastron | Body armor | Your current armor has poor defenses or effects |
| Greaves / Helm | Leg armor and headgear | You need defensive bonuses or useful passive skills |
| Abandoned Supplies | Consumables and miscellaneous items | Supplies matter more than another equipment roll |
The category narrows the possible result, but it does not reveal the exact weapon, stats, or skills beforehand.
That is why appraising a high-level weapon Spoil for an active vocation is usually more compelling than identifying several armor pieces that cannot address your immediate weakness.
For example, if your Main Pawn is a Fighter and is struggling to survive, an unidentified shield may be more useful than another weapon for a vocation nobody in your party currently uses.
If your party already survives comfortably but lacks damage, prioritize weapon categories.
Can Party Composition Affect Spoils Drops?
The vocations in your party influence the types of weapon Spoils you are more likely to find.
A group containing Archer, Mage, and Magick Archer has a stronger reason to pursue Bowstaff Spoils, while a party built around Warriors and Sorcerers benefits more directly from Long Weaponry.
This matters before you return to Jiera. Matching your party to the equipment types you need can improve your chances of collecting useful Spoils instead of repeatedly finding weapon categories nobody currently uses.
It does not guarantee a particular weapon, rarity, or special skill when the item is appraised.
Each vocation’s Obelisk also offers a temporary Spoils Spawn Rate Boost. Activate the bonus for the vocation you want to equip before starting a focused farming trip.
The bonus helps you pursue suitable drops, but it should not be treated as a guaranteed appraisal result. For the activation requirements and duration, see the Obelisks of Benediction.
Level 1, Level 2, and Level 3 Spoils
Spoils also have levels.
Level 1 items are available early in Norgan and provide a relatively accessible way to replace underpowered equipment. A good Level 1 appraisal can be valuable even to a character who finished much of the original game.
Level 2 Spoils become more interesting as you fight stronger enemies and venture farther into Norgan. These are worth prioritizing when early equipment is no longer sufficient.
Level 3 represents the more demanding end of the Relic hunt. Collecting higher-level Spoils is attractive for advanced equipment, but the enemies guarding the relevant areas can be considerably more dangerous.
A higher level does not remove the randomized outcome of appraisal. It improves the pool you are pursuing, not your ability to choose a specific result every time.
For a character just arriving in Norgan, obtaining a useful Level 1 weapon and surviving the next expedition is often better than repeatedly attempting a Level 3 hunt that the party cannot finish.
There is no need to ignore every low-level Spoil, either. A weapon with a suitable skill or beneficial effect can remain useful after you have found equipment with better raw numbers.
Ancient Spoils vs Superior, Singular, and Majestic Relics
An Ancient Spoil is not simply one level higher than a normal Spoil. Its advantage is a better chance of revealing a higher-rarity result within the same equipment level.
Relic level and rarity affect different things. The level determines the general range of weapon attack, armor defense, and potential special-skill slots. Rarity distinguishes stronger outcomes within that level.
Equipment can appear with names such as Superior, Singular, or Majestic. Higher-rarity results can offer stronger statistics or more attractive skill combinations than ordinary equipment of the same level.
Ancient Spoils improve the chance of obtaining these desirable outcomes, but they do not guarantee one. A normal Level 2 weapon may still be more useful to your character than an Ancient Level 1 result, particularly when the former has much better base stats.
When choosing between another low-level Ancient Spoil and a higher-level weapon Spoil, consider whether your current weakness is insufficient attack power or the absence of a useful special skill.
How Much Does Relic Appraisal Cost?
Jiera charges Rift Crystals, not ordinary Gold, for appraisal.
The cost depends on the unidentified items being processed. You should inspect the amount shown in the appraisal menu rather than assume every Spoil has the same price.
A batch of 12 selected Spoils costs 145 RC in this example. This is the combined cost of the selected items, not a fixed per-item fee. Review the total before confirming, especially when your RC balance is low.
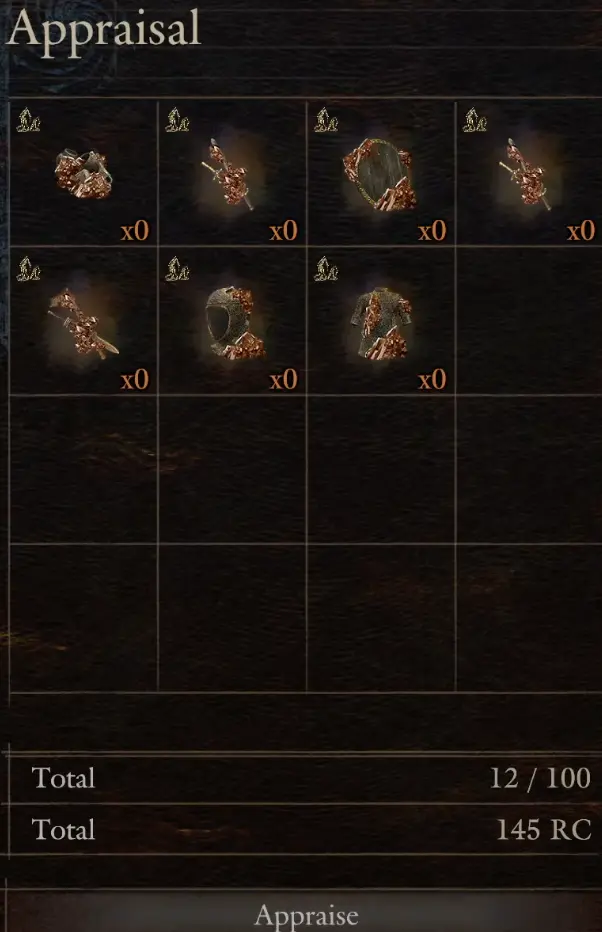
That batch produced a mixture of equipment and additional effects, including improved combat abilities and resistances.
The value came from the resulting equipment, not from the number of items processed.
Appraising several Spoils together is convenient when returning from a long expedition, but it is still possible to spend RC on results you have little reason to use.
Should You Appraise Everything at Once?
Not necessarily.
For a new arrival, a better approach is to start with the weapon or armor category that addresses your weakest equipment slot.
Check the result, compare it with your current loadout, and decide whether another appraisal is necessary.
A useful weapon may save you from spending more RC immediately.
If the first result is disappointing and you have another Spoil of the same category, trying again may be reasonable. Continuing to appraise unrelated categories simply because you have them in your inventory is much harder to justify.
Rift Crystals also pay for hiring Pawns.
Spending your entire balance at Jiera may leave you unable to hire the stronger Pawn you intended to use for the next difficult encounter.
Keep that competing expense in mind before processing a large batch.
Trade Spoils for RC or Keep Them?
Jiera can also exchange Spoils for Rift Crystals.
This is useful when you have collected several items you do not particularly need.
However, trading an unidentified Spoil gives up the opportunity to obtain its equipment or other reward.
The decision depends on what you are trying to accomplish.
Appraise when you need gear in that category, the item is a promising level, or its possible result could improve your active party.
Trade when you need RC more urgently than another uncertain equipment roll, particularly if the category is not relevant to your current characters.
Save when the item could become useful later but you do not have enough RC to appraise it comfortably.
Do not trade a higher-level weapon Spoil merely because you cannot equip the corresponding vocation right now. It may be worth holding for a later build.
Conversely, there is little value in hoarding every low-level supply bundle while your character is struggling with inventory weight.
How to Tell Whether an Appraised Relic Is Actually Better
Attack and defense numbers are only part of an appraised item’s value.
Some Relics carry special abilities that cannot be understood through their basic equipment rating.
An early weapon appraisal produced a Deerhorn Bow with substantially improved damage, while other results included effects such as Powder Barrage and a Stamina enhancement.
Another appraisal produced a Barbaric Axe with Forceful Strikes, an effect that increases knockdown power.
That second example is useful because it demonstrates why two weapons cannot always be compared by attack alone.
Knockdown Power Can Matter More Than Raw Damage
Forceful Strikes improves knockdown power.
If your Fighter or Warrior is repeatedly trying to stagger large enemies, that property can be valuable even when a different weapon offers somewhat higher damage.
The meaningful comparison is between what your party is missing and what the Relic provides.
Against enemies that are already easy to stagger, extra knockdown may contribute less than higher attack. Against a dangerous large monster, preventing another attack through a stagger can be more important.
One equipment comparison favored retaining an existing weapon because the new result improved knockdown but did not provide enough overall benefit to justify switching immediately.
That is a sensible way to evaluate unfamiliar Relics: equip them to solve a specific combat problem rather than assuming every new weapon is automatically an upgrade.
Special Skills Can Change the Decision
Some Relic weapons provide more than attack power or knockdown bonuses. They can carry passive effects or enhanced forms of existing vocation skills.
For Mage and Sorcerer, certain skills normally progress from a base version to a High version. A suitable Relic weapon can provide an additional Grand-tier enhancement to a matching skill.
Other vocations can also benefit from equipment that enhances their existing abilities.
These effects depend on the appraised weapon. You cannot select a particular skill at Jiera, and a powerful bonus is less useful if it does not support the vocation or attacks you regularly use.
This is why the Special Skills section deserves attention before replacing an equipped weapon.
Chaotic Strike: When a Lower-Damage Weapon May Still Be Useful
Chaotic Strike gives physical attacks a chance to inflict Icebound, Caught Fire, Sleep, or Silence.
Those effects can provide opportunities that ordinary attack statistics do not show.
For example, a Superior Barbaric Axe can carry both Eviscerating Skewer and Chaotic Strike. In the equipment comparison below, Slash Strength and Knockdown Power remain unchanged, but the additional status effect gives the weapon another way to influence combat.
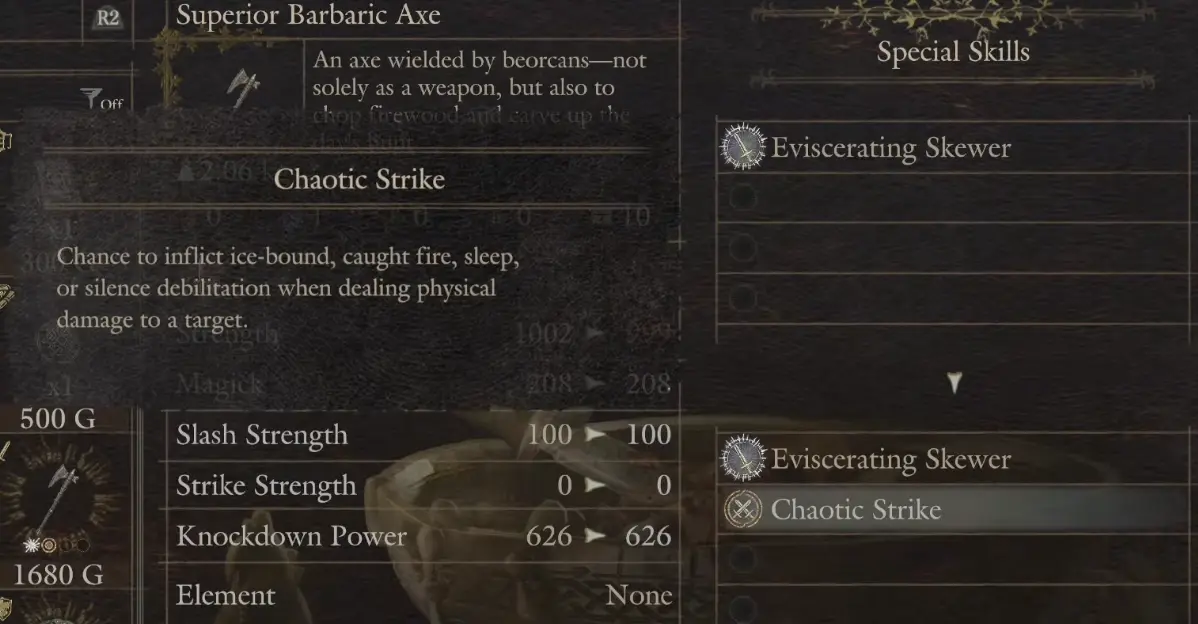
That does not make Chaotic Strike automatically better than a large increase in attack power. Its value depends on the enemies you are fighting and how often your character can apply physical hits.
Other equipment effects deserve the same evaluation. Eviscerating Skewer enhances a stabbing attack with additional strikes, while Spirit Counter is more useful against particular supernatural enemies.
Compare what the effect actually does for your party rather than choosing a weapon solely because it has more special-skill entries.
Compare Equipment on the Character Who Will Use It
A Relic may appear powerful in your inventory but be unsuitable for the character you intended to equip.
After appraising a batch:
- Inspect the weapon type and vocation compatibility.
- Compare the new item with the character’s existing equipment.
- Read any special-skill descriptions.
- Check resistances, knockdown values, and other useful stats.
- Equip the result only if it improves the role that character needs to perform.
Do this for your Main Pawn as well as your Arisen.
A weapon that improves the Pawn’s ability to hold enemies in place may be more useful to your party than a marginal increase in the Arisen’s damage.
When changing equipment, remember that your previous items can be stored rather than discarded immediately. Keeping a weapon with a useful specialized effect gives you the option to switch later.
Where to Get Level 1, Level 2, and Level 3 Spoils Early
You can obtain stronger Relics before completing most of Norgan’s story. The important distinction is how far you are willing to travel and which enemies your party can reliably defeat.
The easiest starting point is a Snatching-Beast’s Lair containing several loot piles. Beorcan Stronghold offers a more demanding route to Level 2 Spoils, while Frozen Ravine Hollow provides early access to enemies capable of dropping Level 3 equipment.
None of these routes guarantees a particular weapon or appraisal result. They give you access to different Spoils levels without requiring you to finish the Norgan campaign first.
Level 1: Search Snatching-Beast’s Lair Without Fighting
A Snatching-Beast’s Lair contains several piles of loot that can be collected without needing to defeat its resident monster.
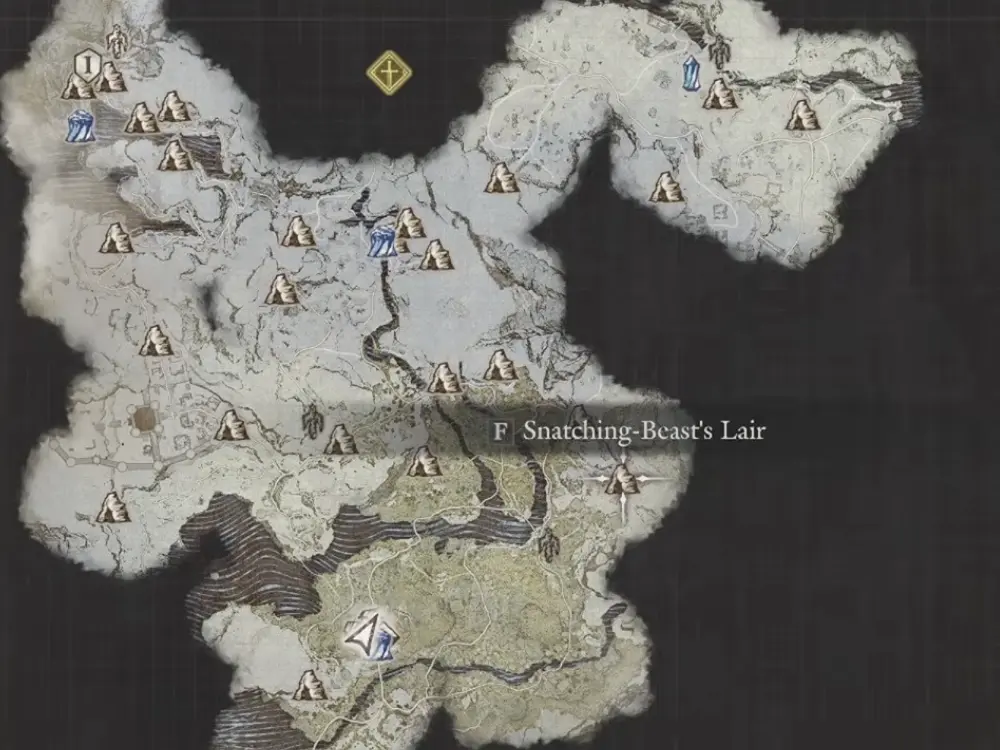
Search the cave carefully and inspect the available piles before leaving. They can contain unidentified Spoils, although some results will be consumables rather than weapons or armor.
This makes the lair useful when your current equipment is too weak to handle the stronger enemies farther north.
The beast associated with the lair may also appear nearby. It is a boss-type encounter that can provide additional Spoils, but fighting it is not required to collect the loot already inside the cave.
For an under-equipped Arisen, collecting the available items and returning to Jiera is a reasonable first trip. You can attempt the boss after improving your weapons.
A second Snatching-Beast’s Lair is located west of the route, just south of Beorcan Stronghold. This one lies in a more dangerous area where the surrounding encounters can yield Ancient Level 1 or Level 2 Spoils.
The second lair is therefore worth visiting once your party can comfortably handle enemies beyond the settlement. Check its loot piles and chests before deciding whether to fight the nearby beast.
These two locations are useful for obtaining equipment before committing to the harder stronghold encounters. Their loot should not be treated as a guaranteed endlessly repeatable chest farm.
Level 2: Farm Beorcans Beneath Beorcan Stronghold
Beorcan Stronghold is one of the more practical early places to seek Level 2 Spoils because several underground chambers contain small groups of enemies.
Head north from the settlement toward the stronghold. The area is affected by a persistent whiteout until the relevant story progression changes its conditions, so navigation requires more care than usual.
Open the large map after entering the stronghold.
Several dark square-shaped areas indicate openings leading into underground passages. Descend into these chambers and fight the Beorcans inside.
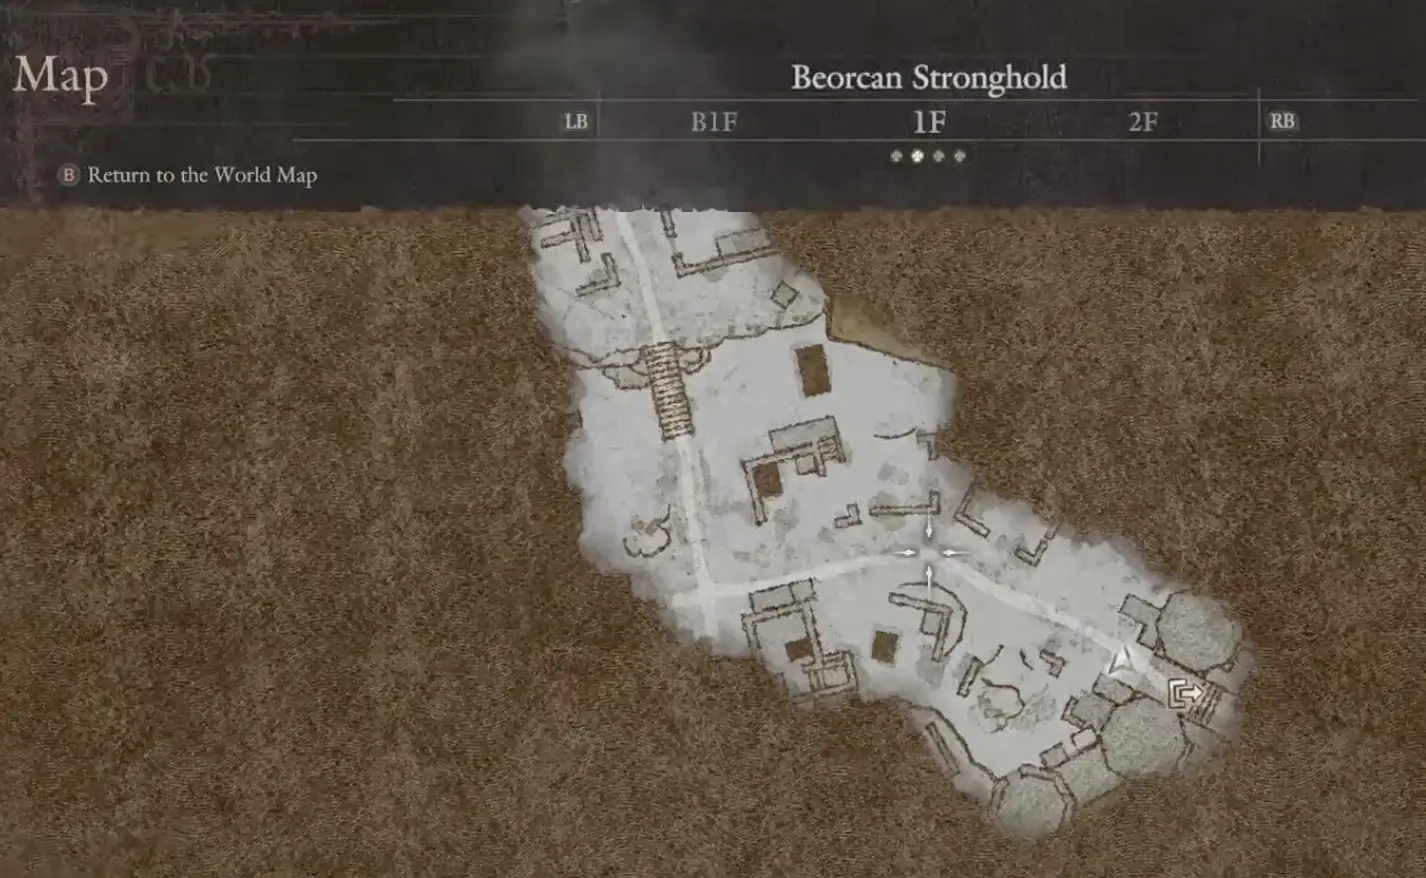
Most of these encounters involve only one or two enemies at a time. A full party of four can concentrate its attacks on these smaller groups instead of confronting every enemy above ground simultaneously.
The Beorcans in these passages are useful targets for Level 2 Spoils.
This does not mean every enemy is guaranteed to drop a Level 2 item. Check the actual drops after each encounter and collect any Ancient or higher-level Spoils you find.
Navigate the Whiteout Without Losing Your Position
The stronghold’s whiteout makes it difficult to rely on the usual directional information.
Open Options → Game Settings and turn Minimap Rotation off.
You can then use the large map to identify your position and compare it with the direction indicated by your minimap. This makes moving between the underground entrances considerably easier.
Focus on the accessible chambers rather than exploring every passage immediately.
The central locked room requires two Beorcan’s Twinned Keys and contains valuable one-time treasure. However, opening that gate is not necessary for farming Level 2 Spoils from the accessible underground Beorcans.
If your goal is repeatable equipment drops, clear the available enemy chambers first. Return to the locked room when you want its fixed treasure rather than treating it as another farming location.
Continue North for More Level 1 Ancient and Level 2 Spoils
The path running north of Beorcan Stronghold offers another opportunity to collect stronger equipment.
Follow the road beyond the stronghold and clear enemies along the accessible route.
The enemies in this area can provide Ancient Level 1 and Level 2 Spoils, making it useful when you want several possible appraisals without traveling all the way into Norgan’s most difficult northern regions.
There is a straightforward stopping point: once you have collected enough promising weapon or armor Spoils, return to the settlement and appraise them.
A useful Level 2 weapon may make the next set of encounters significantly easier. There is little benefit in carrying a full inventory farther into dangerous territory without checking whether you have already obtained an upgrade.
Level 3: Reach the Higher Area Through Frozen Ravine Hollow
You can reach enemies capable of dropping Level 3 Spoils before completing the story progression that normally opens the northern mountain route.
The access point is Frozen Ravine Hollow, a cave near an early northern Portcrystal.
Its entrance is concealed behind a breakable rock obstruction. Another breakable wall lies inside the cave, and the passage beyond leads to the upper side of the mountain.
Follow the Frozen Ravine Hollow shortcut to reach the higher terrain.
Once outside the cave, explore the elevated northern area. Enemies here can provide Level 2 Spoils, while tougher bosses can drop up to Level 3 Spoils.
The route becomes more rewarding as you continue eastward, where the stronger encounters offer further opportunities for Level 3 equipment.
There is a significant difference between collecting a few early Level 2 Spoils and defeating a boss in this region.
The latter can take a considerable amount of time with ordinary early Norgan equipment. If your party repeatedly loses to the same encounter, return after appraising stronger weapons from the lower-level routes.
Level 2 equipment is a sensible stepping stone toward these fights.
You do not need to defeat every advanced enemy during your first visit. Reaching the area, obtaining a useful Spoil, and returning safely is already worthwhile.
When Should You Stop Farming and Return to Jiera?
Choose your next trip according to what your party can reliably handle.
- Snatching-Beast’s Lair: Collect accessible loot piles when your equipment is still too weak for demanding fights.
- Beorcan Stronghold: Fight smaller groups in the underground chambers for opportunities to obtain Level 2 Spoils.
- Northern highlands: Pursue tougher enemies for higher-level Spoils once your party can survive those encounters consistently.
After obtaining several useful items, return to Jiera instead of continuing into more dangerous areas with unappraised equipment.
A good Level 2 weapon can make the next farming trip substantially easier. Continuing to fight stronger enemies before checking your inventory may mean taking unnecessary risks with equipment you could already improve.
If you intend to farm a particular weapon category, activate the corresponding Obelisk’s temporary Spoils bonus before departure.
Keep fixed treasure separate from repeatable enemy drops. A chest that rewards useful equipment once should not be treated as an endlessly renewable source of Spoils.
If repeated appraisals are consuming your RC without producing the equipment your party needs, consider collecting fixed weapons or armor from Lost Rites instead of continuing to roll random results.