All 9 Obelisk Locations & New Vocation Skills in Dark Arisen
Find all nine Obelisks of Benediction in Norgan, unlock ten new vocation skills, reach hidden shrines, and choose which Offering Flame upgrades to buy.
Updated:
Quick Answer
Once you arrive in Norgan, find the Obelisk of Benediction for your vocation and buy its first skill with Discipline Points (Dcp). You do not need an Offering Flame for that first purchase. To unlock the upgraded skill, permanent stat enhancement, and temporary Spoils bonus, offer a flame obtained from a completed Lost Rite.
Norgan contains nine Obelisks of Benediction, each associated with one vocation. There is no separate Warfarer Obelisk. Trickster is the exception to the usual one-skill arrangement: its shrine offers two new skills, bringing the total to ten initial skill lines across the nine locations.
The closest Obelisks can be reached soon after entering Norgan, but the northern shrines are less straightforward. Some sit above the road you are following, three lie beyond a mountain passage normally opened later in the story, and the Warrior Obelisk is hidden inside a cave where severe Whiteouts can make navigation difficult.
If you only want the new skills, you can collect them before completing the Norgan campaign. Bringing Offering Flames becomes important when you want the stronger versions and additional enhancements.
All Nine Obelisks: Locations, Skills, and Stat Enhancements
| Vocation | Location | Skill → Upgrade | Stat Enhancement |
|---|---|---|---|
| Mage | East of Norgandian Settlement | Virtuous Bolt → Exalted Bolt | Magick Defense |
| Fighter | Valgr Ravine, off the road northeast of Mage | Whirlwind Strike → Hurricane Strike | Defense |
| Sorcerer | South of Beorcan Stronghold, near a cliff | Brontide → High Brontide | Magick |
| Thief | Near Rivercave Campground, above the northern road | Fanged Schism → Fanged Rift | Strength |
| Archer | Cliff near Underhill Passage, south of Thief | Falcon Arrow → Kite Arrow | Stamina |
| Mystic Spearhand | Northern Norgan, beyond the mountain passage | Bataille Twinne → Bataille Idole | Strength and Defense |
| Magick Archer | Norgan Snowfield, east of the chasm | Shadebind Bolt → Shadefetter Bolt | Magick and Magick Defense |
| Trickster | Beyond Gagana’s Grotto, across the northern chasm | Curing Cloud → Vitalising Vapor; Diverting Fume → Rousing Aroma | Health and Stamina |
| Warrior | Cave at Mad-Lord’s Chapel | Iron Cleave → Steel Cleave | Health |
Mage, Fighter, and Sorcerer are practical early targets because their approaches begin near the settlement and stronghold roads. Thief and Archer can be collected during the same northern excursion.
Mystic Spearhand, Magick Archer, and Trickster are best grouped into a single trip once you reach the northern snowfield. Warrior is a separate expedition because its shrine is farther away and requires navigating dangerous terrain near Mad-Lord’s Chapel.
How Offering Flames and Dcp Purchases Work
Finding an Obelisk does not automatically unlock its associated skill.
Interact with the monument to open its purchase menu. The first form of the vocation skill can be bought with Dcp even while the Obelisk remains frozen.
Most initial skills cost 2,500 Dcp. Sorcerer and Magick Archer have 5,000 Dcp initial purchases, while Trickster offers two separate skills at 2,500 Dcp each.
After purchasing the ability, you can equip it immediately without returning to a Vocation Guild.
What Changes When You Offer a Flame?
An Offering Flame melts the ice around the monument and opens its additional purchase options.
These include:
- The upgraded form of the Obelisk skill.
- A permanent attribute enhancement.
- A temporary bonus that improves Spoils availability for the associated vocation.
The upgraded skill is a separate Dcp purchase. Offering the flame unlocks access to it; the flame does not automatically grant the stronger ability.
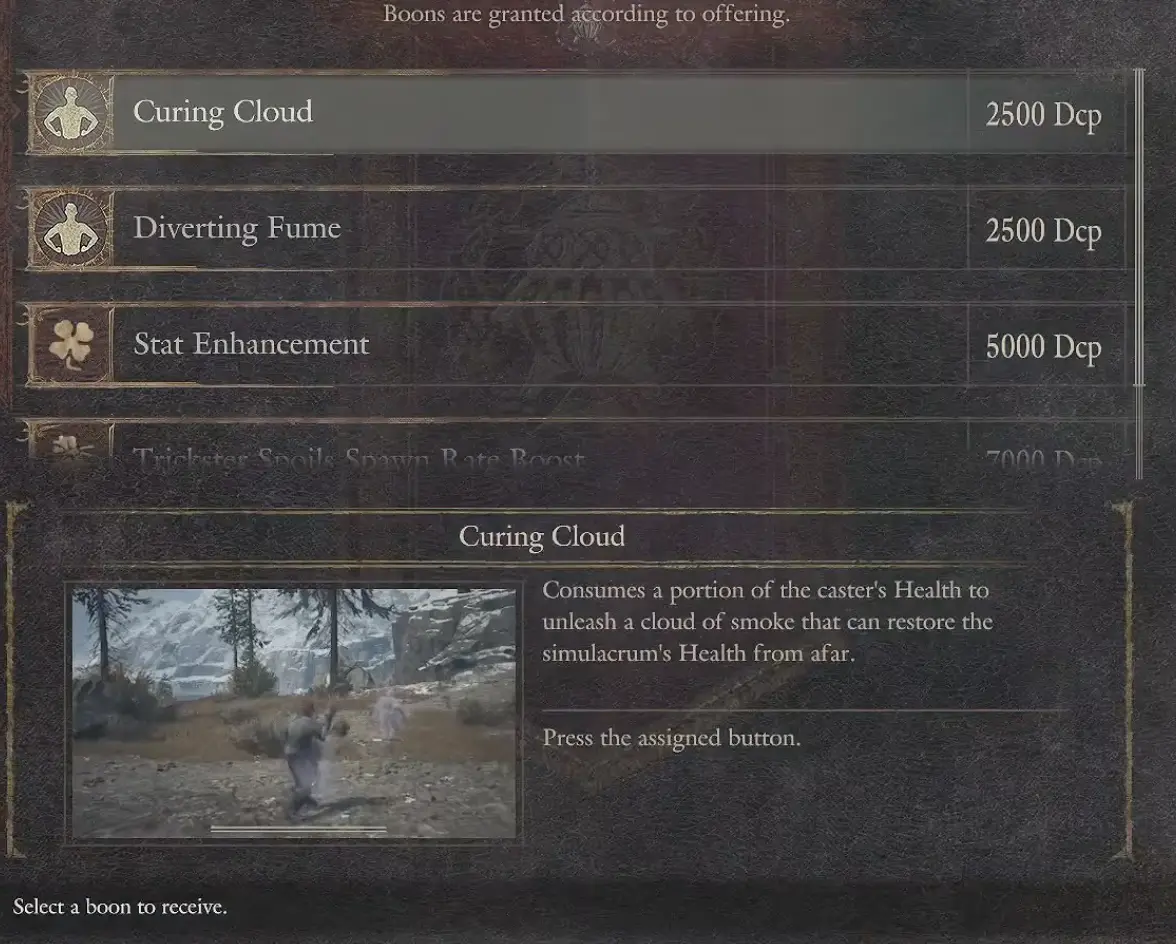
For example, the Trickster menu shows a 5,000 Dcp Stat Enhancement and a 7,000 Dcp Trickster Spoils Spawn Rate Boost. Those are different purchases serving different purposes.
The permanent enhancement is useful throughout your adventure. The Spoils bonus is temporary, so purchasing it immediately before a long journey unrelated to farming wastes part of its duration.
Where Do Offering Flames Come From?
Offering Flames are rewarded for clearing Lost Rites in Vermund and Battahl.
You do not need to complete all the trials before using your first flame. A single completed Lost Rite provides a flame that can be offered at an Obelisk you have already discovered.
For dungeon entrances, first-clear restrictions, and important rewards, follow the Lost Rites locations and rewards.
Which Obelisk Should Receive Your First Flame?
The most useful first choice is usually the vocation your Arisen actively plays. If your Main Pawn is responsible for most of your frontline damage or healing, its corresponding Obelisk is a strong second choice.
A Sorcerer Arisen with a Warrior Main Pawn, for example, has an immediate reason to improve Brontide and the Warrior’s close-range attack before buying enhancements for vocations neither character regularly uses.
Permanent attributes provide another reason to visit other Obelisks later. Archer gives Stamina, Thief gives Strength, and Trickster provides Health and Stamina, so those enhancements can remain useful even when you are playing a different vocation.
There is no need to save every Offering Flame until all nine monuments have been found.
Before Leaving the Settlement: Climbing Hooks and Fast Travel
A few preparations make collecting the Obelisks considerably easier.
Climbing Hooks allow you to use certain tether posts and reach elevated paths. They are consumable, so carrying at least one is useful when exploring a route that depends on a hook.
Mage and Sorcerer can avoid some of these obstacles with Levitate. That makes either vocation convenient for reaching difficult shrines, even if the skill you intend to collect belongs to another class.
You do not need to travel as the Obelisk’s associated vocation. Once you have unlocked the desired skill, you can switch back when convenient.
Portcrystals are also worth planning around. Activate Norgan’s fixed Portcrystals as you encounter them. If you have a portable one to spare, the Obelisk associated with your active vocation is a useful place to consider placing it.
The temporary Spoils bonus lasts one in-game day. Returning to the same Obelisk becomes more convenient when you can travel directly to it instead of repeating a lengthy mountain journey.
1. Mage Obelisk — East of Norgandian Settlement
Location: Eastern hillside beside the starting settlement
Skill: Virtuous Bolt → Exalted Bolt
The Mage Obelisk is one of the easiest monuments to reach after arriving in Norgan.
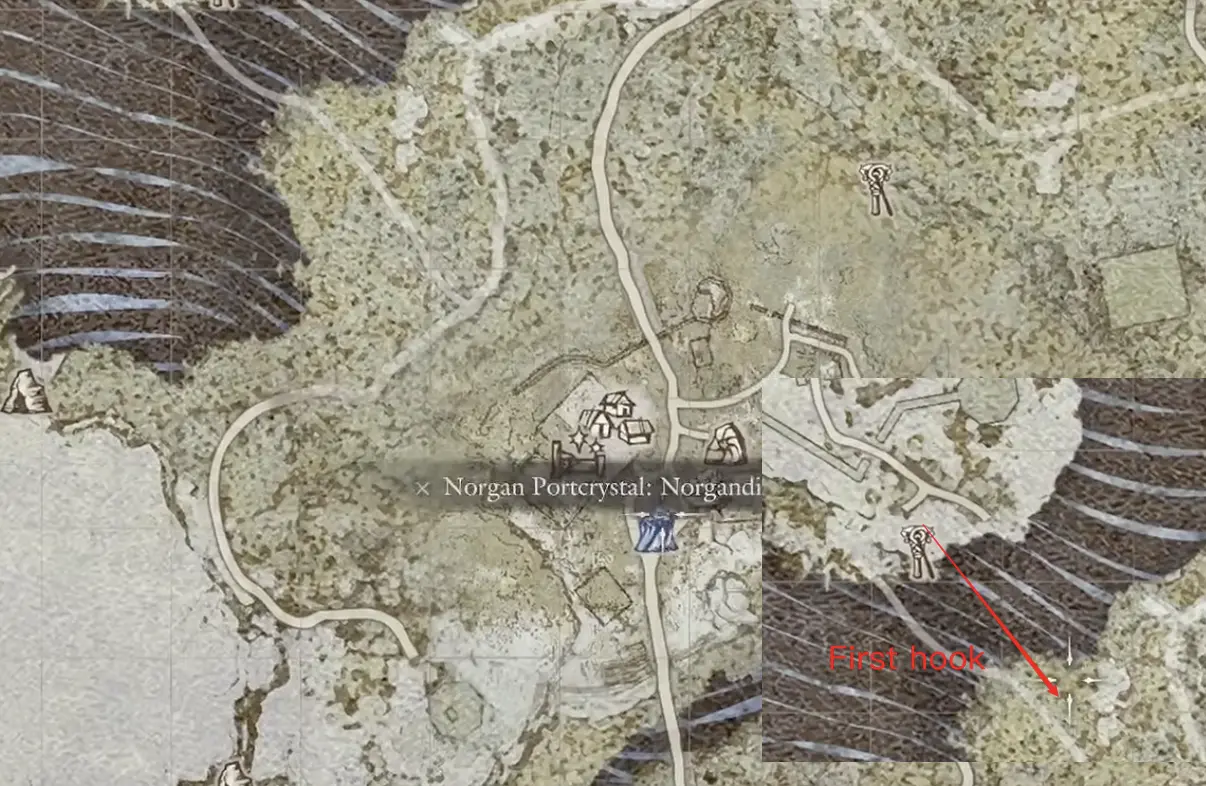
From the Norgandian Settlement, look toward the eastern hillside. The Obelisk stands above the village road, with a climbing route leading toward its platform.
A tether post near the shrine provides the intended way up.
Use a Climbing Hook at the post to reach the platform. If you are traveling as Mage or Sorcerer, Levitate can bypass the obstacle.
You do not need to venture into the distant northern mountains for this skill, making it a sensible first stop for a Mage-focused party.
What Does Virtuous Bolt Do?
Virtuous Bolt adds supplementary holy projectiles when you use the appropriate staff core attacks. Its upgraded form, Exalted Bolt, improves that effect.
The skill can add damage while a Mage continues using their regular staff abilities. This makes it particularly relevant when your Main Pawn is a Mage, as it gives that character additional offensive utility without requiring a complete change of party role.
The Obelisk’s permanent enhancement improves Magick Defense.
Because the shrine is close to the settlement, you can return for its Offering Flame upgrades later without committing to another lengthy expedition.
2. Fighter Obelisk — Valgr Ravine Road
Location: Valgr Ravine, northeast of the Mage shrine
Skill: Whirlwind Strike → Hurricane Strike
The Fighter Obelisk is another practical early pickup.
Leave the settlement and follow the road into Valgr Ravine. The shrine stands on elevated ground near a river crossing, a short distance from the main road.
You do not need to enter a distant cave or complete a mountain quest to reach it.
Approach along the road until you are near the marked hillside, then climb toward the monument instead of taking unnecessary detours across the ravine.
Whirlwind Strike and Hurricane Strike
Whirlwind Strike provides a rushing sequence of sword attacks, ending with a stronger blow. Its upgrade, Hurricane Strike, improves the attack sequence.
For an Arisen or Main Pawn using Fighter, this is a useful addition when you want to close the distance and maintain offensive pressure.
The associated enhancement improves Defense.
Because Fighter is a common frontline Pawn vocation, this shrine may deserve an early Offering Flame even when your Arisen plays something else.
If neither character currently uses Fighter, buy the initial skill if desired and save the flame for a more immediate upgrade.
3. Sorcerer Obelisk — South of Beorcan Stronghold
Location: Cliffside south of Beorcan Stronghold
Skill: Brontide → High Brontide
The Sorcerer Obelisk can be reached relatively early, but taking the wrong road creates a much longer trip than necessary.
Leave the Norgandian Settlement and follow the northern road toward Beorcan Stronghold.
As you approach the stronghold region, look for the branch that leads toward the lower cliffside route. Do not continue climbing directly into the stronghold.
Follow the lower path to the Obelisk.
The Climbing Hook Shortcut
A tether post along the northern approach provides a shorter route to the Sorcerer shrine.
Using a Climbing Hook here can save considerable travel time compared with following the entire road around.
If you have no hook, stay on the established route. The longer path is preferable to repeatedly attempting steep icy ledges that do not connect to the shrine.
Why Brontide Is Worth Collecting Early
Brontide creates a lightning whip that lasts for roughly a minute and can be used to attack enemies at relatively close range.
Its main advantage is that you can continue casting other spells while the whip effect remains active. After finishing a spell, you can return to attacking with Brontide instead of having to start the entire effect again.
This gives Sorcerer a useful response when enemies get too close for comfortable long casting.
High Brontide improves the skill, making the Sorcerer Obelisk a strong early Offering Flame candidate for players who regularly use it.
The permanent enhancement provides additional Magick.
If Sorcerer is your primary vocation and you expect to activate its temporary Spoils bonus repeatedly, placing a spare Portcrystal near this shrine can save repeated journeys from the settlement.
4. Thief Obelisk — Rivercave Campground
Location: Elevated route near Rivercave Campground
Skill: Fanged Schism → Fanged Rift
The Thief Obelisk lies farther north, near an area visited during the early Norgan story.
From the settlement, follow the northern roads toward Rivercave Campground and activate the fixed Portcrystal when you reach it.
The shrine is above the surrounding road. Look for the nearby stairs and ascending path rather than descending into the lower terrain.
Enemies may be present around the approach, so clear the immediate area before interacting with the stone.
The monument’s glow is easy to recognize at night or during poor visibility, but the elevation of the approach matters more than its apparent distance on the map.
Fanged Schism and Fanged Rift
The initial skill is Fanged Schism.
Its upgraded form, Fanged Rift, combines an evasive movement with an attack that launches the enemy and follows with a damaging burst.
That movement makes the skill useful for a vocation built around repositioning and exploiting openings.
The Thief Obelisk also offers a Strength enhancement. This is one of the more broadly useful permanent upgrades for characters who rely on physical damage.
If you are collecting multiple Obelisks during the same trip, the Archer shrine is a convenient next destination.
5. Archer Obelisk — Near Underhill Passage
Location: Elevated cliffside route near Underhill Passage
Skill: Falcon Arrow → Kite Arrow
The Archer Obelisk is located near Underhill Passage, south of the Thief shrine.
From the Thief area, travel southwest toward the entrance to the surrounding valley cave system. Follow the connecting trail south toward the cliffside monument.
The important detail is the height of the shrine.
Approaching its position from the valley floor may leave you below the correct route. Use the higher trail or reach the appropriate side of the rock formation before trying to move toward the marker.
If you are coming from the settlement instead, stay with the northern road and follow the branch toward Underhill Passage rather than attempting a straight climb from below.
Falcon Arrow and Kite Arrow
Falcon Arrow gives Archer a close-range acrobatic attack that uses contact with an enemy to reposition the character and fire a shot.
The upgraded Kite Arrow develops that movement-based attack further.
The skill is useful when a target closes the distance and you need to create separation while continuing to deal damage.
Archer’s permanent enhancement increases Stamina, a benefit that remains useful for climbing, sprinting, evasive movement, and many vocation skills.
Even if Archer is not your primary vocation, the Stamina enhancement makes this a worthwhile shrine to revisit after you have funded the most important upgrades for your active party.
6. Reach the Northern Obelisks Early Through Frozen Ravine Hollow
The next three Obelisks belong to Mystic Spearhand, Magick Archer, and Trickster.
They lie beyond the northern mountain passage, which becomes accessible through normal story progression. However, you can reach the area earlier by traveling through Frozen Ravine Hollow.
This allows you to obtain the new skills before completing a large portion of the Norgan campaign.
If your party is already struggling against the enemies around Beorcan Stronghold, the shortcut does not make the northern snowfield safer. You can wait until the main story opens the usual route instead.
For the normal progression through the mountains, follow the Norgan main quest walkthrough.
Find the Frozen Ravine Hollow Entrance
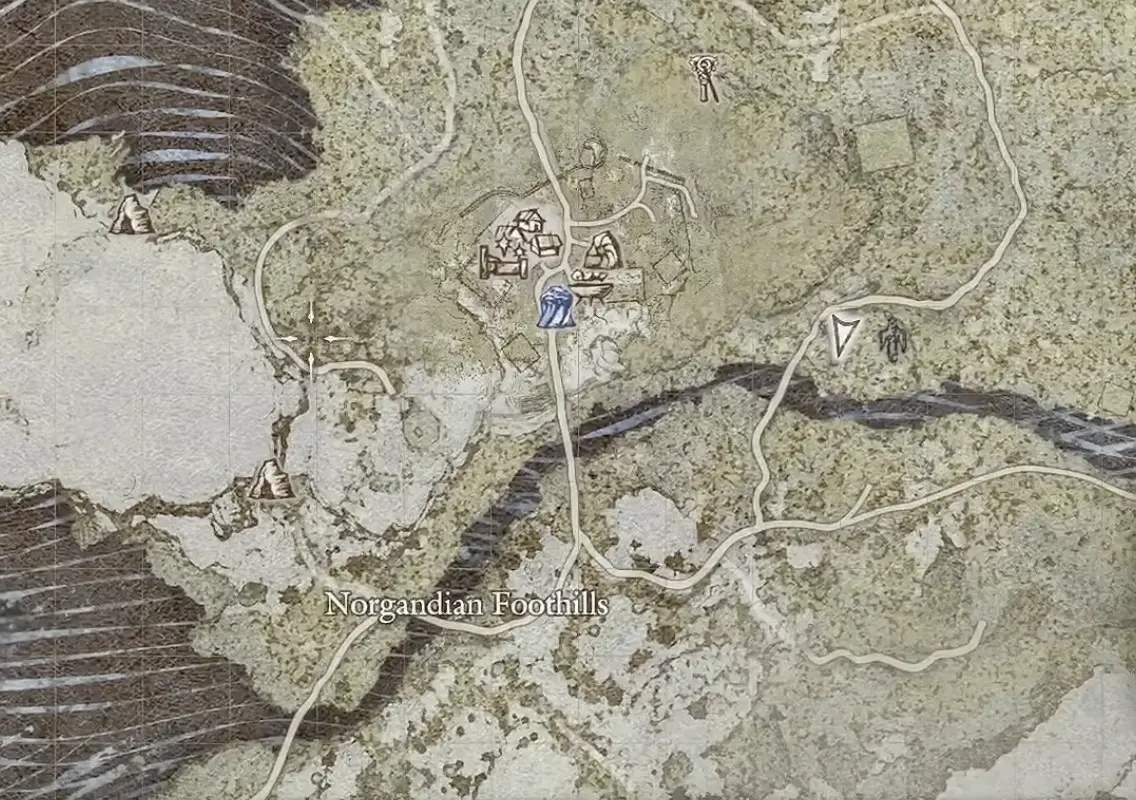
Start from the Norgandian Settlement and travel north toward the campground containing a fixed Portcrystal.
Activate it before continuing.
From the campground:
- Head south, passing underneath the large icy spikes.
- Continue to the ledge overlooking the lower terrain.
- Drop down carefully toward the cave entrance.
- Break the large boulder obstructing the entrance.
- Enter Frozen Ravine Hollow and take the right-hand passage.
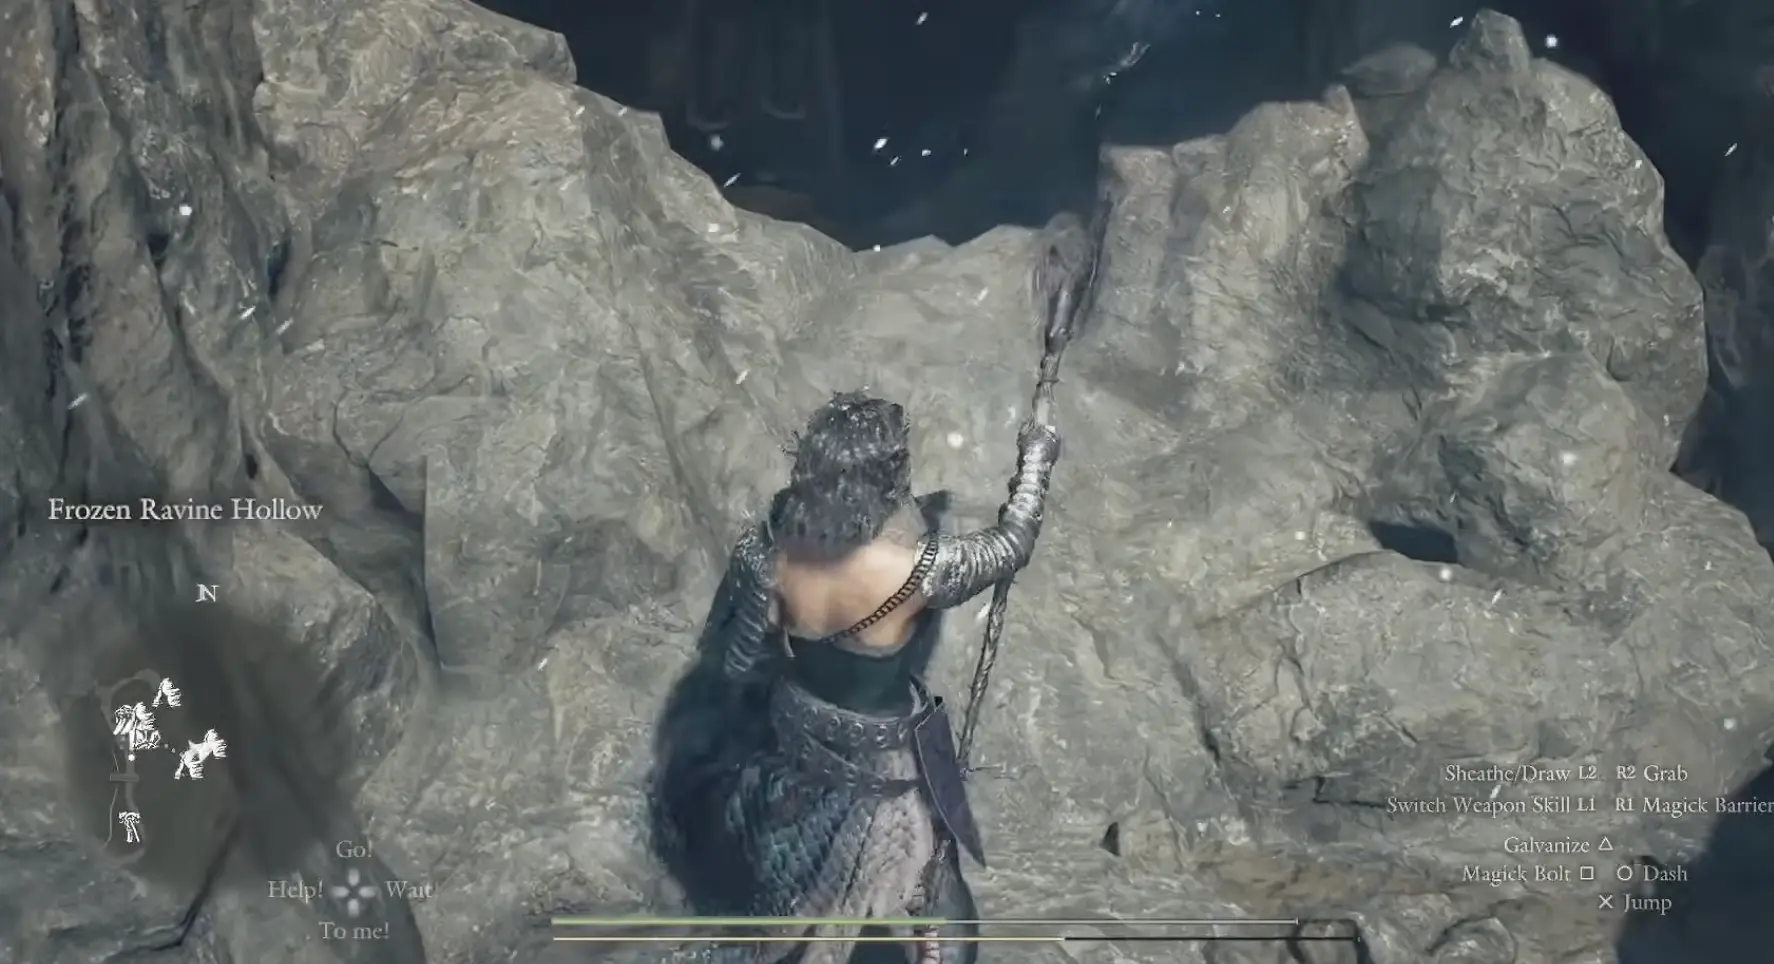
More breakable boulders obstruct the interior passages. Destroy them as you advance instead of assuming that a blocked tunnel is a dead end.
Continue through the cave until you emerge on the far side of the mountain.
From the exit, follow the lighter connecting path toward the main road. Turn right when you reach the main road and continue until you find a smaller ascending path leading toward a series of ledges.
Climb those ledges to reach the Mystic Spearhand Obelisk.
This route is particularly useful because Magick Archer and Trickster can be collected during the same northern excursion.
7. Mystic Spearhand Obelisk — Beyond Frozen Ravine Hollow
Location: Elevated northern route beyond the mountain passage
Skill: Bataille Twinne → Bataille Idole
After leaving Frozen Ravine Hollow, head toward the main road and take the smaller path climbing the nearby ledges.
The Mystic Spearhand Obelisk is above this route.
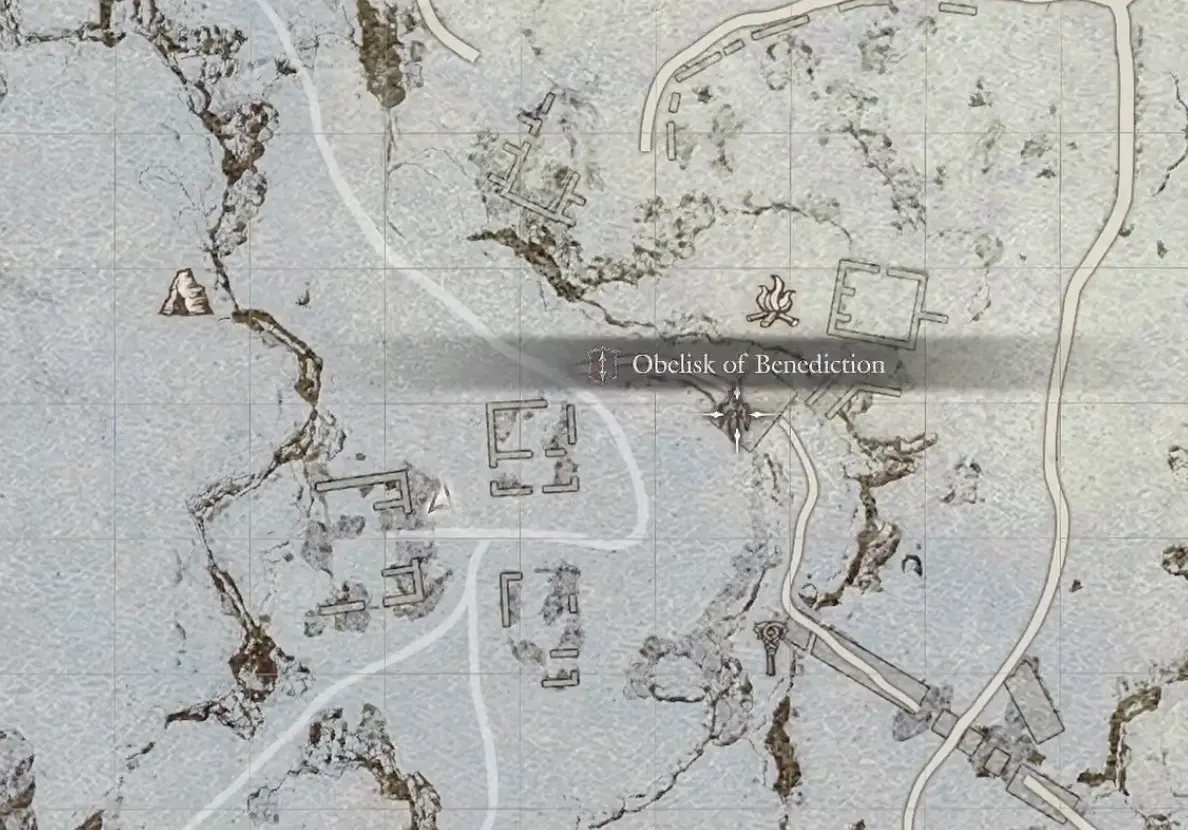
A frequent mistake is attempting to approach the shrine directly from the lower road. The map marker may appear close, but the final ascent begins at the side path.
If a Whiteout makes the terrain difficult to read, use the full map to confirm that you are following the elevated route rather than wandering into a nearby ravine.
Bataille Twinne and Bataille Idole
Bataille Twinne creates a phantom of the Arisen that attacks while the character moves backward.
It allows Mystic Spearhand to create distance while maintaining offensive pressure.
The upgraded form is Bataille Idole, which strengthens the summoned attack.
The shrine’s permanent enhancement improves both Strength and Defense.
If Mystic Spearhand is your regular vocation, taking the Frozen Ravine Hollow shortcut can be worthwhile because you gain access to the new skill earlier in the campaign.
Once you have collected it, continue north toward the Magick Archer shrine rather than returning immediately to the settlement.
8. Magick Archer Obelisk — Norgan Snowfield
Location: Elevated hill in Norgan Snowfield, east of the chasm
Skill: Shadebind Bolt → Shadefetter Bolt
From the Mystic Spearhand Obelisk, continue north toward Norgan Snowfield.
The Magick Archer shrine stands on a hill east of the large chasm, near the approach to Snowslide Pass.
Follow the road through the snowfield and look for the path ascending toward the monument. Avoid descending into the gorge simply because the marker appears close on the map.
The shrine is comparatively straightforward once you are in the correct part of the snowfield. Reaching that region is the more significant obstacle.
Shadebind Bolt and Shadefetter Bolt
Shadebind Bolt fires a magickal projectile that slows an enemy’s movement.
For Magick Archer, this is useful when fighting mobile enemies or when the party needs more time to reposition and attack.
Its upgrade, Shadefetter Bolt, extends the slowing effect while reducing the Stamina needed to use it.
The permanent enhancement improves Magick and Magick Defense.
Players already using Magick Archer have a clear reason to unlock the first skill as soon as they reach the snowfield. The upgrade becomes more attractive when controlling fast-moving targets is a regular part of their combat strategy.
The next shrine, Trickster, is relatively close on the map but significantly less direct to reach.
9. Trickster Obelisk — The Bridge and Cliffside Route
Location: Northern cliffs beyond Gagana’s Grotto
Skills: Curing Cloud and Diverting Fume
The Trickster Obelisk is one of the easiest northern shrines to approach from the wrong side.
Although it appears close to the Magick Archer area, a large chasm and surrounding cliffs prevent a direct crossing.
Do not descend into the lower gorge and try to climb straight toward the shrine marker. That route can leave you beneath the destination with no convenient way back up.
Instead, return toward the crossroads and take the smaller connecting path leading toward the bridge and cave approach.
Cross the Bridge Area Without Getting Trapped Below
At the bridge, you have two practical options.
If you have Levitate: Approach the left side near the bridge and descend onto the route curving around the cliff. Use Levitate to cross exposed sections and reach the far side without following the longer interior route.
If you do not have Levitate: Enter the cave and follow its connected passages toward the same destination. The route is longer but avoids relying on the aerial shortcut.
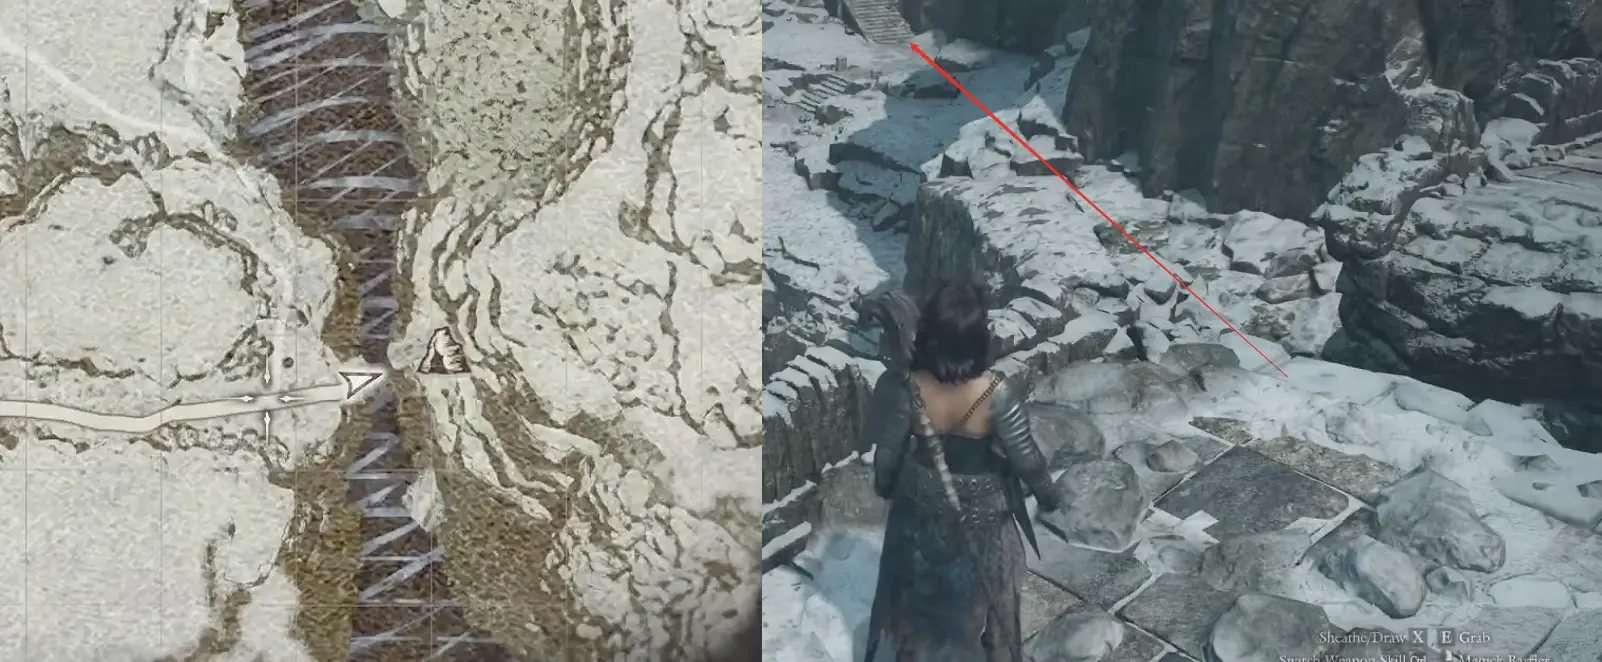
After following the cliffside route, you reach a large ruin entrance.
Go inside and take the immediate left turn.
Follow the corridor, take the next left-leading passage, and continue until you emerge on the correct side of the ruins.
From there, proceed to the Trickster Obelisk.
The bridge, cliffside path, and large entrance are more useful navigation landmarks than the apparent distance to the shrine on the map.
Why Trickster Has Two New Skills
Unlike the other eight vocation Obelisks, the Trickster monument offers two initial weapon skills.
Curing Cloud consumes part of the Arisen’s Health to release a cloud that restores the Health of the Trickster’s Simulacrum from a distance.
It does not directly heal the Arisen. Its purpose is to keep the illusion active when it has suffered damage.
The upgraded form is Vitalising Vapor.
Diverting Fume changes enemy targeting behavior, redirecting aggression away from the Simulacrum. It provides another way to manage which members of the party enemies attack.
Its upgraded form is Rousing Aroma.
These abilities make the Trickster’s illusion and enemy-positioning mechanics more flexible, but they do not replace the need to protect your own character.
The permanent enhancement provides Health and Stamina, one of the more broadly useful combinations for an Arisen using several vocations.
Even if Trickster is not part of your regular setup, this enhancement makes the shrine worth remembering.
10. Warrior Obelisk — Mad-Lord’s Chapel
Location: Cave at Mad-Lord’s Chapel
Skill: Iron Cleave → Steel Cleave
The Warrior Obelisk is the most demanding of the nine to collect immediately after entering Norgan.
It sits beyond Beorcan Stronghold, along the broader route toward the Sage, inside a cave associated with Mad-Lord’s Chapel.
Unlike the Mage and Fighter shrines, reaching it requires navigating a long stretch of hostile northern terrain. A severe Whiteout can obscure the route, and an enemy may be guarding the final Obelisk.
You can reach the shrine before completing the expansion, but it is reasonable to postpone the trip if your party cannot survive the surrounding enemies.
Follow the Route Through Beorcan Stronghold
Leave the Norgandian Settlement and follow the northern road to Beorcan Stronghold.
Enter the stronghold and proceed through its main passage.
At the appropriate junction, turn right and continue through the archway toward the far side of the ruins.
Follow the connecting path, using the stairways and elevated passages to move through the damaged stronghold structures.
The route eventually leads across a bridge and into a connecting cavern.
Mage or Sorcerer can make the exposed crossing easier with Levitate, particularly when the path ahead is difficult to follow in poor visibility.
After passing through the cavern, continue along the road until you can turn right and climb a final large staircase.
That staircase leads to the cave containing the Warrior Obelisk.
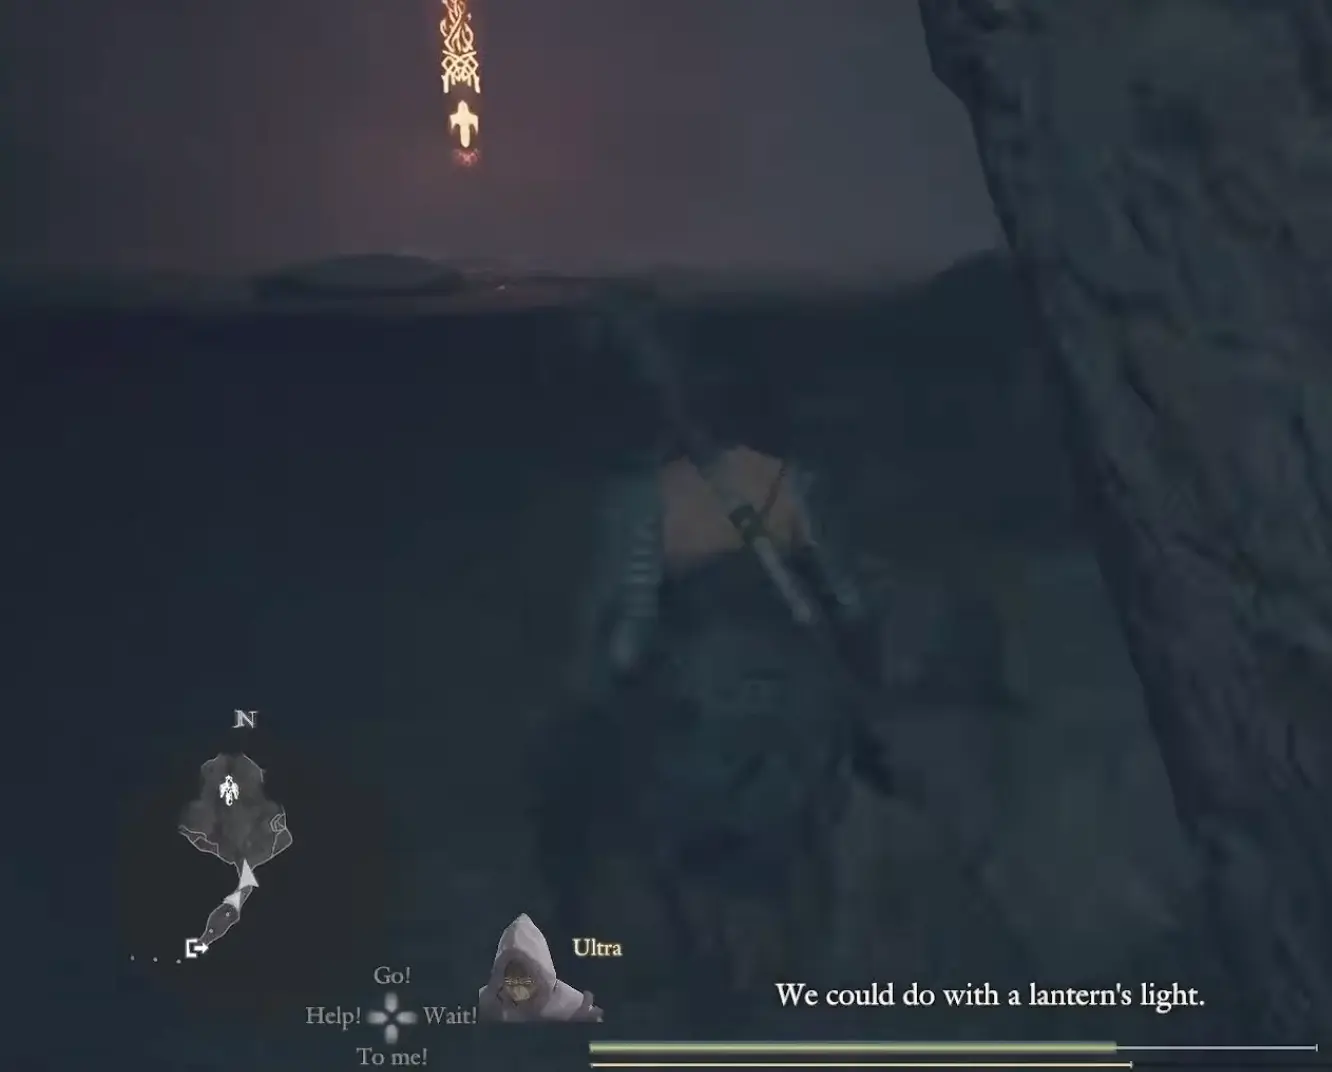
How to Navigate the Whiteout
The severe weather along this route can create two problems at once: it reduces visibility and steadily drains Stamina.
The most useful technique is to keep a consistent directional reference.
Disable minimap rotation if it is making your orientation difficult to follow, then compare your position with the full map, which remains readable during the storm.
Travel in short sections:
- Identify the next road segment on the full map.
- Follow the visible ground path until the next turn or staircase.
- Open the map again to confirm your direction.
- Continue toward the next archway, bridge, or tunnel.
Do not rely solely on the Obelisk’s glow. It may help you recognize the destination once nearby, but it does not reveal the safe route through the cliffs.
If your Stamina is running low, stop using unnecessary sprinting and recover before continuing. Carrying restorative items is particularly useful on this expedition because a wrong turn in a Whiteout can consume more resources than the distance suggests.
Defeat the Guardian and Claim the Skill
Once you reach Mad-Lord’s Chapel, enter the cave and prepare for a difficult enemy encounter near the shrine.
You may need to defeat the guardian before safely interacting with the Obelisk.
Do not use all your remaining healing supplies just to finish the approach. The final encounter can be more dangerous than the last stretch of walking.
When the area is safe, purchase Iron Cleave.
The upgraded form, Steel Cleave, sends the Warrior forward while dragging a two-handed weapon along the ground through multiple hits before finishing with a forceful upward swing.
It gives Warrior an aggressive moving attack rather than another stationary heavy strike.
The associated enhancement increases Health.
For a Warrior Arisen or Warrior Main Pawn, the new skill and Health enhancement can justify the long journey. For everyone else, collecting the easier shrines first is a reasonable choice.
What to Spend Dcp and Offering Flames On
Once the nine locations are discovered, the remaining question is how much to spend at each one.
The most efficient use of your early resources depends on your actual party rather than completing every available purchase immediately.
For an active Sorcerer: Brontide is a strong early unlock because it provides an additional close-range attack that can remain active while other spells are cast.
For a Fighter or Warrior Main Pawn: The corresponding Obelisk skill provides another offensive option. Improving the Pawn’s relevant attributes can also support its frontline role.
For a character switching between physical vocations: Thief’s Strength enhancement and Archer’s Stamina enhancement are attractive permanent purchases.
For a character collecting broadly useful attributes: Trickster’s combined Health and Stamina enhancement deserves consideration even if you rarely play Trickster.
Temporary Spoils Spawn Rate Boosts are different. They last one in-game day, so buy them when you intend to spend that time fighting and collecting Spoils rather than traveling to unrelated story objectives.
The specific Spoils categories, equipment outcomes, and appraisal decisions are covered in the Relics and Appraisal guide.
Why Return to an Obelisk Later?
An Obelisk is not necessarily finished with you after its initial skill has been purchased.
You may need to return with an Offering Flame or additional Dcp for the upgraded skill and permanent attributes. Its temporary Spoils bonus can also be useful during later equipment farming.
After completing the Dark Arisen main story, additional Maister spirit challenges can become available at the corresponding Obelisks. These reward further vocation abilities and are separate from the initial skill purchases and Offering Flame upgrades.
That gives you another reason to activate nearby Portcrystals and remember the more remote shrine locations, especially Warrior and the three northern snowfield Obelisks.
Why Is an Obelisk Skill Still Locked?
Different obstacles require different solutions.
- The initial skill has not appeared in your equipment list: Interact with the correct vocation Obelisk, purchase the skill using Dcp, and equip it.
- The upgraded form remains unavailable: Offer an Offering Flame to activate the additional Obelisk options.
- The upgrade is visible but cannot be purchased: Check the Dcp cost. Offering the flame does not waive the separate purchase.
- You can see the Obelisk marker but cannot reach it: Check your elevation and approach route. The Frozen Ravine Hollow shortcut, Trickster bridge, and Warrior cave are the most likely places to take a wrong path.
- You are looking for a further Maister ability: The initial Obelisk purchase and its enhanced form are separate from the challenges that become available after the main story.
For the northern Obelisks, having the correct approach matters more than attempting to travel in a straight line toward the map marker. The eastern settlement shrines are simple early pickups; the mountain monuments reward planning the route before leaving the nearest campground.