Dragon's Dogma 2: All 12 Lost Rites Locations & Rewards
Find all 12 Lost Rites, their entry restrictions, routes, bosses, key rewards, and the three Unmoored World trials.
Updated:
Quick Answer
There are 12 Lost Rites in Dragon’s Dogma 2: Dark Arisen: nine in Vermund and Battahl, and three in the Unmoored World. Speak to Captain Brant at Vernworth’s Stardrop Inn at night about the uncovered ruins, clear Devilkin Hollow to obtain the Proving Ground Compass, and use it to reveal the other locations. Most sealed trials require the Empowered Godsbane Blade. The final trial, Final Proving Ground, opens only after completing Molten Gauntlet and Seafloor Sepulcher.
Finding a Lost Rite is usually easier than entering or finishing it. One doorway refuses a party carrying too much weight. Another limits the Arisen to two weapon skills. Others require a particular vocation, earlier trial completions, or an existing quest route through Battahl.
There is also a major difference between the first nine trials and the three in the Unmoored World. The regular-world trials supply Offering Flames for Norgan’s Obelisks of Benediction. The final three instead focus on endgame equipment, Ephemeral Key weapons, and a ten-encounter boss challenge.
The important decision is not simply which marker is closest. It is which trial you can enter with your current party, which encounters you can handle, and whether the reward justifies the preparation.
All 12 Lost Rites: Locations, Entry Conditions, and Key Rewards
| # | Lost Rite | Location | First-clear requirement | Main reason to complete it |
|---|---|---|---|---|
| 1 | Devilkin Hollow | Darkhorde Cave, Vermund | No special party restriction | Proving Ground Compass, Offering Flame, early weapons |
| 2 | Daemons’ Corral | Timeworn Shaft, eastern Vermund | No special party restriction | Greatsword and Sorcerer equipment |
| 3 | Sunken Spire | Western Vermund | No special party restriction | Shield, daggers, magick bow, other weapons |
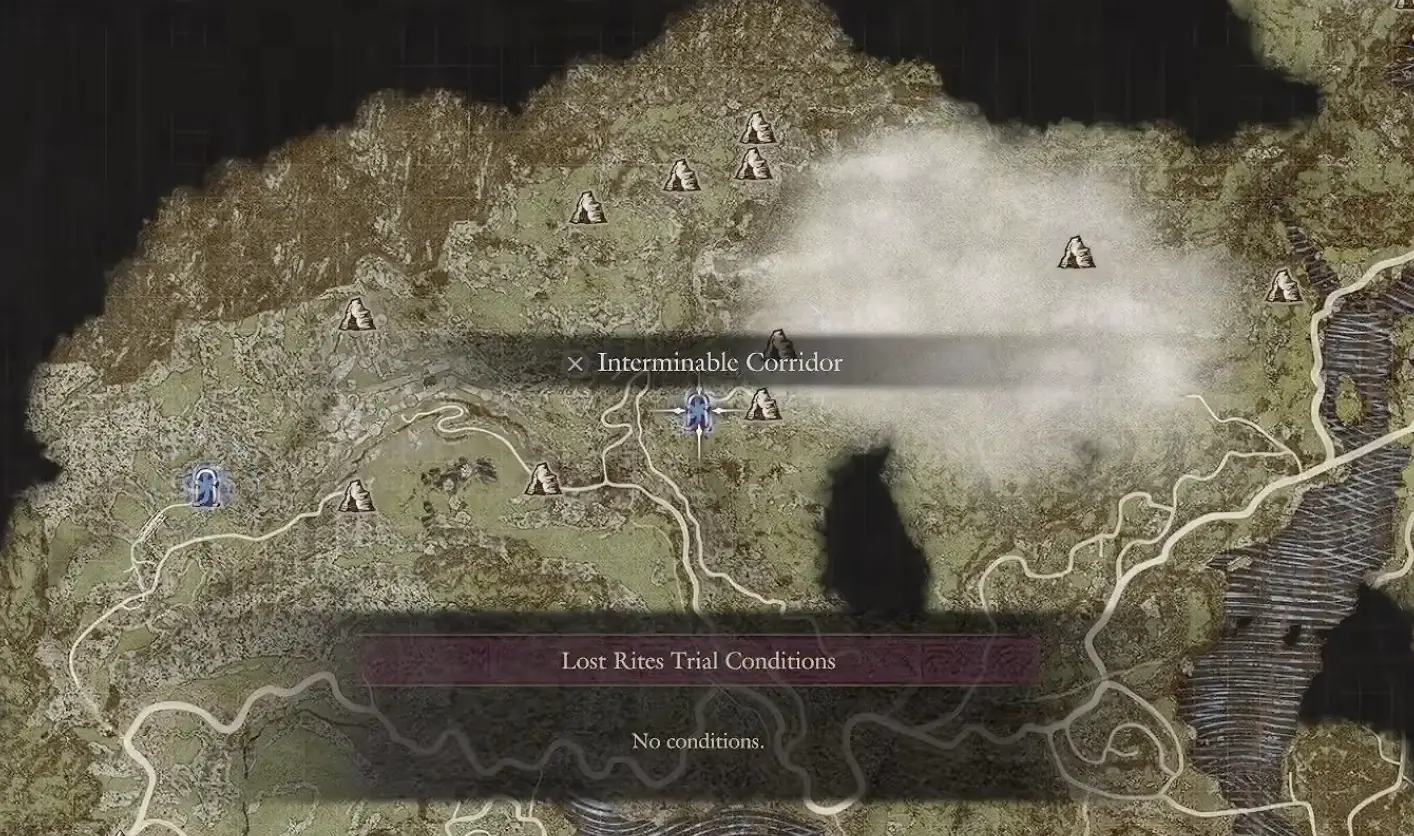
| 4 | Interminable Corridor | Western Vermund valley | Entire party must be Very Light | Kibisis Coat, Fleetstride Cuisses |
| 5 | Wyrmsblood Arena | Sal’Battahl Cavern, southern Battahl | Arisen may equip no more than two weapon skills | Wyrmscale Cuirass, Steelsilk Sabatons |
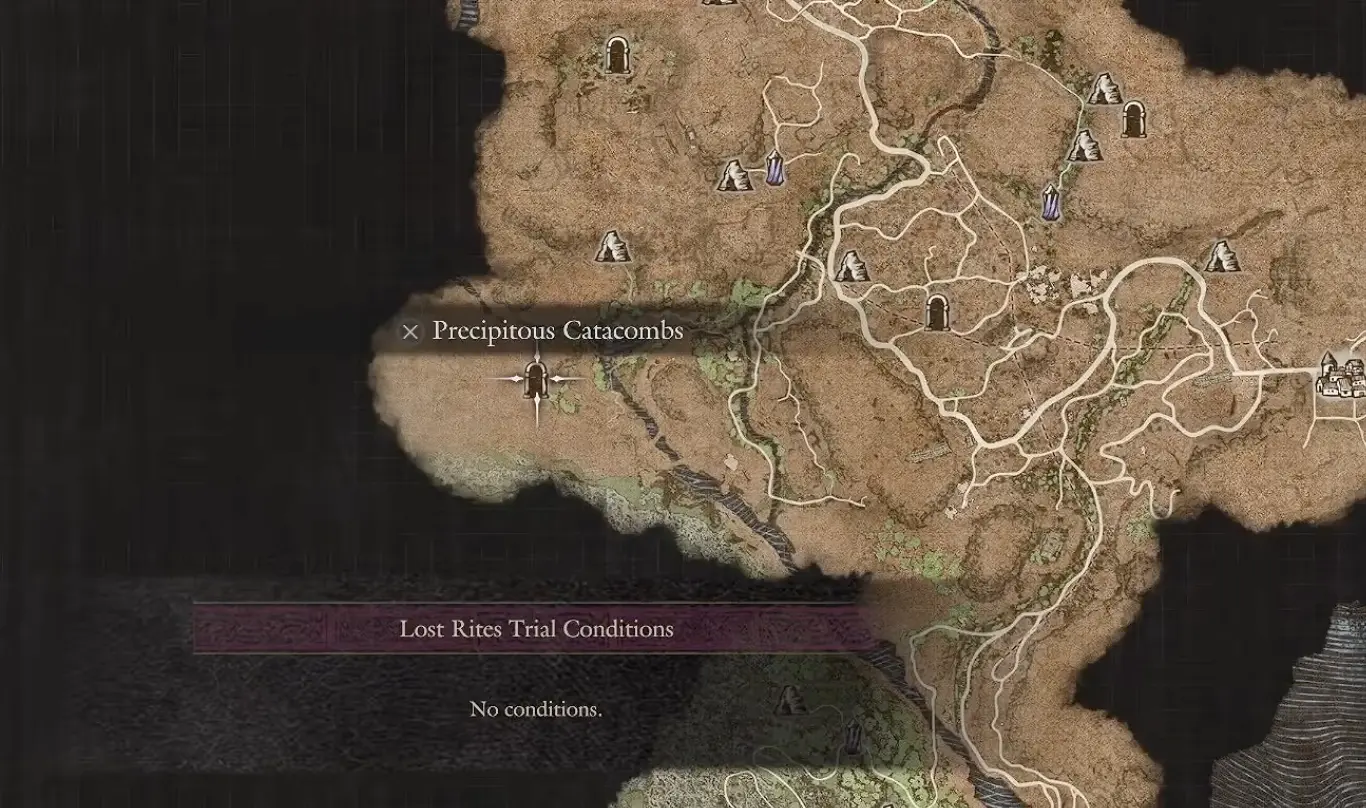
| 6 | Precipitous Catacombs | Elevated western Battahl cliff | Arisen must be Archer or Magick Archer | Portcrystal, Catamount Jacket |
| 7 | Mired Conduit | Coral Snakes’ Hideout, Battahl | Complete four other Lost Rites; reach the hideout | Allegoric Plate, Meteoric Cuisses |
| 8 | Embersand Mine | Sandsear Cave, eastern Battahl | No prohibited grimoires, enchanted weapons, or elemental skills | Eldritch Threnody, Glory Laurel |
| 9 | Shrouded Warren | Central Battahl | Only Arisen and Main Pawn may participate | 100,000 Gold, hidden Offering Flame, rings and armor |
| 10 | Molten Gauntlet | Western exposed strait, Unmoored World | Empowered Godsbane Blade | Endgame equipment, Evil Eye encounter |
| 11 | Seafloor Sepulcher | Exposed seabed near Seafloor Shrine | Empowered Godsbane Blade | Ephemeral Key, vocation-specific weapons |
| 12 | Final Proving Ground | Exposed seabed near Seafloor Shrine | Clear Molten Gauntlet and Seafloor Sepulcher | Ten boss encounters, Pawn Badge |
The numbers matter when another entrance asks how many trials you have completed. The progression order, however, can be different. You can postpone a demanding numbered trial while clearing an easier one farther down the list.
How to Start Lost Rites and Unlock the Sealed Doors
Get the Proving Ground Compass
Visit The Stardrop Inn in Vernworth at night and speak to Captain Brant. Choose the investigation concerning the uncovered ruins, rather than the separate conversation about a new Arisen.
Brant directs you toward Devilkin Hollow, reached through Darkhorde Cave.
The first trial has a broken entrance seal. Clear its enemy encounters and reach the reward chamber to collect the Proving Ground Compass.
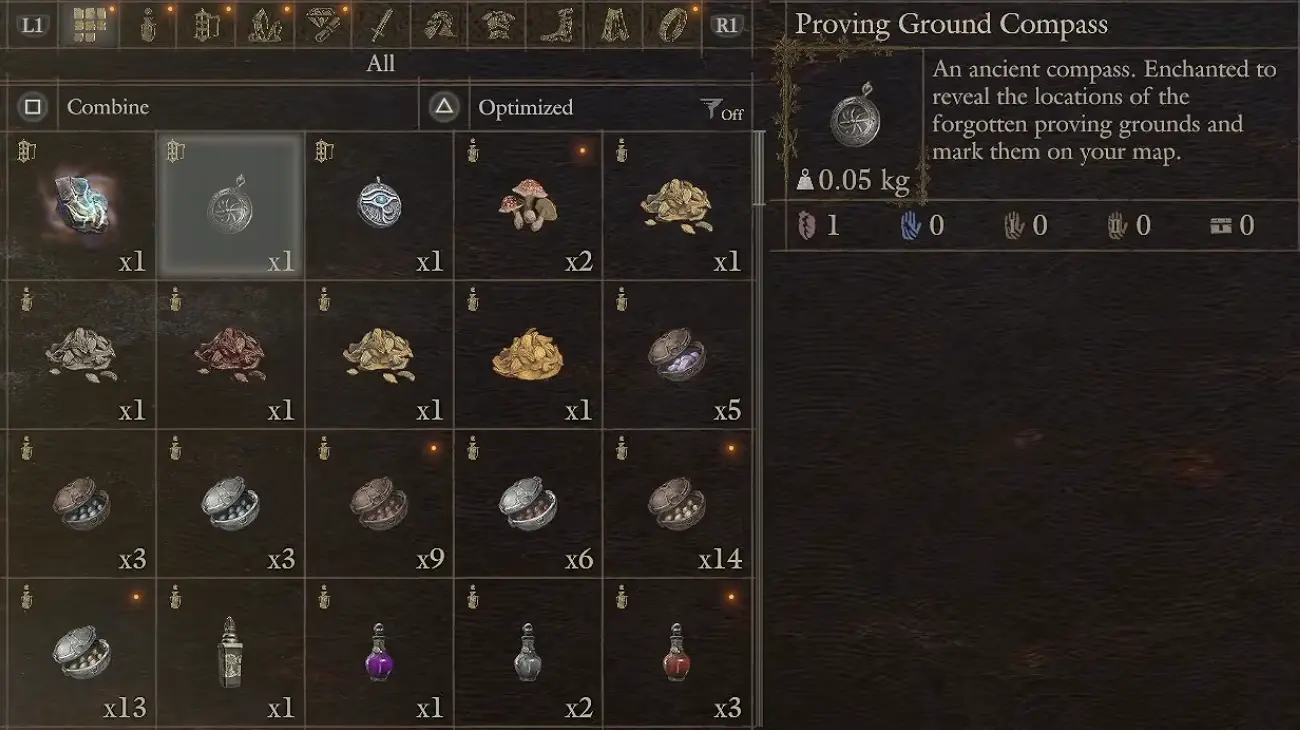
Open your inventory and use the compass. It marks the other proving grounds on your map, where you can inspect their locations and entrance restrictions before traveling.
The compass identifies entrances; it does not bypass the seals protecting them.
Why Does a Lost Rite Door Ask for an Item?
Most of the magically sealed proving grounds require the Empowered Godsbane Blade.
Obtain it through the original main story, including Convergence and A New Godsway, where you deliver 15 Wyrmslife Crystals to Ambrosius.
Until you possess the blade, an entrance or an interior rune door may prevent you from reaching the trial’s final reward.
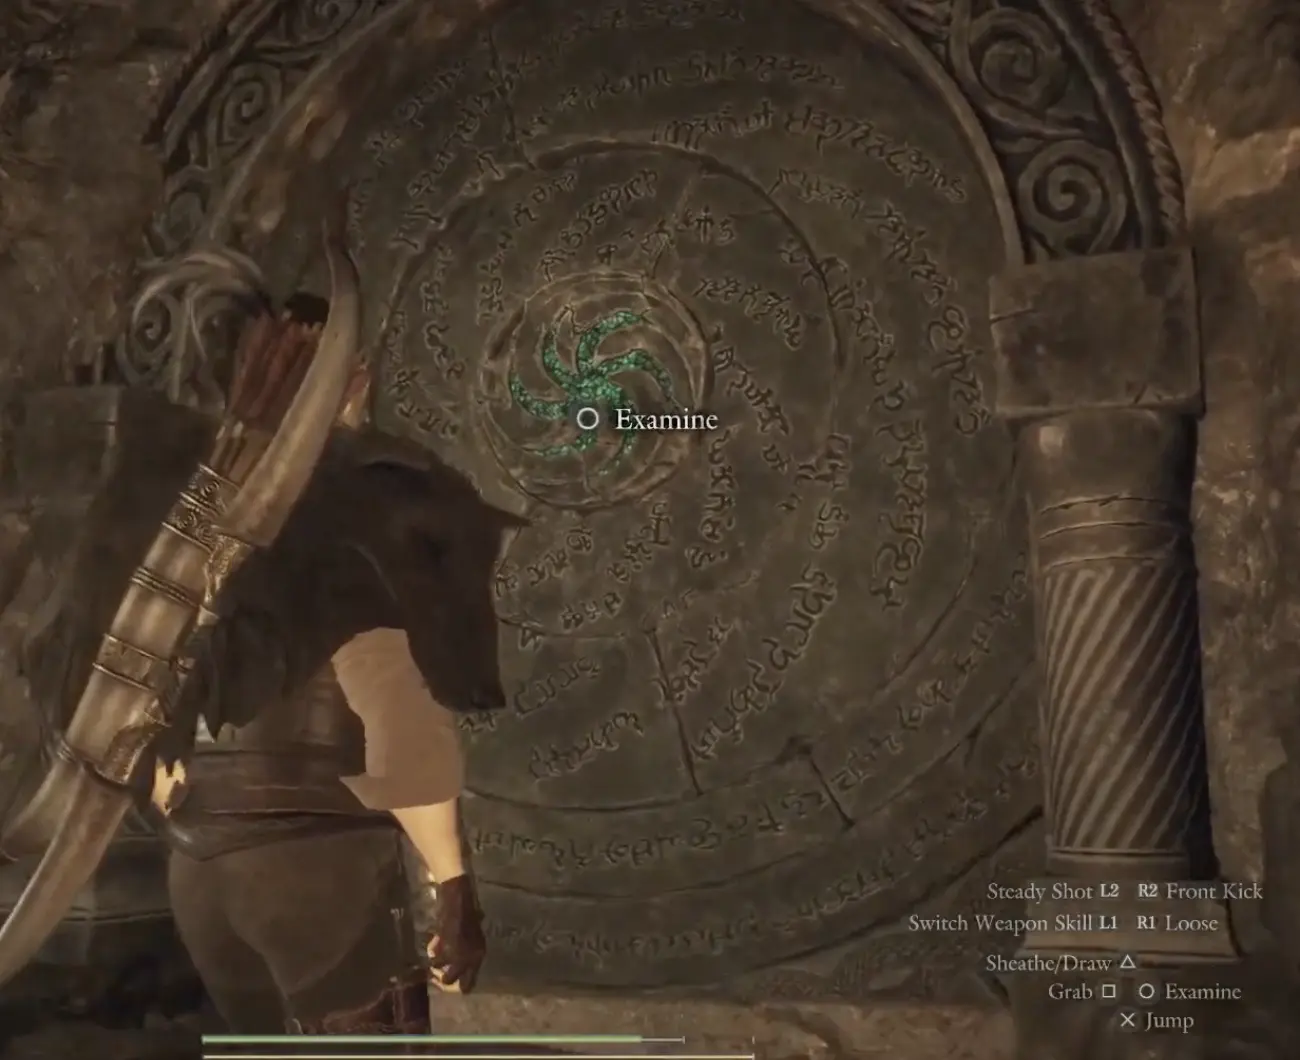
Devilkin Hollow is the important exception: its broken entrance lets you complete the introductory trial and obtain the compass before having the empowered blade. Some other proving grounds also allow you to explore early rooms before their final seal stops you.
To reach Norgan instead, you do not have to complete the Lost Rites first. Take Brant’s other investigation by following How to Start Dark Arisen and Reach Norgan.
Why Does a Completed Trial Say “No Conditions”?
Several entry restrictions apply only to the initial clear.
For example, Interminable Corridor requires a Very Light party on the first attempt. Once completed, a later visit can display No conditions.
Do not use the current conditions shown on a completed save to decide what a new character must prepare.
Which Lost Rites Should You Complete First?
A practical route is:
Devilkin Hollow → Daemons’ Corral → Sunken Spire → Interminable Corridor → Shrouded Warren → Embersand Mine → Mired Conduit → Precipitous Catacombs → Wyrmsblood Arena.
The first three Vermund trials introduce the mechanics without forcing you to rebuild your party. Interminable Corridor becomes easier once you can survive without carrying as much equipment. Shrouded Warren is a useful early Battahl detour if your Main Pawn is capable and you need money.
For Mired Conduit, remember that four other Lost Rites must already be complete. Clearing Devilkin Hollow, Daemons’ Corral, Sunken Spire, and one additional trial is a straightforward way to meet that requirement.
Leave Wyrmsblood Arena until late in the ordinary-world sequence. Its restricted skill loadout and simultaneous boss encounters are much less forgiving than a simple cave of progressively stronger enemies.
If you only want the most immediately useful reward, Precipitous Catacombs has a Portcrystal, while Shrouded Warren has a 100,000 Gold chest. Neither requires clearing every preceding numbered trial.
Vermund Lost Rites
1. Devilkin Hollow — Darkhorde Cave
Location: Darkhorde Cave, northern Vermund
Entry condition: None
Important rewards: Proving Ground Compass, Offering Flame, Hexfinger, Dread Tusk, Calycate Scepter
Enter Darkhorde Cave and take the right-hand passage to reach the broken proving-ground entrance.
This trial teaches the basic rhythm of Lost Rites: enemies occupy a chamber, a passage remains blocked while they are alive, and defeating the encounter opens the way forward.
The route is relatively direct. Clear the corrupted enemies, follow the unlocked passages, and claim the reward in the final chamber.
Do not leave before taking the Proving Ground Compass. This is what allows you to reveal the remaining trials without searching every cave across the map.
Devilkin Hollow is the natural first clear because it has no vocation or party-composition requirement. It also provides early equipment for different weapon types.
2. Daemons’ Corral — Timeworn Shaft
Location: Eastern Vermund, near the route toward Nameless Village
Entrance: Timeworn Shaft
Entry condition: No special party restriction
Important rewards: Scarbrand, Nerodia, Prickled Pomander, Offering Flame
Approach the Timeworn Shaft through the eastern Vermund valley. Follow the cave toward the proving-ground entrance, but look for treasure along the approach before entering the sealed section.
Inside, the chambers close behind you as encounters begin.
The useful habit here is to inspect the walls and elevated ledges after a fight. Some sections contain breakable stone, ladders, and additional treasure that are easy to overlook when following the next unlocked doorway.
The final major obstacle is a Corrupted Cyclops. Its eye remains the important weak point.
An explosive barrel positioned above or near the fight can inflict substantial damage when thrown accurately at the eye. That is a better use of the environment than jumping into the arena and trading hits with a stronger-than-usual Cyclops.
Once it falls, collect the equipment and Offering Flame. The weapon rewards make this an attractive early stop for parties using Warrior or Sorcerer.
3. Sunken Spire — The Waterfall and Ogre Encounter
Location: Western Vermund, beyond Checkpoint Rest Town
Entry condition: No special party restriction
Important rewards: Memento Draco, Staunch Sabatons, weapons for Mystic Spearhand, Thief, and Magick Archer
Follow the road from Checkpoint Rest Town, climb the hill, and cross the bridge leading toward Sunken Spire.
The entrance is part of a large vertical cavern. Unlike a straightforward tunnel, you must work your way through different elevations before reaching and clearing the proving-ground rooms.
First, climb toward the upper section of the cavern. Near the upper Lost Rite doorway, check the nearby chest for Memento Draco.
A Corrupted Ogre appears below, close to a water barrier.
Look for an explosive barrel beside the structure holding back the water. Destroying it releases a heavy flow that damages the Ogre.
This is the main shortcut through the encounter. Fighting the Ogre normally is possible, but using the water mechanism greatly reduces the danger.
Afterward, continue through the newly accessible sections and descend to the lower chambers for the remaining enemies and final equipment.
Do not assume the first reward chest is the end. Sunken Spire distributes its useful equipment across different levels, and the final weapon chest is farther along the route.
4. Interminable Corridor — Everyone Must Be Very Light
Location: Western Vermund valley
First-clear condition: Every party member must be Very Light
Important rewards: Kibisis Coat, Fleetstride Cuisses, hidden Lordly Eyepatch
Interminable Corridor is the first trial where getting inside can be as troublesome as fighting through it.
The doorway is set into a narrow valley reached from the western roads beyond Checkpoint Rest Town.
How to Pass the Very Light Requirement
The check covers the Arisen, Main Pawn, and both hired Pawns. If the door still refuses you, check each Pawn’s load as well as your own.
Before making the trip, deposit spare weapons, materials, excess consumables, and other unnecessary items at storage.
If a Pawn remains too heavy, adjust its carried equipment. Removing heavier armor can satisfy the requirement, but it also makes the following battles riskier.
The better approach is to arrive with a party strong enough that reducing equipment weight does not destroy its survivability.
Survive the Long Gauntlet
This is an endurance dungeon with multiple encounters and campsites.
Use the available camps to recover instead of carrying accumulated damage all the way to the final boss.
The early enemies are manageable if you exploit their weaknesses. Fire helps against ordinary Slimes, while Cyclopes remain vulnerable to attacks on the eye. The airborne undead spellcaster can be knocked down with suitable ranged or heavy attacks, leaving it easier to damage.
After the Cyclops encounter, inspect the stonework for a breakable wall. A hidden room contains the Lordly Eyepatch.
The last major obstacle is the Dullahan.
Bring a source of holy damage, watch the severed head it carries, and avoid staying close during its scream and extended attack combinations. Wait for those attacks to finish before committing to another long offensive sequence.
Reaching the Dullahan with healing resources and enough stamina matters more than rushing through the earlier chambers.
Battahl Lost Rites
5. Wyrmsblood Arena — Only Two Weapon Skills
Location: Wyrmsblood Forest, southern Battahl
Entrance: Sal’Battahl Cavern
First-clear condition: The Arisen may have no more than two weapon skills equipped
Important rewards: Wyrmscale Cuirass, Steelsilk Sabatons, Offering Flame
Wyrmsblood Arena is numbered fifth, but it is better approached after the easier Battahl trials.
Travel toward southern Battahl and enter Sal’Battahl Cavern through Wyrmsblood Forest. Follow the tunnel to the round proving-ground door.
If the seal refuses you entry, check the Arisen’s equipped weapon skills.
The restriction is not a demand to change into a particular vocation. You must reduce your equipped weapon skills to two or fewer before entering.
Choose skills that remain useful against several enemy types. A loadout that only works against a single boss can leave you without good answers in the following arenas.
Use the Enemies Against Each Other
The fights involve several large corrupted monsters, environmental hazards, and enemies with different elemental vulnerabilities.
During the opening encounters, your Pawns can be separated from you temporarily. Do not immediately assume they have been lost permanently; progress through the encounter until they can rejoin.
In the larger fights, avoid standing between multiple bosses and trying to damage everything at once.
Magma Slimes are particularly useful when other enemies are vulnerable to fire. Draw a larger target toward their dangerous area and reposition before the same damage reaches you.
This trial rewards movement and timing. Wait for monsters to interfere with one another, then attack whichever target becomes exposed.
Before leaving, check the side rooms for Crown of Blades and Wildskirl Breeches in addition to the main equipment rewards.
6. Precipitous Catacombs — Archer or Magick Archer Required
Location: Elevated cliff in western Battahl
First-clear condition: Arisen must be Archer or Magick Archer
Important rewards: Portcrystal, Catamount Jacket, Offering Flame
Precipitous Catacombs sits above the valley floor. Approach from the waterway and follow the rocks upward to reach the elevated entrance.
The vocation requirement applies to your Arisen, not merely to a Pawn in your party.
The reason becomes clear almost immediately: this trial repeatedly uses ranged attacks to break environmental structures.
Shoot the Pillars Instead of Fighting Every Enemy
Watch for destructible supports and marked sections of stone.
Shooting a support can drop heavy debris onto enemies or remove an obstacle blocking progress. Several fights are easier when you use these structures before the monsters can reach you.
Against the two Golems, target their glowing weak points. Their elevated platforms also create opportunities to knock them into the abyss.
Near the end, a Corrupted Drake occupies an arena surrounded by destructible pillars.
Clear interfering flying enemies when they become a problem, then use the pillars to stagger the Drake. Aim at its head and exposed heart during the openings.
You can win with ordinary ranged damage, but ignoring the environment makes the encounter unnecessarily difficult.
Where Is the Portcrystal?
After the Drake encounter, do not leave immediately.
Search the lower treasure area beneath the boss arena. The chests here include a Portcrystal, alongside gold and other rewards such as a Ferrystone and the Catamount Jacket.
The Portcrystal is one of the most useful practical rewards among the ordinary-world Lost Rites. It can improve travel across the rest of your playthrough, even if you do not need the armor.
7. Mired Conduit — Four Completed Trials and Coral Snakes’ Hideout
Location: Western Battahl
Entrance: Coral Snakes’ Hideout, near the central pool
First-clear condition: Complete at least four other Lost Rites
Important rewards: Allegoric Plate, Meteoric Cuisses, Offering Flame
Mired Conduit has two separate access problems, and solving only one does not open the trial.
You must first reach the correct part of Coral Snakes’ Hideout. Then you must meet the requirement shown on the proving-ground door.
Reach the Entrance Through Mercy Among Thieves
Begin the Mercy Among Thieves quest near Checkpoint Rest Town and follow the investigation of the Coral Snakes.
The pursuit leads through the cave system into the gang’s hideout. Once the relevant quest events have opened the area, descend toward the central pool.
The carved Lost Rite entrance is set into the rock beside the water.
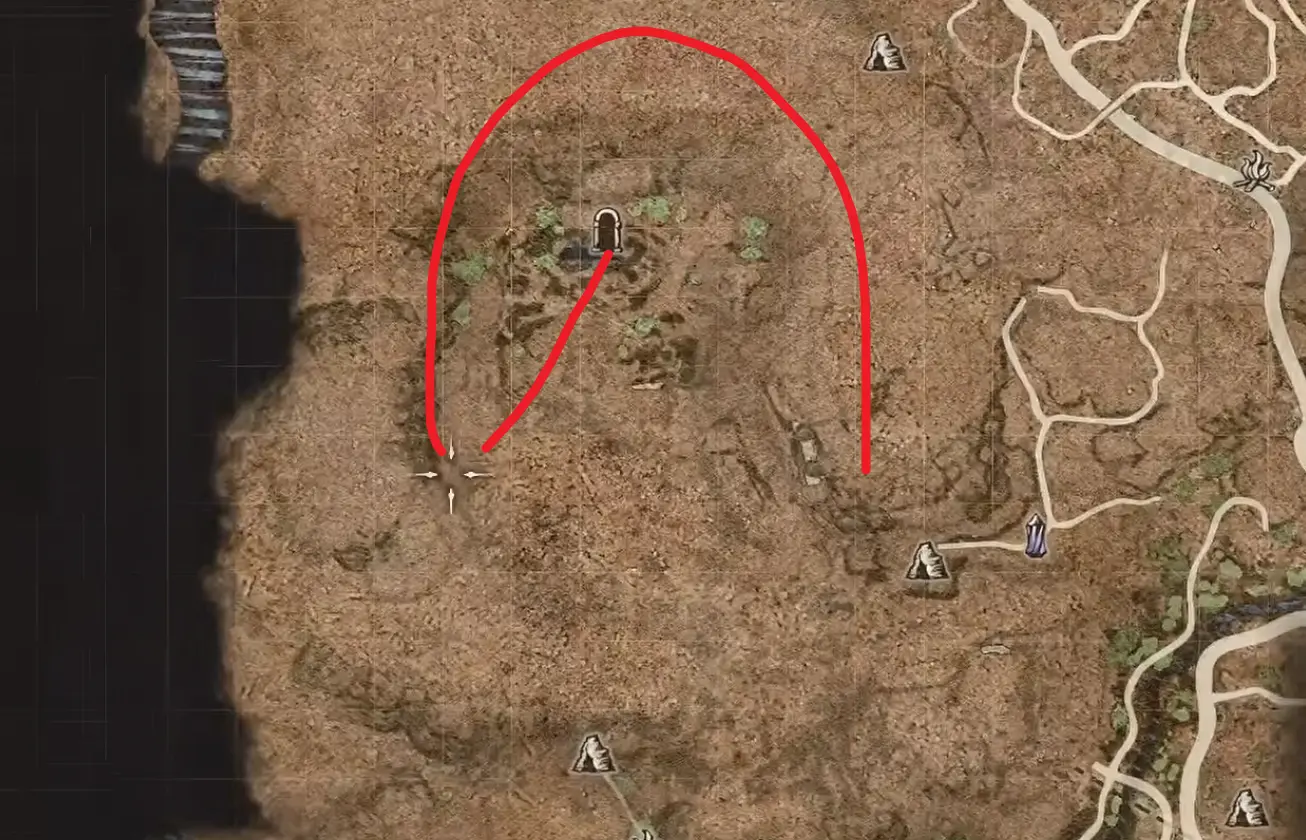
If the outer route remains inaccessible, continue the quest rather than trying to force the proving-ground door from somewhere else.
Why Does Mired Conduit Still Refuse Entry?
The Lost Rite itself requires four previously completed trials.
A practical sequence is to finish Devilkin Hollow, Daemons’ Corral, Sunken Spire, and either Interminable Corridor or another accessible trial.
Then return to Mired Conduit and examine its door again.
Reaching the hideout through the correct quest does not replace the four-trial requirement.
How to Fight the Evil Eye
The most unusual encounter is the Evil Eye.
Its protective barrier makes direct attacks ineffective while the shield is active. Focus on the exposed tentacles; destroying them can drop the barrier and create an opening to hit the eye.
Holy damage is useful once the weak point is exposed.
The Evil Eye can also lower its barrier while preparing certain attacks. Use these moments for damage rather than attacking blindly into the protected body.
During the initial encounter, the creature can retreat before you permanently defeat it. A retreat is not automatically a failed encounter. Follow the newly accessible route.
Before the boss, look out for imprisoned Pawns. A Makeshift Gaol Key found during the dungeon can be used to free one, potentially giving you a useful replacement with abilities suited to the upcoming enemies.
8. Embersand Mine — Remove Prohibited Magic Before Entry
Location: Eastern Battahl, northeast of Bakbattahl
Entrance: Sandsear Cave
First-clear condition: No prohibited grimoires, enchanted weapons, or elemental archmagick weapon skills
Important rewards: Eldritch Threnody, Glory Laurel, Canopy of Plenty
Embersand Mine is reached through Sandsear Cave, not a separate mine entrance standing in the open desert.
Follow the eastern Battahl routes toward the green valley and enter Sandsear Cave. The proving-ground doorway lies inside.
Fix the Entry Restriction
The important wording at the entrance is that bearers of grimoires and enchanted weapons are forbidden entry.
The condition also prohibits weapon skills that grant or use the listed elemental archmagicks: fire, ice, lightning, and holy.
Check the whole party, not just your Arisen.
Before entering:
- Remove prohibited grimoires and enchanted weapons from the relevant equipment or inventory.
- Check equipped weapon skills for the forbidden elemental magic effects.
- Reconfigure Mage and Sorcerer support if their setup breaks the condition. If the door still refuses you, check the remaining Pawns for enchanted weapons or restricted skills; dismissing the Mage alone may not be enough.
The Correct Drop in the Pillar Maze
Inside, the trial forces you to handle enemies without relying on your usual elemental equipment.
Explosive barrels are a major part of the solution. Use them against groups of Slimes and other vulnerable enemies instead of spending excessive time fighting each target separately.
After the early chambers, you descend into an area with multiple pillars, breakable walls, and drop-down routes.
Several openings circle back or lead into additional enemy rooms.
Look for the drop marked by two treasure chests and a Riftstone. That is the important route forward.
The Riftstone also gives you an opportunity to change your temporary Pawns after you have already passed the entrance restriction. If you need elemental support for the remaining fights, examine the available Pawns here.
Defeat the Corrupted Minotaur With the Room’s Traps
The final arena contains pressure plates that release large falling stones.
Use the plates to damage or stagger the Corrupted Minotaur, while avoiding the falling rocks yourself.
You can also exploit its charging behavior by drawing it toward solid obstacles.
Fire and ice remain useful weaknesses, but the most reliable advantage is using the arena’s machinery rather than treating it as an ordinary open-space boss fight.
Canopy of Plenty is available earlier in the dungeon.
9. Shrouded Warren — Heavy Floor, Hidden Offering Flame, and Cyclops Treasures
Location: Central Battahl
First-clear condition: Only the Arisen and Main Pawn may participate
Important rewards: 100,000 Gold, Lex Talionis, Insidiator’s Boots, hidden Offering Flame, Ring of Exorcism, Ring of Dragonsbane
Follow the central Battahl roads toward the proving-ground marker, climb the nearby hill, and continue along the path to the doorway. Only your Arisen and Main Pawn can enter. Your two hired Pawns must stay outside, so choose a Main Pawn that can keep you alive or help control the undead while you deal damage.
The first stretch is a series of cramped passages and undead encounters. Keep an eye on the unusually heavy two-handed weapons and camping kits in the chests. They look like a nuisance when you only have one Pawn to share the load, but that extra weight has a purpose later in the dungeon.
Clear the Main Route and Claim the 100,000 Gold
Shrouded Warren includes undead groups and a Corrupted Skeleton Lord. Holy damage and blunt attacks help against the undead. Destroy the heads of enemies that can rise again, and avoid attacking a shielded Skeleton Lord straight from the front; move to its exposed side instead.
Defeat the main encounter to reach the chamber with the 100,000 Gold chest. Take the gold, but do not treat that chest as the end of the trial. The Offering Flame is elsewhere. If you leave now, you will miss the hidden section with the Lich and its rewards.
How to Break the Hidden Floor
Return toward the hallway immediately before the normal final encounter room. Inspect the stone flooring for a large cracked section rather than another ordinary doorway. This floor is an entrance to the lower part of Shrouded Warren, but it will not give way under a lightly loaded Arisen.
Raise your Arisen’s carry-weight status to Heavy by keeping the large weapons or camping kits collected along the way, or by moving enough of that weight back from your Main Pawn. Walk onto the cracked section; with sufficient weight, the floor breaks and drops you into the hidden area. You do not need to start over just because you claimed the 100,000 Gold first.
If nothing happens, check the weight category actually shown on the inventory screen, not just how many heavy items you are carrying. Equipment that reduces your effective load, or a Pawn that automatically redistributes items, can leave you below the necessary category. Add more weight until the status changes, then try the damaged floor again. Heavy has been shown to work; there is no need to assume that every character must reach the maximum encumbrance tier.
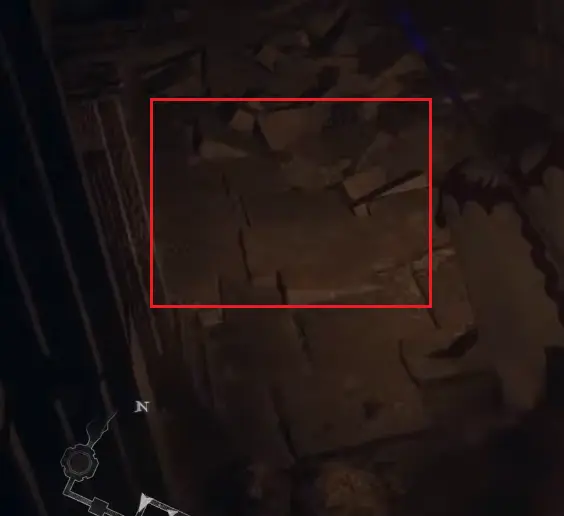
Find the Lich Chamber and Offering Flame
Below the broken floor is a hidden chamber with a Lich and an apparently dead Cyclops. The Lich encounter and the hidden treasure routes are connected, so avoid immediately destroying everything in the room before checking the body and surrounding stonework.
The Offering Flame is collected from the hidden Lich-area reward chest, along with the Ring of Exorcism and Ring of Dragonsbane. This is separate from the 100,000 Gold chest on the normal route. Defeat the Lich when you are ready to collect those rewards; you do not have to finish every optional treasure route before securing the Flame.
If your goal is simply to obtain an Offering Flame for an Obelisk, this is the reward you need. The other secrets below are worth pursuing for equipment, but do not mistake them for another required Flame.
Let the Lich Revive the Cyclops Before Killing It
To reach the treasure beneath the Cyclops, keep the Lich alive long enough for it to revive the fallen monster. Draw the Lich toward the body and give it room to finish the revival. When the Cyclops gets up, it reveals a hole in the floor that its body had covered. Drop through that opening and follow the lower passage to a statue-lined treasure chamber.
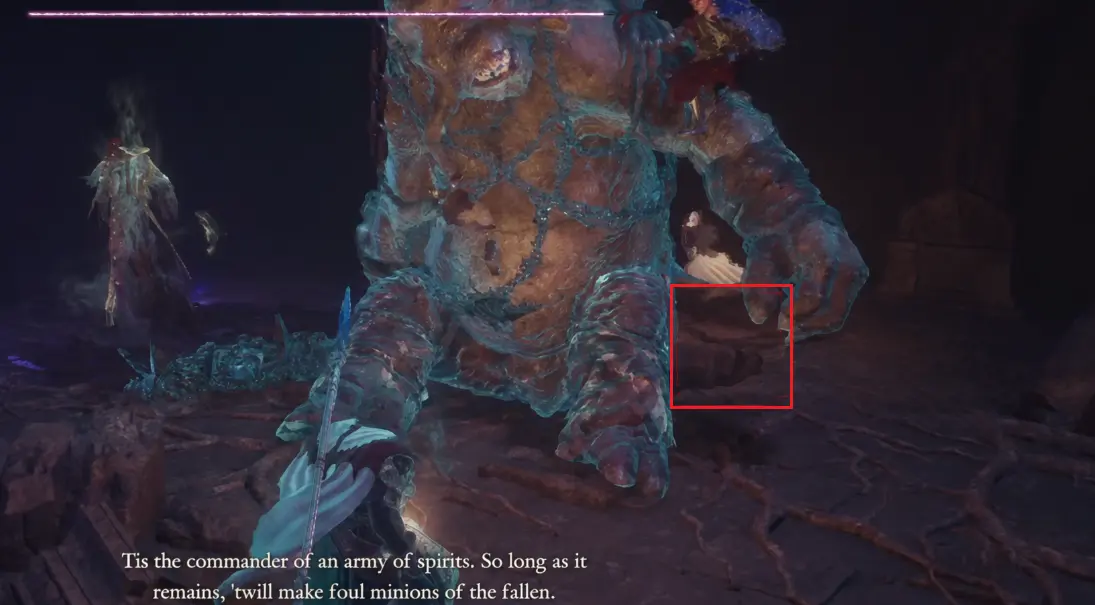
The revived Cyclops can also break weakened walls in its room. If you want to open these passages, keep your Main Pawn from killing it too quickly and bait its attacks toward the left-hand and rear walls as you enter the room. Stay ready to dodge: you are using its attacks to open a route, not trying to win the fight as quickly as possible.
If you killed the Lich before it revived the Cyclops, do not assume the entire lower area is lost. Fire can clear the corpse covering the floor opening, offering another way to reach the chamber underneath. Removing the corpse does not itself open the side walls, so it is not equivalent to letting a living Cyclops smash them.
Reach the Upper Secret Treasure Room
There is also an elevated hidden route reached from the lower cave passages. Look for the high rocky ledge rather than following every corridor at ground level. A Thief’s wall-jump movement can get you up the vertical section; continue through the upper tunnel to a torch-lit chamber marked by two warrior statues.
The ornate chest here contains the Dragonscoil Harness and Sanctified Boots. These are additional equipment rewards, not substitutes for the Offering Flame in the Lich section. The climb is an optional detour, so if you cannot reach the ledge with your current vocation, prioritize the Flame and the main completion rewards instead of repeatedly searching the 100,000 Gold room.
Before leaving Shrouded Warren, check your inventory for the Offering Flame and consider whether you have opened the Cyclops-covered lower passage and the elevated treasure route. The most expensive mistake in this trial is treating the obvious gold chest as the finish line while leaving the hidden half of the dungeon unexplored.
The Three Unmoored World Lost Rites
The last three Lost Rites become accessible when the sea recedes in the Unmoored World.
Use the Proving Ground Compass again. The new locations appear on the exposed seabed of the strait between Vermund and Battahl.
You do not need to search for three additional entrances in ordinary-world caves.
The first two Unmoored World trials are independent of each other. You may complete them in either order. Both require the Empowered Godsbane Blade.
These encounters are substantially more demanding than the introductory Vermund trials. Strong endgame equipment, suitable Pawn support, and a reliable way to handle corrupted enemies matter far more than the order in which you discovered the entrances.
10. Molten Gauntlet — Levers, Moving Hazards, and Evil Eye
Location: Western section of the exposed strait, Unmoored World
Entry condition: Empowered Godsbane Blade
Important rewards: Horns of Moloch, Thorns of Agony, Greaves of the Mad Sovran, other equipment
After entering the Unmoored World, travel onto the newly exposed seabed and follow the compass toward the western proving-ground entrance.
Examine the circular rune door with the Empowered Godsbane Blade to open it.
The opening area contains stone halls, braziers, and statues. Three green-handled levers appear in the first stretch of the dungeon, and moving contraptions feature in the route.
Inspect these mechanisms before committing to a hazardous crossing. A lever or moving structure may be the intended way forward rather than an obstacle you must bypass with a movement skill.
The early enemies include Skeletons, Oozes, Sludges, Rattlers, and Magma Scales.
The dungeon culminates in an Evil Eye encounter.
Fight it as in Mired Conduit: clear the exposed tentacles, then hit it while the barrier is down.
Molten Gauntlet’s value lies in its equipment and in counting toward the Final Proving Ground requirement.
11. Seafloor Sepulcher — Ephemeral Keys and Which Chest to Open
Location: Exposed seabed near Seafloor Shrine
Entry condition: Empowered Godsbane Blade
Important rewards: Ephemeral Key, sealed vocation weapons, Wyrmhorne Helm, Tenebrous Stole, and Crystalline Shawl
Seafloor Sepulcher is the most important of the three endgame trials if you want a particular weapon.
Its entrance stands on the exposed seabed near Seafloor Shrine. Use the compass to locate it and examine the rune door while carrying the Empowered Godsbane Blade.
The opening passages descend past fallen pillars and violet crystals into ruined chambers with blue-lit sections. Enemies near the entrance include Skeletons and several Harpy variants.
The major reward decision comes later, when you encounter the Ephemeral Key and its corresponding sealed weapon chests.
How Does the Ephemeral Key Work?
One Ephemeral Key opens one sealed chest. The key is consumed when used.
The nine sealed weapon chests represent different vocation choices. The Fighter reward contains both a sword and shield, so that single chest provides a paired equipment set.
Before spending a key, decide which vocation you actively use or intend to develop.
The choices are:
| Vocation | Ephemeral Key weapon |
|---|---|
| Fighter | Seraphic Spar + Celestial Crux shield |
| Archer | Skygill |
| Mage | Peregrine Totem |
| Thief | Talons of the Magpie |
| Warrior | Blade of Aldose |
| Sorcerer | Selenic Cane |
| Mystic Spearhand | Oscine |
| Magick Archer | Parhelion |
| Trickster | Beckoning Delight |
Do not spend your first key simply because the nearest chest is available.
If your main character uses Thief, opening the Fighter chest does nothing for your immediate weapon loadout. Likewise, choosing an Archer or Magick Archer weapon should depend on which vocation you actually intend to use, rather than assuming those bows are interchangeable.
If you use Fighter and need both weapon slots upgraded, its paired sword-and-shield reward can be particularly attractive.
Can You Get More Than One Ephemeral Key?
Repeat clears award more Ephemeral Keys. Rewards by clear count:
- First clear: An Ephemeral Key that can be used to open one of the sealed vocation weapon chests.
- Second clear: Another Ephemeral Key, with gold and Wakestone rewards.
- Third clear: Another Ephemeral Key, again alongside other rewards.
- Fourth and later clears: The Ephemeral Key is replaced by a lesser reward, such as a Wakestone Shard.
Keys stop after the third clear, so do not spend them on secondary vocations expecting replacements.
How Do the Special Weapon Boons Change?
The unique weapons have an additional interaction with Evil Eye encounters.
Defeating an Evil Eye can grant a special weapon boon, but the interaction does not end with the kill itself.
Interact with the defeated Evil Eye’s remains to absorb the effect.
The weapons can receive different boon effects, and another Evil Eye defeat can change the result.
This creates a separate decision from opening the weapon chest: first acquire the equipment you want, then consider whether the current boon is useful enough to keep.
Do not confuse a weapon’s boon with the key used to unlock its chest. Spending another Ephemeral Key is not the normal method for changing that effect.
12. Final Proving Ground — All Ten Boss Encounters
Location: Exposed seabed near Seafloor Shrine
Entry condition: Complete Molten Gauntlet and Seafloor Sepulcher
Important rewards: Pawn Badge, equipment found inside, final encounter drops
The Final Proving Ground is the last numbered Lost Rite.
Its circular rune entrance is close to Seafloor Shrine, but carrying the Empowered Godsbane Blade alone is not enough.
Examine the door. If the trial remains locked, confirm that you have fully completed both Molten Gauntlet and Seafloor Sepulcher, rather than merely entering or discovering them.
Once both are cleared, return and open Final Proving Ground.
What Happens After You Enter?
Final Proving Ground is a consecutive ten-encounter boss challenge.
Once committed to the main gauntlet, you cannot simply leave between rounds and return later with a different party.
Prepare your Pawns, curatives, defensive skills, and equipment before crossing the entrance. If your active vocation needs a Seafloor Sepulcher Ephemeral Key weapon, take it first.
The ten rounds, in order:
| Round | Enemies |
|---|---|
| 1 | Corrupted Dragon |
| 2 | Two Corrupted Grim Ogres |
| 3 | Three Corrupted Garms and an Undead Knight |
| 4 | Corrupted Gryphon and Corrupted Harpies |
| 5 | Corrupted Lesser Dragon Devastator and Corrupted Lich |
| 6 | Corrupted Dullahan |
| 7 | Two Corrupted Goreminotaurs |
| 8 | Corrupted Gorechimera with Evil Eye tentacles |
| 9 | Evil Eye |
| 10 | Corrupted Medusa and Corrupted Sphinx |
The difficulty is not that every round requires a complicated puzzle. It is the accumulated cost of ten dangerous fights.
Some encounters emphasize movement and positioning, while others punish a party that cannot interrupt spellcasters or recover quickly after being staggered.
What Happens After Round 5?
After Round 5 you can choose a boon before continuing. Five rounds remain, including the Evil Eye and the final Medusa and Sphinx fight, so pick the effect that covers what your party struggled with in the first half and will need in the second.
How to Prepare for the Most Dangerous Rounds
The first several rounds establish the pace of the gauntlet, but do not spend all your best resources on an early encounter simply to finish it faster.
Round 3 — Garms and Undead Knight: Multiple fast enemies can interrupt attacks and isolate a Pawn. Maintain enough space to avoid being surrounded.
Round 4 — Gryphon and Harpies: Remove or control the smaller airborne enemies when they interfere with your ability to attack the larger target.
Round 5 — Lesser Dragon Devastator and Lich: Bring ways to interrupt dangerous spellcasting. The combination is more difficult when the Lich is allowed to cast freely while the larger enemy occupies your frontline.
Round 6 — Dullahan: Preserve stamina for avoidance and wait out its longer sequences before counterattacking.
Round 8 — Gorechimera and Evil Eye tentacles: Do not overlook the additional tentacle pressure while concentrating on the larger monster.
Round 9 — Evil Eye: Same approach as in Mired Conduit: tentacles first, damage while the shield is down.
Round 10 — Medusa and Sphinx: Enter the final fight with enough recovery items and defensive options to survive more than one major mistake. Be particularly mindful of Medusa’s petrification threat.
Your party needs to handle sustained combat, physical pressure, and hostile magic. A composition that destroys a single boss quickly but has no dependable healing or control may struggle over the full sequence.
What Do You Get for Completing Final Proving Ground?
Completing the gauntlet awards a Pawn Badge associated with the challenge.
The trial also contains treasure chests with items such as Ring of Predominance, Ring of Awareness, and Dragonslayer’s Mantle.
The final Sphinx encounter can yield an Eternal Wakestone, while the Medusa can provide its own monster drops. These are separate from the Pawn Badge awarded for completing the gauntlet.
If you are attempting the Dark Arisen achievement tied to completing Final Proving Ground without recovering the Loss Gauge, that is an additional condition beyond simply finishing the ten fights. Check the Dark Arisen achievements and 100% checklist before attempting that more restrictive clear.
Offering Flames: Where They Come From and Why One May Be Missing
The nine Lost Rites in Vermund and Battahl each give one Offering Flame on their first clear. The three Unmoored World trials are not additional sources of Offering Flames.
A Lost Rite can contain multiple treasure chambers, hidden paths, and rewards that appear before you have finished exploring everything. Opening one valuable chest does not always mean you have collected the Offering Flame.
Shrouded Warren is a particularly important example: its 100,000 Gold chest lies on the normal route, while the Offering Flame is inside the secret Lich section reached by breaking a cracked floor with a Heavy load. The revived Cyclops and upper treasure passages contain additional rewards, but are not required to claim the Flame.
If you believe you completed a trial but cannot find its Flame, check whether you reached every required or optional reward section before assuming the item disappeared.
Offering Flames are spent at the Obelisks of Benediction in Norgan. These enable access to enhanced vocation abilities and other benefits. For individual Obelisk locations and upgrade choices, use the Obelisk locations and vocation skills.
What Changes When You Repeat a Lost Rite?
Enemy arrangements can change on a repeat run, and the trials remain useful for experience or certain materials.
However, the unique equipment and Offering Flames from a first clear should not be treated as infinitely repeatable rewards.
If you are trying to collect an Offering Flame for another Obelisk, clearing a previously unfinished ordinary-world trial is a better priority than repeatedly completing one you have already conquered.
In the Unmoored World, each rest advances the world’s destruction and your rests are limited, so do not spend them repeating a dungeon for ordinary materials.
If the reason you are repeating Lost Rites is to improve Norgan equipment instead of finishing the challenges, compare that approach with collecting and identifying higher-level Spoils in the Relics and Appraisal guide.
Lost Rites Questions That Commonly Stop Progress
Why can I see a Lost Rite marker but not reach its doorway?
A compass marker identifies the dungeon, not necessarily the path into its surrounding cave. Check whether the entrance is above your current elevation, behind an existing quest area, or accessible only through another cave.
Do I need to complete all nine regular-world trials before entering the Unmoored World?
No. You can reach the Unmoored World without clearing all nine Lost Rites.
However, being able to reach them does not mean your current equipment is strong enough to complete them comfortably.
Why is Final Proving Ground still locked after I found the other two entrances?
Finding or entering the other two trials is not enough. Conquer both and collect their completion rewards, then examine the door again.