Crashout Crew S Rank Guide
A practical Crashout Crew S Rank guide with real S Rank result examples, likely S Rank requirements, solo and co-op strategy, result-screen reading, rank-killer fixes, and route lessons for Forklift Certification, By the Barrel, and Speed Limit.
Updated:
Quick Answer
To get S Rank in Crashout Crew, treat rank as a clean-run problem before a speed problem. Send correct orders, prevent crash outs, stage cargo clearly, avoid wasted trips, assign one button owner, and review every failed run for the one mistake that cost the most time or caused the most chaos.
S Rank Result Examples
The examples below are based on result screens where the final large grade is S. They are not meant to be a wiki-style list of every contract. They are practical route examples showing what made each S Rank run work.
Use them as patterns:
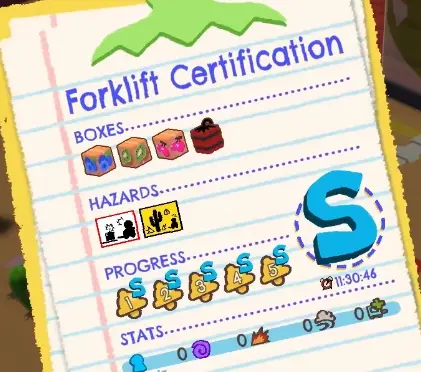
- Forklift Certification shows clean early execution.
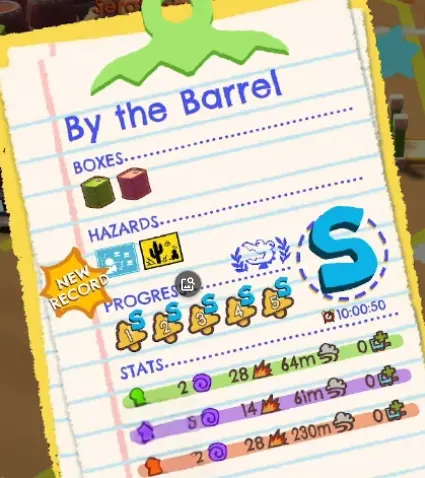
- By the Barrel shows barrel handling, spill pressure, and route control.
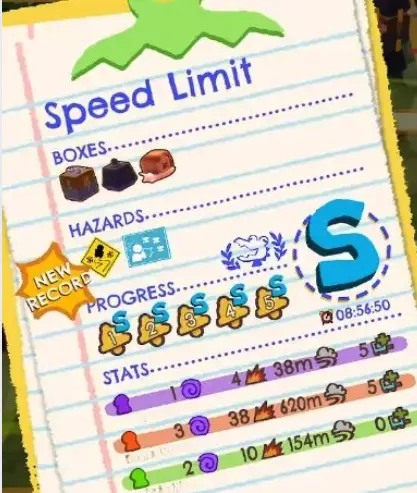
- Speed Limit shows that controlled speed beats reckless speed.
| Contract | Final rank | Main challenge | Useful upgrade angle | S Rank lesson |
|---|---|---|---|---|
| Forklift Certification | S | Basic control, correct deliveries, and avoiding careless crashes. | No special upgrade plan needed. Focus on clean execution. | Treat this as an execution check. Do not overdrive, do not rush the button, and keep the route simple. |
| By the Barrel | S | Barrel handling, spill pressure, and traffic around pickup or delivery. | Cleanup support, staging, and route-compression tools can help this style of run. | Treat this as a barrel-control contract, not a pure speed check. Keep barrel movement readable, avoid reckless throws, clean spills quickly, and reduce repeated travel with staging or Teleporter support. |
| Speed Limit | S | Going fast without turning the route into collisions, wasted turns, or unsafe crossings. | Route speed tools can help after the lane is readable. | Controlled speed beats reckless speed. Get the route stable first, avoid unnecessary collisions, and push pace only when lanes are safe. |
Real S Rank result examples and the route lesson from each run.
How to Read S Rank Result Screens
Crashout Crew result screens can show both a final grade and smaller progress marks. For S Rank examples, the final large grade is the key result.
A large final S means the whole run earned S Rank. A smaller S in the progress row is still useful, but it only shows that one part of the run performed well. It does not always mean the full run earned S Rank.
| Result screen detail | What it means | How to use it |
|---|---|---|
| Large final S | The full result earned S Rank. | Use it as an S Rank route example. |
| Large final A or lower | The full result did not reach S Rank. | Review what kept the run from S. |
| Progress row has some S marks | Some parts of the run were strong. | Use those parts as clues, not as full S Rank proof. |
| Mixed progress marks like A/S/S/A | The run had strong sections and weak sections. | Compare the weak sections to the strong ones and fix the repeated problem. |
| New Record stamp | The run beat a previous best. | Useful context, but the final grade still matters more. |
| Stats lines | Player performance and penalties can reveal the biggest issue. | Look for crashes, damage, slow routes, or repeated mistakes. |
How to understand S Rank result screens.
What S Rank Usually Rewards
S Rank is not just about going fast. A fast run with wrong orders, crash outs, and messy cargo can still fall short. The strongest S Rank attempts are clean first, then fast.
| Rank factor | What it means | How to improve it |
|---|---|---|
| Correct orders | Trucks must leave with the right cargo and quantity. | Assign one final checker before pressing the button. |
| Mistake control | Sloppy sends, avoidable damage, and panic decisions can cost the run. | Remove the biggest repeated mistake first. |
| Crash out prevention | Crash outs disrupt cargo, routes, and timing. | Use Cup Holder, Aromatherapy, safer lanes, and cleaner roles. |
| Time efficiency | Long empty trips and bad routing cost rank. | Stack useful cargo, stage near trucks, and shorten repeated routes. |
| Cargo control | Loose boxes and wrong staging create late mistakes. | Use shelves, The Grippers, and clear staging zones. |
| Route consistency | A route that only works once is not an S Rank route. | Repeat the same safe path until it becomes reliable. |
| Safety Violation control | Extra modifiers can add money but also add failure points. | Skip risky modifiers while learning the route. |
The main things to improve before pushing for S Rank.
Quick S Rank Diagnosis
Use this table after a failed run. Find the symptom, then change one thing before the next attempt.
| What happened in the run? | Likely rank killer | Fix for the next attempt |
|---|---|---|
| Orders were wrong. | Cargo checking or button control failed. | Assign one shipper and require a final order call before sending. |
| Players crashed out. | Stress, hazards, collisions, or panic driving were too high. | Add Cup Holder or Aromatherapy and move stressed players to safer jobs. |
| The run felt slow. | Too much empty driving or weak stacking. | Stack needed cargo and stage it closer to the truck path. |
| Cargo was everywhere. | No sorter, shelf, or staging plan. | Buy Standard Shelf and assign a sorter/stager. |
| Important cargo got dropped. | Special cargo handling was too risky. | Buy The Grippers and reduce crowded crossings. |
| Everyone blocked each other. | Co-op lanes and roles were unclear. | Split lanes and stop crowding the truck area. |
| Everyone chased the same item. | Team roles collapsed under pressure. | Assign reader, runner, sorter, shipper, and floater. |
| Safety Violations ruined the shift. | The modifier added more chaos than the team could handle. | Skip risky modifiers until the base route is stable. |
| You had enough speed but still lost rank. | Speed was hiding bad execution. | Fix wrong orders and crash outs before adding more speed. |
| The same mistake repeated. | The team did not review the result screen. | Write down the biggest delay and buy or route around it next run. |
Use this after each failed S Rank attempt.
Correct Orders Come First
A run cannot become a serious S Rank attempt if the truck orders are unreliable.
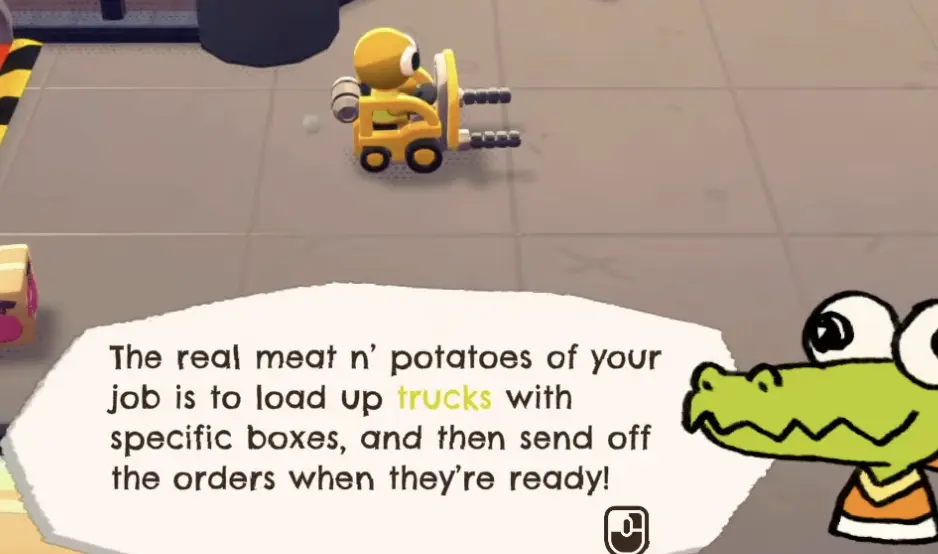
Before thinking about perfect upgrades or advanced routes, make sure every truck leaves with the correct cargo. Wrong orders create stress, wasted time, and possible deductions all at once.
| Check | Why it matters |
|---|---|
| Correct cargo type | Similar boxes can get mixed up during fast routes. |
| Correct quantity | One missing or extra item can ruin the order. |
| Wrong cargo removed | Bad cargo near the truck creates accidental sends. |
| Button owner assigned | Prevents early sends from random players. |
| Reader confirms | The shipper should not guess under pressure. |
Use this order check during rank attempts.
Solo S Rank Strategy
Solo S Rank is not just co-op with fewer players. It is a different problem.
You have no teammate to read the order, clean the lane, recover a dropped item, or press the button while you stage cargo. That means solo S Rank is usually about reducing workload before adding speed.
| Solo problem | Best adjustment | Why it matters |
|---|---|---|
| You forget what the truck needs. | Stage cargo on Standard Shelf before final loading. | A stable staging point reduces memory pressure. |
| You crash out after one bad route. | Buy Cup Holder before pure speed. | More stress tolerance gives solo players time to recover. |
| Stress stays high after mistakes. | Add Aromatherapy after Cup Holder. | Faster recovery helps between orders. |
| Special cargo keeps dropping. | Buy The Grippers. | One dropped item can force a full solo reset. |
| The route is long but predictable. | Use Teleporter or Nitro Canisters after the route is clean. | Route compression matters when every trip is yours. |
| The floor keeps ruining movement. | Buy Scrubbie, Tire Chains, or Fire Extinguisher based on the hazard. | Solo players cannot spare much time for repeated cleanup. |
| You are almost fast enough but not clean enough. | Remove one mistake before adding speed. | A cleaner A run is the path to S. |
Solo S Rank priorities by failure point.
Solo vs Co-op for S Rank
Solo and co-op are not simply “easy” or “hard.” They are better in different contract patterns.
| Scenario | Solo advantage | Co-op advantage |
|---|---|---|
| Simple cargo, short routes | Cleaner control and fewer collisions. | Faster if roles are disciplined. |
| Special cargo or fragile cargo | One player can control handling more carefully. | Strong if one runner owns The Grippers and one shipper owns the button. |
| Long routes or split warehouse | Harder because every trip is yours. | Stronger because runners, sorters, and shippers can work in parallel. |
| Many item types | Easier to avoid teammate confusion, but slower. | Stronger with a reader and sorter; worse if everyone grabs random cargo. |
| Heavy hazards or cleanup | Harder because cleanup steals your delivery time. | Stronger if a floater owns cleanup. |
| High-stress modifiers | Fewer teammate bumps, but no rescue if you crash out. | Stronger if players give stressed teammates safer jobs. |
When solo or co-op is usually stronger for S Rank attempts.
Co-op Roles for S Rank
A serious co-op S Rank attempt needs role discipline. Everyone should know their job before the shift starts.
| Role | S Rank job | Biggest mistake to avoid |
|---|---|---|
| Reader | Calls exact cargo, truck, and quantity. | Leaving everyone to guess. |
| Runner | Moves needed cargo quickly through the safest lane. | Chasing random boxes or overboosting. |
| Sorter / Stager | Builds clean staging areas and removes wrong cargo. | Dropping mystery piles near the truck. |
| Shipper | Confirms final order and presses the button. | Sending early. |
| Floater | Handles missing cargo, hazards, cleanup, and route problems. | Copying the runner instead of fixing bottlenecks. |
Co-op roles for S Rank attempts.
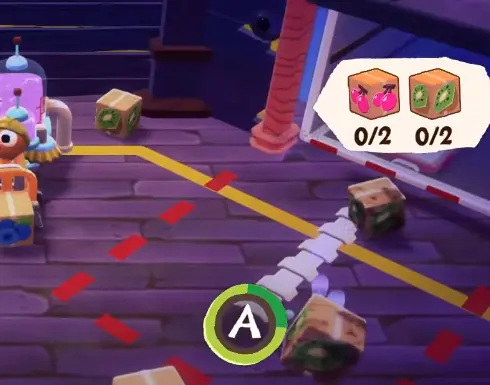
Upgrade Priority for S Rank
For full upgrade details, use the Best Upgrades Guide. For S Rank specifically, the rule is simple:
Remove errors first, remove crash outs second, shorten routes third, and add speed last.
| S Rank goal | Upgrade direction |
|---|---|
| Stop wrong boxes. | Standard Shelf, Sturdy Shelf, better staging. |
| Stop dropped cargo. | The Grippers. |
| Stop crash outs. | Cup Holder, Aromatherapy. |
| Stop repeated hazards. | Scrubbie, Tire Chains, Fire Extinguisher, Water Balloon Pump. |
| Shorten long routes. | Teleporter, Nitro Canisters, Boost Pad. |
| Improve clean-route speed. | Racing Tires, Charge Pad, Sick-ass Spoiler. |
S Rank upgrade priority by goal.
Safety Violations and S Rank
Safety Violations can give money, but they also add failure points.
If you are learning a contract route, skip risky modifiers. Once the base route is stable, test one manageable modifier at a time. If a modifier changes the whole route, it is probably not the right choice for your first S Rank attempts.
| Situation | Safety Violation plan |
|---|---|
| First time learning the contract | Skip risky modifiers. |
| Trying to move from B to A | Pick only mild, predictable modifiers. |
| Trying for S Rank | Avoid anything that disrupts cargo, routes, or stress. |
| Farming money for better upgrades | Take manageable modifiers, then spend the money on consistency. |
| Testing route strength | Add one modifier at a time so you know what caused the failure. |
Use this when deciding whether to take a Safety Violation during a rank push.
Special Cargo and S Rank
Some shifts are harder because the cargo itself needs extra handling.
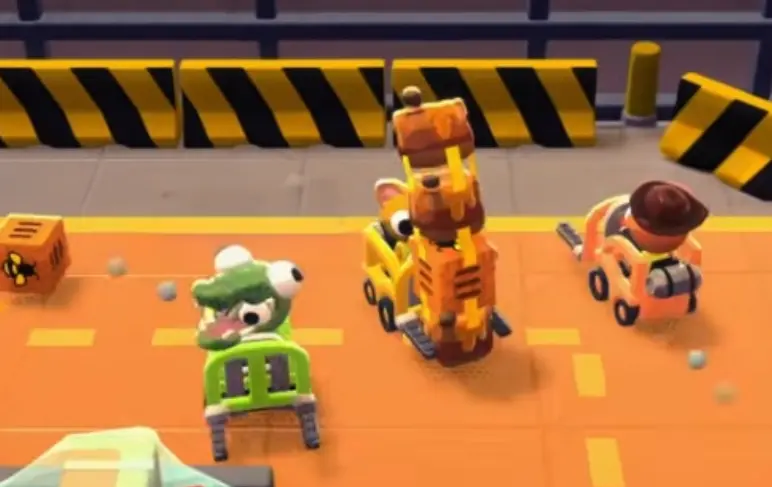
Honey, hives, eggs, explosives, barrels, or other awkward cargo can ruin a rank attempt if players treat them like normal boxes. Assign one person to the risky cargo and keep the route clear.
| Special cargo problem | S Rank solution |
|---|---|
| Cargo is easy to drop. | Buy The Grippers and reduce crowded crossings. |
| Cargo needs staging. | Use Standard Shelf or Sturdy Shelf near a safe route. |
| Route is long. | Add Teleporter or runner tools after staging is stable. |
| Players are unsure what to bring. | Reader calls exact item and quantity before movement. |
| Truck is almost leaving. | Finish the correct order instead of panicking with wrong cargo. |
Use this when special cargo is costing rank.
Early S Rank Practice Plan
Use this progression instead of forcing S Rank immediately.
| Practice stage | Goal | What to do next |
|---|---|---|
| Stage 1: Clear normally | Learn the contract and finish without worrying about rank. | Identify the route and cargo types. |
| Stage 2: Remove wrong orders | Make every truck send correct. | Assign a final shipper and button owner. |
| Stage 3: Reduce crash outs | Fix stress, collisions, hazards, and panic driving. | Add Cup Holder or Aromatherapy if needed. |
| Stage 4: Improve staging | Cut wrong boxes and last-second searching. | Use shelves, sorter roles, and clean piles. |
| Stage 5: Shorten repeated routes | Reduce empty driving. | Add Teleporter, Boost Pad, or runner tools only after the route is stable. |
| Stage 6: Add speed | Push from clean A-level execution toward S. | Add Racing Tires, Nitro Canisters, Charge Pad, or Sick-ass Spoiler carefully. |
| Stage 7: Use the result screen | Turn the failure reason into the next run’s plan. | Change one upgrade, route, or role based on the biggest mistake. |
Turn messy clears into realistic S Rank attempts.
How to Use Result Notes
Result notes are useful only if they change your next attempt.
After each run, write one line:
“We lost S because of ___, so next run we will ___.”
| Result note | Next-run change |
|---|---|
| One wrong truck send. | One shipper owns the button; reader confirms before send. |
| Two crash outs near hazards. | Buy Cup Holder or Aromatherapy; reroute around hazard lane. |
| Too many loose boxes. | Buy Standard Shelf; assign one sorter. |
| Special cargo dropped twice. | Buy The Grippers; reduce crowded crossings. |
| Runner wasted time on long route. | Add Teleporter or Nitro Canisters after staging is stable. |
| Everyone chased the same item. | Assign reader, runner, sorter, shipper, and floater before starting. |
| Safety Violation caused the failure. | Skip it until the base route earns a clean A-level run. |
Turn result notes into concrete fixes.
FAQ
How do you get S Rank in Crashout Crew? +
To push for S Rank, focus on correct truck orders, fewer crash outs, clean cargo staging, less wasted driving, safer button control, and upgrades that remove mistakes before adding speed.
What are the S Rank requirements in Crashout Crew? +
Based on S Rank result examples, S Rank rewards clean, fast, low-mistake runs. Correct orders, clean cargo control, fewer crash outs, good routing, and stable teamwork matter more than reckless speed.
Does one S mark in the progress row mean the whole contract is S Rank? +
No. A single S in the progress row means that part of the run performed well, but the full run should only be treated as S Rank when the final large grade is also S.
Which Crashout Crew contracts have S Rank examples in this guide? +
This guide uses real final S result examples for Forklift Certification, By the Barrel, and Speed Limit. Each example focuses on the route lesson behind the S result, such as clean control, barrel handling, or controlled speed.
Is this a full all-contract S Rank walkthrough? +
This guide is built around real S Rank result examples and practical route lessons. It is designed to help players improve S Rank attempts now, while additional contract examples can be added as more final S results are collected.
What lowers your rank in Crashout Crew? +
The biggest early rank killers are wrong orders, crash outs, messy cargo, wasted trips, teammate collisions, poor button control, unsafe Safety Violations, and not reviewing why the previous run failed.
Is S Rank easier solo or co-op? +
Solo can be cleaner because there are no teammate collisions, but co-op can be faster when players split roles. Solo is better for simple or special-cargo control, while co-op is usually stronger on long routes and multi-truck pressure.
Should I use Safety Violations while going for S Rank? +
Avoid risky Safety Violations while learning an S Rank route. Extra money is useful only if the modifier does not cause wrong orders, crash outs, cargo disruption, or major route delays.
What upgrades are best for S Rank? +
For S Rank, prioritize consistency before speed: Standard Shelf for staging, The Grippers for dropped cargo, Cup Holder or Aromatherapy for stress, then Teleporter, Boost Pad, Nitro Canisters, or Racing Tires once the route is already clean.