How I Fix Fetchers, Warehouses, and Slow Routes
My practical route-checking order for missing inputs, empty Warehouses, cross-Camp deliveries, red paths, and transport upgrades.
Updated:
Quick Answer
When a resource stops moving, I select the building that needs it and check the route in this order: requested input, selected provider, Pirate Camp, assigned Fetcher, provider stock, Warehouse slot, route color, and production versus drain. I do not build another Warehouse or add another Fetcher until I know which link has failed. A faster path cannot fix missing production, and higher production cannot fix an invalid provider.
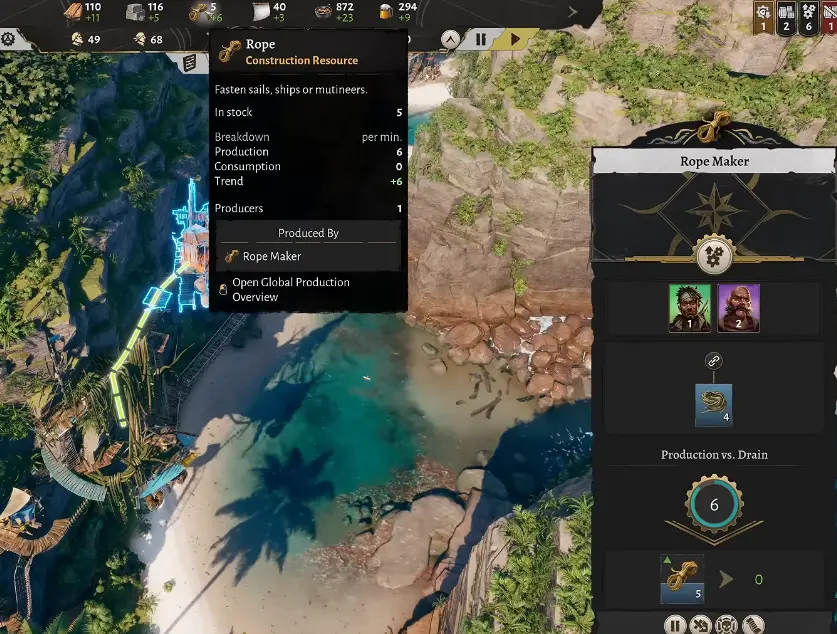
My first confusing logistics failure happened while producing Rope.
The Rope Maker was operating, Rope appeared in the island total, and a nearby Warehouse looked connected. Nothing moved.
The problem was not the Rope Maker or the visible path.
The Warehouse belonged to another Pirate Camp.
Once I routed the Rope into storage inside the producer’s own territory, the Fetcher began moving it normally.
That changed how I read every logistics problem:
A resource can exist somewhere on the island without being available to the building that needs it.
My 60-Second Logistics Check
When a consumer shows an empty input, I pause and use this order:
- select the stalled consumer;
- identify the exact missing input;
- open the selected provider;
- confirm that the provider contains or produces the correct resource;
- check whether the provider belongs to a usable Pirate Camp;
- confirm that a Fetcher is assigned;
- check whether the Warehouse accepts that resource;
- inspect the complete route and its color;
- compare production with current consumption;
- unpause and watch one Fetcher complete the full round trip.
I do not judge the route only by how close two buildings look from above.
Corsair Cove is vertical. Two buildings can appear adjacent while the Fetcher has to descend a cliff, cross a bridge, climb another level, collect the resource, and repeat the same route in reverse.
Watching one full trip usually reveals more than adding another building.
I Check the Pirate Camp Before Rebuilding Anything
Pirate Camps divide the island into separate territories.
A producer may be physically close to a Warehouse but still lack a valid local destination when the buildings belong to different Camps.
For a resource that must cross territories, I use visible stages:
producer → local Warehouse → relay or destination Warehouse → consumer
I avoid connecting one remote producer directly to several distant consumers.
That approach creates multiple long routes, consumes more Fetchers, and makes it hard to identify which connection has stopped.
A local Warehouse gives the production district a clear first destination. Only after stock begins accumulating do I build the next leg.
A Warehouse Is a Buffer, Not a Teleporter
I use Warehouses for three jobs:
- collecting surplus from nearby producers;
- providing a shorter pickup point for consumers;
- creating checkpoints along long cross-Camp routes.
A Warehouse does not remove the physical journey.
A Fetcher still has to collect the resource, travel along a valid route, deliver it, and return.
That means another Warehouse does not solve:
- a provider from the wrong Camp;
- a missing bridge;
- an inaccessible cliff level;
- no free Fetcher;
- a full destination;
- insufficient production.
I add storage only when it gives the route a useful buffer or checkpoint.
I Reserve Warehouse Slots Around the District’s Job
A standard Warehouse gives me 15 resource slots.
I do not let one early Warehouse accept every resource it can reach.
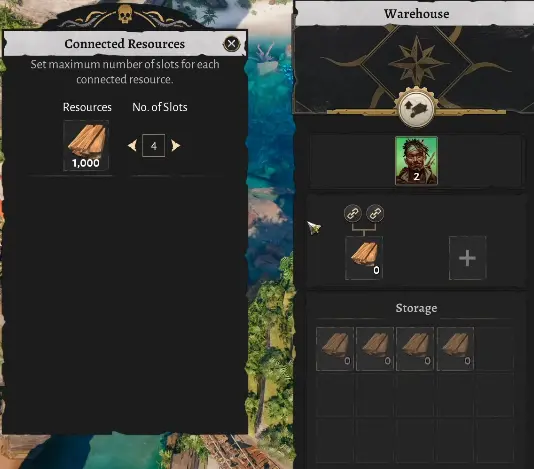
My storage priorities depend on the district.
Near a Pier, I reserve space for:
- Planks;
- Rope;
- current shipbuilding materials;
- repair resources.
Near a Galley or Cassava Oven, I reserve space for:
- the required ingredients;
- the finished Upkeep resource;
- one construction material needed for local expansion.
At a mining outpost, I prioritize:
- the extracted resource;
- its processed output;
- the Planks or Stone needed to expand the outpost.
I reduce storage limits on common resources instead of allowing one large stockpile to occupy most of the Warehouse.
How I Build a Cross-Camp Relay
Salt was the first resource that forced me to create a real cross-island route.
The Bread-producing Camp had no nearby Salt deposit. Moving the producer a little closer could not solve the problem because the raw resource was fixed in another territory.
My route became:
- Salt source;
- Warehouse inside the Salt Camp;
- relay Warehouse near the difficult elevation change;
- faster vertical connection;
- destination Warehouse or Cassava Oven.
I build that route one leg at a time.
First, I make sure Salt reaches the source Warehouse. Only after the source stock begins rising do I create the relay connection.
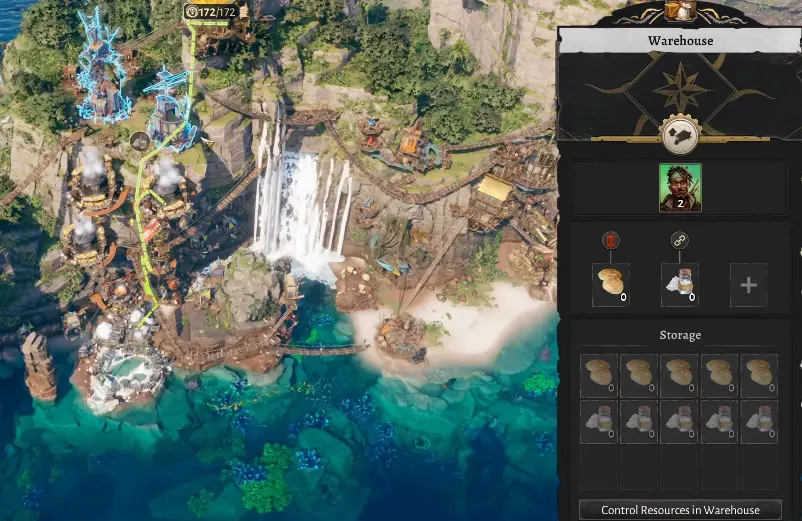
The checkpoints tell me where to look:
- empty source Warehouse: extraction or the first Fetcher has failed;
- full source and empty relay: the middle route has failed;
- full source and relay but empty consumer: the final provider or consumer route has failed;
- every storage point empty: production may be below total demand.
This is easier to diagnose than one route that crosses the entire island.
Route Color Matters More Than Visual Distance
When I select a consumer and its provider, the route display tells me how efficient the connection is.
For a continuous, high-volume resource, I want a green route.
Adding a Zip Line between two Warehouse levels turned one Salt route green and reduced the time spent walking around the cliff.
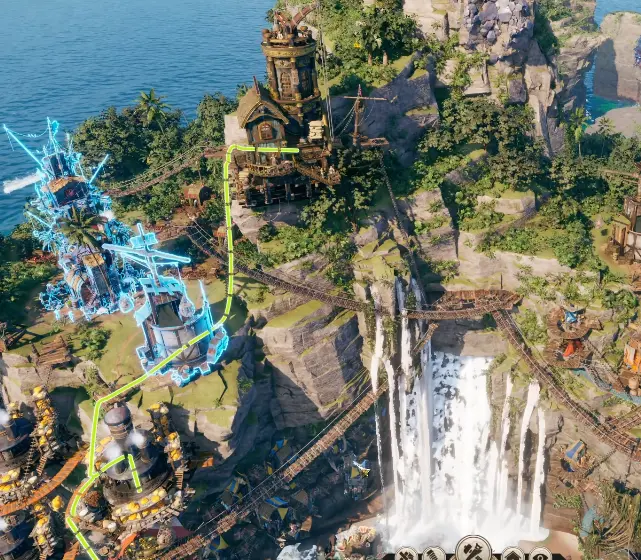
I tolerate a red route when:
- the resource exists only at that location;
- the demand is low or occasional;
- duplicating the full production chain would cost more than the delay;
- the destination has enough buffer to survive slow deliveries.
I do not tolerate a red route for the only Stew, Bread, or other continuously consumed Upkeep resource.
A full Galley can hide the problem temporarily. Once the buffer empties, the same slow route can cause falling Satisfaction and Outrage.
A Zip Line May Improve Only Half the Trip
A Zip Line can solve the loaded journey while leaving the return route slow.
In one setup, the Fetcher travelled downhill quickly, collected the resource, and then had to walk all the way back up.
The route improved, but the round trip was still unbalanced.
I added a Mast at a higher point and created a second useful direction.
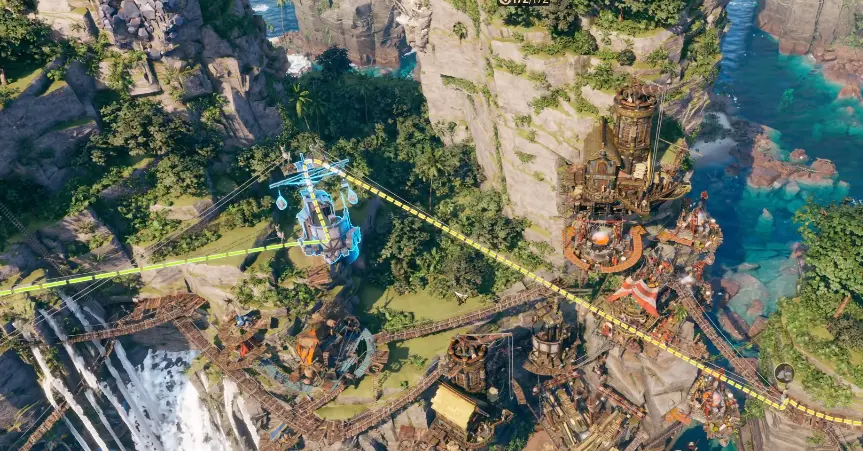
Before placing a Zip Line, I check:
- which direction the loaded Fetcher travels;
- where the worker ends after using the line;
- how the worker returns to the provider;
- whether another building or Mast offers a better high anchor;
- how frequently the resource moves;
- whether the improvement changes the route color.
I do not assume that a fast downhill trip means the complete route is fast.
When I Buy a Zip Line, Elevator, or Area Lift
I choose the cheapest transport option that removes the real bottleneck.
I use a Zip Line for a focused route
A Zip Line cost 10 Coin in my run.
I use one when:
- suitable high and low anchors already exist;
- one resource follows the same route repeatedly;
- the walking path around the cliff is much longer;
- even a one-way improvement meaningfully reduces the trip.
Because the cost is low, I usually test a Zip Line before considering a major transport building.
I use an Elevator for a direct vertical gap
An Elevator cost 50 Coin.
I use one when two busy levels sit almost directly above and below each other.
It works best for:
- a mining outpost;
- a dock;
- a production level visited by several workers;
- a route carrying more than one resource.
If the terrain reports that it is not steep enough, I move the endpoints rather than rebuilding the entire district around an invalid placement.
I delay the Area Lift until several routes need it
The Area Lift cost 300 Coin while I had only 600 Coin available.
I did not spend half of the reserve to improve one early Bread route.
I buy an Area Lift when:
- several chains use the same vertical corridor;
- the route carries continuous Upkeep;
- repeated trips consume too many Fetchers;
- cheaper connections still leave the main route long;
- the purchase will not block a required ship or building.
A transport upgrade should remove a meaningful bottleneck. It should not merely make one worker’s animation look faster.
I Produce Continuous Upkeep Locally
Not every resource should cross the island.
I initially tried importing Stew into a distant Pirate Camp. The route was possible, but the destination needed food continuously and the source Warehouse was already supplying other demands.
I stopped extending that route and built local Campfires.
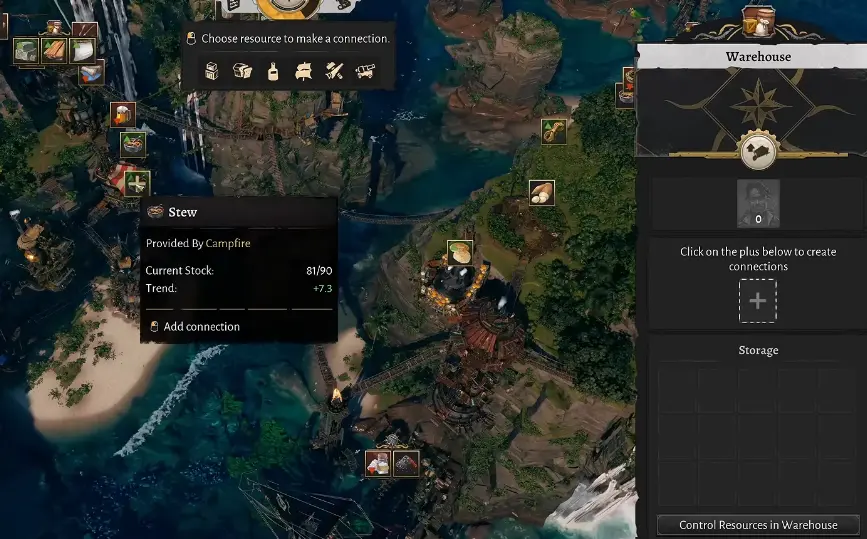
My general rule is:
- Produce locally: Stew and other basic continuously consumed Upkeep.
- Transport between Camps: Planks, Rope, Stone Blocks, and construction materials used in bursts.
- Build an outpost: Salt, Guano, Lead, Lime, and other fixed deposits.
- Move the processor: when the raw deposit is fixed but the processing building can sit closer to the consumer.
- Use a relay: when a rare resource must serve several distant consumers.
I am willing to transport building materials because demand is intermittent.
I am much less willing to transport the only food keeping an entire Camp satisfied.
I Separate Production Failure From Delivery Failure
A short green route can still end with an empty destination.
My Bread system exposed two problems at the same time:
- production was 14.4 Bread per minute;
- Upkeep consumed 15 Bread per minute;
- one Fetcher route also showed a slow effective rate of 6.7.
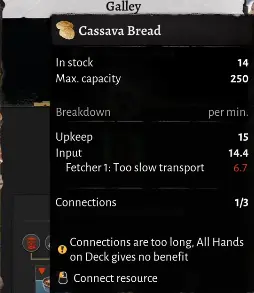
Improving the route alone could not solve the permanent 0.6-per-minute production deficit.
Adding production alone might also leave the Galley empty if the Fetcher could not move the new output quickly enough.
I diagnose the two systems separately.
Production checks
- Is output higher than total drain?
- Are all ingredient producers working?
- Is the processor waiting for an input?
- Is storage filling at the producer?
Delivery checks
- Is the consumer empty while the provider is full?
- Is the Fetcher assigned?
- Does the route show Long Transportation?
- Does changing the provider improve the route?
- Is the round trip slow in only one direction?
When output is below demand, I add or boost production.
When the provider is full and the consumer is empty, I improve transportation.
When both sides are empty, I trace the production chain backward.
I Add a Second Provider Only After Confirming the First Is Saturated
A Cassava Oven can receive the same input from more than one provider.
When Salt delivery limited Bread production, I connected two Warehouses to the same Oven.
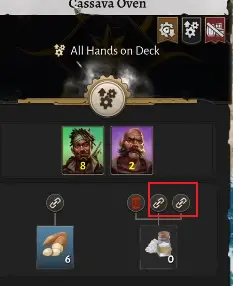
A second provider can improve flow, but it also needs another Fetcher.
I add one only when:
- both Warehouses contain Salt;
- the first Fetcher remains active;
- another Drifter is available;
- the Oven can process the additional deliveries;
- upstream Salt production is sufficient.
If both Warehouses are empty, adding two routes only creates two idle Fetchers.
When a Deposit Requires Another Pirate Camp
Some deposits sit outside every existing territory.
When I needed Lead, a longer road could not claim it. I had to place a Pirate Camp whose range covered the resource.
I treat that location as an outpost rather than copying the entire main Haven.
I build a resource Camp when:
- the required deposit is outside current territory;
- the resource will support more than one useful objective;
- the Camp claims several deposits or a Pier;
- enough Drifters remain for extraction and transport;
- Housing and basic Upkeep can be supported;
- another territory will not leave defence exposed.
I do not place a new Camp solely to shorten an ordinary walking route.
Every Camp creates additional Housing, Upkeep, workforce, transport, and defence obligations.
I Move Stored Goods Before Deleting a Warehouse
Production buildings can often be paused and rebuilt safely.
Warehouses need more care because their inventory can be lost.
Before deleting one, I:
- build the replacement Warehouse;
- enable the required resource slots;
- connect the old and new storage;
- wait for important goods to move;
- confirm the old inventory is empty;
- delete the old Warehouse;
- reconnect every consumer.
This matters most for:
- Rope;
- Salt;
- Black Powder;
- rare event resources;
- higher-tier shipbuilding materials.
Recovering the Warehouse’s construction materials does not compensate for losing the stock inside it.
The Long-Route Layout I Trust
For a resource that must cross several elevations or Camps, I use:
source → local Warehouse → relay Warehouse → destination Warehouse → consumer
I keep every leg visible and assign only the resources that need to travel through it.
I then watch one Fetcher complete each leg before increasing the volume.
When the chain stops:
- empty local storage means production or the first pickup failed;
- full local storage and empty relay means the middle route failed;
- full Warehouses and an empty consumer mean final delivery failed;
- empty storage everywhere usually means production is below drain;
- full storage with idle Fetchers usually means the provider, slot, or consumer assignment is wrong.
The best logistics network is not the one with the most Warehouses.
It is the one where I can identify the failed leg before an entire Pirate Camp runs out of Upkeep.
FAQ
Does a Warehouse require workers in Corsair Cove? +
The Warehouse itself does not require working hands, but every active pickup or delivery connection still needs a Fetcher. Building more Warehouses without preserving free Drifters can create storage that nobody is available to fill.
Why does Long Transportation remain after I build an Elevator? +
An Elevator only improves one section of the trip. The Fetcher may still have a long walk before reaching it, after leaving it, or while returning to the provider. I inspect the complete round trip rather than only the vertical section.