How I Pick the Best Hippodrome Racer
I test Specialists, compare their real racing stats and potential, and stop spending once I have a racer strong enough to carry the harder Hippodrome events.
Updated:
Quick Answer
I do not choose my best Hippodrome racer by rarity.
I put promising Specialists through Trials until I can see both their current racing profile and enough of their potential to know whether continued development is worth it.
The four stats I care about are Speed, Stamina, Sprint and Reliability. For a long-term racer, I value a strong overall ceiling much more than one impressive starting stat.
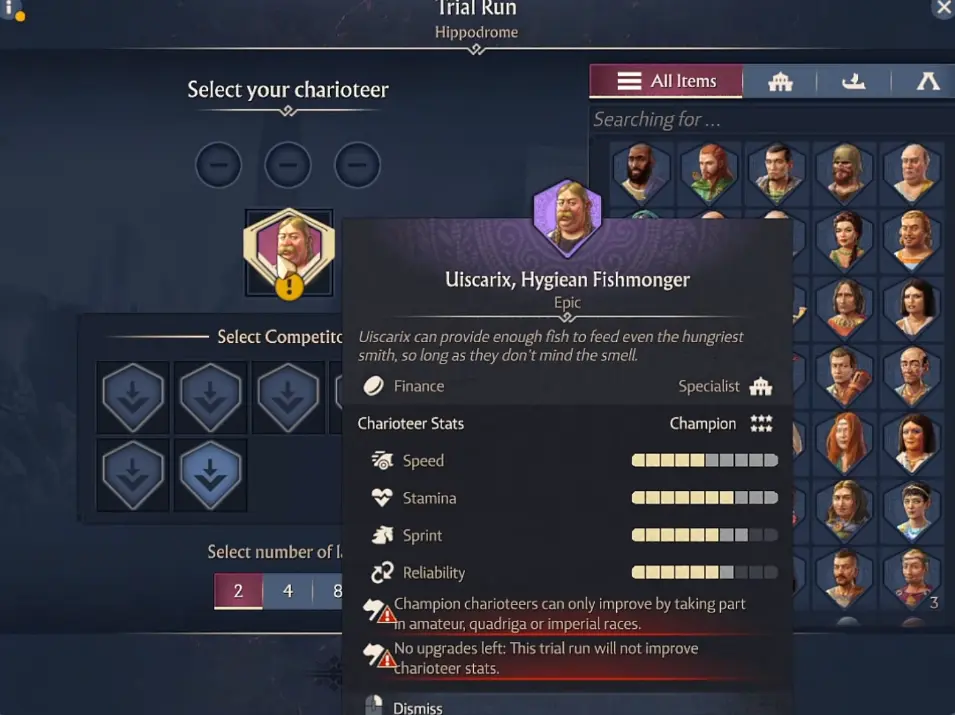
The best candidate I found proved why. He was a purple Underdog, not one of the Legendary Specialists I had been testing. By Champion Level 6, he had reached maximum Speed and Stamina and was only 2 points short in Sprint and 3 short in Reliability — just 5 total points from the apparent maximum across all four stats.
My process is:
find promising Specialists → reveal stats → reveal potential → compare the ceiling → develop the best complete profile
Once I already have a racer that close to the top, I stop burning money looking for a slightly better border color.
I Do Not Commit to a Racer Before I Know the Potential
A Specialist’s rarity is visible immediately.
The racing profile is not.
That is why I treat a newly acquired Specialist as a candidate, not as my new main racer.
The first useful Trial exposes the four charioteer stats. Further testing reveals more of that Specialist’s potential, which is the information I really want before investing heavily.
I am trying to answer two separate questions:
How good is this racer now?
and:
How good can this racer become?
Those answers can be very different.
A Specialist with an ordinary-looking starting profile can still have plenty of room to grow. Another can look strong immediately but already be close to a mediocre personal ceiling.
For the timing of Trials and when I fit them between main events, I use my Hippodrome racing route. Here, the Trial matters because it exposes the information I use to make the investment decision.
I Judge the Four Stats as One Racing Profile
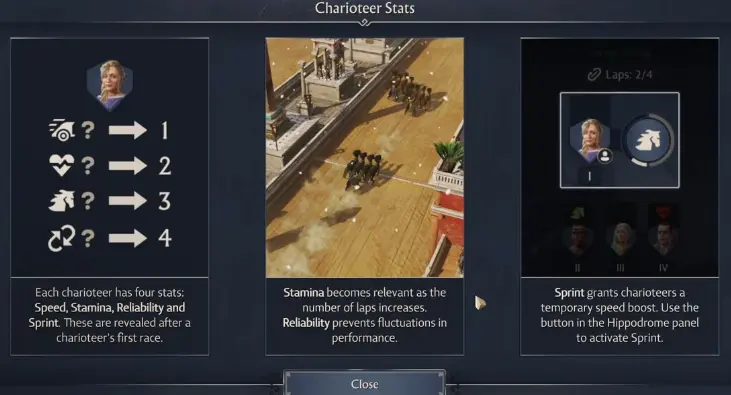
Every eligible charioteer has four racing stats:
- Speed
- Stamina
- Sprint
- Reliability
I do not simply add the four numbers together.
Each one solves a different problem.
Speed gives me the basic pace
Speed is the easiest stat to notice.
A slow racer struggles to gain ground no matter how well I time everything else.
I want strong Speed on a long-term candidate, but a large Speed bar is not enough to carry a bad overall profile.
If the charioteer cannot maintain that pace, the early advantage disappears.
Stamina matters more as I move into longer races
Stamina is the stat I become stricter about as the Hippodrome progression gets harder.
The game explicitly notes that it becomes more relevant as the number of laps increases, and that matches what I see on the track.
A weak-Stamina racer can look completely acceptable early and then begin sliding backward once the field has been running for several laps.
For an early Amateur candidate, I can tolerate some weakness.
For someone I want to carry into Classic Quadriga and Imperial events, I want much more confidence in the Stamina ceiling.
Sprint is useful when the rest of the racer already works
Sprint gives me the active speed burst during a race.
A strong Sprint stat is valuable because it gives me more opportunity to recover position or complete an overtake.
But I do not use Sprint potential to excuse poor fundamentals.
If Speed and Stamina are weak, a temporary burst only covers the problem for a few moments.
Reliability matters when I want repeatable results
Reliability is easier to underestimate because it is less visible than a fast Sprint or obvious top speed.
Its value is consistency.
I care more about Reliability once I stop looking for a temporary Amateur racer and start choosing the Specialist I intend to keep.
One excellent race does not help much if the same racer produces wildly uneven performances afterward.
For my main charioteer, I want the complete profile to hold together.
Legendary Is a Useful Signal, Not a Guarantee
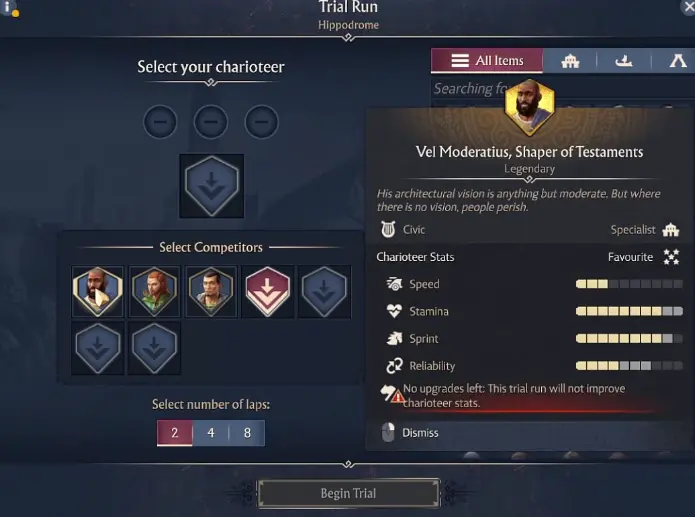
I tested several Legendary Specialists because the gold rarity naturally looked like the safest route to a top racer.
Some of them were useful.
Several were already Contenders, which made them attractive when I wanted someone capable of racing immediately.
But once I exposed their potential, the result was clear:
Legendary did not guarantee the strongest final stat spread.
That changes when I am willing to pay a premium.
If my city is rich and I simply need a competent racer now, an attractive Legendary Contender can be a reasonable shortcut.
If I am searching for the best long-term ceiling, I would rather test several promising candidates than keep paying for gold rarity without knowing what the stats will become.
My Best Racer Was a Purple Underdog
The strongest example came from a racer I could easily have ignored.
He was a purple Underdog.
After development he reached Champion Level 6 with:
- maximum Speed
- maximum Stamina
- Sprint only 2 points short of maximum
- Reliability only 3 points short of maximum
Across the four stats, that left just 5 points missing from the apparent maximum.
That was the point where rarity stopped being an important part of the decision.
The racing profile was already better than what I had found among the more expensive candidates.
I now treat Underdog as a reason to test, not a reason to discard.
I Use Contenders When I Need Results Now
Underdogs and Contenders solve different problems for me.
A Contender is useful when the Hippodrome is already running and I need someone capable of handling early events without waiting through a long development project.
A high-potential Underdog is more interesting when I am thinking several races ahead.
That means I do not force myself to choose one philosophy.
Early in the DLC I am happy to let a competent Contender carry Amateur events while I continue testing other Specialists.
If one of those Underdogs reveals a much stronger ceiling, I can change my long-term racer later.
This avoids the opposite mistake: spending so much time searching for a theoretical perfect character that I stop progressing through the Hippodrome at all.
One Win Is Not Enough for Me to Call a Racer Good
Race results can be noisy.
I have seen a charioteer get trapped behind traffic, lose pace when Stamina dropped and recover a bad position because Sprint became available at exactly the right moment.
That means a victory gives me useful evidence, but not a complete evaluation.
If weak Stamina needed a last-second Sprint to rescue one Amateur win, I still treat the Stamina as a weakness.
If Reliability is poor, one clean event does not suddenly make the racer consistent.
This is why I combine:
visible stats
with:
potential
and:
repeated race performance
before I make a long-term choice.
The stat ceiling tells me what is possible.
Actual races tell me whether that profile works the way I expected.
Traders Are My Fastest Way to Build a Candidate Pool
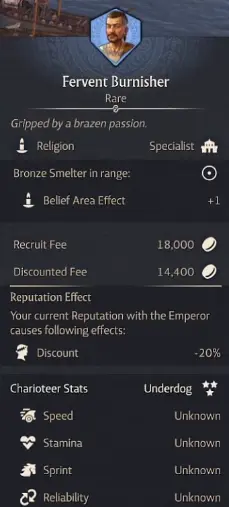
When I want more racers to test, traders are the most direct source I use.
I keep ships near several traders rather than repeatedly moving one ship around the map.
When inventories refresh, I check for:
- Underdogs worth testing;
- useful Contenders;
- higher-rarity Specialists at a price I can justify.
I do use rerolls, but I give myself a stopping point.
In one search, the first reroll cost 7,500 Denarii. I was comfortable doing one or two cheaper refreshes, but I stopped once the next attempt became noticeably more expensive.
The mistake would be assuming another reroll is bringing me closer to certainty.
It is not.
It only buys another random inventory.
Once the price starts climbing, I would rather sail to another trader and get another independent stock roll.
My route is usually:
check stock → buy a promising Specialist → use one or two affordable rerolls → move on
That gives me several candidates without turning the search itself into a huge money sink.
I Check the Character Type Before Paying
There is an even simpler mistake I try not to make at traders.
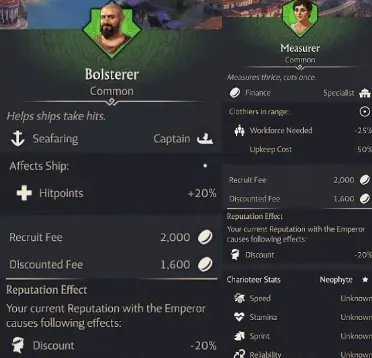
Captains cannot participate in Hippodrome events.
That matters because a Captain can still look extremely attractive in a high-rarity inventory.
The character may be valuable somewhere else in the empire.
That does not make the purchase useful for the job I am currently trying to fill.
So if I am shopping specifically for a charioteer, I verify the unit type before spending the money.
I Use Other Specialist Sources Without Changing the Evaluation
Traders are convenient, but they are not the only way I end up with possible racers.
Festivals and the Hall of Fame can add more Specialists to the pool.
Honoured Guests can eventually give me even rarer candidates, including Heroics.
I do not change the evaluation process based on where the character came from.
A free Specialist, an expensive trader purchase and a rare Honoured Guest all end up facing the same question:
What are the racing stats, and what does the ceiling look like?
The Honoured Guest and Heroic acquisition system has its own economy, so I keep that progression in my Splendour and Honoured Guests guide.
Here, once the Specialist reaches my roster, the source stops mattering.
The profile matters.
I Stop Searching Once the Improvement Becomes Marginal
The easiest way to waste money in this system is to keep searching after I already have an excellent racer.
My purple Champion changed that for me.
With maximum Speed and Stamina and only 5 combined points missing from Sprint and Reliability, I could still imagine finding someone slightly better.
But the possible gain had become tiny.
The cost of chasing it had not.
At that point, another round of:
- trader checks;
- rerolls;
- candidate purchases;
- Trials;
- development;
was competing with the actual Hippodrome progression I could already be doing.
So I stopped.
My stopping condition is not:
I found the mathematically perfect racer.
It is:
I have a racer with strong Speed and Stamina, useful Sprint and Reliability, a high enough ceiling for the harder events, and no obvious weakness that keeps costing me races.
Once that is true, I would rather develop and race that Specialist than spend hours looking for one extra point.
The Racer I Keep Is the One That Still Looks Good After the Hidden Information Is Gone
My final choice is rarely the Specialist that looked most impressive when I bought them.
I collect several candidates.
I expose their racing profile.
I compare the potential instead of only the starting stats.
I eliminate racers with weaknesses that matter for the races I want to run.
Then I stop when one candidate is already strong enough that replacing them would only produce a marginal improvement.
That is why the purple Underdog became my main racer while several Legendary Specialists did not.
Rarity got those characters onto the shortlist.
Speed, Stamina, Sprint, Reliability and the final ceiling decided who stayed there.