Anno 117: Pax Romana Guide
Featured
How I Unlock and Build the Hippodrome
I unlock Hippodrome Plans, find a workable 60x28 site in Latium, prepare Albion shipments, and keep all five construction phases supplied.
Read Guide →Game Guide Hub
My practical route through The Hippodrome, from the monument build and first races to racer development, research, Splendour and Heroic Specialists.
Recommended Order
Use these guides to find the right Anno 117: Pax Romana walkthrough, solution or next step.
Guide
I unlock Hippodrome Plans, find a workable 60x28 site in Latium, prepare Albion shipments, and keep all five construction phases supplied.
Guide
I use the first Trial before committing to a race, prepare only the goods I can afford, manage Sprint and Stamina, and avoid bad Rival Challenge bets.
Guide
I test Specialists, compare their real racing stats and potential, and stop spending once I have a racer strong enough to carry the harder Hippodrome events.
Guide
I prioritize Tireless Training and Mass Trials early, reveal useful racer potential next, then move into Daring Research and Mentorship only when my racer is ready.
Guide Cluster
I unlock Hippodrome Plans, find a workable 60x28 site in Latium, prepare Albion shipments, and keep all five construction phases supplied.
Read Guide →I use the first Trial before committing to a race, prepare only the goods I can afford, manage Sprint and Stamina, and avoid bad Rival Challenge bets.
Read Guide →I test Specialists, compare their real racing stats and potential, and stop spending once I have a racer strong enough to carry the harder Hippodrome events.
Read Guide →I prioritize Tireless Training and Mass Trials early, reveal useful racer potential next, then move into Daring Research and Mentorship only when my racer is ready.
Read Guide →I manage Hippodrome Splendour without draining the city, prepare for new Horse needs, and turn Prestige and Honoured Guests into Heroic Specialist chances.
Read Guide →The easiest way I found to handle The Hippodrome is to treat it as a progression chain rather than one giant monument project:
unlock and build it
→ use Trials before committing to expensive races
→ settle on a racer worth developing
→ use research to remove the next bottleneck
→ turn repeated races into Splendour, Prestige and better Specialist opportunities
If I am returning to an older save, I check that the DLC is enabled before changing anything in the city.
After construction, I do not rush the hardest race or buy Specialists just because they have the highest rarity. I get the racing system working first, then let research and Splendour grow around a racer and an economy that can actually support them.
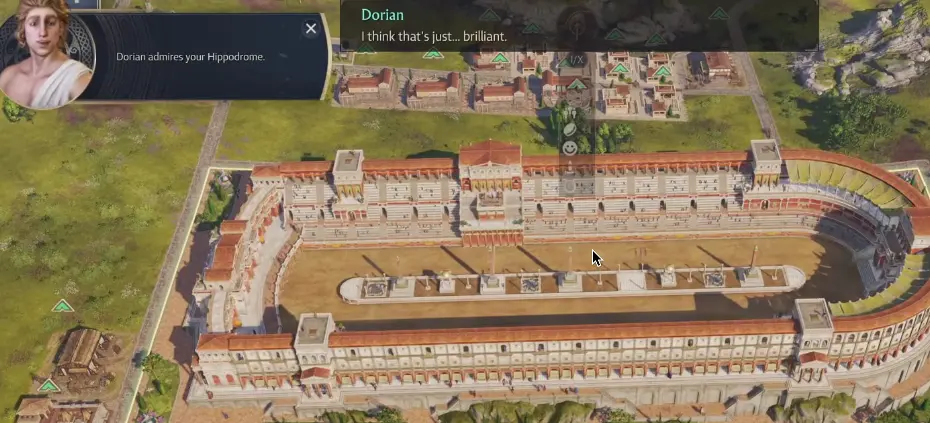
The Hippodrome looks like a construction expansion at first because the monument dominates so much land and demands a long sequence of deliveries.
Once it is finished, those problems disappear almost immediately.
I am no longer thinking about foundation placement or late construction materials. I am choosing who should race, what event I can afford, which research removes the next limitation and how much of the city’s economy I want to commit to recurring games.
That is why I prepare for the build without letting it consume the whole capital.
My Hippodrome unlock and construction guide covers the old-save setup, site selection, cross-region logistics and all five construction phases.
The useful mindset here is simpler:
finish the monument with the city still healthy enough to support what comes next.
A successful build that leaves the island short on workforce or basic goods only moves the bottleneck from construction into racing.
I do not celebrate the completed Hippodrome by immediately sponsoring the largest event available.
I use the early Trial opportunity first.
That gives me a low-risk way to see how the racing system behaves before I start paying the higher workforce, Denarii and goods costs attached to proper events.
From there my progression is usually:
Trial
→ Amateur races
→ develop a dependable charioteer
→ Classic Quadriga
→ Imperial competition
The Hippodrome chariot racing guide covers race preparation, Sprint and Stamina decisions, the main-event rhythm and the extra risk attached to Rival Challenges.
At this stage, I only need one rule:
I test before I commit.
A high-rarity Specialist can be useful, but I do not use rarity as the final answer to who should become my main charioteer.
The Hippodrome has its own racing profile and development system.
So once I have several candidates, I compare what they can actually become rather than repeatedly buying the most expensive-looking character.
That decision matters because everything afterward gets easier once I have someone worth developing.
Trials have a purpose.
Research has a target.
Harder races stop being experiments.
And I know when another Specialist purchase would only be a marginal improvement.
My best Hippodrome racers guide covers the full selection process, including how I compare the four racing stats, reveal potential, use Underdogs and Contenders differently and decide when to stop searching.
The research tree makes more sense once I know what problem I am trying to solve.
If I still have several uncertain racers, I value research that helps me screen candidates.
If I already have a racer I want to keep, training efficiency becomes much more useful.
Later, the tree introduces proper race and Knowledge gates, and eventually the early Trial-based development loop stops being the answer for the same Champion.
I follow that progression in my Hippodrome research order rather than buying whichever node happens to be available next.
For me, the best research is usually the one that removes the problem I am dealing with now.
Once the basic race loop works, the Hippodrome becomes an economic system rather than just an event building.
Repeated races generate Splendour, and higher Splendour can change island bonuses, unlock stronger benefits and eventually affect production and population needs.
That is where I become more careful with race spending.
I do not automatically add every optional good just because it produces a larger Splendour reward.
Before pushing another step, I look at what the next reward changes and whether the island is ready for it.
Some Hippodrome rewards can affect the Horse economy and cavalry, so a Splendour increase can create a production decision instead of simply giving me another passive bonus.
Splendour also connects to Prestige, Honoured Guests and Heroic Specialists.
I handle that full economic loop in my Splendour and Honoured Guests guide, including when I prepare Horse supply, how the Heroic chance works and how I judge an expensive Heroic after it arrives.
Normal races mainly cost me preparation resources and time when they go badly.
A Rival Challenge can cost the charioteer.
That makes it one of the few Hippodrome objectives I refuse to enter just because it appears.
I check the rival first.
If my racer is untested, has an obvious weakness or is a Specialist I cannot afford to lose, I leave the challenge alone and come back after more development.
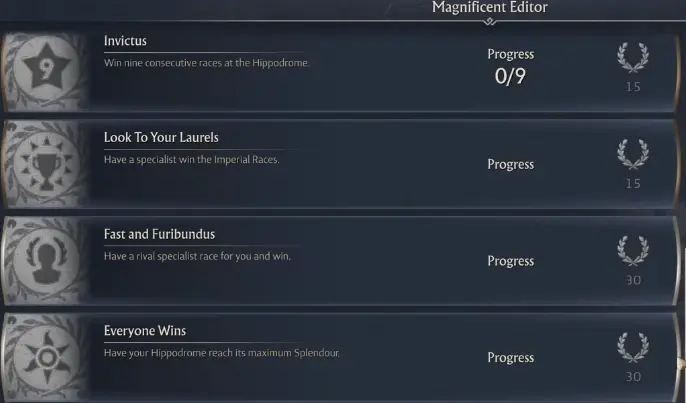
The broader Hippodrome progression also pushes me toward objectives such as:
I treat those as late-game checks on systems I have already built.
If I am struggling with one of them, I go back to the underlying problem rather than treating the objective itself as a new mechanic.
A failed Imperial push usually tells me something about the racer or race preparation.
A maximum-Splendour problem points back to the event economy.
A bad Rival Challenge usually starts with the matchup.
The Aspirant is the one Hippodrome character I do not judge using exactly the same process as a random trader Specialist.
This is a story-driven charioteer whose rarity and stats can change as the storyline progresses.
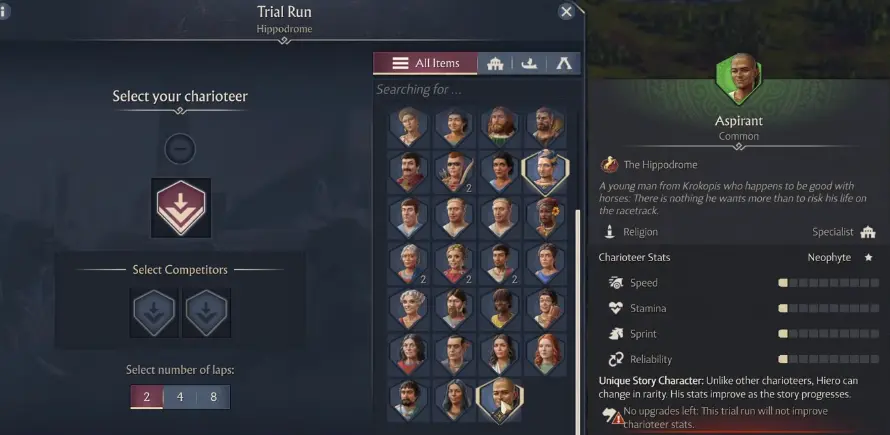
After some races, I can respond to the Aspirant rather than simply collecting an event result.
The choices include approaches such as:
Popularity also becomes part of the character’s progression.
I can build that popularity through Hippodrome activity and through the Aspirant’s presence around the Villa.
That is why I do not discard the Aspirant based only on the first visible racing profile.
For an ordinary Specialist, a weak ceiling can be enough for me to move on.
For the Aspirant, I first let the story progression show me what the character is becoming.
The DLC became much easier once I stopped trying to advance construction, racing, research, Splendour and Specialist hunting simultaneously.
On a fresh Hippodrome run, I prefer this order.
First, I finish the monument without damaging the existing economy.
Then I use the early races to establish one dependable charioteer.
Once I know who I am developing, research becomes much easier to prioritize.
Only after the race loop is stable do I start spending more aggressively on Splendour and the longer Honoured Guest system.
That gives me a progression that feels much more like normal Anno:
build the infrastructure
→ prove the basic loop works
→ remove the next bottleneck
→ scale only when the city can afford it
The Hippodrome becomes expensive when I try to skip those steps.
When I follow them in order, it stops feeling like one isolated DLC mechanic and starts fitting naturally into the rest of the empire.