Angels Fall First Walkthrough
Featured
How to Board Ships and Defend a Breach
Use the right dropship, complete the boarding transfer, secure the Breach Point, clear the Core route, and stop enemy reinforcements.
Read Guide →Game Guide Hub
Learn the controls, survival loop, faction choice, tutorial order, first bot-match setup, and which Angels Fall First guide to open next.
Recommended Order
Use these guides to find the right Angels Fall First walkthrough, solution or next step.
Walkthrough
Use the right dropship, complete the boarding transfer, secure the Breach Point, clear the Core route, and stop enemy reinforcements.
Systems
Understand every loadout slot, fix over-budget builds, choose useful ammo, and plan infantry, vehicle, fighter, rank, and Prestige progression.
Systems
Set up a useful bot match, choose the right AI difficulty, understand Commander tasks, and keep squads moving toward active objectives.
Achievements
Plan all 103 achievements with a four-stage route covering quick unlocks, role challenges, hidden tasks, map mastery, ranks, and long grinds.
Guide Cluster
Use the right dropship, complete the boarding transfer, secure the Breach Point, clear the Core route, and stop enemy reinforcements.
Read Guide →Understand every loadout slot, fix over-budget builds, choose useful ammo, and plan infantry, vehicle, fighter, rank, and Prestige progression.
Read Guide →Set up a useful bot match, choose the right AI difficulty, understand Commander tasks, and keep squads moving toward active objectives.
Read Guide →Plan all 103 achievements with a four-stage route covering quick unlocks, role challenges, hidden tasks, map mastery, ranks, and long grinds.
Read Guide →Start with the four tutorials in this order: Infantry, Vehicle, Ship, then Command. Confirm your interaction, targeting, Tac Map, command, Flight Assist, and countermeasure bindings before entering a match. Learn the basic survival loop—shields recharge, armor needs repair attention, and health needs medical support—then play one Single Player bot scenario while staying with one role and one objective at a time.
Updated for Angels Fall First 1.0 on July 15, 2026. Menu values shown below are a practical checked setup, not mandatory settings for every player or map.
Angels Fall First combines infantry combat, ground vehicles, spacecraft, pilotable capital ships, boarding, loadouts, bots, and battlefield command.
Trying to learn all of them during the same match makes the game feel more confusing than it is.
This page gives you the foundation that belongs before the specialist guides:
It does not repeat every boarding step, budget number, bot setting, order type, or achievement condition.
| Your current problem | Start here | What the focused guide adds |
|---|---|---|
| I do not understand the controls or survival loop | Continue on this page | Controls, defense layers, repairs, healing, factions, tutorials, roles, and first-match setup |
| My loadout is over budget or cannot deploy | Loadout Budget and Progression Guide | Exact caps, seven infantry slots, ammunition, vehicle builds, ranks, 25/25/25, Loaded, and Prestige |
| I reached a ship but cannot get inside | How to Board Ships Guide | Dropships, Breach Points, rear-module transfer, Core routes, defense, and troubleshooting |
| Bots, Freelance, tasks, or orders make no sense | Single Player, Bots and Orders Guide | AI settings, MILNET, objective hierarchy, squad roles, vehicle offers, and bot troubleshooting |
| I want to complete all achievements | Achievements Guide and 103 Checklist | Four-stage roadmap, hidden tasks, map mastery, ranks, Prestige, and long counters |
Do not start with a full server and attempt every available role.
Use this sequence instead:
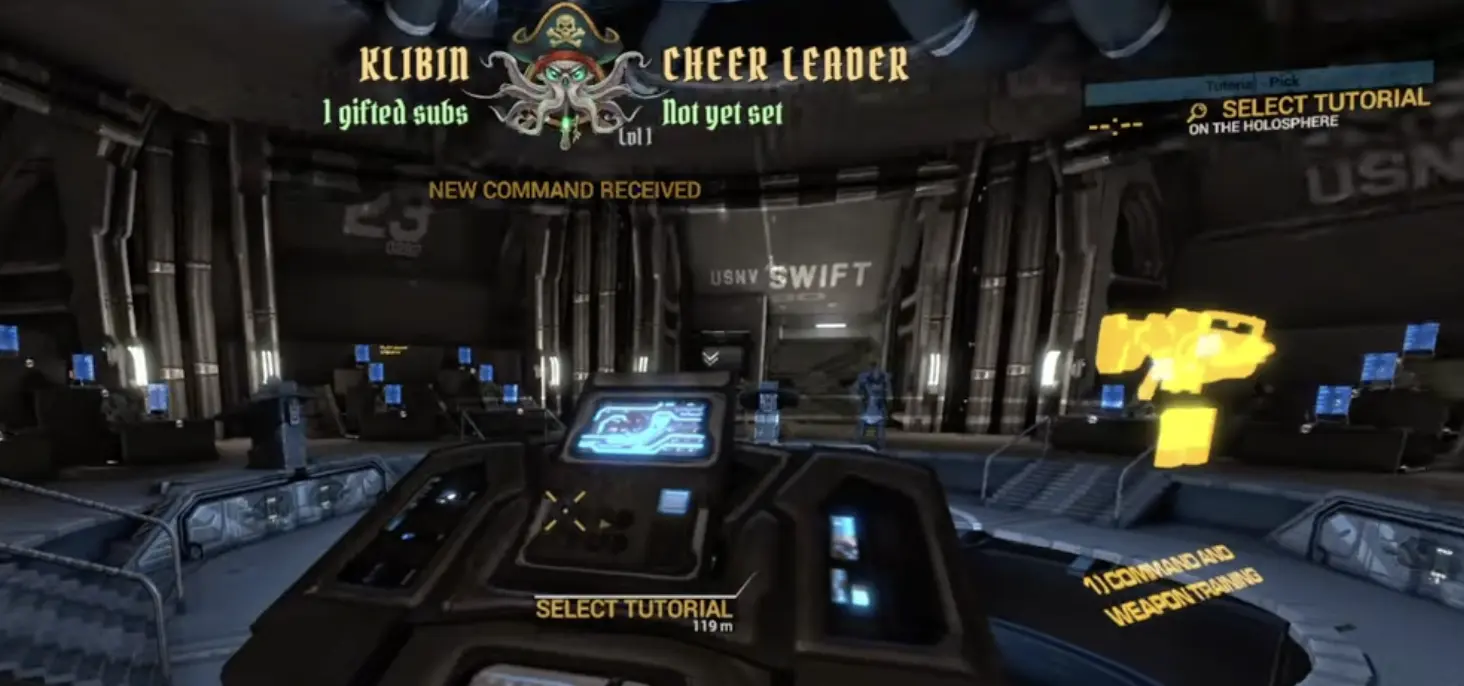
| Tutorial | Learn this first | Do not leave until you can | Why it comes here |
|---|---|---|---|
| Infantry | Movement, weapons, interaction, objective markers, Support tools, and reviving | Move between objectives, interact with equipment, and recognize a downed teammate | Every other role eventually returns to infantry movement and objective play |
| Vehicle | Entering vehicles, vehicle deployment, equipment, armor, weapons, and repair flow | Deploy, operate, leave, and repair a vehicle without losing the objective | Ground vehicles add another control layer but still use familiar objectives |
| Ship | Launching, targeting, Flight Assist, countermeasures, docking, and boarding introduction | Launch, target, fly, return to a bay, and recognize a boarding opportunity | Spacecraft movement is the largest control change |
| Command | Tagging, context-sensitive orders, squad structure, and objective assignment | Tag a valid target and issue an order that matches it | Orders make more sense after you recognize units, maps, and objectives |
The game allows controls to be rebound, so use this table as a first-session checklist rather than assuming every installation uses the same full layout.
| Action | Current default or reference | Why it matters |
|---|---|---|
| Move | WASD | Infantry, interiors, vehicles, and ship movement all begin here |
| Look and aim | Mouse | Used for weapons, interaction prompts, targeting, and orders |
| Primary fire | Left mouse | Fires the current weapon or active vehicle system |
| Aim or secondary function | Right mouse | Used for aiming and equipment-specific secondary behavior |
| Interact or use | F in the current tutorials | Activates tutorials, equipment, vehicles, docking, and boarding prompts |
| Tag or target | G in the current Ship Tutorial | Selects enemies, friendlies, objectives, spacecraft, and order subjects |
| Return to tutorial selection | Home | Returns you to the tutorial area without restarting everything |
| Tac Map and deployment | Confirm your current binding | Used to read locations, objectives, squads, spawn points, and redeployment |
| Command menu | Confirm your current binding | Opens context-sensitive orders after a target has been tagged |
| Flight Assist toggle | Confirm your current binding | Switches between assisted turning and freer momentum-based flight |
| Vehicle countermeasure | Confirm your current binding | Answers incoming guided missiles when the vehicle has a countermeasure equipped |
| Cycle weapons and tools | Mouse wheel or your current binding | Needed to reach the Multiwrench, explosives, sidearms, and specialist tools |
Infantry can show three separate defensive layers:
They should not be treated as three identical health bars.
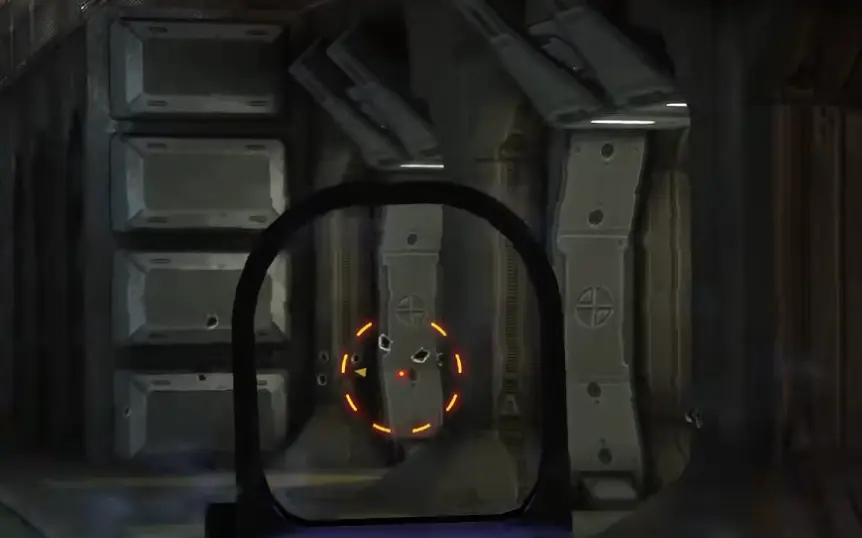
| Layer or state | What happens | What you should do |
|---|---|---|
| Shield | Takes the first layer of normal pressure and recharges after you avoid damage | Break line of sight and wait for the shield to return before re-entering the same angle |
| Armor | Protects health after the shield is depleted | Use a Multiwrench or find repair support instead of waiting in place |
| Health | The final survival layer | Use medical equipment or teammate support and stop taking unnecessary trades |
| Incapacitated | You are down but can still be recovered | Give teammates room to reach you; a Multiwrench can revive you |
| Dead or redeploying | You return through the deployment system | Select a useful spawn and role instead of automatically repeating the same failed route |
The safest rhythm is:
The Multiwrench is not just an optional repair gadget.
It can support several important jobs:
A beginner does not need to carry it in every loadout, but every squad benefits from someone who knows how to use it.
When a teammate goes down in a protected position, revive first and resume shooting second. When the body is exposed to several enemies, clear the immediate threat before standing over it with a repair tool.
ULA is the United League faction. AIA represents the Antarean side.
Both factions use the same broad match structure:
Their weapons, vehicles, spacecraft, ship layouts, sounds, and silhouettes differ.
| Choice | What changes | Beginner recommendation |
|---|---|---|
| ULA | You learn the United League weapon, vehicle, spacecraft, and ship roster | Stay with ULA for several matches if you start here, so friendly equipment becomes recognizable |
| AIA | You learn the Antarean weapon, vehicle, spacecraft, and ship roster | Stay with AIA for several matches if you prefer this side, rather than switching every round |
| Switching later | You see the opposing roster from the inside | Switch after the basic objectives feel familiar and compare equivalent roles |
There is no need to find a universally correct beginner faction.
The useful choice is the one you keep long enough to recognize:
Single Player is the normal objective-based combined-arms experience filled with AI.
Do not begin expecting a linear story campaign with chapters and permanent mission progression. The reliable solo structure is:
Steam describes support for up to 64 players or bots combined, but a maximum-size match is not the best place to learn the interface.
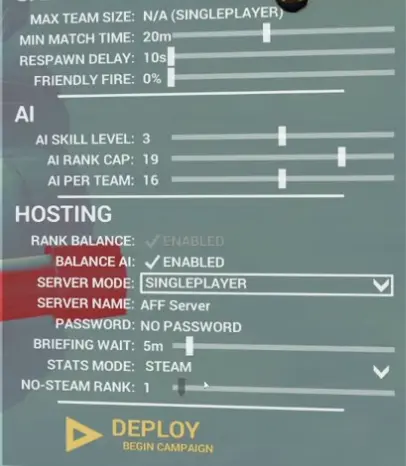
| Setting | Checked value | How to adjust it |
|---|---|---|
| Server Mode | Single Player | Keep this for an offline bot match |
| Minimum Match Time | 20 minutes | Long enough to see the objective flow without committing to a very long session |
| Respawn Delay | 10 seconds | Keeps mistakes readable without removing their cost |
| Friendly Fire | 0% | Prevents accidental team damage while learning silhouettes and weapons |
| AI Skill Level | 3 | Lower this first if individual fights feel too punishing |
| AI Rank Cap | 19 | Controls how advanced AI loadouts can become |
| AI Per Team | 16 | Lower population if the HUD, objective, or performance becomes difficult to read |
Do not change every field after one bad match.
Use this troubleshooting order:
For the full AI scale, MILNET, server population, bot labels, role hierarchy, and order troubleshooting, open the Single Player, Bots and Orders Guide.
Angels Fall First rewards objective play more than wandering toward the largest group of enemies.
You may see several layers of instruction:
| Instruction layer | What it represents | Your decision |
|---|---|---|
| Main Objective | The current match phase that advances or wins the scenario | Use this when no more specific assignment applies |
| Commander Task | A team or squad assignment from the Commander | Support it when your role and location make it practical |
| Squad Task | A more specific assignment passed through the squad structure | Follow it with nearby squad members instead of splitting |
| Freelance | You do not currently have a specific assigned task | Continue helping the main objective rather than treating the match as deathmatch |
The fastest beginner check is:
You can change scale quickly, but that does not mean every life should contain every system.
| Role | Good first goal | Leave the advanced decisions for later |
|---|---|---|
| Infantry | Reach, capture, defend, repair, revive, or destroy the marked ground objective | Specialized ammunition, extreme armor setups, and rare weapon challenges |
| Support infantry | Keep a contested route supplied, repaired, or revived | Trying to carry every Support tool in one loadout |
| Ground vehicle | Move infantry, protect an approach, or attack the marked vehicle objective | Chasing isolated enemies far from the task |
| Spacecraft | Protect friendly ships or attack the current fleet target | Constantly switching craft and weapon roles |
| Capital-ship crew | Repair, defend, operate a station, or follow the ship objective | Attempting to pilot, repair, command, and fight as infantry simultaneously |
| Boarding team | Reach the valid insertion and support the interior objective | Memorizing every ship interior before learning one route |
| Squad Leader or Commander | Keep one current order useful and visible | Issuing many overlapping orders without checking completion |
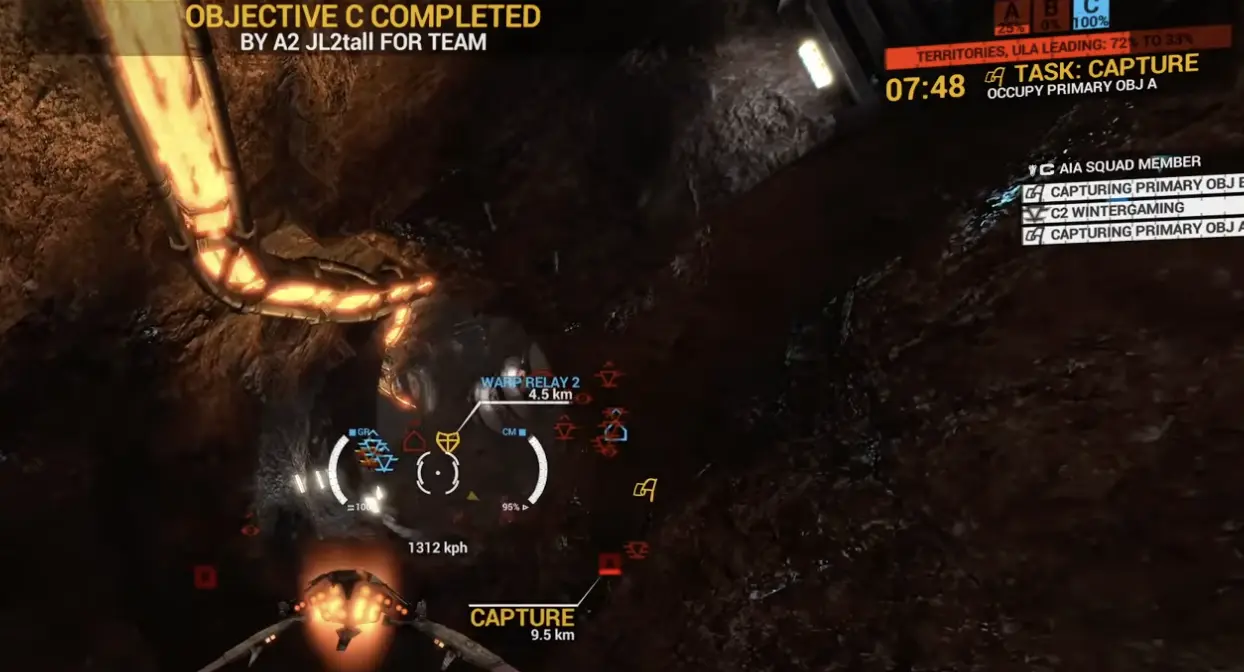
Spacecraft can switch between assisted flight and freer momentum-based movement.
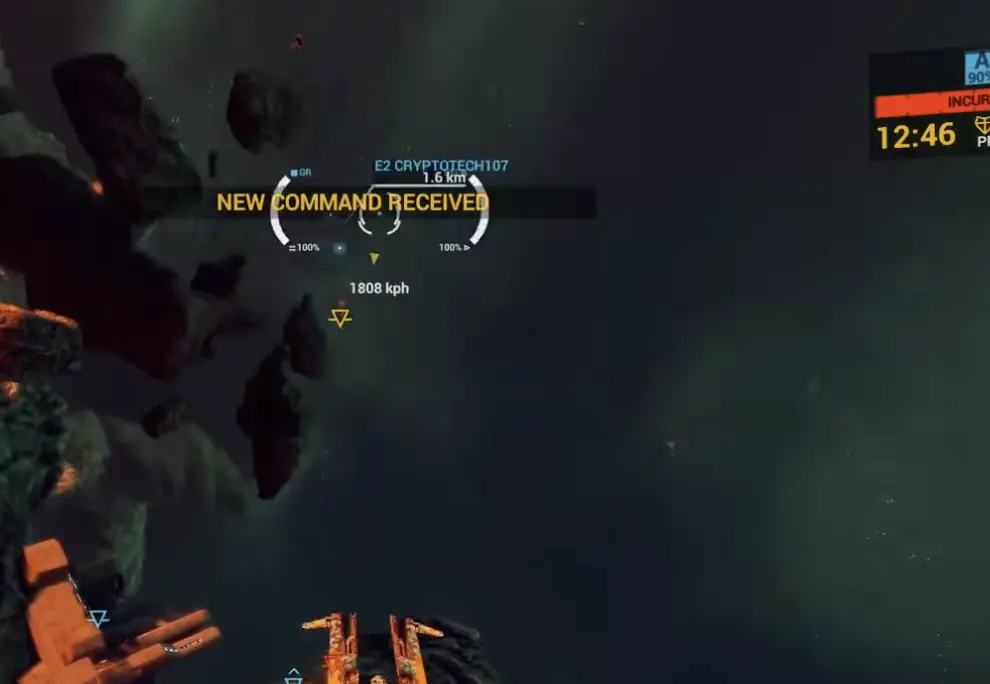
Use assisted flight when you need:
Use freer movement when you need:
Do not disable Flight Assist once and assume it should remain off permanently. Toggle it to solve the current movement problem.
A loadout becomes invalid when Combat, Support, or Command exceeds its available budget.
The Hub-level rule is simple:
The Loadout Budget and Progression Guide contains the exact rank curve, seven infantry slots, ammunition types, ground-vehicle templates, spacecraft templates, 25/25/25 planning, Loaded, Simpler Times, and Prestige order.
The two useful clues are:
Do not turn the Hub into an eight-step boarding walkthrough. Open the How to Board Ships Guide for the complete dropship route, rear boarding module, internal spawn, Core objectives, station differences, defense, and failure fixes.
The most common problem is not that every bot has stopped working.
It is usually one of these:
Use the Single Player, Bots and Orders Guide for AI Skill, player limits, MILNET, Commander tasks, Squad tasks, Freelance status, vehicle offers, and troubleshooting.
Do not work through the achievement list alphabetically.
The efficient route is:
The Achievements Guide and 103-Item Checklist contains the full categorized list, current completion-rate snapshot, hidden-achievement status, map tracker, loadout naming system, and pre-Prestige order.
The official requirements are modest, but a large bot match can be more demanding than an empty tutorial area.
| Component | Official minimum | Official recommended |
|---|---|---|
| Operating system | Windows 7 or later listed for the game | Windows 7 or later listed for the game |
| Processor | Dual-core 2 GHz | Quad-core 2.8 GHz |
| Memory | 4 GB RAM | 8 GB RAM |
| Graphics | Nvidia 400 series or later | Nvidia 600 series or later |
| DirectX | Version 9.0c | Version 11 |
| Storage | 10 GB available | 10 GB available |
| Network | Broadband connection | Broadband connection |
The Steam client itself now requires Windows 10 or later even though the game’s requirement block still lists Windows 7.
If the camera, weapon, or movement begins shaking or drifting at a very high frame rate:
Use the symptom to choose the first setting:
The game uses familiar shooter controls but combines them with targeting, orders, vehicles, spacecraft, deployment, and repair systems.
Kills help, but the current capture, destroy, hack, escort, defense, or boarding objective controls the match.
Constant switching prevents you from learning one weapon, one vehicle, one route, or one objective flow.
A full shield does not guarantee full armor and health.
Move behind cover before reading squads, objectives, and spawn points.
A valid focused loadout is more useful than an overloaded build that cannot deploy.
Use vehicles to transport, escort, attack, defend, intercept, or support a marked objective.
More units create more action, but they also make markers, routes, orders, and performance harder to read.
Before deploying:
During the match:
After the match:
| Guide | Open it when | Main coverage |
|---|---|---|
| How to Board Ships and Defend a Breach | You cannot find a dropship, enter a ship, reach the Core, escape, or stop enemy reinforcements | Breach Points, boarding transfer, internal objectives, Core routes, defense, and fixes |
| Loadout Budget and Progression Guide | A weapon, armor layer, ammunition type, tool, or vehicle build exceeds budget | Exact budget curve, slots, ammunition, templates, ranks, Loaded, and Prestige |
| Single Player, Bots and Orders Guide | AI settings, tasks, MILNET, Freelance, squad orders, or vehicle offers are unclear | Bot setup, 64-slot scale, objective hierarchy, orders, roles, and troubleshooting |
| Achievements Guide and 103 Checklist | You want a completion route rather than a raw achievement list | Four-stage roadmap, hidden tasks, map mastery, ranks, faction wins, and long grinds |
Complete the Infantry, Vehicle, Ship, and Command tutorials, confirm your main controls, then enter a Single Player bot match and follow one objective chain with one role at a time.
Start with Infantry, continue with Vehicle and Ship, then finish with Command. Orders are easier to understand after you can recognize objectives, vehicles, hangars, and battlefield roles.
The current tutorials use F for interaction, G for tagging or targeting, and Home to return to the tutorial selection. Confirm your Tac Map, Command, Flight Assist, and countermeasure bindings in the Controls menu.
Do not wait for health to refill. Shields recharge after you avoid damage, while damaged armor and health should be handled with repair tools, medical equipment, or teammate support.
The Multiwrench repairs armor and damaged systems and can revive an incapacitated teammate. It is one of the most useful Support tools for infantry, vehicles, and capital-ship interiors.
Both factions use the same core objectives and progression structure but have different weapons, vehicles, spacecraft, and silhouettes. Pick either faction and stay with it for several matches before switching.
The checked setup uses a 20-minute minimum match time, 10-second respawns, 0% friendly fire, AI Skill 3, AI Rank Cap 19, and 16 AI per team. Reduce AI Skill or population if the battle feels too busy.
The dependable solo experience is objective-based scenarios played with bots rather than a traditional linear story campaign. Single Player uses the same combined-arms maps and objectives as normal matches.
At least one Combat, Support, or Command budget has been exceeded. Open the focused loadout guide for exact caps, slot structure, ammunition effects, vehicle templates, ranks, and Prestige planning.
A valid target needs a Breach Point marker, and reaching the hull is not the entire transfer. The complete boarding guide covers dropships, the rear boarding module, Core objectives, defense, and failure fixes.
The match objective, Commander task, Squad task, and Freelance state are not the same thing. Use the Single Player guide to identify which instruction currently applies to you or your bots.
Angels Fall First has 103 Steam achievements. The achievements guide organizes them into quick actions, role projects, map and hidden cleanup, and long-term rank, faction-win, and Prestige grinds.
Try setting a reasonable frame-rate cap first. If a large bot match remains unstable, reduce AI population for CPU load or lower resolution and effects for GPU load.