Rubinite True Ending Guide: How I Entered True Difficulty and Saved Roy
The first Alcina victory is only Maybe the End. This is the exact route I used through Mira’s events, the Red-Eyed Tree, Roy, and the real final fight.
Updated:
Quick Answer
Rubinite’s first Alcina victory is only Maybe the End. I reloaded the same cleared save, entered the White Space, and chose to wake up, which began True Difficulty. From there, I followed Mira’s Monastery events, completed the four Mana Sources, opened the Nun’s Room, defeated the Red-Eyed Tree, and returned its root to Mira before fighting Roy. After Dark Ruby and Puppet Master, the Mark of Courage became the five-slot Rubinite, and the route ended with the real three-phase Alcina battle.
This guide contains full story, boss and ending spoilers.
I completed the first route on Normal and continued the same file through True Difficulty on the July 2026 PC release build.
My apparent ending arrived at roughly 4 hours 20 minutes. The White Space sequence began about five minutes later, and True Difficulty started shortly afterward.
That timing matters because the first credits-style conclusion is not the end of the game. A large part of the story, several new bosses, Mira’s complete route and Roy’s rescue still remain.
How Many Endings Does Rubinite Have?
I treat Rubinite as having two main endings.
| Ending | How I reached it | Achievement/result | What to do next |
|---|---|---|---|
| Apparent ending | Defeat Alcina during the first route | Maybe the End | Reload the same cleared save |
| True ending | Complete True Difficulty and defeat real Alcina | Kingdom Reclaimed | Completes the actual ending route |
The first ending is not simply a shorter version of the true ending.
It is the victory Alcina wants Ruby to accept inside the illusion. The White Space reveals that the route was built from possible real events but arranged to trap Ruby inside a convincing happy conclusion.
I found no separate third ending during this route.
Which Steps Are Required for the True Ending?
The true route contains mandatory story progression, optional preparation and completion-only collectibles.
| Step | Required? | Why it matters |
|---|---|---|
| Defeat first-route Alcina | Yes | Reaches Maybe the End |
| Reload the same cleared save | Yes | Opens the White Space continuation |
| Choose to wake up | Yes | Begins the real-world route |
| Complete the four Mana Sources | Yes | Advances the repeated main story |
| Follow Mira’s event chain | Yes | Opens the Nun’s Room and Roy solution |
| Complete the Nun’s Room memory | Yes | Reveals the route beneath the Monastery |
| Defeat the Red-Eyed Tree | Yes | Provides the root used for Roy |
| Return to Mira with the root | Yes in my route | Confirms how it will be used |
| Defeat Roy and Dark Ruby | Yes | Saves Roy and clears the castle route |
| Defeat the basement Penitent | No | Awards an optional revival talisman |
| Explore the cave beside the Tree route | No | Optional encounter and 400 currency |
| Find every chest or talisman | No | Required only for completion achievements |
The distinction prevented me from wasting time on optional cleanup while wondering whether it was secretly blocking the ending.
What to Do After Maybe the End
After defeating Alcina during the first route, I let the apparent ending sequence finish.
I then:
- returned to the title or continue screen;
- loaded the same cleared save;
- entered the White Space;
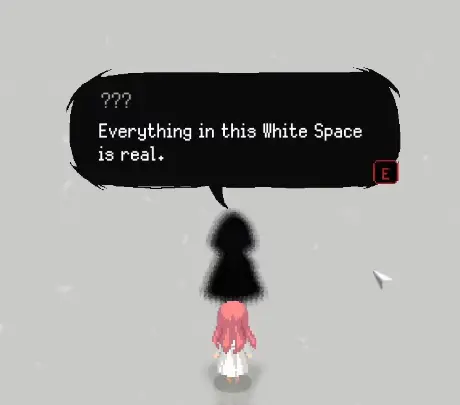
- spoke to the shadow waiting there;
- continued through the explanation of Alcina’s illusion;
- chose to wake up and face the real world.
I did not start a new file.
The White Space conversation explains that Alcina used an illusion to make Ruby believe everything was progressing normally: the enemies fell, the kingdom was reclaimed and the Witch was defeated.
Accepting that result would leave Ruby trapped.
Ruby also receives the Mark of Courage, which remains important until it transforms near the real final battle.
What if I choose the wrong White Space option?
I did not test every alternative choice far enough to confirm every outcome.
The safe route is:
- keep the cleared save;
- keep a backup before the final White Space choice;
- choose the option that wakes Ruby and rejects the illusion.
I would not delete the cleared file or overwrite it with a brand-new run.
What Changes in True Difficulty?
True Difficulty restarts the story structure, but it changes the way I approach progression.
The differences I could directly confirm were:
- boss health bars are hidden;
- the normal healing safety net is removed or heavily restricted;
- several attacks become lethal enough that one mistake can end an attempt;
- the former health-focused skill branch becomes a Strength-focused branch;
- Mira begins appearing during Monastery returns;
- new rooms, memories and bosses become available;
- Roy can be saved;
- the true final Alcina battle has three phases.
The missing health bar changed my decisions more than the increased damage.
I could no longer justify a greedy third Slash by telling myself the boss was almost dead. When a punish window ended, I backed away.
What carries over?
The same cleared save is required, so this is not a completely separate save file.
However, I could not verify every inventory value clearly enough to publish a full yes-or-no carryover matrix for:
- every ordinary talisman;
- exact Blood Dust totals;
- every previously opened chest;
- every rematch state;
- every unspent resource.
I therefore do not recommend planning the route around an assumed currency or inventory carryover.
The parts I plan around are the confirmed route changes: the new skill branch, restricted healing, hidden boss health and Mira’s event chain.
The Exact True Ending Route I Used
My successful route was:
- defeat first-route Alcina;
- reload after Maybe the End;
- leave the White Space;
- repeat the Beast and Guardian Faye sections;
- meet Mira and obtain Mira’s Shadow;
- complete the four Mana Sources;
- return to the Monastery after each major victory;
- complete the newly opened memories and Mira conversations;
- trigger the night event and follow Mira to the Nun’s Room;
- complete the Nun’s Room memory;
- enter the underground route beneath the Monastery;
- defeat the Red-Eyed Tree;
- collect its root and check the optional side cave;
- return to Mira before continuing to Roy;
- defeat Roy;
- enter Roy’s consciousness and defeat Dark Ruby;
- finish optional Monastery preparation;
- enter the castle and defeat Puppet Master;
- reject Alcina’s ideal world;
- obtain Rubinite;
- defeat all three phases of real Alcina.
I did not complete the four Mana Sources consecutively without returning.
Those Monastery returns are where the true route advances.
Mira Event Locations and Triggers
Mira’s event chain is the easiest part of the route to lose track of because the game does not always place her directly in front of Ruby.
This is the sequence I followed.
First Mira meeting: after the repeated Guardian section
After repeating Guardian Faye and returning to the Monastery, I walked back through the interior corridor instead of immediately choosing another destination.
Mira appeared, introduced herself and gave Ruby Mira’s Shadow.
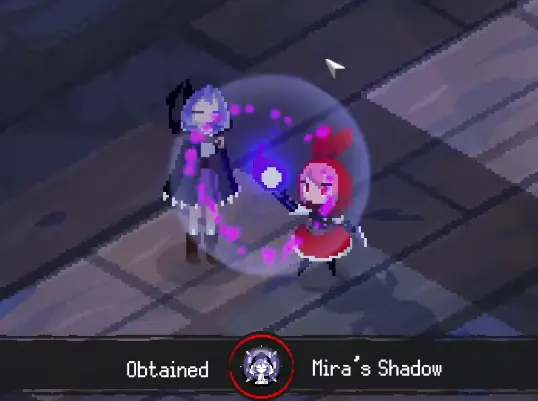
Mira’s Shadow cancels one hit.
I value it more than a minor damage increase while learning a new phase, because one protected mistake can preserve a long attempt.
After each Mana Source: return and inspect the new memory route
My return pattern was:
- defeat one Mana Source boss;
- return to the Monastery;
- check for a newly opened Phantom Door or hidden room;
- interact with the memory inside;
- leave through the room’s normal exit;
- check the nearby corridor and library for Mira;
- speak until the conversation is exhausted;
- rest only after the new interaction is complete.
I did not find evidence that one exact Mana Source order was required.
What mattered in my route was completing all four and not skipping the Monastery events between them.
After the bell-tower memory: use the lower exit
One easy-to-miss meeting occurred after a bell-tower-related memory.
I used the lower exit and checked the library rather than returning directly to the destination menu.
That continued Mira’s relationship with Ruby and led into the later reading events.
Night event: follow Mira manually
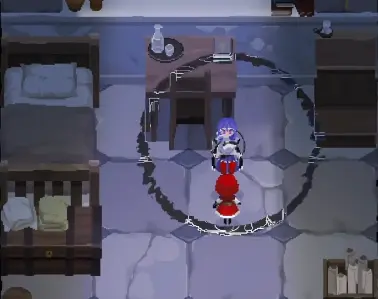
After the required memories and conversations were complete, Mira woke Ruby during the night.
I left Ruby’s room, entered the corridor and followed Mira manually.
I did not use the destination menu or start another boss.
She opened the circular sealed passage leading into the Nun’s Room.
Mira is not appearing
When a Mira event did not appear where I expected, I checked:
- whether I had entered the newest memory;
- whether I left that memory through the intended exit;
- whether another character still had new dialogue;
- the library and adjacent corridor;
- whether I had rested after completing the previous interaction;
- whether I had accidentally started the next destination too soon.
Repeating completed bosses did not solve a missed conversation. The missing step was usually inside the Monastery.
How to Open the Nun’s Room
The Nun’s Room is not opened by finding a random key.
It is the result of completing Mira’s event chain.
My order was:
- complete all four Mana Sources;
- return after each major victory;
- finish the available Phantom Door memories;
- complete Mira’s corridor and library conversations;
- rest when no new daytime event remains;
- wake during Mira’s night event;
- follow her through the corridor;
- enter the circular secret passage she opens.
Inside, I interacted with the central memory associated with the Nun.
The scene explains Alcina’s relationship with her, why the ideal world matters to Alcina and why Mira knows more about the illusion than an ordinary travelling mage should.
I also searched the room before leaving rather than touching the memory and immediately returning.
The key progression result is Mira’s clue that something beneath the Monastery may help Roy.
How to Find the Red-Eyed Tree
After the Nun’s Room sequence, I returned to the lower Monastery route and entered the newly relevant underground area.
The route contains remains linked to a tree with red eyes.
When I reported the clue, Mira’s English dialogue confirmed:
“Strange remains and a tree with red eyes?”
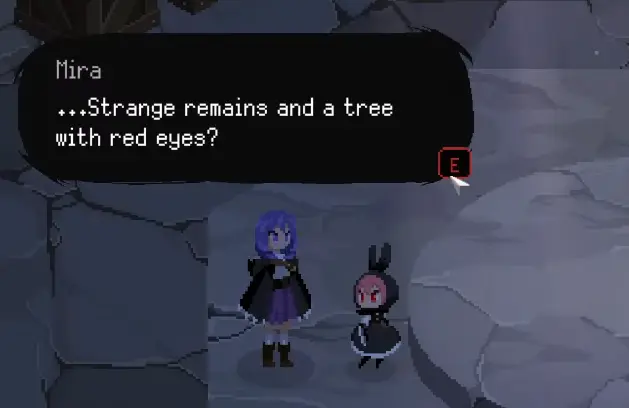
I then returned underground and continued deeper until the Red-Eyed Tree encounter began.
The full attack-by-attack strategy is in the Rubinite Boss Guide.
For the route itself, the most important points are:
- the boss is beneath the Monastery;
- it becomes relevant after the Nun’s Room chain;
- its post-battle root is needed for Roy;
- I return to Mira with the root before continuing to Roy.
How the Tree Root Can Save Roy
Roy’s condition contains two linked problems.
The Pureblood Crystal is controlling him, but it is also helping sustain his damaged body.
Simply destroying the entire crystal would remove the control and the thing keeping him alive.
Mira identifies the red-eyed tree as resembling a Devouring Tree capable of absorbing magical substances.
That gives Ruby a way to remove the controlling magic without destroying Roy along with it.
This is why the route requires more than defeating Roy differently.
Ruby first needs the material from the Red-Eyed Tree.
How to Save Roy — Exact Order
The sequence I used was:
- complete the Nun’s Room event;
- enter the underground route;
- defeat the Red-Eyed Tree;
- collect the root after the fight;
- return to Mira;
- complete the conversation confirming what the root can do;
- continue to the castle approach;
- defeat Roy normally;
- interact with Roy after the fight;
- allow Mira to use the root;
- enter Roy’s consciousness;
- defeat Dark Ruby;
- return from the internal fight;
- confirm that Roy’s Pureblood response is gone.
I did not manually replace one of my combat talismans with the root.
The important action in my successful route was returning to Mira after collecting it rather than going directly to Roy.
Roy’s boss fight still happens. The root does not create a dialogue option that skips it.
After Roy is defeated, the route continues instead of ending with the first-route result.
Inside his consciousness, Ruby fights Dark Ruby. Once that enemy is defeated, the controlling magic can be absorbed.
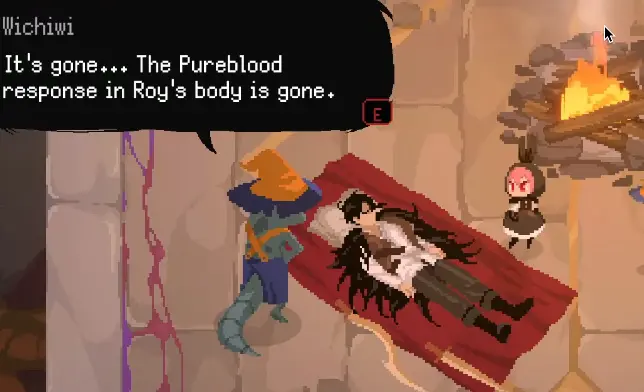
The exact English confirmation is:
“The Pureblood response in Roy’s body is gone.”
Roy remains alive while Witchiwi stays behind to care for him.
Optional Preparation Before the Castle
Several useful activities are not required to unlock the ending.
Basement Penitent
The immortal man in the basement cannot be permanently defeated during the early route.
I stopped repeating the fight and returned only after filling the available Strength upgrades on True Difficulty.
Defeating him then granted a talisman that revives Ruby once after a lethal hit.
This is useful preparation, not an ending trigger.
One important limit is that the revival does not refresh Mira’s Shadow.
If Mira’s Shadow has already blocked a hit, dying and reviving does not grant a second use of it.
Hidden cave beside the Red-Eyed Tree route
After defeating the Tree, I did not immediately take the main route back.
From the boss-area exit, I checked the small opening on the left, continued through it and moved downward into a hidden area containing a magic circle and a distorted enemy.
The encounter awarded 400 currency.
I use this detour for hidden-area and achievement cleanup, but it did not provide the root and was not required to save Roy.
Chests and talismans
I do not need every treasure chest or talisman for the true ending.
I still search newly opened rooms because the rewards improve the build, but I do not delay the ending route because one Damaged Talisman remains missing.
The complete collection logic belongs in the Rubinite Achievement Guide.
The True-Route Point of No Return
The first-route Alcina entrance displays an explicit warning that Ruby cannot return to the Monastery after entering.
On the true route, I treat entering the castle after saving Roy as the practical cleanup cutoff.
The remaining sequence moves through:
- Puppet Master;
- Alcina’s final illusion;
- Mira’s last conversation;
- obtaining Rubinite;
- real Alcina.
Before entering, I finish:
- the basement Penitent if I want the revival;
- the hidden cave;
- current Mira dialogue;
- available memories;
- useful skill upgrades;
- final talisman crafting;
- candle, chest or achievement cleanup I do not want to postpone.
I do not spend the remaining currency simply because I am about to leave.
I buy an upgrade only if it will remain equipped during the final sequence.
Puppet Master and the Final Illusion
Puppet Master is required for the true route.
The fight uses Ruby’s mother as the central puppet and attacks with two giant hands.
The only route-level counters I need to remember are:
- right-hand aerial slam: Focus and fire a dart;
- left-hand grab: use Strike Slash;
- puppet combo: finish dodging it before reacting to either hand.
The detailed fight is in the Rubinite Boss Guide.
After Puppet Master, Alcina places Ruby inside another ideal-world sequence.
Ruby encounters false versions of Roy and her parents.
I reject each illusion instead of accepting a world where grief, conflict and choice have been removed.
The false Roy is especially revealing. The real Roy would continue searching for his own solution instead of abandoning his determination for a perfect fantasy.
How to Obtain Rubinite
During the final illusion sequence, the Mark of Courage transforms into Rubinite.
The English equipment screen confirms two exact effects:
- Rubinite costs 5 talisman slots;
- it sets the Mark cap to infinite.
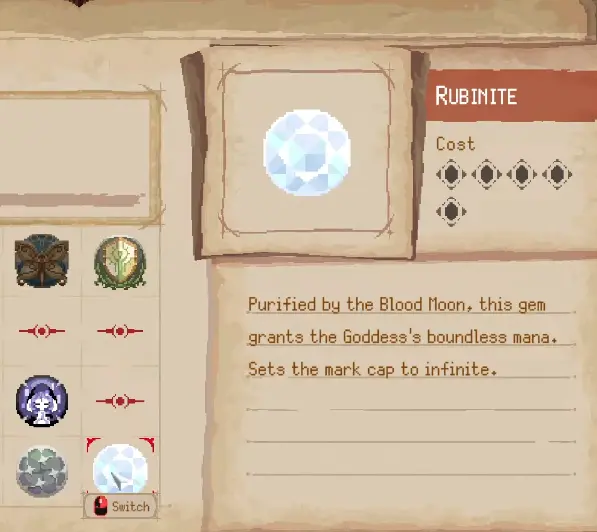
Rubinite does not need to be crafted manually.
It is awarded through the required story sequence after Ruby rejects the ideal world.
With six slots unlocked, I have one free slot after equipping it.
I use that final slot to solve the problem ending my attempts:
- survival while learning;
- utility against one recurring effect;
- damage only after reaching phase three consistently.
Infinite Marks do not make greed safe. They reward keeping the attempt alive long enough to continue building them.
How to Reach the Real Alcina Fight
After Ruby rejects the illusion, Mira intervenes and opens the way forward.
Ruby then faces the real Alcina in a battle with three phases.
The first apparent-ending fight had only two main phases. The Blood Moon third phase is exclusive to the real final sequence.
My route-level reminders are:
- phase one: build Marks without chasing;
- phase two: defend the complete multi-hit sequence before punishing;
- phase three: stop attacking during the wide bombardment;
- wait for the delayed projectile and scythe after the two sword attacks.
The full phase breakdown is in the Rubinite Boss Guide.
I do not repeat every attack here because this page is responsible for reaching the fight, while the Boss Guide is responsible for winning it.
Rubinite True Ending Explained
The apparent ending is the outcome Alcina wanted Ruby to believe.
It uses real fears, relationships and possible events to create a victory that feels convincing enough for Ruby to stop questioning it.
The true ending happens because Ruby rejects that controlled happiness.
Why Mira helps Ruby
Mira carries memories and qualities connected to Alcina’s ideal world, but she does not accept Alcina’s conclusion.
She develops her own relationship with Ruby and chooses reality even though breaking the illusion may also end Mira’s own existence.
The game strongly connects Mira to Alcina and the ideal world, but it does not reduce her to a simple copy with no independent will.
Why Roy survives
Roy survives because the Devouring Tree root absorbs the controlling magical response without destroying the Pureblood Crystal sustaining his body.
That is why merely winning his boss fight is not enough.
Ruby needs the Red-Eyed Tree route first.
Why Ruby rejects the ideal world
Ruby is not rejecting happiness.
She rejects a world where one person decides what everyone else should want, removes grief by removing freedom and replaces real people with versions that fit Alcina’s fantasy.
The false versions of Roy and Ruby’s parents fail because they do not preserve the choices and determination that made those people real.
What happens to Alcina
Defeating real Alcina breaks the final illusion and prevents her plan from replacing reality with the ideal world.
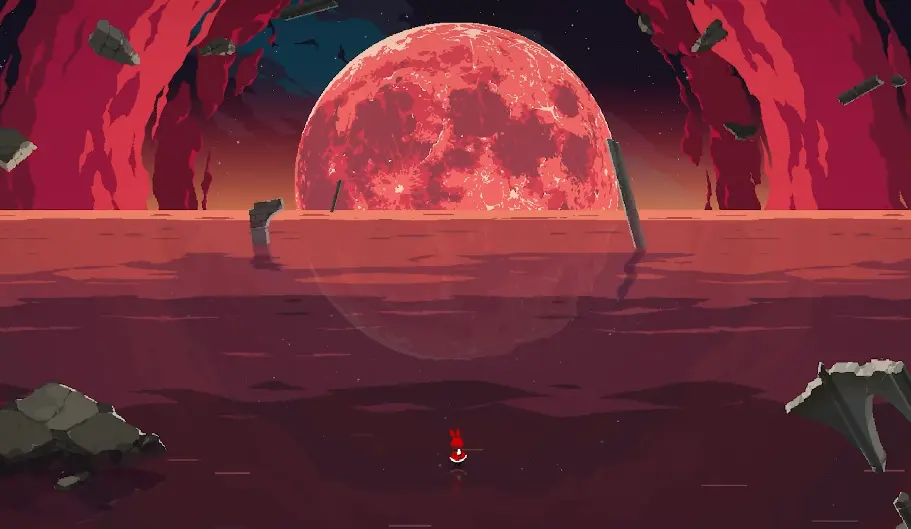
The ending resolves Alcina’s immediate plan and Roy’s condition.
It does not explicitly answer every wider political question about the kingdom, magic users or what happens long after the final scene. I do not treat those unresolved points as confirmed plot outcomes.
My Final Missable-Step Check
Before starting the castle sequence, I verify only the steps that are easiest to overlook:
- I reloaded the same save after Maybe the End;
- I completed the latest Phantom Door memory;
- I exhausted Mira’s corridor and library dialogue;
- Mira opened the Nun’s Room;
- I defeated the Red-Eyed Tree;
- I returned to Mira with the root;
- Roy survived after Dark Ruby;
- optional cleanup is finished before entering the castle;
- I slow down during Mira’s final dialogue;
- Rubinite is equipped before real Alcina.
If all of those are complete, I do not need every chest, every ordinary talisman or every boss challenge to reach the true ending.
What to Read Next
- Read the Rubinite Boss Guide for every boss order, aerial and grab counters, Plaguebearer spacing, Roy’s cover mechanic, Puppet Master and all three real Alcina phases.
- Read the Rubinite Achievement Guide for all 38 achievements, Mira’s dialogue achievement, the basement Penitent, hidden area, memories, candles, chests and talismans.
- Return to the Rubinite Guide Hub for early upgrades, talisman decisions, Monastery return rules and the recommended reading order.
FAQ
How many endings are in Rubinite? +
I found two main ending states: the apparent ending after the first Alcina fight, which unlocks Maybe the End, and the true ending after True Difficulty and the real three-phase Alcina fight. I did not find a separate third ending.
Do I need to start a new save for the true ending? +
No. I reloaded the same cleared save after Maybe the End. That continued into the White Space and then restarted the story under True Difficulty.
Can the true ending be permanently missed? +
I did not need a new save or a perfect first route. The safest method is to keep the cleared file, reload it after Maybe the End, and choose to wake up in the White Space. I keep a backup before major dialogue choices.
Do I need to equip the Red-Eyed Tree root to save Roy? +
I did not manually replace a combat talisman with the root. My successful route was to defeat the Red-Eyed Tree, collect its root, return to Mira, and then continue to Roy.
Are the basement Penitent and hidden cave required? +
No. The basement Penitent gives a one-use revival talisman, while the hidden cave gives an optional encounter and 400 currency. Neither provided the root or unlocked Roy’s rescue in my route.
Do I need every chest, memory or talisman for the true ending? +
Every chest and talisman is not required. Mira’s required memory chain and the Nun’s Room sequence matter, but the full collectible sets belong to the achievement route rather than the ending requirement.