Rubinite Bosses
Featured
Rubinite Boss Guide: How I Beat Every Boss
I use three reads across the whole game: dodge normal attacks, dart red aerials, counter grabs, and stop after two Slashes.
Read Guide →Game Guide Hub
The combat rules, upgrade decisions, boss order, Monastery routine, and cleanup plan that kept my first clear from turning into wasted reruns.
Recommended Order
Use these guides in order if you are starting a new casino.
Bosses
I use three reads across the whole game: dodge normal attacks, dart red aerials, counter grabs, and stop after two Slashes.
Endings
The first Alcina victory is only Maybe the End. This is the exact route I used through Mira’s events, the Red-Eyed Tree, Roy, and the real final fight.
Achievements
I split the 100% route into story progress, boss rematches, true-route secrets, and collection cleanup so one failed condition never ruined the run.
Guide Cluster
I use three reads across the whole game: dodge normal attacks, dart red aerials, counter grabs, and stop after two Slashes.
Read Guide →The first Alcina victory is only Maybe the End. This is the exact route I used through Mira’s events, the Red-Eyed Tree, Roy, and the real final fight.
Read Guide →I split the 100% route into story progress, boss rematches, true-route secrets, and collection cleanup so one failed condition never ruined the run.
Read Guide →My safest Rubinite rhythm is dodge, Slash, Slash, reset. I use a focused dart against red aerial attacks, Strike Slash against grabs, and movement before another dodge when the arena is crowded. After Guardian Faye, I clear the more readable Mana Source bosses first and leave Plaguebearer until my Slash damage, talisman capacity, and Strike recovery are better. I also return to the Monastery after every major boss. The first Alcina victory is only Maybe the End; I reload the same save to enter the White Space and continue toward the true ending.
I expected Rubinite to be a short, linear boss rush.
My apparent ending arrived at roughly 4 hours 20 minutes, but that was only the first half of the full route. About five minutes later, the same cleared save continued into the White Space, and the story restarted under True Difficulty.
Across both routes, this guide cluster covers:
This Hub focuses on the decisions that affect the entire run. Detailed Boss, ending, and achievement instructions stay in their own pages.
| I need help with… | Start here |
|---|---|
| Boss order, attack tells, counters, and builds | Rubinite Boss Guide |
| Maybe the End, Mira, saving Roy, and real Alcina | Rubinite True Ending Guide |
| All 38 achievements and 99% cleanup | Rubinite Achievement Guide |
My most common mistake was pressing the third Slash.
Ruby’s first and second normal attacks recover quickly enough for me to read the next animation. The third hit commits her for longer and frequently lands after the boss has already begun attacking again.
My normal sequence is:
Dodge → Slash → Slash → reset
Against a fast recovery, I take only one Slash.
I finish the third hit only when:
This mattered more than several small damage upgrades.
Gravekeeper, Plaguebearer, second Faye, Puppet Master, and real Alcina all punished me for treating every successful dodge as permission to finish the full combo.
Rubinite uses three different defensive answers.
For an ordinary strike, projectile, or body attack, I dodge through the actual hit.
I watch the boss’s body rather than reacting only to the first flash or wind-up. Several later attacks pause before connecting. Dodging at the start of the animation leaves Ruby vulnerable when the attack finally lands.
Afterward, I use the one- or two-hit punish described above.
When an enemy rises into a red aerial attack, I stop attacking, enter Focus, and fire a dart as the move commits.
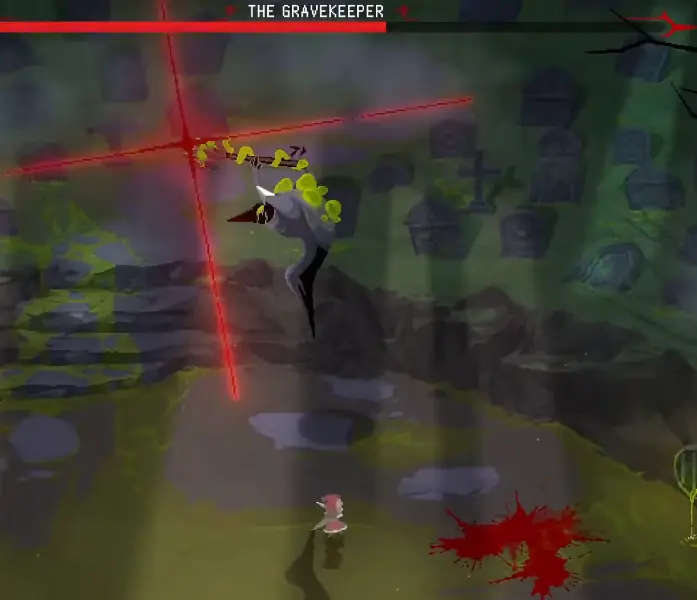
I do not repeatedly roll and hope to pass through the aerial hit.
The tutorial explains this mechanic before it becomes essential, but Gravekeeper was where ignoring it started ending entire attempts.
When the grab cue appears, I use Strike Slash.
The harder grabs occur after another attack or while a second part of the boss is still active. Second Faye and Puppet Master both punished me for pressing the counter before the previous sequence had ended.
My order is:
Focus is more than a ranged aiming mode.
I use it to:
Perfect Dodges can accelerate Mark generation and create strong punish opportunities, but I do not chase one against every attack.
Large body sweeps, overlapping projectiles, and delayed sequences may be safer to avoid from a distance.
Marks become more valuable as the skill tree and talisman selection expand. Some effects scale Slash, projectile, or Strike damage with the number of Marks already applied.
That makes survival part of the damage plan.
Preserving a long attempt is often worth more than forcing one unsafe hit for another Mark.
I do not buy every node as soon as it appears.
My priority is:
Base Slash damage works throughout the game.
Poison resistance matters only when the next route contains poison. A larger area Strike matters when I am fighting multiple targets, but may be too slow against a boss with short openings.
I buy a Strike when it solves one of these problems:
I do not buy a slow move solely because its listed damage is higher.
Against Gravekeeper, a shorter Strike that let me leave safely produced more real damage than a heavier move that trapped Ruby beneath the next aerial drop.
I buy a slot when it completes a setup.
A useful combination may include:
I save the currency when the new slot would remain empty or hold an effect that does not change the next fight.
I build for the next problem, not for the highest-looking collection of numbers.
Before Plaguebearer, poison or negative-effect resistance has real value. Against a clean physical fight, that same slot should usually return to damage, recovery, or another relevant effect.
On True Difficulty, Mira’s Shadow gives Ruby one protected mistake.
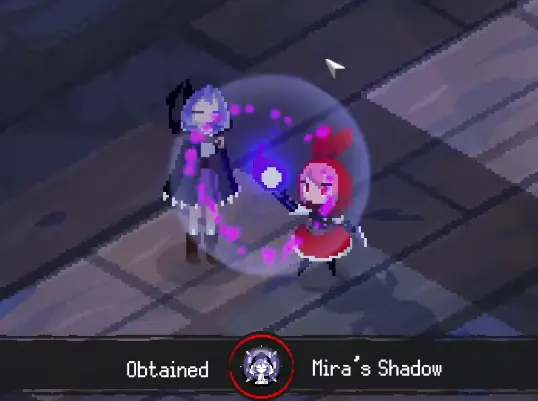
I do not consume that protection intentionally.
One blocked attack can preserve ten or twenty minutes of progress during a late boss. I change to a more aggressive setup only after I can reach the difficult phase consistently.
A separate revival talisman does not refresh Mira’s Shadow after the protection has already been spent.
The fixed opening route is:
After Guardian Faye, four Mana Source destinations become available:
My preferred order is:
The middle order is flexible. The important decision is leaving Plaguebearer until later.
Plaguebearer was my longest non-final wall. My serious attempts lasted almost 56 minutes, and the recorded death count approached 100 during that fight.
Before entering, I want:
Gravekeeper was my first mechanical wall, but the learning stretch was closer to 15 minutes. Once I recognized its aerial drop as a Focus-dart check, the fight became much more consistent.
After the four Mana Sources, the route continues through:
The detailed attack tells, phases, rewards, and True Difficulty encounters are in the Rubinite Boss Guide.
Returning to the Monastery is part of progression, not merely a shopping trip.
My routine is:
This becomes essential on True Difficulty because Mira’s event chain is placed between repeated story sections.
If I defeat several Mana Source bosses without returning, I may later know that something is missing but not know which memory or conversation I skipped.
I turn back when:
I do not return during every failed boss attempt for a tiny sidegrade.
I return when I can investigate a newly opened route or make a build change that directly addresses the current wall.
I stop buying when an item does not solve a current problem.
Before spending, I ask:
When all three answers are no, I save the currency.
A newly unlocked recipe is not automatically an upgrade.
Buying every sidegrade immediately can delay:
After Meditation opens, lighting the candles lets Ruby relive previously defeated bosses.
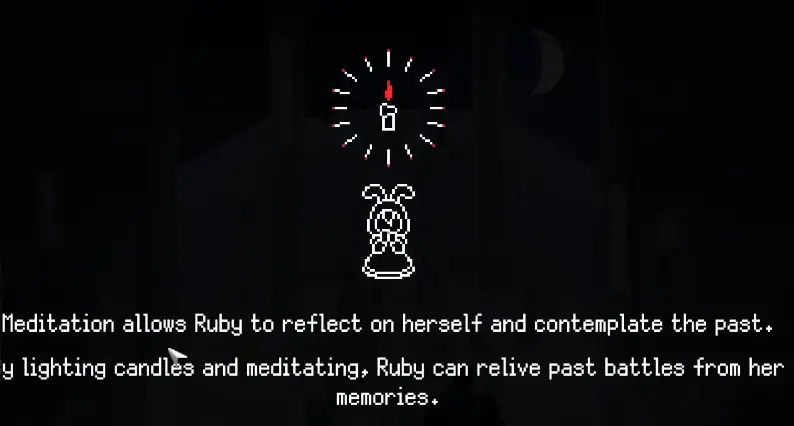
This changes my achievement strategy.
I do not force these conditions during a difficult first clear:
I finish the progression fight with the safest setup and return through Meditation with one clear objective.
For example, True Hunter and Talismans? Nah. can be combined against the Beast: remove every talisman and complete one no-damage rematch.
The complete route for all 38 achievements is in the Rubinite Achievement Guide.
Before entering the first Alcina battle, the game warns that Ruby will be unable to return to the Monastery.
This is where I stop and turn back.
Before confirming, I check:
I do not need all 38 achievements before this fight, but I do not enter with an obvious upgrade unpurchased or a newly opened room unexplored.
The first Alcina fight has two major phases and leads to Maybe the End.
It is not the actual conclusion.
I reload the same cleared save.
I do not start a separate file.
Ruby wakes inside the White Space and learns that the apparent victory was part of Alcina’s illusion.

After choosing to wake up, the story repeats under True Difficulty.
True Difficulty is the name of the post-ending route. It is separate from the Normal or Story gameplay difficulty selected in the menu.
The new route changes several important systems:
The true route also introduces the five-slot Rubinite, which sets the Mark cap to infinite during the final sequence.
The complete progression order is in the Rubinite True Ending Guide.
I stop after one or two Slashes unless I have confirmed a long recovery.
I inspect new rooms, memories, dialogue, recipes, and passages before resting or launching the next destination.
I stop advancing and finish the preparation that will actually affect the next sequence.
Those three habits prevented more wasted retries than trying to copy one maximum-damage build for the entire game.
Before leaving the Monastery for a difficult destination, I ask:
Rubinite rewards execution, but it rewards restraint just as much.
My biggest improvements came from attacking less, returning to the Monastery at the right time, and refusing to spend resources on an upgrade that did not solve the next problem.
No. I could only save Roy after reaching True Difficulty, completing Mira's event chain, defeating the Red-Eyed Tree, and bringing its root back before fighting Roy again.
The story route can still continue, but the separate RUBINITE achievement requires the real final clear with gameplay difficulty set to Normal. True Difficulty is the post-ending route name, not the menu difficulty.
I check the newest Phantom Door memory, leave through its intended exit, exhaust nearby dialogue, and search the corridor and library before starting another destination or resting.
No. If Mira's Shadow already blocked one hit, reviving Ruby does not restore it. The revival provides another life, not a second protected hit.
No. Full chest and talisman collections are achievement requirements. The true route instead depends on the White Space, Mira's events, the Nun's Room, Red-Eyed Tree, Roy rescue, Puppet Master, Rubinite, and real Alcina.