Rubinite Achievement Guide: How I Unlocked All 38
I split the 100% route into story progress, boss rematches, true-route secrets, and collection cleanup so one failed condition never ruined the run.
Updated:
Quick Answer
Rubinite has 38 achievements. I complete the apparent-ending story first, reload the same cleared save, and continue into True Difficulty. I do not force restrictive boss conditions during progression: once Meditation opens, I use rematches for the no-damage, no-talisman, poison-pod, three-segment, Faye grab, Ghost and Roy’s Dagger achievements. Before the true-route castle sequence, I finish Mira’s events, the basement Penitent, Red-Eyed Tree side area, Roy’s rescue, skills, memories, candles, chests and talisman cleanup.
This guide contains complete story and true-ending spoilers.
The hardest part of Rubinite’s 100% route was not understanding the achievement descriptions. It was deciding when to attempt each condition.
Several challenges make a normal progression clear unnecessarily difficult:
- True Hunter turns one hit into a restart;
- Talismans? Nah. removes the entire equipment setup;
- Bomb Disposal Expert changes how I manage Gravekeeper’s arena;
- Plague It Cool asks me to preserve the most dangerous Plaguebearer state;
- Don’t Even Think About It makes Faye’s grabs more important than damage;
- Out-Of-Body changes how far I can safely retreat from the Ghost.
I therefore finish difficult story bosses with a reliable build, then revisit them through Meditation with one clear objective.
Rubinite 100% Overview
| Item | My result |
|---|---|
| Total achievements | 38 |
| Minimum story structure | Apparent-ending route, then continued True Difficulty |
| Separate new save required | No |
| Boss replay | Yes, through candle Meditation |
| Online-only achievements | None appear in the 38 listed conditions |
| Difficulty-specific achievement | RUBINITE requires the final clear on Normal |
| Apparent ending time | About 4 hours 20 minutes in my run |
| Full 100% time | Highly boss-dependent; late fights and collection cleanup add several hours |
| Main point-of-no-return risks | Apparent Alcina entrance and true-route castle sequence |
| Biggest collection risks | Last chest, last talisman, last memory, last candle and True Difficulty skill nodes |
The True Difficulty route and the selected gameplay difficulty are different things.
True Difficulty is the story route that begins after the White Space. I can play that route while the gameplay difficulty remains set to Normal.
I keep it on Normal until the real final clear because the achievement named RUBINITE specifically checks the selected gameplay difficulty.
My Recommended Achievement Roadmap
| Stage | Complete now | Save for later | Check before leaving |
|---|---|---|---|
| Normal opening | Story bosses and visible Monastery content | Restrictive boss challenges | New rooms, memories and chests |
| Four Mana Sources | Required boss achievements | Gravekeeper and Plaguebearer conditions | Return after every boss |
| Before apparent Alcina | Roy, available candles and obvious cleanup | True-route achievements | Point-of-no-return warning |
| True Difficulty | Mira, memories, Penitent, Red-Eyed Tree and Roy rescue | Final collection audit | Do not rush into the castle |
| Meditation cleanup | No-hit, no-talisman and boss-specific conditions | Nothing that requires story progress | Confirm each achievement before changing setup |
| Final sequence | Puppet Master, Rubinite, Mira dialogue and real Alcina | None | Keep gameplay difficulty on Normal |
What Is Actually Missable?
Most boss challenges are not permanently missable because Meditation allows me to replay defeated bosses.
The practical risks are:
Mira’s final dialogue
Leave the Rest to Me! is tied to Mira’s supportive conversation before the
real final battle.
I keep a save backup before this exchange and choose the reassuring response that tells her everything will be all right.
The exact sentence may vary slightly with text revisions, so I do not rush through the dialogue by repeatedly pressing confirm.
Normal difficulty completion
I keep the selected gameplay difficulty on Normal through real Alcina.
Changing to Story may still allow the story completion achievement, but it would invalidate the separate Normal-clear requirement.
Collection cleanup before the final sequence
The apparent Alcina entrance displays a no-return warning.
On the true route, I also treat entering the castle after saving Roy as the final cleanup cutoff. The route then moves through Puppet Master, the final illusion, Rubinite and real Alcina.
Before entering, I finish anything I do not want to postpone:
- current memories;
- candle sweep;
- chest sweep;
- skill purchases;
- talisman crafting;
- basement Penitent;
- Red-Eyed Tree side area;
- Roy’s rescue.
Normal Story Achievements
These 12 achievements unlock naturally on the first route:
- Awaken from a Nightmare
- Defeated the Beast
- Repelled the Guardian
- Defeated the Dual Cultists
- Defeated the Gravekeeper
- Defeated the Martyred Angel
- Defeated the Plaguebearer
- Defeated Faye
- Defeated the Ghost
- Defeated Roy
- Defeated the Witch
- Maybe the End
I do not restart these progression fights because I missed a separate challenge condition.
The first Alcina victory unlocks Maybe the End, not the real conclusion. Afterward, I reload the same cleared save to continue into the White Space.
How I Unlock Boss Rematches
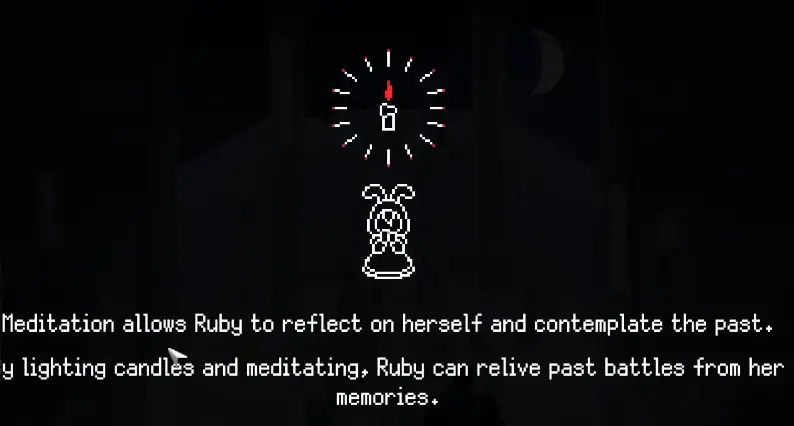
Meditation becomes available inside the Monastery after the early Mana Source progression.
The tutorial explicitly states that lighting candles and meditating allows Ruby to relive past battles from her memories.
Before starting a rematch, I check:
- the exact achievement condition;
- currently equipped talismans;
- equipped Strike or special weapon;
- whether one hit or missed counter invalidates the run;
- whether the achievement has actually appeared before changing the build.
True Hunter
Condition: Defeat a boss without taking damage.
My recommended target is the Beast rematch.
The arena is clean, its attacks are readable, and no poison, fire trail or secondary enemy can deal an unnoticed hit.
My route is:
- equip a reliable damage setup;
- use only one or two Slashes per opening;
- do not chase the Beast across the arena;
- restart immediately if Ruby takes damage;
- ignore speed and leaderboard time.
True Hunter checks damage taken, not completion speed.
Talismans? Nah.
Condition: Defeat a boss with no talismans equipped.
I open the equipment screen and remove everything.
That includes:
- damage talismans;
- status resistance;
- revival effects;
- Mira’s Shadow;
- any apparently harmless one-slot effect.
I combine this with True Hunter on the Beast:
- remove every talisman;
- enter the Beast rematch;
- take no damage;
- defeat it once.
This saves one complete rematch.
I’m Not Tasty At All…
Condition: Be swallowed by a Skynest priest.
I attempt this during the Dual Cultists rematch.
The priest eventually uses a grab attack. For this achievement, I deliberately do not dodge or use Strike Slash.
I stand within range and allow the complete swallow animation to finish.
The usual grab counter is the wrong response here.
Once the achievement registers, I can finish the fight normally or leave the rematch.
Bomb Disposal Expert
Condition: Defeat Gravekeeper without detonating a single poison pod.
The poison pods require separate attention from Gravekeeper’s normal attacks.
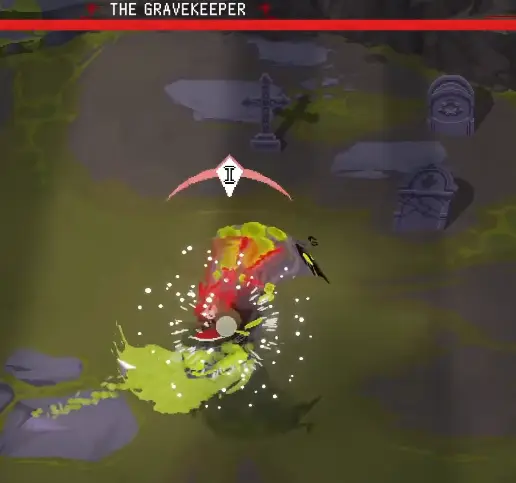
My conservative route is:
- identify every newly spawned pod;
- stop attacking Gravekeeper when a pod becomes the immediate threat;
- clear the pod before it reaches its explosion;
- keep Gravekeeper’s wide attacks away from remaining pods;
- restart if I see a full poison detonation.
The official wording focuses on detonation, not simply whether a pod exists.
I do not let a pod complete its explosion and hope the game ignores it.
Because different destruction sources can be visually confusing, I judge the attempt by the clear explosion effect: if that appears, I restart.
The full Gravekeeper counter strategy is in the Rubinite Boss Guide.
Plague It Cool
Condition: Defeat Plaguebearer while all three segments are active.
This condition is the opposite of the safest progression strategy.
Normally, I reduce active bodies as quickly as possible. For the achievement, I need the original body to split until three separate segments are present.
My order is:
- damage the original body until it splits;
- avoid finishing the first smaller segment;
- damage the larger remaining body until it splits again;
- confirm that three independent bodies are visible;
- complete the shared fight while preserving that state.
Once all three are active, I use only one or two Slashes.
The heavy third Slash leaves Ruby trapped while another segment is already moving through the same area.
Plaguebearer took almost 56 minutes of serious attempts in my route, so I do not combine this with a no-hit or no-talisman challenge.
Don’t Even Think About It
Condition: Successfully counter all grabs during Faye’s second battle.
Dodging a grab does not satisfy the condition.
Every grab must be answered with Strike Slash.
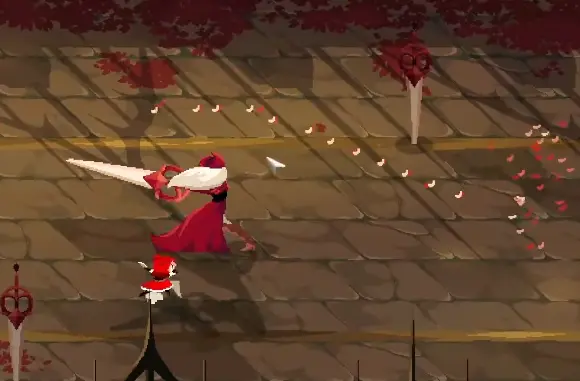
The hardest grabs appear after a delayed attack or another active sequence.
My route is:
- stop attacking when I am unsure which animation has begun;
- finish avoiding the current combo;
- wait for the grab cue;
- use Strike Slash;
- restart if the grab connects or I dodge it instead.
I prioritize correct counters over damage.
Out-Of-Body
Condition: Defeat the Ghost without allowing it to use self-harm to leave the soldier’s body.
This is not simply a normal Ghost clear.
I stay close enough to interrupt the self-harm sequence while still preserving a route around its fire trail.
My priorities are:
- do not retreat so far that I cannot return in time;
- save a fast attack or Focus response for the escape cue;
- stop a long combo when the body prepares to leave;
- keep fire from cutting off the shortest return lane.
If the Ghost completes the self-harm animation and exits the soldier, I restart the achievement attempt.
You Dare Use My Own Weapons Against Me, Ruby?
Condition: Hit Roy with Roy’s Dagger.
Roy’s Dagger is obtained after the normal-route Roy encounter.
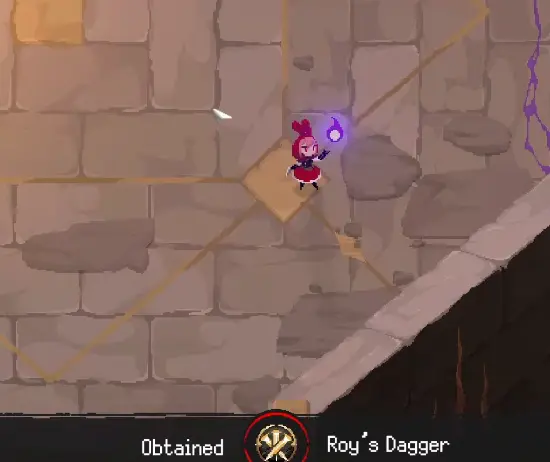
My route is:
- defeat normal-route Roy;
- obtain Roy’s Dagger;
- return to the Monastery;
- equip the dagger;
- enter Roy’s Meditation rematch;
- land one confirmed dagger hit;
- finish the fight with any attacks.
I do not need to defeat Roy using only the dagger.
Escape the Illusion
After unlocking Maybe the End, I reload the same cleared save.
Ruby enters the White Space and learns that the first victory was part of Alcina’s illusion.
I choose to wake up and continue into the real-world route.
I do not create a separate new save.
True Difficulty
True Difficulty is the name of the continued post-ending route.
It is not the same setting as Normal or Story gameplay difficulty.
The achievement unlocked during the opening portion of my True Difficulty route. I avoid assigning it to one exact frame such as the repeated Beast kill because the route transition and early story events happen close together.
The visible route changes include:
- hidden boss health;
- restricted healing;
- a Strength-focused skill branch;
- Mira’s Monastery events;
- new bosses and rooms;
- the ability to save Roy.
First Encounter?
After repeating the early Guardian section, I return through the Monastery instead of immediately choosing the next destination.
Mira appears, introduces herself and gives Ruby Mira’s Shadow.
If she does not appear, I check:
- the interior corridor;
- whether all current dialogue is finished;
- whether I entered and exited the newest memory correctly;
- whether I started another destination too early.
Fulfilling a Wish
This achievement belongs to the immortal Penitent in the basement.
During the early game, he restores himself after defeat. Repeating the fight does not solve it.
I return after filling the available Strength upgrades on True Difficulty.
My route is:
- complete the Strength branch;
- return to the basement;
- speak to the Penitent;
- defeat him permanently;
- collect the revival talisman.
The reward revives Ruby once after a lethal hit.
It does not restore Mira’s Shadow after that protection has already been used.
Someone Else’s Past
Condition: Explore all memories.
I complete memories as soon as their rooms open rather than leaving the entire set for the end.
My pattern is:
- defeat one Mana Source boss;
- return to the Monastery;
- enter the newly opened Phantom Door or hidden room;
- interact with the central memory object;
- leave through the intended exit;
- check for Mira;
- continue only after the room is complete.
The route includes:
- the memories opened through the four Mana Source progression;
- additional Monastery memory rooms;
- the Nun’s Room memory reached through Mira’s night event.
The Nun’s Room memory is a late checkpoint, but it cannot compensate for an earlier Phantom Door I never entered.
If the achievement does not unlock after the Nun’s Room, I revisit the older memory rooms first.
I do not claim an exact total until every memory name and room is verified from the in-game menu.
Defeated the Red-Eyed Tree
After the Nun’s Room sequence, Mira points Ruby toward a possible way to save Roy beneath the Monastery.
I enter the underground route and defeat the Red-Eyed Tree.
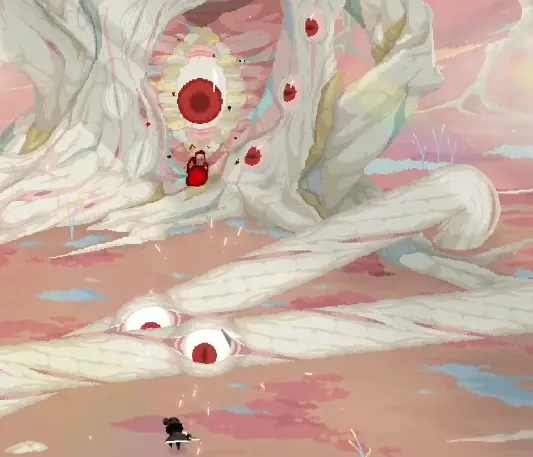
The complete attack strategy is in the Rubinite Boss Guide.
After the fight, I collect the root and check the side passage before returning to Mira.
Found You
After defeating the Red-Eyed Tree, I do not immediately leave through the main route.
From the boss-area exit:
- check the small opening on the left;
- continue left through the passage;
- move downward;
- enter the hidden room with the magic circle;
- complete the encounter inside.
The route awarded 400 currency in my run.
It is easy to miss because the main exit naturally leads back toward Mira.
Defeated… Myself?
After obtaining the tree root, returning to Mira and defeating Roy on the true route, Ruby enters Roy’s consciousness.
The internal boss is Dark Ruby.
Defeating Dark Ruby unlocks Defeated… Myself?
I use short attacks rather than repeating the full boss strategy here. The complete fight belongs in the Boss Guide.
Break the Curse
Break the Curse follows the Dark Ruby fight.
After the internal enemy is defeated, the tree root absorbs the controlling magic inside Roy.
The clearest confirmation appears after Ruby returns:
“The Pureblood response in Roy’s body is gone.”
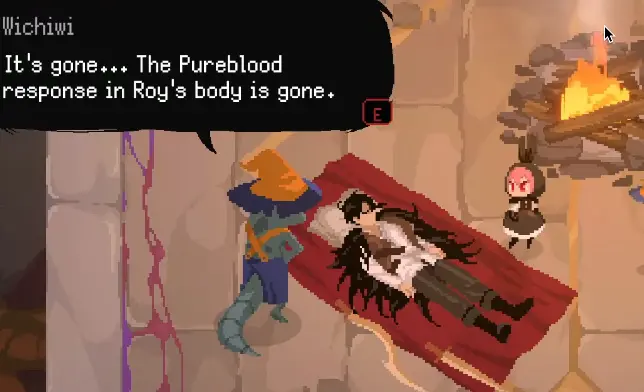
The full route order is in the Rubinite True Ending Guide.
Defeated the Puppet Master
Puppet Master is a required true-route story boss inside the castle.
Defeating it unlocks the achievement naturally.
For the fight itself:
- the right-hand aerial slam uses a Focus dart;
- the left-hand grab uses Strike Slash;
- the puppet’s own combo must finish before I answer either hand.
The detailed strategy is in the Rubinite Boss Guide.
Obtain the Legendary Rubinite
After Puppet Master, Ruby rejects the false versions of Roy and her family.
The Mark of Courage transforms into Rubinite.
The equipment screen confirms:
- Rubinite occupies 5 talisman slots;
- it sets the Mark cap to infinite.
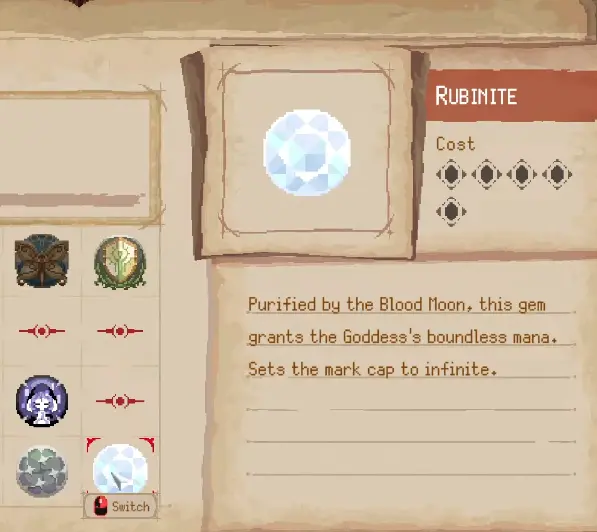
I do not craft it manually.
The story transformation unlocks the achievement.
Leave the Rest to Me!
This achievement is tied to Mira’s final conversation before the real Alcina battle.
I keep a save backup before the exchange.
When Mira expresses concern, I choose the supportive response that reassures her and tells her everything will be all right.
I do not skip through this conversation.
The choice is associated with the achievement, not with replacing the entire true-ending route. A wrong choice may still allow story progression, which is why I preserve a reload point.
Kingdom Reclaimed
Kingdom Reclaimed requires completing the actual true ending.
The apparent Alcina clear and Maybe the End are not sufficient.
The route must continue through:
- White Space;
- True Difficulty;
- Mira’s events;
- Red-Eyed Tree;
- Roy’s rescue;
- Puppet Master;
- Rubinite;
- real Alcina.
RUBINITE
RUBINITE is the gameplay-difficulty achievement.
I keep the selected difficulty on Normal until the real Alcina fight and true ending are complete.
Again:
True Difficulty is the post-ending route name. Normal is the selected gameplay difficulty.
I can be in the True Difficulty route while still playing on Normal.
Fully Fledged
Condition: Learn all skills.
I do not stop after filling the first-route tree.
True Difficulty changes part of the skill tree, including the Strength branch.
My cleanup order is:
- buy useful progression skills normally;
- enter True Difficulty;
- fill every Strength node;
- complete Slash, Strike, Focus and counter branches;
- inspect each branch for a node hidden behind another purchase;
- use Meditation rematches to farm additional Blood Dust if needed.
I do not publish a total Blood Dust cost until every node and price has been verified from the final tree.
For farming, I use the fastest boss rematch I can clear consistently rather than a difficult late boss with a higher failure rate.
Finders keepers?
Condition: Find every treasure chest.
I can verify seven chest rewards tied to colored Damaged Talismans:
- Damaged Red Talisman;
- Damaged Purple Talisman;
- Damaged Blue Talisman;
- Damaged Green Talisman;
- Damaged Yellow Talisman;
- Damaged Orange Talisman;
- Damaged White Talisman.
The visual landmarks are:
- Red: five-bed dormitory, left side of the room;
- Purple: study with a circular rug and central desk;
- Blue: dark mirror or storage room with draped fabric and cobwebs;
- Green: outdoor courtyard near the ash pile;
- Yellow: dark room containing a large circular instrument;
- Orange: dining hall with a long table;
- White: windowed study beside a purple barrier and NPC.
These landmarks are useful for checking a missing colored talisman.
They do not prove that the game contains only seven treasure chests.
A different chest may award another item, and later story events open additional Monastery rooms.
My chest sweep is:
- return after every Mana Source;
- inspect every newly opened passage;
- check beneath and behind stairs;
- revisit the library, dormitory, dining room and courtyard;
- search again after illusion barriers disappear;
- complete obvious first-route cleanup before apparent Alcina;
- inspect newly changed rooms again on True Difficulty.
I do not provide fake turn-by-turn directions when the doorway sequence has not been verified.
Illuminate the Night
This achievement requires lighting every relevant Monastery candle.
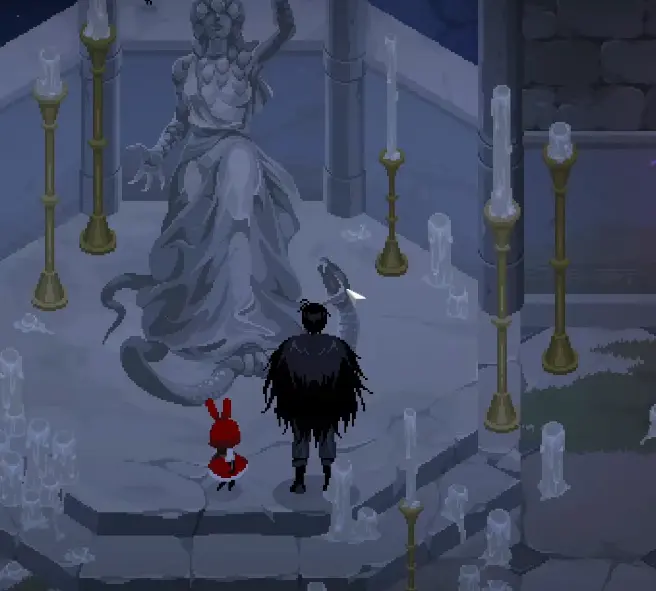
I perform the sweep after Roy and again after the later hidden rooms open.
My room order is:
- Meditation room;
- main corridor;
- library;
- dormitory and bedroom routes;
- dining hall;
- courtyard;
- lower corridor;
- basement route;
- rooms opened through the four seals;
- Nun’s Room and late true-route spaces.
I do not rely on the large Meditation candle group alone.
If the achievement remains locked, I check the newest hidden room first. Those candles are easier to miss than the ones in the main corridor.
I also avoid claiming an exact total candle count until every interactable candle has been individually verified.
Talisman Connoisseur
Condition: Obtain every talisman.
I separate the collection into four groups.
Damaged Talisman chest rewards
I verify all seven colors:
- Red
- Purple
- Blue
- Green
- Yellow
- Orange
- White
Finding one Damaged Talisman does not complete the set.
Crafted talismans
I return to Witchiwi after major bosses and inspect newly unlocked recipes.
A recipe being visible is not the same as owning the talisman.
For completion, I eventually purchase or craft even the effects I did not use in combat.
Story and true-route talismans
My audit includes:
- Mark of Courage;
- Mira’s Shadow;
- basement Penitent revival reward;
- Red-Eyed Tree route rewards;
- Rubinite.
Boss rewards
I check Roy’s Dagger separately.
It is easy to remember the associated achievement while forgetting that the item itself may also matter to the complete talisman collection.
If Talisman Connoisseur remains locked, I check in this order:
- an unopened Damaged Talisman chest;
- an unlocked recipe that was never purchased;
- Roy’s Dagger;
- the Penitent reward;
- Red-Eyed Tree rewards;
- Mira’s Shadow;
- Rubinite.
I do not state a total talisman number until the complete English inventory has been verified.
Stuck at 99%? Check These First
When the save appears complete but one achievement remains, I check in this order.
1. An uncollected boss reward
I return to the area or inventory and verify that I actually picked up every post-fight item.
Defeating a boss and leaving the reward on the floor are not the same thing.
2. Roy’s Dagger
I confirm the item is owned, not merely that Roy was defeated.
3. Basement Penitent reward
The early basement fight does not count.
I must return after filling the True Difficulty Strength branch and defeat him permanently.
4. An unlocked but uncrafted recipe
I inspect every Witchiwi recipe.
A recipe can be unlocked without the corresponding talisman being owned.
5. One missing Damaged Talisman color
I compare the inventory against all seven colors and use the room landmarks above.
6. A True Difficulty skill node
I re-open every branch after entering the post-ending route.
The Strength replacement is easy to overlook when the first-route tree already looked complete.
7. An earlier Phantom Door memory
If Someone Else’s Past remains locked after the Nun’s Room, I revisit the older memory rooms rather than repeatedly interacting with the final one.
8. Found You
I return to the Red-Eyed Tree exit and check the small opening on the left, then continue downward.
9. The final candle
I sweep the newest hidden room, library and lower corridor before checking the obvious Meditation area again.
10. Gameplay difficulty
If Kingdom Reclaimed unlocked but RUBINITE did not, I verify whether the
selected gameplay difficulty was changed away from Normal.
Compact 38-Achievement Checklist
Normal story
- Awaken from a Nightmare
- Defeated the Beast
- Repelled the Guardian
- Defeated the Dual Cultists
- Defeated the Gravekeeper
- Defeated the Martyred Angel
- Defeated the Plaguebearer
- Defeated Faye
- Defeated the Ghost
- Defeated Roy
- Defeated the Witch
- Maybe the End
Boss challenges
- I’m Not Tasty At All…
- True Hunter
- Talismans? Nah.
- Bomb Disposal Expert
- Plague It Cool
- Out-Of-Body
- Don’t Even Think About It
- You Dare Use My Own Weapons Against Me, Ruby?
True route
- Escape the Illusion
- True Difficulty
- First Encounter?
- Fulfilling a Wish
- Someone Else’s Past
- Defeated the Red-Eyed Tree
- Found You
- Defeated… Myself?
- Break the Curse
- Defeated the Puppet Master
- Obtain the legendary Rubinite
- Leave the Rest to Me!
- Kingdom Reclaimed
- RUBINITE
Completion
- Fully Fledged
- Finders keepers?
- Illuminate the Night
- Talisman Connoisseur
What to Read Next
- Read the Rubinite Boss Guide for attack tells, aerial and grab counters, Plaguebearer spacing, Roy’s cover mechanic, Puppet Master and real Alcina.
- Read the Rubinite True Ending Guide for White Space, Mira’s event route, the Nun’s Room, Red-Eyed Tree, saving Roy, Rubinite and the real ending.
- Return to the Rubinite Guide Hub for early skill priorities, talisman decisions, Monastery return rules and the recommended reading order.
FAQ
Can I unlock all 38 Rubinite achievements on one save? +
Yes. I continued the same cleared save from Maybe the End into the White Space and True Difficulty, then used Meditation rematches for restrictive boss challenges. I did not need a separate second save for the true route.
Is True Difficulty the same as changing the gameplay difficulty? +
No. True Difficulty is the name of the post-ending story route. I continued that route while keeping the selected gameplay difficulty on Normal so the final RUBINITE difficulty achievement remained available.
Which Rubinite achievements are easiest to miss? +
The main risks are Mira’s final supportive dialogue, switching away from Normal before the real final clear, and entering a no-return sequence before finishing Monastery collection cleanup. Most boss challenges remain available through Meditation.
Can I combine True Hunter and Talismans? Nah.? +
Yes. I remove every talisman, including defensive effects such as Mira’s Shadow, and defeat the Beast rematch without taking damage. One clean rematch can satisfy both conditions.
Do I have to defeat Roy using Roy’s Dagger? +
No. The achievement requires hitting Roy with his own dagger. I equip Roy’s Dagger, enter his Meditation rematch, land one confirmed hit, and then finish the fight with any attacks.
Are the seven Damaged Talisman chests every chest in Rubinite? +
I do not assume so. I can verify seven colored Damaged Talisman rewards, but Finders keepers? checks every treasure chest, including any chest with a different reward.