Rubinite Boss Guide: How I Beat Every Boss
I use three reads across the whole game: dodge normal attacks, dart red aerials, counter grabs, and stop after two Slashes.
Updated:
Quick Answer
Rubinite became much more consistent when I stopped forcing the third Slash. My default rhythm is dodge, Slash, Slash, reset. I interrupt red aerial attacks with a focused dart, answer grabs with Strike Slash, and reposition before relying on another dodge. After Guardian Faye, I clear the more readable Mana Source fights first and leave Plaguebearer until I have more damage, more talisman capacity, and a fast-recovery Strike.
This guide contains boss, route and true-ending spoilers.
I tested these fights on PC across both Normal and True Difficulty in the July 2026 release build. I do not use one universal damage build for every boss. The setup that clears an open arena quickly can become a liability when poison, fire trails, multiple bodies or delayed attacks reduce the usable floor.
The rule that carried me through nearly every fight was simpler:
I stop attacking before the boss forces me to stop.
How Many Bosses Are in Rubinite?
I count 14 major progression boss encounters in this guide.
There are:
- 10 encounters on the route to Maybe the End;
- 4 additional encounters that become part of the true-ending route.
Those 14 encounters represent 12 distinct named boss identities, because:
- Faye is fought twice;
- Alcina is fought once for the apparent ending and again as the real final boss.
I count Dual Cultists as one encounter even though two enemies participate.
I do not count the Bound Man training encounter as a major progression boss. It introduces combat and counter mechanics, but it is not part of the main boss sequence covered below.
All Rubinite Bosses at a Glance
| Encounter | Route | Main danger | My first answer |
|---|---|---|---|
| The Beast | Opening route | Overcommitting after a dodge | Two Slashes, then reset |
| Guardian Faye | Opening route | Fast gap closing | Stay near center |
| Dual Cultists | Mana Source | Enemies splitting across the arena | Keep both on one side |
| Gravekeeper | Mana Source | Red aerial drop and poison pods | Focus dart the aerial |
| Martyred Angel | Mana Source | Aerial pressure and shifting angles | Stop chasing, prepare counter |
| Plaguebearer | Mana Source | Three bodies, poison and huge hitboxes | Move first, use one-two strings |
| Faye, second battle | After four seals | Delayed attacks and grabs | Read the body movement |
| Ghost | Late route | Fire trails and body escape | Preserve a clean return lane |
| Roy | Castle approach | Two phases and arena-wide attack | Hide behind the blocks |
| Alcina, apparent battle | Apparent ending | Two-phase pressure and grabs | Finish Monastery cleanup first |
| Red-Eyed Tree | True route | Roots, flowers and phase-two laser | Watch the trunk and clear floor |
| Dark Ruby | Inside Roy | Ruby-speed counterattacks | Use short double hits |
| Puppet Master | True-route castle | Puppet combo plus two hands | Identify the active hand |
| Alcina, real battle | True final route | Three phases and delayed projectiles | Defend the complete sequence |
The Boss Order I Recommend
The fixed opening is:
- The Beast
- Guardian Faye
The game then opens four Mana Source encounters.
My preferred order is:
- Dual Cultists
- Gravekeeper
- Martyred Angel
- Plaguebearer
The middle order is flexible, but I deliberately leave Plaguebearer until last.
Plaguebearer was my longest non-final wall. The serious attempt stretch lasted almost 56 minutes, and my recorded deaths approached 100 during that fight.
More damage does not remove the mechanics, but it reduces the amount of time I must manage:
- multiple body segments;
- poison-covered floor;
- fast full-body sweeps;
- overlapping movement angles.
After all four Mana Sources, the route continues through:
- Faye’s second battle
- Ghost
- Roy
- apparent-ending Alcina
The true-ending route repeats the core progression under True Difficulty and adds:
- Red-Eyed Tree
- Dark Ruby
- Puppet Master
- real Alcina
The exact story order, Mira events and Roy rescue are covered in the Rubinite True Ending Guide.
The Three Defensive Reads I Use
Rubinite attacks do not all use the same defensive answer.
Normal attack: dodge
For an ordinary strike, projectile or body attack, I dodge through the committed hit.
I react to the boss’s actual movement rather than the beginning of the animation. Several late-game attacks pause after the wind-up, making an early dodge just as dangerous as a late one.
After a clean dodge, I normally take:
- one Slash against a very fast boss;
- two Slashes against a normal opening;
- the third Slash only during a confirmed long recovery.
Red aerial attack: Focus and fire a dart
When the boss rises and the red aerial cue appears, I enter Focus and fire a dart.
I do not repeatedly dodge and hope to pass through it.
Gravekeeper was the first fight where this distinction became unavoidable. Its aerial drop was fast enough to kill the attempt before I could correct a bad read.
Grab: Strike Slash
When the grab cue appears, I use Strike Slash.
The harder grabs appear after another attack or while another part of the boss is still moving.
I do not mash the grab counter immediately. I wait for the earlier combo to finish, confirm the grab, and then use Strike Slash.
The Boss Builds I Actually Use
I use three broad setups rather than one build for the entire game.
Safe learning setup
My safe setup prioritizes:
- a fast-recovery Strike;
- reliable base Slash damage;
- status resistance that matches the boss;
- Mira’s Shadow on True Difficulty;
- a revival effect when it becomes available.
I use this while learning an unfamiliar second or third phase.
One blocked hit is often worth more than a small damage increase if the attempt has already lasted ten or twenty minutes.
Progression damage setup
Once I understand the fight, I shift toward:
- base Slash damage;
- Mark-scaling damage;
- a short Strike that does not trap Ruby in recovery;
- only the status resistance the boss actually requires.
I do not keep poison resistance equipped against a boss with no poison.
I also avoid buying a slow Strike solely because its listed damage is higher. A move that misses its opening or prevents a dodge is not a real damage increase.
Final Alcina setup
The final route forces a different decision.
Rubinite occupies five talisman slots and sets the Mark cap to infinite. With six total slots, I have only one slot left.
I choose that sixth slot based on the part of the fight ending my runs:
- utility or survival while learning;
- damage after I reach phase three consistently.
I do not rebuild around several small effects that no longer fit.
How to Beat the Beast in Rubinite
Route: Opening progression
Main check: Basic dodge timing
Related achievements: True Hunter, Talismans? Nah.
The Beast is where I establish the two-hit reset.
I stay close enough to read its actual movement, dodge the committed attack, take one or two Slashes, and stop.
Chasing the Beast across the arena usually costs more than it gains. By the time Ruby reaches it, the next attack may already be active.
I also use the Beast for restrictive rematch achievements because:
- the arena is clean;
- the attack cycle is readable;
- there are no overlapping poison, fire or multi-body effects.
For a first clear, I ignore no-hit or no-talisman conditions and simply learn the rhythm.
How to Beat Guardian Faye in Rubinite
Route: Opening progression
Main check: Gap closing and positioning
Progression: Opens the wider Mana Source route
Guardian Faye punishes chasing.
She can close distance quickly, so I keep the fight near the center and make her return to me.
My punish is usually one Slash when her position is uncertain and two when she has fully committed.
The important lesson is not maximizing damage. It is learning to recognize when Faye’s recovery is real and when she is already moving into the next attack.
That timing carries directly into the second Faye battle.
How to Beat the Dual Cultists in Rubinite
Route: One of four Mana Source destinations
Main check: Tracking two enemies
Related achievement: I’m Not Tasty At All…
The Dual Cultists fight becomes difficult when the enemies split across both sides of Ruby.
I stop attacking and rotate until I can see both.
My sequence is:
- move until both enemies are on the same side;
- dodge the nearer committed attack;
- take one or two hits;
- leave before the second cultist reaches Ruby;
- rebuild the same angle.
I do not buy an entirely new area-damage build for this one fight when my normal Slash setup is already developed.
For the swallow achievement, I use a later rematch and deliberately allow the priest’s grab to complete. I do not combine that test with the first progression clear.
How to Beat Gravekeeper in Rubinite
Route: One of four Mana Source destinations
Main danger: Aerial drop, poison pods and clutter
Related achievement: Bomb Disposal Expert
Observed learning stretch: About 15 minutes
Gravekeeper was the first boss that forced me to stop treating every red attack as a dodge test.
Its aerial drop is too fast and too punishing to handle consistently with a normal roll.
When Gravekeeper rises and the red cue appears:
- I stop Slashing;
- enter Focus;
- wait for the attack to commit;
- fire the dart;
- take one or two Slashes;
- reset before the next animation.
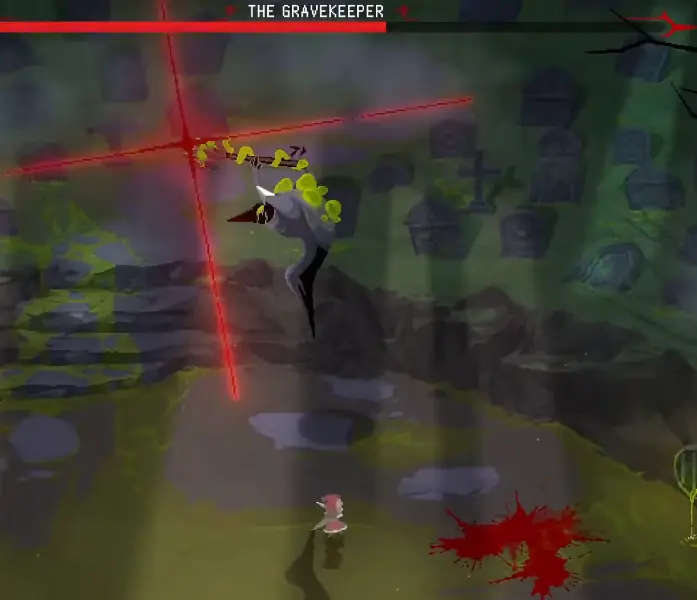
The poison pods create a separate awareness check.
For a normal clear, I keep the fight away from dangerous pods and preserve an open lane. I do not chase Gravekeeper into a corner filled with poison just to finish a combo.
For Bomb Disposal Expert, the official wording is “without detonating a single poison pod.” Because manually breaking a pod and letting it explode may not be treated identically, I handle the exact condition in the Achievement Guide.
My safe rule is simple: if I see a pod visibly detonate during the achievement attempt, I restart.
Recommended setup
I use:
- a fast-recovery Strike;
- broad Slash damage;
- poison protection only when it fits without removing the core build.
I avoid slow Strikes that leave Ruby standing beneath Gravekeeper’s next drop.
How to Beat Martyred Angel in Rubinite
Route: One of four Mana Source destinations
Main danger: Aerial pressure and fast angle changes
Observed True Difficulty stretch: About 22 minutes
Martyred Angel punished me whenever I followed it too aggressively.
When the boss leaves my clean Slash angle, I stop chasing and prepare for the next aerial cue.
The fight improved when I separated its attacks into two groups:
- grounded movement that I dodge normally;
- red aerial pressure that I interrupt with a focused dart.
I use one short punish after the counter and allow the boss to reposition.
On True Difficulty, the reduced margin for error makes Mira’s Shadow especially valuable. I keep the protection while learning the faster sequence rather than replacing it with a narrow damage bonus.
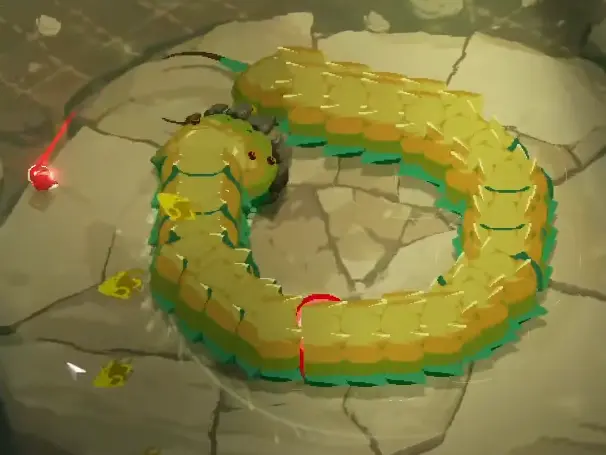
How to Beat Plaguebearer in Rubinite
Route: One of four Mana Source destinations
Main danger: Multiple segments, poison and massive hitboxes
Related achievement: Plague It Cool
Observed learning stretch: Almost 56 minutes
Plaguebearer was the fight that finally broke my three-hit habit.
The first and second Slashes can still flow into a dodge. The third heavy Slash keeps Ruby committed while the body is already changing direction.
My rule became:
One, two, move. One, two, move.
When the angle is poor, I use only one hit.
Move before dodging
The worm covers too much floor for repeated dodges in the same position to create real space.
I first move around the body, find a lane, and then dodge the actual attack.
When no clean exit exists, I abandon the punish completely.
Do not panic immediately in poison
In one attempt, I observed roughly three seconds between entering the dangerous poison state and dying.
I do not treat that as a universal fixed timer, but it proved that panic dodge-spamming was worse than completing one controlled movement out of the area.
Recommended setup
I use:
- strong base Slash damage;
- a fast Strike;
- poison or negative-effect resistance;
- extra talisman capacity before entering.
I do not enter early with a slow build and expect patience alone to carry a very long fight.
For Plague It Cool, all three segments must remain active when the fight is completed. I save that condition for a rematch because it deliberately keeps the arena at its most dangerous state.
How to Beat Faye’s Second Battle
Route: After the four Mana Source seals
Main danger: Delayed attacks, bait and grabs
Related achievement: Don’t Even Think About It
Observed True Difficulty stretch: About 14 minutes
The second Faye battle punishes early reactions.
Several attacks begin, pause, and then land after an early dodge has already ended.
I watch Faye’s body movement rather than reacting only to the first visual wind-up.
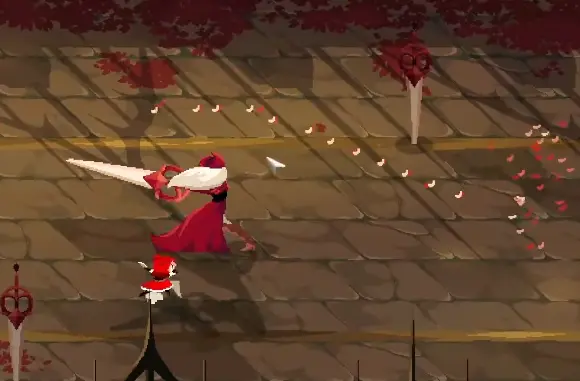
The grab is also easy to mishandle when it appears after another sequence.
I do not press Strike Slash while the previous attack is still active. I finish the defensive read, identify the grab, counter it, and take one short punish.
For Don’t Even Think About It, every grab must be countered. I attempt that in meditation rather than restarting the first story clear every time one grab connects.
How to Beat the Ghost in Rubinite
Route: Late main route
Main danger: Fire trails and reduced floor space
Related achievement: Out-Of-Body
Observed True Difficulty stretch: About 13 minutes
The Ghost becomes difficult when I follow it through its own fire trail.
I stop chasing as soon as the floor behind it becomes unsafe.
Instead, I:
- create distance;
- keep a clean route back toward the boss;
- wait for the trail to clear or change direction;
- re-enter for one short punish.
Negative-effect resistance helps, but it does not make the fire harmless. I treat it as protection from one imperfect route, not permission to stand inside the hazard.
For Out-Of-Body, I stay close enough to interrupt the Ghost before it uses self-harm to leave the soldier’s body. That condition changes my spacing, so I save it for a dedicated rematch.
How to Beat Roy in Rubinite
Route: Castle approach
Phases: Two
Main danger: Parry stance and arena-wide second-phase attack
Reward: Roy’s Dagger on the normal route
Roy’s second phase includes an attack that I could not solve by dodging in open space.
The arena blocks are the answer.
I start moving toward cover as soon as the sequence becomes recognizable and stand behind a block before the explosion completes.
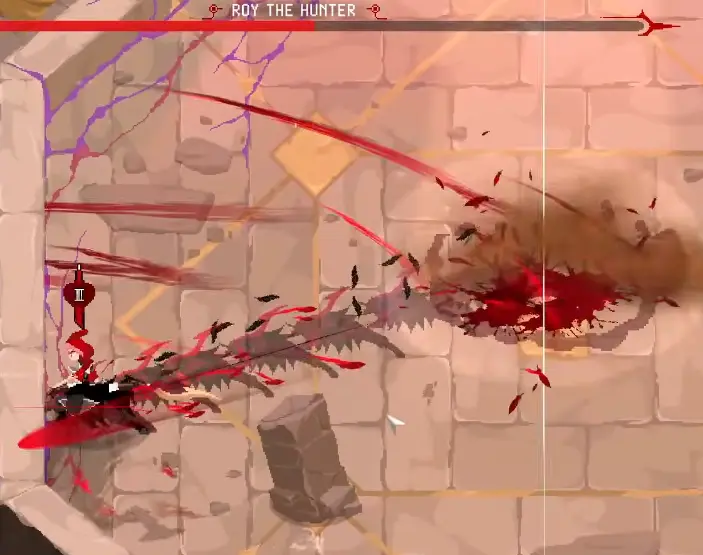
Waiting for the blast itself is too late.
Roy can also parry Ruby. When he takes the defensive stance, I stop attacking instead of feeding another Slash into the counter.
Recommended setup
I use:
- a fast Strike;
- short Slash strings;
- enough mobility to reach the blocks;
- no slow move that traps Ruby during the cover sequence.
Roy’s Dagger is useful for his achievement, but I do not force it into the first-clear build. I equip it later and land a hit in a rematch.
On the true route, defeating Roy leads into Dark Ruby and the rescue sequence. The route requirements are covered in the True Ending Guide.
How to Beat Apparent-Ending Alcina
Route: After Roy
Phases: Two
Unlock: Maybe the End and the White Space route
Main danger: Point of no return, grabs and phase transitions
Before entering, the game warns that Ruby cannot return to the Monastery.
I turn back at this prompt.
Before confirming, I check:
- unspent currency;
- equipped Strike;
- talisman slots;
- newly opened memories;
- obvious Monastery chests;
- any upgrade that directly affects the final battle.
I do not buy a sidegrade simply because the shop is about to become unavailable.
The battle itself combines normal attacks, grabs and aerial counters. I keep the same short punish rhythm and refuse to chase Alcina across the arena.
Defeating her here does not finish the real story. It leads to Maybe the End.
What Changes on True Difficulty
True Difficulty changes the decisions around the bosses even when the basic identity of the fight remains familiar.
The largest differences in my route were:
- boss health bars were hidden;
- normal healing was heavily restricted;
- mistakes carried much higher costs;
- Mira’s Shadow added one blocked hit;
- the skill tree shifted toward Strength;
- new story encounters and bosses opened.
The hidden health bar mattered more than expected.
I could no longer justify a greedy combo by telling myself the boss was almost dead. I stopped when the opening ended, even after a long attempt.
Mira’s Shadow also changed my build priority. While learning, one cancelled hit had more practical value than a modest damage bonus.
A separate revival effect does not refresh Mira’s Shadow after the protection has already been consumed.
How to Beat the Red-Eyed Tree
Route: True route beneath the Monastery
Main danger: Root attacks, obscured floor and phase-two laser
Reward: The root needed to save Roy
The Red-Eyed Tree adds several simultaneous visual threats:
- roots slamming across the floor;
- eye-shaped projectiles falling from above;
- roots thrusting upward;
- bouncing projectiles from the trunk;
- flowers obscuring the arena;
- a large laser in phase two.
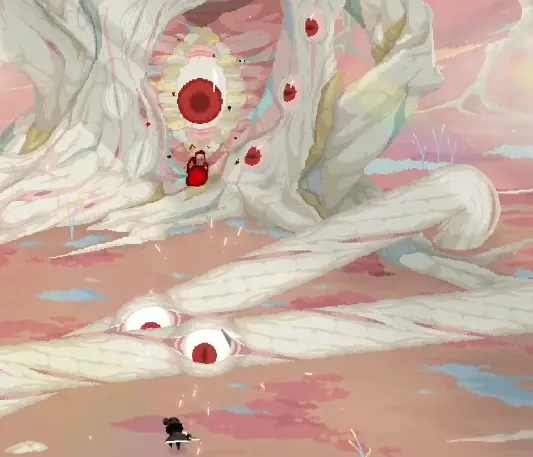
The flowers caused more failures than their direct damage suggested.
Once the arena became visually crowded, I watched:
- the Tree’s trunk;
- the nearest clean floor lane;
- the root direction;
- Ruby only after choosing the route.
During the phase-two laser, I move first and attack only after the laser and overlapping roots have cleared.
After the fight, I collect the route item used to save Roy.
Before leaving, I check the small opening on the left side of the exit and follow it downward into the optional hidden area. That detour awards 400 currency and is easier to complete now than after returning to the main route.
How to Beat Dark Ruby
Route: Inside Roy’s consciousness
Main danger: Ruby-speed attacks and familiar timings
Progression: Required to save Roy
Dark Ruby uses attacks similar to Ruby’s own Slash and Strike tools.
That familiarity encouraged me to attack too long.
I use short double hits and reset before the enemy can answer with the same speed.
I do not build a strategy around the inconsistent appearance that Dark Ruby may retain damage after a failed attempt. I approach each retry as a full fight.
Once Dark Ruby is defeated, the controlling magic inside Roy can be removed.
How to Beat Puppet Master
Route: True-route castle
Main danger: Puppet combo overlapping with two different hand attacks
Observed learning stretch: About 13 minutes
Puppet Master became manageable only after I stopped treating both hands as the same mechanic.
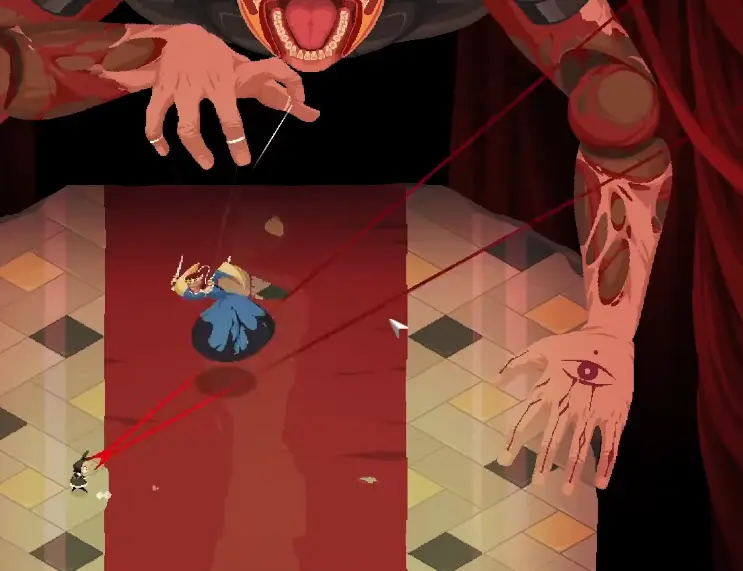
My response is:
- dodge the puppet’s complete four-hit combo;
- interrupt the right-hand aerial slam with a focused dart;
- counter the left-hand grab with Strike Slash;
- dodge the left-hand thrust through the clear side;
- take one short punish and reset.
The main trap is answering a hand while Ruby’s mother is still attacking.
I finish the puppet sequence first. Only then do I identify which hand has become active.
How to Beat the Real Alcina Final Boss
Route: End of the true route
Phases: Three
Required equipment: Rubinite
Main danger: Long phase-two sequence and delayed phase-three projectile
Before the fight, the Mark of Courage transforms into Rubinite.
The English equipment screen confirms:
- Rubinite costs five talisman slots;
- it sets the Mark cap to infinite.
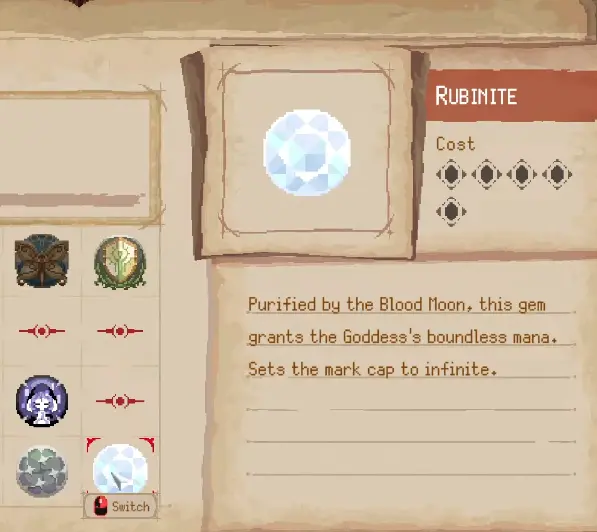
Unlimited Marks reward survival.
They do not mean I should attack during every opening.
Phase one
I stay near the center, dodge familiar attacks, and use one or two Slashes.
I do not chase Alcina across the arena to preserve a combo.
Phase two
The most dangerous transition contains a multi-hit sequence.
Dodging the first hit does not create an immediate damage opening.
I treat the full sequence as one defensive unit:
- dodge the first attack;
- wait;
- clear the second timing;
- clear the third attack;
- punish only after Alcina fully stops.
Several fire patterns also require moving toward the center early. I reposition before the route closes instead of trying to cross the finished attack.
Phase three
The third phase changes the arena into the Blood Moon environment.
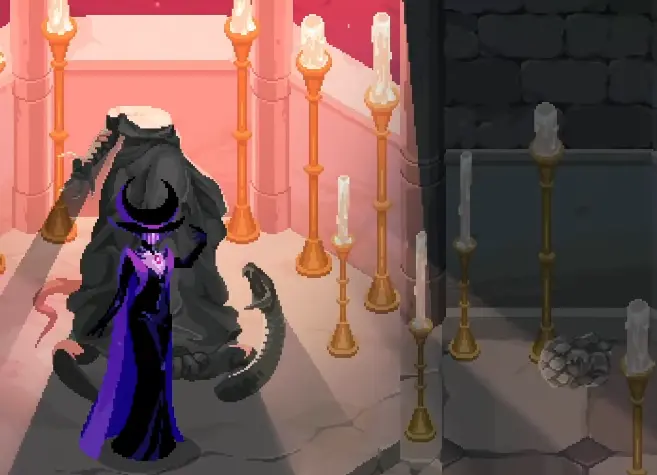
The first new pattern is a large bombardment.
I stop attacking and move through the open lane until the sequence ends.
The second dangerous pattern follows this order:
- two sword attacks;
- a delayed projectile;
- a scythe sweep.
The delayed projectile is the trap.
After dodging the two sword attacks, the animation looks punishable. Attacking immediately puts Ruby directly into the projectile.
I wait for both the projectile and the scythe before committing.
My Hardest Rubinite Bosses
These are the learning stretches I observed in my runs, not guaranteed completion times.
| Boss | Observed learning stretch | What caused the wall |
|---|---|---|
| Real Alcina | Longest overall | Three phases and delayed phase-three chains |
| Plaguebearer | About 56 minutes | Multiple bodies, poison and third-hit greed |
| Martyred Angel, True Difficulty | About 22 minutes | Aerial timing and angle changes |
| Gravekeeper | About 15 minutes | Discovering the correct aerial counter |
| Faye, second battle, True Difficulty | About 14 minutes | Delayed attacks and overlapping grabs |
| Puppet Master | About 13 minutes | Reading the puppet and active hand separately |
The ranking is build-dependent.
Roy became much easier once I understood the block-cover attack. Plaguebearer remained difficult even after I understood the mechanics because the arena continued to demand patient movement.
Common Boss Problems
My aerial counter is not working
I check four things:
- am I actually in Focus?
- is this a red aerial cue rather than a normal jump?
- am I firing when the attack commits rather than spamming early?
- am I standing in a position where another hit is already covering Ruby?
The dart counter does not correct a bad arena position.
A boss achievement did not unlock
I use meditation and attempt one condition at a time.
I also check:
- whether a talisman remained equipped;
- whether one hit invalidated a no-damage run;
- whether a poison pod visibly detonated;
- whether every grab was countered rather than dodged;
- whether the required segment or body state was still active at the kill.
The complete conditions are in the Rubinite Achievement Guide.
I defeated Alcina but the game is not finished
Reload the same cleared save.
Maybe the End continues into the White Space and True Difficulty. Do not start a separate file unless you intentionally want another clean run.
What to Read Next
- Read the Rubinite True Ending Guide for Mira’s route, the Nun’s Room, Red-Eyed Tree, saving Roy, Puppet Master, Rubinite and the real ending.
- Read the Rubinite Achievement Guide for all 38 achievements, meditation challenges, boss-specific conditions, memories, skills, candles, chests and talismans.
- Return to the Rubinite Guide Hub for upgrade priorities, Monastery return decisions and the recommended reading order.
FAQ
How many bosses are in Rubinite? +
I count 14 major progression encounters: 10 before Maybe the End and four additional true-route encounters. That becomes 12 distinct named boss identities because Faye and Alcina each have two major battles. I exclude the Bound Man tutorial encounter.
What is the best Rubinite boss order? +
After the Beast and Guardian Faye, I clear the more readable Mana Source fights first and leave Plaguebearer until last. More Slash damage, talisman capacity and a fast-recovery Strike make the multi-segment fight much safer.
Which Rubinite boss is the hardest? +
The real three-phase Alcina fight was the hardest overall. Plaguebearer was my longest non-final wall, taking almost 56 minutes of serious attempts and pushing my recorded death count toward 100.
Can I replay defeated bosses in Rubinite? +
Yes. Once meditation opens in the Monastery, lighting the candles lets Ruby relive defeated bosses. I use rematches for no-damage, no-talisman and boss-specific achievement conditions.
Should I keep Mira's Shadow equipped? +
I keep Mira's Shadow while learning True Difficulty bosses because it cancels one hit. I replace it with damage only after I can reach the final phase consistently without consuming the protection.