Miami Zero Achievements: All 15 Unlocks & 100% Checklist
Track all 15 Miami Zero achievements, including hidden survivor encounters, Rat King, Cyberpunk, EUREKA!, and Secrets Revealed.
Updated:
Quick Answer
Miami Zero has 15 achievements. During your first run, complete ordinary inspections, confiscate seven contraband items, and watch for unusual survivors and special encounters.
Keep virus research and yacht repairs progressing before Day 15. Save deliberate overcharged-Taser challenges for a shift when you can afford the inspection risk.
Miami Zero adds 15 achievements to the original 25 in Quarantine Zone: The Last Check, bringing the Steam total to 40.
The difficult part of completing the Miami set is recognizing which requirements depend on opportunities you may not encounter again during the same campaign. Research and yacht repairs take several shifts, while achievements such as Cyberpunk, The Smell of Victory, and No Second Chances involve particular survivors or conditions.
A normal 15-day completion will earn some achievements naturally. Others require actions that a careful inspector would ordinarily avoid, including deliberately overcharging electrical equipment or experimenting on someone Schultz did not request.
All 15 Miami Zero Achievements Checklist
Miami Zero — 15 Achievements
Check off finished trophies. Open a category to view the ones still missing.
No achievements match your filters.
Story, Research & Endings — 4 4 remaining 0 / 4
Inspection & Equipment — 5 5 remaining 0 / 5
Research Actions — 2 2 remaining 0 / 2
Hidden Interactions — 4 4 remaining 0 / 4
Track the 15 Miami achievements as they unlock. The original Chicago achievements are not included.
The Best Order for a Miami Achievement Run
Most of the ordinary inspection achievements can progress alongside the story, so there is little value in forcing unusual actions before the relevant equipment becomes available.
First Shift unlocks after completing Day 1. From that point, examine baggage carefully enough to build progress toward Master Inspector while continuing to assign healthy survivors to the yacht.
Once the Research Ward opens, keep Schultz supplied with the people he requests. The laboratory and yacht objectives are the two longest requirements, and both should be advancing while you continue your shifts.
The special encounters need a different approach. When Torres’s strange storyline begins, pay attention to the Rat King and the lighter. When a survivor with mechanical limbs or a distinctive latex outfit appears, check whether you still need the corresponding inspection achievement before sending that person away.
For a practical first run, I would prioritize completing the research, repairing the ship, and collecting the special encounters that arise naturally. Risky equipment challenges can be attempted separately rather than jeopardizing a run that is already close to finishing both major assignments.
EUREKA! — Complete the Virus Genetic Sequence
EUREKA! unlocks when the laboratory discovers the complete virus formula.
The Research Ward tracks seven required fragments. You must discover all seven rather than merely complete a certain number of experiments.
One important distinction is that successfully studying a drug preparation does not always produce a fragment. Some experiments award equipment upgrades instead.
If several recipes are complete but EUREKA! remains locked, inspect the Virus Formula display for missing fragments. The Miami Zero virus research instructions cover the experimental combinations, mutation identification, and how to finish the sequence.
The achievement is awarded when the final missing fragment is discovered.
Secrets Revealed — Finish Both Major Assignments
Secrets Revealed requires two completed objectives: fully research the virus and restore the yacht.
Earning EUREKA! satisfies the research requirement, but it does not establish that the ship is ready. Every required yacht compartment must also be repaired.
In a completed campaign, the final interrogation recognizes both assignments and Secrets Revealed unlocks after the ending sequence.
If your formula is complete but Secrets Revealed has not unlocked, return to the yacht repair requirements and check the remaining compartments.
Completing both objectives within the same campaign avoids having to repeat the longer tasks on another attempt.
Jack of All Trades — Collect Your First Upgrade
Laboratory experiments can produce two different kinds of rewards: mutagens for the virus formula and upgrades for your equipment.
Jack of All Trades requires obtaining one upgrade.
After an experiment displays Upgrade Acquired, open the indicated crate and collect its contents. One successful mushroom experiment produces a Green Giant transformation and rewards an improvement that increases the scanner’s detection radius.
Other experiments may offer different equipment improvements, so the first upgrade you receive does not have to be that particular reward.
The achievement does not require completing the entire upgrade collection. Once you have acquired your first improvement, you can direct your remaining research opportunities toward unfinished campaign objectives.
Science Demands Sacrifice — Use an Unwanted Research Subject
Schultz normally provides photographs of the survivors he wants sent to the Research Ward.
Science Demands Sacrifice requires the opposite situation: conduct an experiment on someone who is not on the Wanted List.
During a completed laboratory sequence, an unwanted subject was used in an experiment that produced no mutation, and the achievement triggered.
For this challenge, check the current Wanted List before selecting the subject. The requirement concerns the person’s status as a requested or unrequested subject, not whether the experiment produces a useful mutagen.
Avoid spending a needed subject or your last available experimental opportunity on this challenge while you are still trying to finish the virus formula.
Master Inspector — Confiscate Seven Contraband Items
Master Inspector counts seven confiscated contraband items during Miami inspections.
The total accumulates across survivors and shifts. You do not need to find all seven items in one person’s belongings or finish the challenge on a particular day.
Check bags during ordinary inspections and confiscate items the game identifies as prohibited. A survivor’s medical classification does not determine whether their belongings are acceptable; even someone who appears healthy may be carrying contraband.
The safest way to earn this achievement is through regular inspections. Confiscating items that are not prohibited can create unnecessary penalties without helping the counter.
You should have opportunities to accumulate seven valid confiscations before Day 15 without interrupting the campaign’s larger objectives.
Self-Defense — Defeat a Survivor Who Attacked You
Self-Defense is triggered by killing a survivor who has attacked you.
The condition is different from eliminating an infected survivor through the normal checkpoint procedure.
Wait until the relevant person becomes hostile and attacks, then defeat them using the equipment available during the encounter.
Eliminating a compliant survivor before an attack occurs does not establish the condition required for Self-Defense.
The achievement can be pursued separately from ordinary inspections, especially once weapons become available. It should not require deliberately sacrificing a clean inspection or placing healthy people in danger.
Electromaniac and Cyberpunk — Overcharged Taser Challenges
These two achievements use the same unusual electrical condition but count different targets.
Electromaniac requires 10 overcharged Taser shocks against survivors. Ordinary green-zone electrical inspections do not satisfy the stated overcharge requirement.
The Shocker’s charge interaction includes an overload range that can injure the person being inspected. Repeatedly using it during important survivor assignments can interfere with otherwise clean inspections, so this challenge is better attempted when you are prepared for those consequences.
Cyberpunk is more specific: the overcharged shock must be delivered to the cyborg woman.
How to Recognize the Cyborg Woman
One Miami inspection features Raina Solano, a survivor with visible cybernetic limbs. Her background mentions traveling outside Florida for an implant that was illegal in the state.
Her mechanical arms and legs distinguish her from the ordinary survivor line.
If you encounter her while Cyberpunk is unfinished, complete the required overcharged-Taser interaction before selecting her final destination. Merely examining the cybernetic implants with other equipment does not satisfy the achievement.
Cyberpunk depends on both the correct survivor and the overcharged shock. Electromaniac, by contrast, is a cumulative counter involving ten qualifying shocks.
A qualifying interaction with the cyborg woman may also contribute toward the larger counter, but check each achievement independently before marking it complete.
The Smell of Victory — Scan the Survivor in Latex
The Smell of Victory has two specific conditions: the target must be wearing latex, and you must scan their rear.
The inspection position matters as much as the survivor’s outfit.
When you encounter someone wearing latex, move behind them and direct the scanner toward the required area before finishing the inspection.
Performing the same action on an ordinary survivor does not satisfy the stated clothing requirement. Nor is scanning a latex-clad survivor from the front equivalent to the required interaction.
This is worth remembering while examining unusual outfits because it is easy to complete an otherwise thorough inspection and send the person away without attempting the achievement action.
No Second Chances — Eliminate Both Unique Prisoners
No Second Chances requires eliminating both unique prisoners, not two ordinary infected survivors.
The achievement can unlock during the earlier portion of Miami’s campaign. One completed sequence reaches the second elimination during laboratory interactions, with the achievement notification appearing after the subject is eliminated.
One of the special subjects has a distinctive appearance involving a missing hand.
When dealing with these prisoners, distinguish them from the ordinary people arriving at the checkpoint. Sending two unrelated infected survivors to liquidation is not sufficient for the achievement.
The critical requirement is eliminating both qualifying prisoners during the same achievement attempt. A single special-prisoner elimination does not complete it.
Strange Conversations — Find and Talk to the Rat King
The Rat King appears during the strange events following Torres’s drink request.
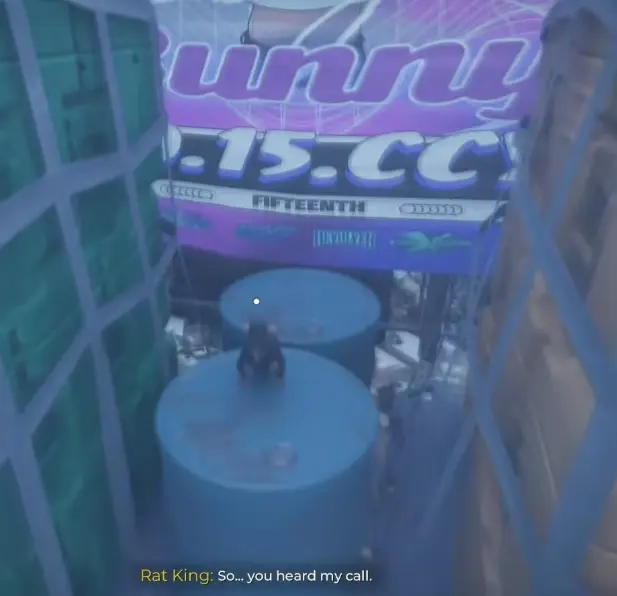
After the protagonist begins hearing rats speak, a small rat appears near the stacked blue barrels beneath a colorful festival sign.
Approach the rat and complete the conversation. Strange Conversations requires talking to the Rat King for the first time; merely spotting him does not satisfy the interaction.
During the exchange, the Rat King discusses the Oracle Mushrooms and the threat to his people. That request leads to another activity in the same area, which can also fulfill Firestarter.
Firestarter — Find the Lighter and Ignite a Trash Can
As the Rat King sequence continues, you encounter a guarded area. Dave is blocking access, and the quest explains that fire can draw him away.
The next objective is to find a lighter.
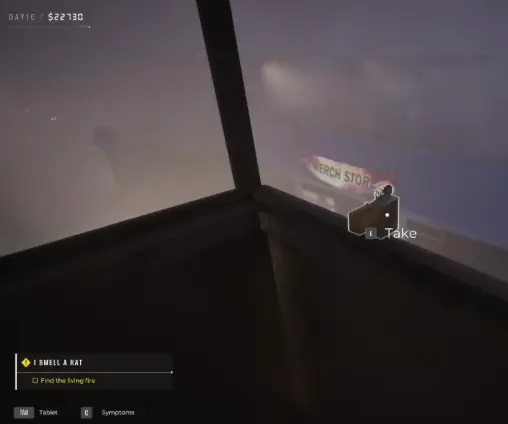
The lighter can be picked up from an elevated area of the checkpoint. After collecting it, follow the objective toward the trash can and use the lighter to set it on fire.
The burning container distracts Dave, allowing the Rat King task to continue.
Firestarter requires setting one trash can on fire. You do not need to ignite several containers or accumulate a larger fire counter.
Completing the Rat King conversation and handling the fire objective during the same sequence makes these two achievements convenient to collect together.
Accomplice — Stay Near the Shark Container When It Opens
Accomplice requires you to stay with a survivor when the shark container opens.
Miami uses the shark container as part of its elimination process. Sending a survivor there initiates the relevant procedure, but the achievement specifically refers to remaining with the survivor during the opening event.
After directing a qualifying survivor toward the container, stay near the area and watch the opening interaction instead of immediately returning to the inspection desk.
The achievement wording does not specify an exact distance from the survivor. Remain present for the event and check for the unlock before treating the attempt as complete.
This is an opportunity to watch for during normal elimination procedures, not a reason to send healthy survivors to the sharks.
Is It Over? — Finish With a Non-True Ending
Is It Over? requires seeing any ending except the true ending.
Miami’s story reaches its conclusion on Day 15. Completing the virus research and restoring the yacht affects the final assessment, but those two tasks do not by themselves establish that the true ending has been reached.
For this achievement, finish the campaign and check whether the ending triggers the unlock.
If you are trying to distinguish the normal conclusion from other final outcomes, the Miami Zero endings explain the final confrontation and the differences between completed and unfinished objectives.
Is It Over? and Secrets Revealed have different conditions. Reaching an ending is not a substitute for completing both major assignments.
What Should You Finish Before Day 15?
Once the campaign reaches its final shifts, the important remaining achievements generally fall into three groups.
Research and repairs: Finish the virus formula and the yacht if EUREKA! or Secrets Revealed is missing. These objectives depend on work accumulated throughout the campaign.
Special encounters: Check whether you completed Rat King, Firestarter, No Second Chances, Cyberpunk, and The Smell of Victory. Their requirements involve people or situations that cannot necessarily be recreated on demand during the final shift.
Deliberate inspection actions: Electromaniac, Self-Defense, and Accomplice may require behavior outside your normal checkpoint routine. If these are your only remaining challenges, they are better handled deliberately than by disrupting the final preparations for the ship and laboratory.
After reaching the ending, check the tracker against the achievements that actually unlocked. A completed Miami campaign is not automatically a 15/15 achievement run, but you can use the remaining entries to decide which interactions are worth pursuing on another attempt.