Nuclear Epoch Mid-Game Progression: Weapons, Elements, Dragons & Farming
A practical Nuclear Epoch mid-game progression guide covering base workflow, weapon leveling, element bonuses, advanced workbenches, iron, armor, Elemental Furnace checks, dragon breeding, farming, and upgrade timing.
Updated:
Quick Answer
The safest Nuclear Epoch mid-game route is: clean up your base workflow, unlock the Weapon Workbench, secure iron and ingot production, train a weapon that actually solves the next zone, prepare element bonuses before hard pushes, verify the Elemental Furnace recipes before relying on it for alloys, then add farming, dragons, advanced workbenches, and higher-rarity gear only when they feed the next run. I do not chase every unlocked system at once.
What This Mid-Game Guide Is For
This page is not another extraction checklist.
The extraction guide is about getting in and out safely. This page is about what those runs should feed once the first base is no longer new.
The mid-game problem is that Nuclear Epoch opens too many systems at once: better guns, ore smelting, armor repair, element materials, advanced benches, farming, fertilizer, dragons, pearls, merchants, and higher-difficulty zones. If I chase all of them equally, every run feels busy but the route does not get stronger.
The better question is:
Does this system make the next extraction, weapon, armor, base upgrade, element craft, farming loop, or dragon output better?
If the answer is no, I delay it.
Mid-Game Route Order
This is the route I use after the first base is placed and the early extraction loop is understood.
| Order | System | What I want before moving on | Why it matters |
|---|---|---|---|
| 1 | Base workflow | Storage, workbench, forge, and key stations close together | Every run becomes faster to process |
| 2 | Weapon Workbench | Firearm crafting unlocked | Starter weapons stop being enough |
| 3 | Iron route | Surface nodes, mine checks, and smelting plan | Iron becomes the bottleneck for gear and upgrades |
| 4 | Weapon growth | A gun worth training, not constant random swaps | Kills can feed weapon levels and stat growth |
| 5 | Armor plan | Repair before risk, replace when durability is no longer worth trusting | Armor damage is part of the real cost of a run |
| 6 | Element prep | Know what bonus I want before spending attribute materials | Elements change both weapons and armor |
| 7 | Elemental Furnace check | Unlock it, then verify the actual recipes shown in the station | The tooltip may not answer every alloy question |
| 8 | Advanced stations | Upgrade when higher-rarity gear attempts are realistic | Rare gear crafting is expensive |
| 9 | Farming support | Food, fertilizer, seeds, and automation direction | Farming is strongest when it supports combat and elements |
| 10 | Dragon loop | Young dragon feeding, adult output, pearl quality | Dragon timing can affect long-term material quality |
Fix the Base Workflow First
A messy base makes every mid-game system slower.
I want my storage, workbench, forge, weapon station, farming area, and later elemental stations close enough that returning from a run feels clean. The real enemy here is not decoration. It is friction: one chest outside, one bench too far away, one furnace on the wrong side of the base, and every craft takes longer than it should.
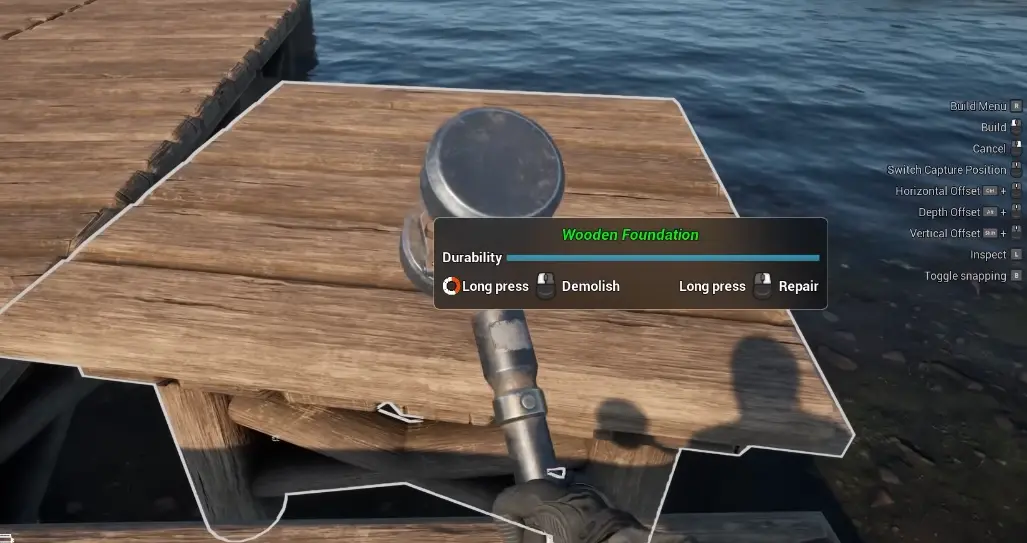
Around Fluorescent Lake, building over water can solve early placement problems because the foundation controls let me adjust height and snapping.
| Base piece | Mid-game reason |
|---|---|
| Main storage | Extraction loot needs a fast drop-off point |
| Workbench | Planks, bricks, and basic materials are still used constantly |
| Forge / furnace area | Ore needs to become ingots before it becomes progress |
| Weapon Workbench | Firearms become the first serious gear gate |
| Armor and repair area | Damaged gear needs a planned loop, not panic repairs |
| Elemental station area | Attribute materials and alloys need their own route |
| Farming space | Crops, fertilizer, and automation need room |
| Dragon / animal space | Feeding and collection should not be a long walk |
Unlock the Weapon Workbench, Then Decide What Is Worth Training
The Weapon Workbench is one of the first real mid-game gates.
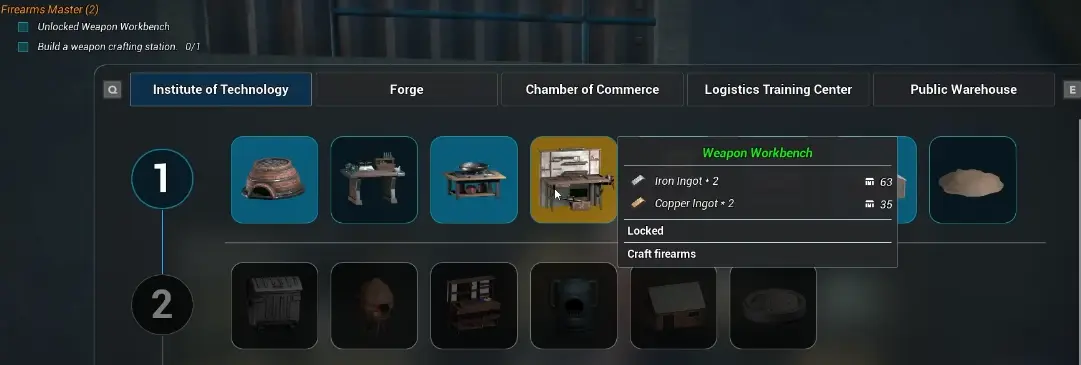
The current research screen shows the unlock cost as 2 Iron Ingots and 2 Copper Ingots. That cost looks small, but it is the start of a bigger pattern: raw ore is no longer enough. I need ingots, parts, ammo, elements, and eventually better stations.
The important mid-game detail is that weapon progression does not stop at crafting.
Current route notes indicate that weapons can gain experience through kills, then level up and receive stat improvements. Higher-rarity weapons are usually better long-term candidates because the level gains and useful stat lines can be stronger.
| Weapon decision | My judgment |
|---|---|
| Crafting a first better firearm | Worth it when starter guns make extraction slow or unsafe |
| Training one working weapon | Better than constantly swapping if the weapon fits the next zone |
| Leveling a bad element weapon | Avoid if it does not solve the next area |
| Buying a weapon | Consider if it saves iron, has useful rarity, or has a better element than I can craft |
| Skipping a weapon upgrade | Correct if armor, ammo, or iron supply is the real bottleneck |
| Using rare materials on a weapon | Only after checking the current tooltip and next-zone need |
| Keeping an old trained weapon | Fine if its level growth still makes runs safer |
| Switching to a new rarity tier | Worth considering when the new weapon can grow better than the old one |
Element Materials: Weapon Bonus and Armor Resistance Are Different
Element prep is not only “which monster takes more damage.”
The more useful mid-game question is: what does this element do when I put it into a weapon or armor path?
Use this as a practical planning table, then check the current in-game tooltip before spending rare or high-grade materials.
| Element material | Weapon-side value | Armor-side value | When I consider it |
|---|---|---|---|
| Fire | Attack power bonus | Fire resistance | When I want raw weapon pressure or need to survive fire-zone damage |
| Ice / Frost | Reload speed bonus | Ice resistance | When reload speed matters, or when preparing against ice pressure |
| Thunder | Fire rate bonus | Thunder resistance | When sustained shooting speed or thunder-zone safety matters |
| Poison | Armor penetration bonus | Poison resistance | When enemies feel armored, or poison/status pressure is the problem |
This table changes how I craft.
If my problem is that enemies take too long to kill, I look at weapon-side bonuses. If my problem is that the zone itself is shredding me, I look at armor-side resistance. If I only think “stronger gun,” I miss half the system.
The strongest screenshot-verified route example is still Ice / Frost support before Extreme Flame Land, which the Emergency Protocol quest points toward. I use that as the firm early example, while checking current tooltips before spending rare alloys on other matchups.
| Next problem | My mid-game preparation |
|---|---|
| Extreme Flame Land | Ice / frost support, enough ammo, and repaired armor |
| Extreme Ice Land | Do not rely on frost-only damage as the main plan |
| Poison or debuff-heavy routes | Poison resistance, status cleanse, and safer exit planning |
| Thunder pressure | Thunder resistance and stamina support |
| Armored enemies | Check Poison weapon bonuses such as armor penetration |
| Long fights with reload pressure | Check Ice / Frost reload-speed value |
| Boss attempts | Match weapon bonus, armor resistance, healing, and ammo before departure |
Iron and Smelting: Think in Ingots, Not Ore
Iron starts as a normal resource and becomes the mid-game bottleneck.
The reason is simple: weapons, armor, stations, and upgrades all begin asking for ingots or crafted parts. A pile of raw ore disappears faster than it looks once every upgrade pulls from the same supply.
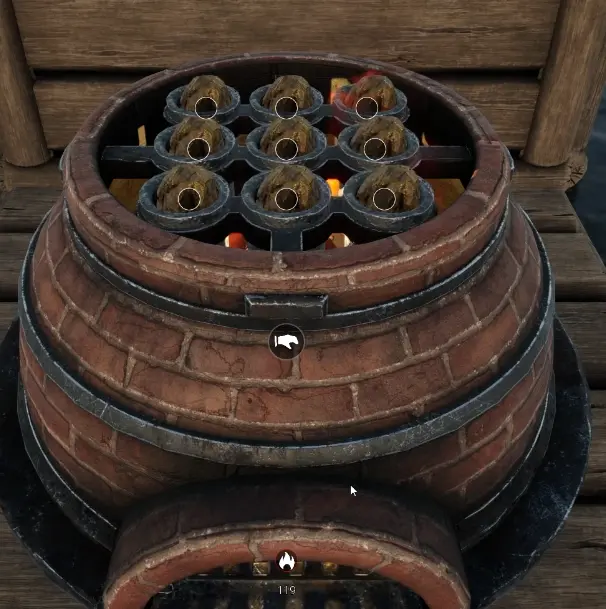
The captured route uses a useful number: 3 ore → 1 ingot. That means I do not judge a cost only by the ingot number. I think about the raw ore behind it.
| Displayed cost | What I actually think |
|---|---|
| 2 Iron Ingots | Small unlock, but still part of the same iron pressure |
| 10 Iron Ingots | Meaningful mid-game cost |
| 20 Iron Ingots | Major gear investment, especially if armor replacement is coming |
| Mixed ingot costs | Competes with weapons, armor, stations, and research |
| Repeated replacement costs | One bad run can become a long material recovery loop |
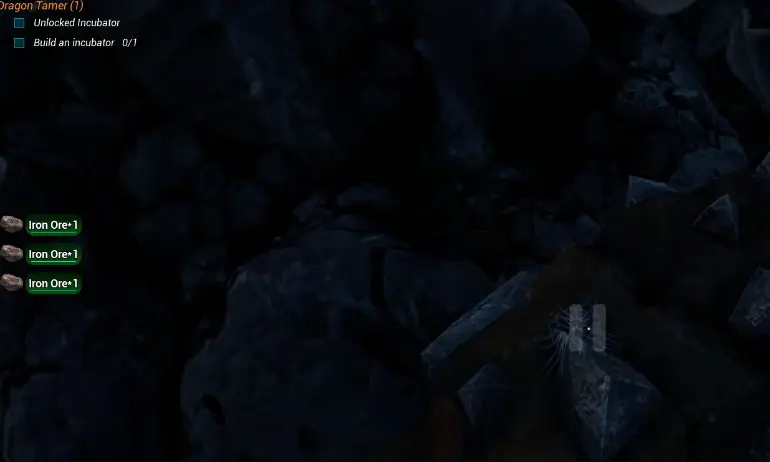
The abandoned mine is one of the cleaner ways to think about early iron routing because it gives me a targeted reason to leave the base, not just random wandering.
Repair or Replace Armor by Cost, Not Emotion
Armor is not permanent treasure. It is mid-game operating cost.
I do not repeat the full extraction-side armor rules here, because that belongs in the extraction guide. The mid-game question is different: should I spend materials repairing, craft a replacement, buy a better piece, or delay the next hard zone?
| Situation | My decision |
|---|---|
| Armor is lightly damaged before an easy farm | I may keep using it |
| Armor is damaged before a new zone | Repair before the run or use cheaper scout gear |
| Maximum durability keeps falling | Start planning replacement |
| Iron is tight | Delay expensive armor crafting unless the next zone requires it |
| Merchant sells a strong piece | Consider buying if it saves a painful ingot grind |
| A boss attempt is next | Repair or replace first; do not gamble weak armor |
| I only need a resource farm | Use cheaper gear and keep the route short |
Elemental Furnace: Unlock It, Then Verify the Recipes
The Elemental Furnace is important, but I handle it carefully.
The current research screen shows Elemental Furnace as a Flame Stone × 2 unlock, and the description says it is used to smelt alloys.
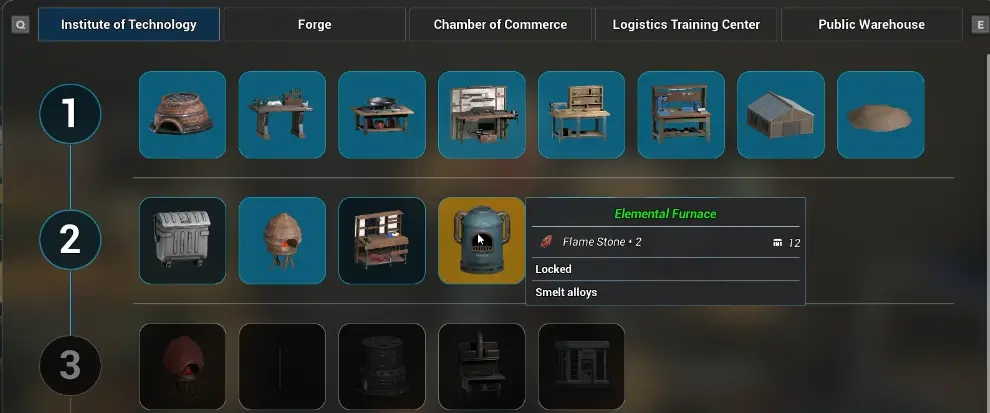
The reason I verify is that this is exactly the kind of mid-game system where a tooltip can be less helpful than the actual recipe list. Some players have reported confusion after unlocking or placing the station, especially when looking for a specific alloy or part.
So my route is:
| Step | What I check |
|---|---|
| 1. Unlock the tech | Confirm the Flame Stone cost and research requirement |
| 2. Place the station | Make sure it is built in the base workflow, not isolated |
| 3. Open the recipe list | Check what it can actually produce in the current version |
| 4. Check missing prerequisites | Some recipes may depend on other stations, quests, or materials |
| 5. Craft a small test batch | Do not spend all rare materials before confirming output |
| 6. Then plan alloy production | Only scale up once the station produces what the next upgrade needs |
Advanced Workbenches: Do Not Burn Rare Materials on the Wrong Station
The basic Weapon Workbench gets the mid-game started. It is not the final crafting plan.
Advanced weapon and armor stations become relevant when I am trying to craft higher-rarity gear, especially gold or red rarity equipment. Current route notes suggest advanced stations are much better suited for those attempts than basic benches.
The key decision is timing. I do not rush advanced stations while I still cannot afford ammo, repairs, or basic iron costs. But I also do not keep throwing rare materials at basic crafting once advanced stations are close.
| Situation | Workbench decision |
|---|---|
| I need my first usable firearm | Basic Weapon Workbench is enough |
| I am still short on iron and ammo | Delay advanced station investment |
| I am preparing for higher-rarity gear | Start planning advanced weapon or armor bench |
| I have gold/red material goals | Use the station with better high-rarity crafting support |
| I only need a farming loadout | Do not waste rare materials chasing perfect gear |
| A boss wall is blocking progression | Advanced gear may be worth the investment |
| The station tooltip shows better success behavior | Craft the expensive item there, not on the basic bench |
Farming: Do Not Waste Elemental Fertilizer Too Early
Farming becomes useful once it supports food, healing, stamina, element prep, and long-term achievement goals.
But I do not treat every fertilizer as something to spend immediately.
The Thunder-type Feces tooltip shows why matching matters: it has a small chance to improve the quality of all crops, but a medium chance to improve thunder-attribute crops.
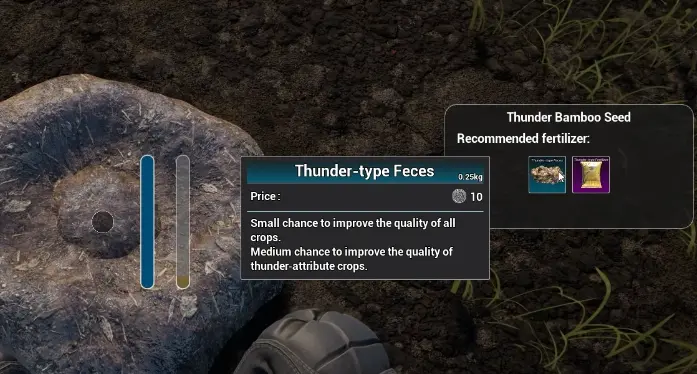
The mid-game question is not “can I fertilize?” It is “is this the right time to spend elemental fertilizer?”
| Farming stage | My rule |
|---|---|
| Basic food stage | Grow food that supports healing, stamina, or routine survival |
| Manual fertilizer stage | Use common fertilizer carefully; do not burn rare element fertilizer randomly |
| Attribute crop stage | Match fertilizer type to crop type when the output matters |
| Before automatic fertilizer | Avoid heavy elemental fertilizer investment unless the crop is important right now |
| After automation unlocks or is close | Elemental fertilizer becomes easier to justify |
| Achievement farming | Wait until the base loop and seed supply are stable |
| Combat-prep farming | Prioritize crops that support the next zone or boss |
Dragons: The Young Stage Is the Important Window
Dragons are not only decoration, but I also do not rush a huge dragon setup before the base can support it.
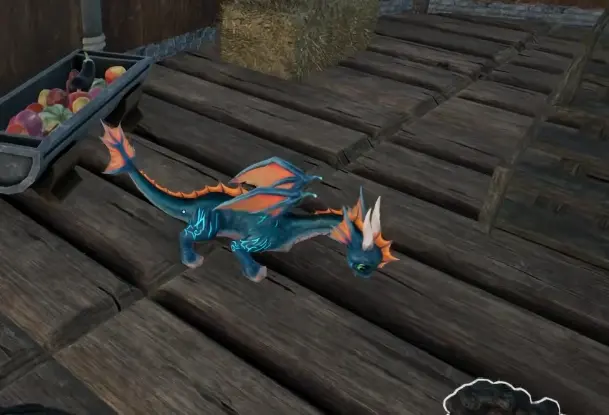
The key route note is the growth window. Current player-route data describes a young dragon stage of about 3 days. During that window, feeding the best matching-element food can improve the young dragon’s base direction before adulthood locks in the stat line. Once the dragon is adult, continuing to feed elemental food is more about output quality, such as dragon pearls, than endlessly improving the adult dragon’s own base attributes.
| Dragon stage | What I do | Why |
|---|---|---|
| Before hatching / setup | Make sure food and space are ready | A dragon system that drains the base too early becomes a distraction |
| Young stage | Feed the best matching-element food I can justify | This is the important growth window |
| End of young stage | Check whether the dragon is worth continuing around | Adult stats become the long-term base |
| Adult stage | Feed for useful output quality, especially pearl direction | Adult feeding is more about output than raising base stats |
| Breeding planning | Use strong adults if I care about second-generation quality | Parent quality affects the long-term dragon line |
| Multiple dragons | Add only when food, space, and collection are stable | Too many dragons too early can starve the route |
Merchants and Buying Decisions
I do not buy every shiny item.
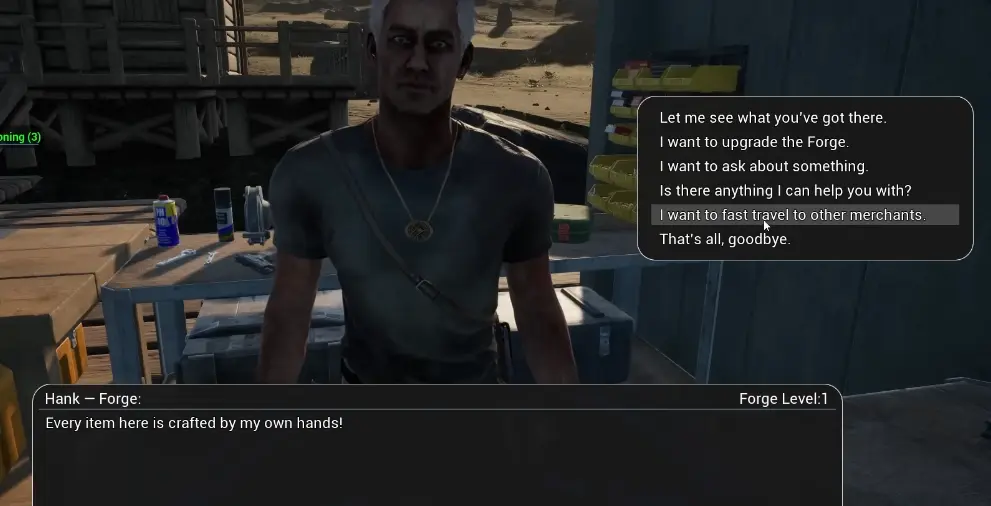
Mid-game merchants are useful when they solve a bottleneck faster than crafting. If buying a weapon saves rare iron, if armor prevents a failed boss run, or if food supports a zone push, I consider it. If the item is just interesting, I wait.
| Buy or upgrade? | I do it when… | I skip when… |
|---|---|---|
| Weapon | It has the right rarity, element, or stat direction for the next zone | It only looks stronger but does not solve the next problem |
| Armor | It saves a painful craft or makes the next boss route safer | I can farm safely with cheaper gear |
| Food / consumables | It gives healing, stamina, cleanse, or resistance I actually need | It is random expensive food with no route purpose |
| Building upgrade | It unlocks a station, recipe, automation, or better production loop | It drains materials before the base can use it |
| Fast travel or merchant routing | It saves repeated travel during upgrade loops | The coin cost is higher than the time saved |
| Rare material | It unlocks a blocked craft or research step | I do not know what recipe needs it yet |
What I Delay Until the Route Is Stable
These systems are useful, but they do not all deserve immediate investment.
| System | Why I delay it |
|---|---|
| Large decorative base work | Workflow matters more than appearance during mid-game |
| Advanced station rush | Rare crafting is wasteful if iron, ammo, and armor are still unstable |
| Every new weapon recipe | Weapon EXP and rarity make focus better than constant swapping |
| Heavy elemental alloy spending | Tooltips and station recipes should be checked first |
| Mass farming | Stronger after automation and stable seed supply |
| Rare elemental fertilizer use | Better after crop matching and automation are ready |
| Multiple dragons | Food, space, and collection need to support them |
| High-rarity gear attempts | Better once advanced benches and material supply are ready |
| Rare achievement chasing | Easier after base, weapon, armor, farming, and dragon systems are stable |
Mid-Game Checklist
Before pushing harder zones or expensive gear attempts, I want these checks done.
| Check | Good answer |
|---|---|
| Base workflow clean? | Storage, crafting, smelting, and farming are easy to reach |
| Weapon Workbench unlocked? | I can craft firearms instead of relying only on starter guns |
| Weapon worth training? | I have a gun whose rarity, element, or stat direction fits the next route |
| Iron route working? | I know where to get more iron before a big armor or weapon craft |
| Smelting active? | Ore is becoming ingots before the bottleneck hits |
| Armor plan ready? | I know whether to repair, replace, buy, or delay the next risk |
| Element bonus chosen? | I know whether I need weapon damage, reload, fire rate, armor penetration, or resistance |
| Elemental Furnace verified? | I have checked the actual recipe list after placement |
| Advanced workbench timing clear? | I know whether this craft needs a better station |
| Farming loop useful? | Crops and fertilizer support food, elements, or achievements |
| Automation plan known? | I am not wasting rare fertilizer before the farm can use it efficiently |
| Dragon window planned? | Young dragons get the best matching food during the important growth window |
| Next zone chosen? | I know whether I am preparing for Flame, Ice, Thunder, Poison, or a boss |
Related Nuclear Epoch Guides
Use this page when your base exists but mid-game systems feel messy. Use the other guides when the problem is extraction safety or achievement targeting.
| If you need help with… | Read this |
|---|---|
| Overall route from Day 1 to early mid-game | Nuclear Epoch Guide |
| Evacuation points, Safe Box, loot priority, and turn-back decisions | How to Extract in Nuclear Epoch |
| Achievement list, rare goals, and hidden achievement warnings | Nuclear Epoch Achievements Guide |
Final Mid-Game Rule
Mid-game is not about doing more systems. It is about making systems pay each other back.
A clean base makes crafting faster. Smelting turns ore into real upgrades. A trained weapon makes extraction safer. Armor decisions control risk. Element bonuses solve zone problems. Advanced stations protect rare crafting attempts. Farming supports food, resistance, and quality. Dragons reward correct timing, not random feeding.
If a system does not feed the next real bottleneck, I delay it. If it does, I build the route around it.
FAQ
When does mid-game start in Nuclear Epoch? +
Mid-game starts when your first base is working, weapon crafting is available or close, iron ingots start limiting upgrades, armor repair matters, and you are preparing for elemental zones, stronger enemies, or higher-value extraction routes.
What should I prioritize after the first base? +
Prioritize base workflow, Weapon Workbench, iron supply, ammo flow, armor repair or replacement, element preparation, and only then deeper farming, dragons, advanced stations, and rare gear attempts.
How do element materials work on weapons and armor? +
Element materials can affect weapons and armor differently. Current route notes use Fire for weapon attack and fire resistance, Ice for reload speed and ice resistance, Thunder for fire rate and thunder resistance, and Poison for armor penetration and poison resistance. Always check the current tooltip before spending rare materials.
Do weapons level up in Nuclear Epoch? +
Yes. Weapon progression is not only crafting a new gun. Weapons can gain experience through kills, level up, and receive stat improvements. Higher rarity weapons are generally more valuable to train because they can receive better or more useful growth.
When should I upgrade to advanced workbenches? +
Do not rush advanced workbenches for basic gear. Upgrade when you are ready to attempt higher-rarity weapons or armor, especially gold or red rarity gear, where advanced stations are more relevant than basic benches.
What should I know about the Elemental Furnace? +
The current research screen shows Elemental Furnace as a Flame Stone x2 unlock and describes it as a way to smelt alloys. Because some players report recipe confusion after placement, verify the actual station recipes in your current client before spending rare materials for a specific alloy or part.
How do dragons work in mid-game? +
The important dragon rule is the young-dragon growth window. Current route notes describe a 3-day young stage where feeding the best matching-element food can affect base attributes before adulthood locks them in. Adult feeding is more about output quality, such as dragon pearls, than continuing to raise the adult dragon's own base stats.
Should I use elemental fertilizer early? +
Do not burn rare elemental fertilizer too early if you are still hand-feeding the farming loop. It is usually better to stabilize farming first, then invest more heavily once automation such as automatic fertilizing is available or close.