Nuclear Epoch Guide: Beginner Route, First Base & What to Do Next
A practical Nuclear Epoch beginner guide for the first route, bus stop, Oasis base, B2 base placement, early gathering, first extraction habits, and choosing what to do next.
A practical Nuclear Epoch extraction guide covering evacuation point search, Safe Box priority, loot value, backpack weight, Toxic Crystal Jerky, element prep, armor repair, boss timing, and when to leave.
A practical Nuclear Epoch achievements guide with the full 73-achievement list, July 2026 unlock rates, early route, extraction goals, crafting walls, rare hidden achievements, and 100% planning advice.
Start Nuclear Epoch by following the tutorial instead of wandering early. Get healing, starter weapons, a backpack, finish the first resource run, build the bus stop, then move toward Oasis and Fluorescent Lake. For the first base, I use the lake route as the anchor and treat the right half of B2 below Fluorescent Lake as the strongest early candidate if the current map labels match. After that, choose your next problem: extraction safety, mid-game production, or achievement routing.
What This Nuclear Epoch Hub Is For
This page is the route map.
It is not trying to replace the focused guides. I use this hub when I need to answer the beginner question:
What should I do next?
The first hours of Nuclear Epoch can feel busy because the game starts opening extraction, base building, workbenches, weapons, iron, elements, farming, dragons, and achievements before all of those systems are equally urgent.
The safer route is to build a clean foundation first, then move into the detailed guide that matches the actual problem.
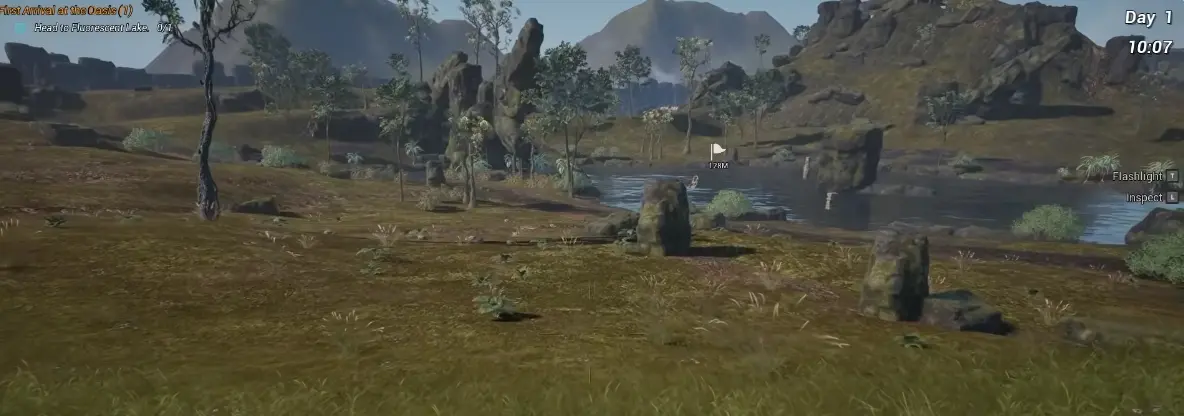
Oasis and Fluorescent Lake are the first real base anchor in this route. I treat this area as the point where tutorial survival turns into production planning.
Choose the Right Nuclear Epoch Guide
Use this table first. It keeps the hub from repeating every spoke.
Covers all 73 achievements, July 2026 unlock rates, hidden goals, and planning order
Beginner Route Summary
This is the route I would follow from the opening into the first stable base.
Stage
Main goal
What I do
What I avoid
Tutorial start
Get the basic kit
Follow the prompt, collect healing, weapons, ammo, backpack, and early route items
Wandering away before the starter route gives the basic tools
First resource run
Learn extraction pressure
Collect enough useful resources and leave safely
Treating the first run like a full clear
Bus stop
Move the route forward
Build it when the quest asks
Treating it like decoration
Oasis route
Reach the first real base anchor
Follow the route toward Fluorescent Lake
Building a scattered base too early
First base
Make a simple workflow
Use Fluorescent Lake as the anchor; consider the right half of B2 below the lake if your map matches
Decorating before production works
Early gathering
Keep basic materials moving
Use efficient tools for repeated gathering, especially a knife for Windblade Grass
Burning stamina with the wrong tool over and over
Workbench phase
Turn resources into progress
Build what the next quest or bottleneck needs
Crafting every visible recipe
Early mid-game choice
Pick the next problem
Choose extraction safety, production, or achievements
Trying to push every system at once
Start by Following the Tutorial, Not Fighting It
The opening section is not just a movement lesson.
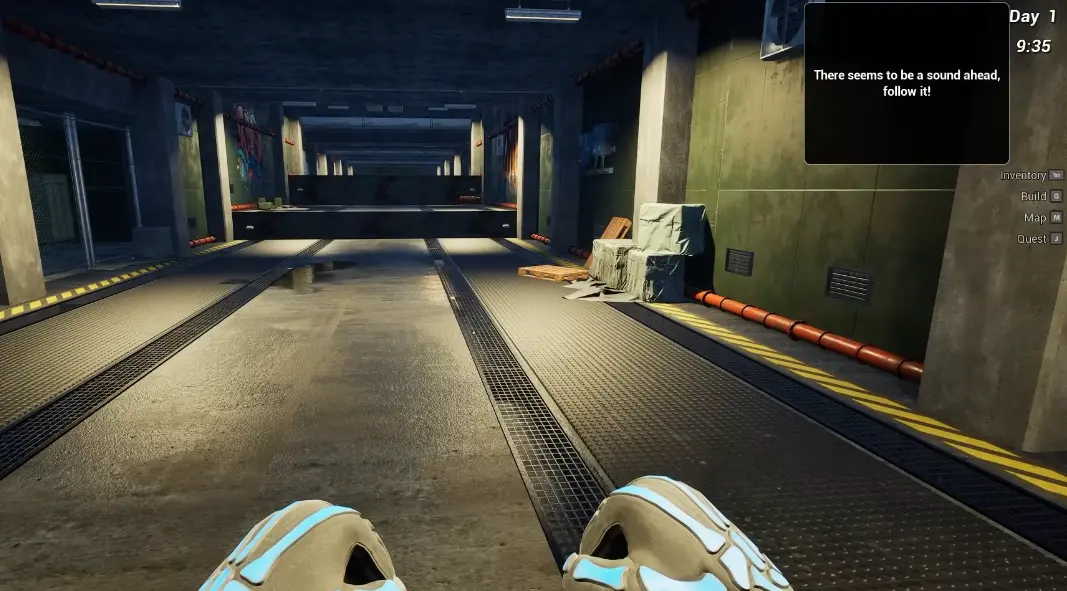
I use it to collect the first tools that make the rest of the game readable: healing, starter weapons, ammo, a backpack, and the idea that runs have risk. The prompt asks me to follow the sound ahead, so I do that instead of trying to freestyle immediately.
The first corridor is where I stop trying to outsmart the route. I follow the prompt, take the starter tools, and let the game lead me into the first real loop.
The first route gives me:
Early item or system
Why it matters
Healing
Mistakes are expected, and recovery matters early
Starter weapons
I need a safe way to handle weak enemies
Backpack
Inventory pressure appears almost immediately
First resource run
The game starts teaching risk and reward
Bus stop objective
The settlement route begins moving forward
Oasis direction
The first base location starts becoming obvious
First-Hour Gathering: Use the Right Tool
The first hour is not only about where to go. It is also about not wasting stamina.
For repeated grass gathering, especially Windblade Grass, current route notes recommend using a knife instead of a heavier tool. The reason is simple: the stamina cost is low, so one gathering loop lasts longer before I need to rest or eat stamina food.
I do not turn this into a full farming section here, because farming belongs in the mid-game guide. For the beginner route, the habit is enough:
Beginner gathering problem
Better habit
Windblade Grass takes too much stamina
Use a knife for repeated cutting
I keep running out of stamina mid-loop
Bring stamina food or shorten the loop
I am gathering everything randomly
Gather what the next base or quest step needs
I keep returning with the wrong materials
Name the target before leaving base
First Extraction Is a Lesson, Not a Full Clear
The first extraction teaches the main habit: loot only matters if I leave safely.
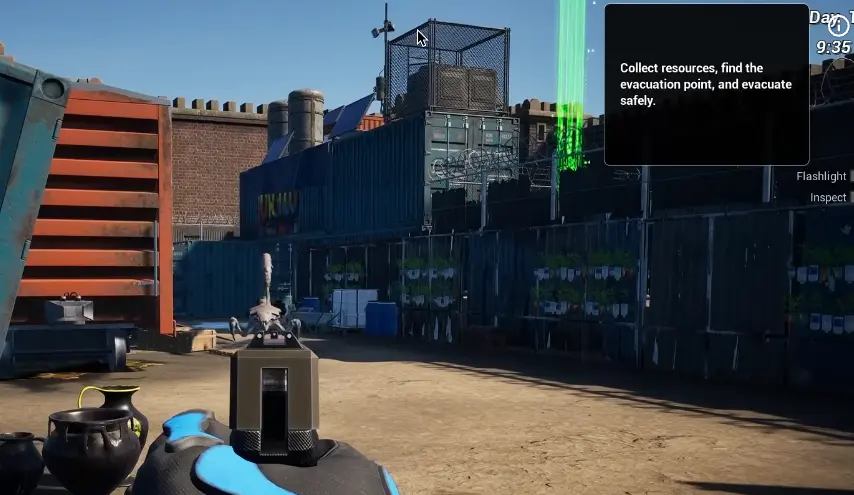
I do not turn the first run into a boss hunt or a complete sweep. I use it to learn that items have weight, the backpack has limits, the run has an exit condition, and greed can turn a good start into a failed return.
The first extraction already teaches the right mindset: collect resources, but keep the exit route in mind before the backpack becomes the problem.
The hub-level rule is simple:
First-run question
Beginner answer
Should I take everything?
No. Take what helps the next quest, base step, or craft
Should I fight everything?
No. Fight when it protects the route or the loot
Should I leave early?
Yes, if the run has already achieved its purpose
Should I learn every extraction detail here?
No. Use the focused extraction guide when this becomes the bottleneck
For evacuation points, Safe Box priority, loot weight, consumables, and turn-back rules, use How to Extract in Nuclear Epoch.
Build the Bus Stop, Then Commit to the Oasis Route
After the first resource run, the route starts pointing toward settlement building.
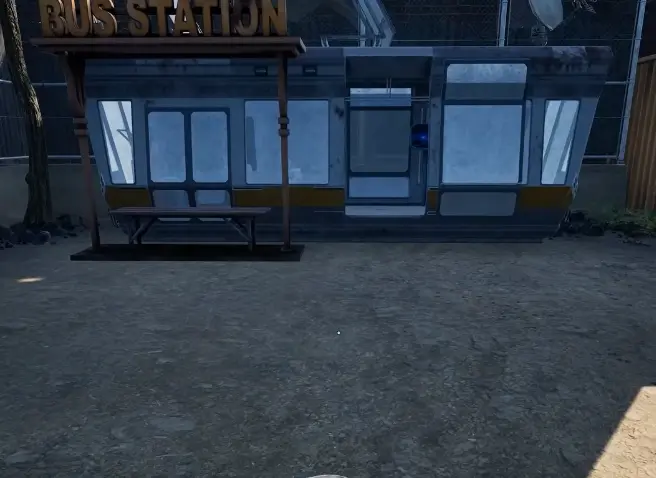
The bus stop is the signal that the game is no longer only about surviving the opening. It is now asking me to create a repeatable loop: leave base, gather or extract, return, process materials, then upgrade.
The bus stop moves the beginner route toward Oasis. I treat it as a progression step, not as optional decoration.
My next steps are:
finish the first resource run;
build the bus stop when asked;
follow the route toward Oasis;
use Fluorescent Lake as the first real base anchor;
check whether the right half of B2 below the lake fits your current map;
keep the base simple until production works.
First Base Location: Fluorescent Lake and the B2 Candidate
The early quest route points toward Oasis and Fluorescent Lake. I use that area as the first serious base anchor because it gives me a landmark, enough space to expand, and a natural place to start placing production pieces.
A more specific first-base candidate is the right half of B2 directly below Fluorescent Lake, if your current map labels and terrain match. Current beginner route notes repeatedly point to that area because it keeps the lake route close while helping with early resource pressure, especially copper and iron demand.
I treat this as a strong candidate, not a law. The goal is not to obey a coordinate blindly. The goal is to build close enough to the early route that every return trip supports production.
Base priority
Why it matters
Close to Fluorescent Lake
Keeps the first quest route and base anchor easy to read
Right half of B2 below the lake
Strong candidate if your map matches and you want a more precise starting point
Room for workstations
Saves rebuilding when weapons, smelting, and farming appear
Nearby early resources
Helps with copper, iron, wood, and routine base materials
Storage close to crafting
Prevents every return trip from becoming inventory cleanup
Expandable ground or foundation space
Makes later base growth less painful
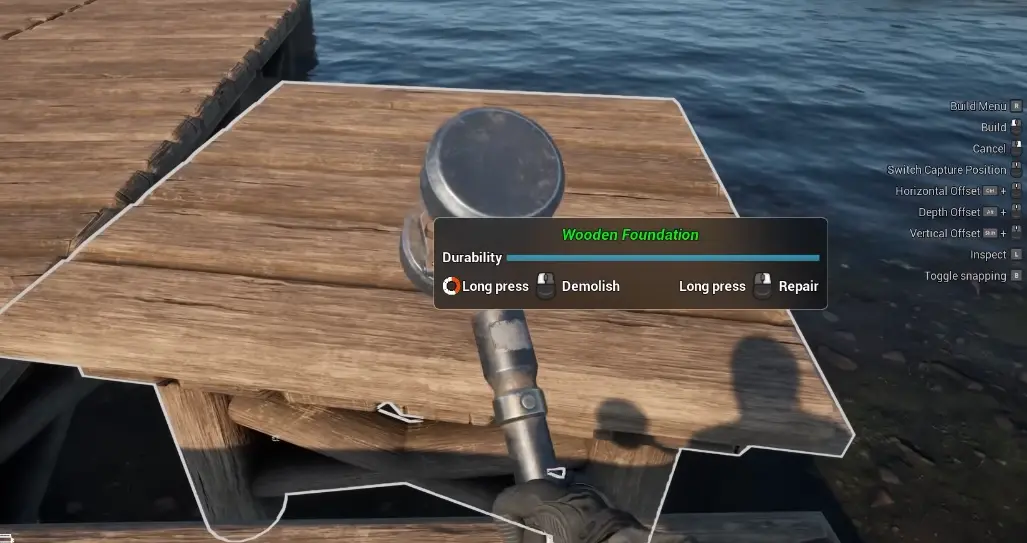
Building over water can help clean up the first base layout. I use foundation height and snapping controls to create a more expandable work area near the lake.
Resource Refresh: Do Not Wait Beside the Node
New players often ask why some resources seem to come back while others do not.
I do not treat resource refresh as a fixed timer that I can safely wait beside. Current route notes commonly describe refresh behavior around player movement and area changes: leaving far enough, re-entering an instance, or reloading can all affect what appears again.
For the beginner route, the practical lesson is simple:
What I notice
What I do
Nearby nodes are empty
Do another useful loop instead of waiting beside them
I need copper or iron again
Leave the immediate area, run a different task, then return
An instance has useful breakables or materials
Re-enter only when the route is worth the time
A resource route feels inconsistent
Do not build the whole plan around one node
A patch changes refresh behavior
Recheck the route instead of assuming an old timer still works
Workbench Priorities: Build for the Next Bottleneck
The early base starts feeling messy when I craft every recipe just because it appears.
I use a simpler rule:
Build the station that solves the next bottleneck.
If I need planks and bricks, I improve the basic workbench loop. If starter weapons are slowing every run, I move toward weapon crafting. If ore is piling up, I need smelting and storage. If every run ends with broken gear, armor and repair planning become more important.
The beginner route ends when I can answer these questions without guessing.
Question
Good enough answer
Where is my base anchor?
Oasis / Fluorescent Lake is set up as the first production area
Do I have a precise base candidate?
The right half of B2 below Fluorescent Lake is my first candidate if the map matches
Can I process basic materials quickly?
Workbench and storage are close enough that returning from runs is clean
Do I understand extraction risk?
I know not to overfill the backpack before I understand the exit route
Do I understand early gathering?
I use the right tool for repeated materials, such as a knife for Windblade Grass
Do I know my next bottleneck?
I can name whether it is weapons, iron, armor, elements, farming, or achievements
Am I ready for focused guides?
I know which problem needs a deeper page
Once those answers are clear, the hub has done its job. The next step is not “read more hub content.” The next step is choosing the spoke that matches the bottleneck.
Common Beginner Mistakes
These are the mistakes I would fix before worrying about rare systems.
Mistake
Why it hurts
Better habit
Wandering before finishing the starter route
You delay the basic kit and first base direction
Follow the prompt until the first loop is clear
Treating the first extraction like a full clear
You learn greed before you learn evacuation
Leave once the run has paid for the next step
Building only “near the lake” with no actual plan
The base can still become scattered
Use the B2-right-half candidate if your map matches, then build for workflow
Using heavy tools for repeated grass gathering
Stamina disappears faster than it should
Use a knife for repeated Windblade Grass loops
Waiting beside empty nodes
You waste time without improving the route
Cycle tasks, leave the area, or re-enter useful routes
Crafting every visible recipe
Materials disappear without solving a bottleneck
Build for the next problem
Ignoring storage layout
The base becomes annoying before it becomes powerful
Keep storage close to workstations
Rushing bosses on first visits
You risk gear before learning the zone
Scout first, commit later
Chasing achievements too early
Rare goals distract from base and extraction stability
Use achievements as direction, not pressure
What I Would Do Next
After the first base is stable, I choose one of three tracks.
Next track
Pick this when…
Focused guide
Extraction safety
You lose loot, get overweight, miss exits, or die after good starts
Full 73-achievement list, July 2026 unlock rates, route bands, rare hidden goals, and planning order
Final Beginner-to-Mid-Game Checklist
Before leaving the hub and pushing deeper, I want these boxes checked.
Check
Good enough answer
Tutorial route finished?
I have healing, weapons, backpack, and the first route complete
First extraction lesson learned?
I understand that loot only matters if I leave safely
Bus stop built?
The route has moved toward Oasis
Base anchor chosen?
Oasis / Fluorescent Lake is my first production area
Base spot narrowed?
I have checked the B2-right-half candidate below Fluorescent Lake
Workbench loop started?
I can process basic materials without fighting the base layout
Storage is usable?
Returning from runs does not turn into chest chaos
Early gathering improved?
I use a knife for repeated Windblade Grass and avoid wasting stamina
Resource loop understood?
I cycle routes instead of waiting beside empty nodes
Next bottleneck named?
I know whether I need extraction, mid-game production, or achievement planning
Focused guide chosen?
I am ready to move from route map to detailed problem solving
The whole beginner route comes down to one habit: make every run feed the next decision. If the next decision is evacuation safety, go to the extraction guide. If it is weapons, iron, armor, elements, farming, or dragons, go to the mid-game guide. If it is long-term cleanup, go to the achievements guide.
Nuclear Epoch FAQ
What should I do first in Nuclear Epoch?+
Follow the tutorial route until you have healing, starter weapons, a backpack, the first resource run, the bus stop, and the route toward Oasis and Fluorescent Lake. Do not wander too far before the game gives you the basic kit and base direction.
Where should I build my first base in Nuclear Epoch?+
The safest beginner route is to follow the quest toward Oasis and Fluorescent Lake. A useful first-base candidate is the right half of the B2 area directly below Fluorescent Lake, because current route notes point to it as a resource-friendly early location.
Why is B2 near Fluorescent Lake a good first-base candidate?+
It is close to the early Oasis and Fluorescent Lake route, gives room for a first production loop, and is commonly recommended because nearby resources can help with early copper and iron pressure.
What tool should I use for Windblade Grass?+
Use a knife if you are doing repeated Windblade Grass gathering. Current route notes recommend it because the stamina cost is low compared with heavier gathering tools.
Do resources respawn in Nuclear Epoch?+
Resource refresh behavior is commonly reported around leaving the area far enough, re-entering instances, or reloading. I treat this as a route habit rather than a fixed timer rule, because refresh behavior can change with patches.
Is this hub a full extraction guide?+
No. This hub explains when extraction becomes important and when to read the dedicated extraction guide. For evacuation points, Safe Box priority, loot weight, consumables, and turn-back rules, use the How to Extract guide.
Is this hub a full mid-game guide?+
No. This hub gets you from beginner route into early mid-game. For weapon leveling, element bonuses, advanced workbenches, farming, dragons, and furnace checks, use the Mid-Game Progression guide.
Which Nuclear Epoch guide should I read next?+
Read How to Extract if you keep losing loot or cannot leave safely. Read Mid-Game Progression if your base works but weapons, iron, armor, elements, farming, or dragons feel messy. Read Achievements Guide if you want the full list and route order.