How to Extract in Nuclear Epoch: Evacuation Point, Safe Box & Loot
A practical Nuclear Epoch extraction guide covering evacuation point search, Safe Box priority, loot value, backpack weight, Toxic Crystal Jerky, element prep, armor repair, boss timing, and when to leave.
Updated:
Quick Answer
To extract in Nuclear Epoch, do not treat the map like a normal loot sweep. I first scout for the evacuation point, keep the backpack light until I know how I am leaving, protect only one priority item in the Safe Box, then take loot that feeds the next base, weapon, armor, or element upgrade. The run is successful when I leave with useful progress, not when I touch every chest.
What This Extraction Guide Actually Answers
Most extraction mistakes do not happen because the player does not understand the word “extract.”
They happen because the player loots first, gets heavier, burns armor and ammo, then starts looking for the evacuation point too late. That is the real early card point: the map is not only asking whether you can fight. It is asking whether you can still leave after the fight.
This guide focuses on the decisions that matter during an actual run:
- how to search for the evacuation point;
- how to treat player-reported discovery behavior safely;
- what the Safe Box should protect;
- which loot is worth carrying;
- when weight becomes a problem;
- which consumables solve real extraction problems;
- how element prep changes Flame, Poison, Thunder, and Ice routes;
- when to turn back;
- when a boss run is worth planning;
- how extraction value connects to achievements.
Evacuation Point Search: Scout Before You Get Heavy
Some player notes describe proximity-based discovery behavior for evacuation points and merchants, including rough 30m / 40m discovery ranges. I do not write those numbers as fixed rules here because I have not verified them with a current in-game screenshot.
The useful takeaway is still practical: if the evacuation icon is not obvious, I stop deep looting, stay light, and scout the likely route before taking bulky resources. Once I know how I am leaving, I loot around the route back to safety.
| Search clue | How I use it safely |
|---|---|
| Visible evacuation icon | Route toward it early before heavy looting |
| Missing or hidden icon | Stay light and scout instead of filling the backpack |
| Map or selection hint | Treat it as a reason to scout, not as a guarantee that the run is safe |
| Possible merchant route | Check it while the backpack is still manageable |
| Repeated map pattern | Learn common room types and exit directions over multiple runs |
| Higher difficulty | Assume the run may hide information until I move closer or scout more |
Map Layouts Are Learnable, Not Pure Chaos
Extraction maps can feel random, but I do not treat each run like a totally new maze.
The room order or segment flow can feel different, but repeated runs still teach useful patterns: where dangerous rooms tend to appear, where containers are worth checking, when the route is leading deeper, and where I should stop looting and turn toward extraction.
| What can feel different | What I still learn |
|---|---|
| Room or segment order | Common room shapes and danger patterns |
| Enemy pressure | Which fights are worth taking |
| Container placement | Which rooms are worth checking for iron, ammo, or stones |
| Exit visibility | Whether I should scout before looting |
| Boss route access | Whether this run is a scout, farm, or boss attempt |
A scouting run is not wasted if it teaches the exit route, merchant path, enemy pressure, or room pattern. That knowledge makes the next farm or boss attempt safer.
First Extraction Route: Do This Before Greed Starts
The first extraction teaches the order of operations:
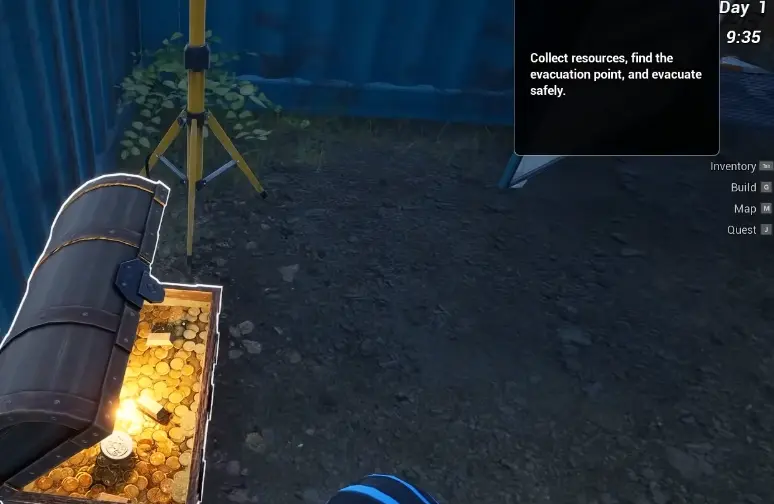
Collect resources, find the evacuation point, and evacuate safely.
I treat this first run as a route lesson, not a full clear. I take useful resources, watch weight, check the evacuation direction, and leave once the run has paid for the next base step.
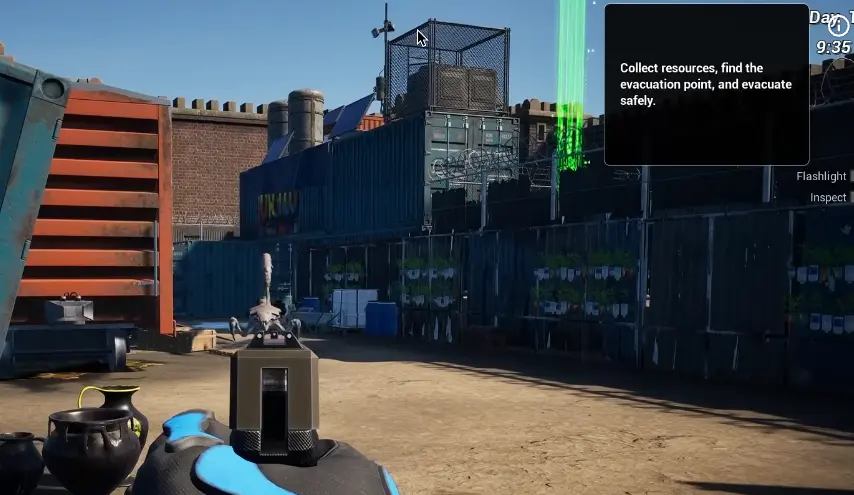
My first extraction path is:
| Step | What I do | Why |
|---|---|---|
| 1. Enter and read the objective | Confirm this is a resource and evacuation run | Prevents me from turning the first run into a boss hunt |
| 2. Find the exit direction early | Look for the evacuation route before deep looting | Stops the backpack from becoming the problem |
| 3. Take only useful early resources | Prioritize stone, logs, ore, ammo, healing, and compact value | These feed the first base and crafting loop |
| 4. Save the Safe Box for priority loot | Do not fill it with common materials too early | Early protected space is tiny |
| 5. Leave when the run pays for the next step | Extract before armor, weight, or ammo collapses | A safe partial run is better than a full failed run |
The first card point is not “Can I kill everything?” It is “Can I leave with the item that moves the next upgrade?”
Safe Box Priority: One Protected Choice
The Safe Box is not a second backpack.
Early on, the Safe Box is tiny, so I decide what it is for before I get greedy. If I am entering a run for one rare material, I do not waste the protected slot on ordinary stone just because I found it first.
| Item type | Safe Box priority | My judgment |
|---|---|---|
| Quest-critical item | Very high | Protect it if losing it blocks the next step |
| Rare boss or zone material | Very high | Usually better than protecting common resources |
| Compact high-value loot | High | Good when it does not block a rarer item |
| Iron ingot or key crafting material | Medium to high | Depends on how badly the next upgrade needs it |
| Ammo stack | Medium | Useful if ammo is scarce, but not always the best slot |
| Stone, logs, common food | Low | Heavy or easy to replace |
| Gear you should not have brought | Warning sign | If I feel forced to protect it, maybe it should have stayed home |
Weight and Value: The First Real Loot Check
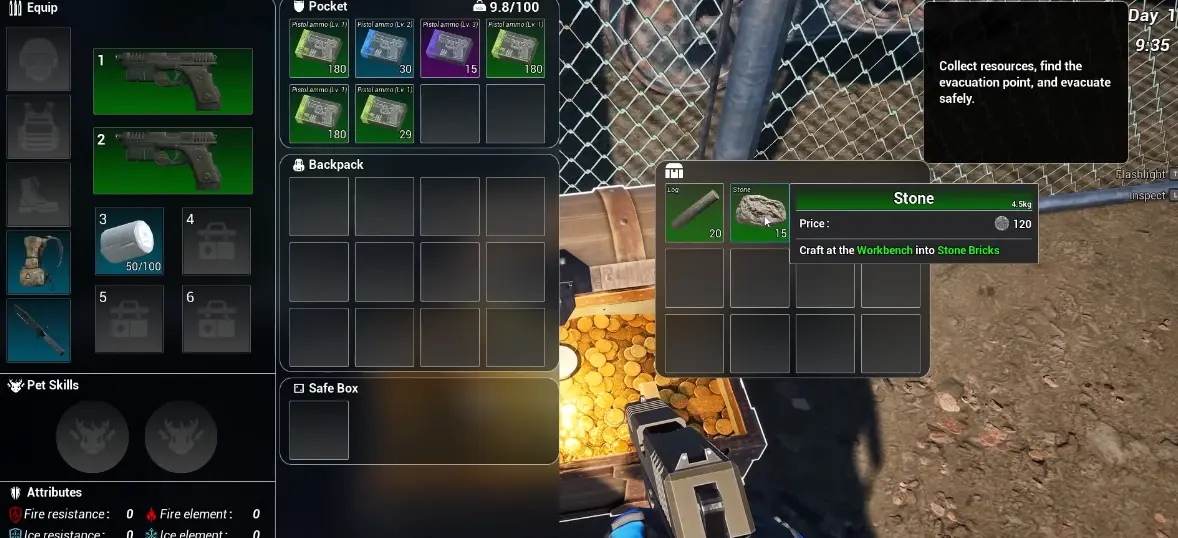
The first extraction inventory gives useful current-version numbers: the character is at 9.8 / 100 carry load, and a basic Stone shows 4.5kg weight and 120 price.
That is enough to show why “take everything” is not a real strategy. Ten heavy common items can make the route worse before the loot is valuable enough to justify the risk.
| Loot choice | Keep when… | Drop or skip when… |
|---|---|---|
| Stone / logs | You need early base materials | The exit is unknown and the pack is getting heavy |
| Iron ore / ingots | You are feeding weapon, armor, or research costs | You already have the target amount and risk is rising |
| Ammo | It supports this run or the next run | It is low-tier excess and blocking rare loot |
| Food / consumables | It keeps you alive or supports the zone | It is generic filler and the pack is full |
| Rare material | Almost always | Only if you cannot survive the exit route |
| High-value compact item | It beats common resources by value and weight | It blocks a quest-critical or rare item |
| Random heavy gear | It solves an immediate gear problem | It is only “maybe useful someday” |
My decision is not value alone. It is value plus distance to the exit, current armor, current ammo, and whether the run has already achieved its goal.
What to Bring Before an Extraction
I do not bring the same loadout to every extraction.
A scout run, farm run, boss run, and recovery run need different risk levels. The mistake is packing for “everything” and then realizing the backpack is full before the run has a real purpose.
| Run type | What I bring | What I leave behind |
|---|---|---|
| First visit / scout | Basic weapon, enough ammo, healing, usable armor, empty backpack space | Rare materials, expensive backup gear, extra valuables |
| Resource farm | Reliable weapon, enough ammo, repair kit if needed, target list | Random items that do not feed the route |
| Boss attempt | Repaired armor, stronger weapon, correct element, healing, stamina support, food buff | Low-value resources that clog space |
| Merchant check | Coins or items I plan to trade, safe loadout | Best gear unless the route is dangerous |
| Recovery run | Cheap gear and only what I can afford to lose | Anything I would hate to lose again |
Consumables: Bring Roles First, Then Named Items
I do not pack food randomly.
For extraction, consumables need jobs: fast healing, stamina support, status cleanse, elemental resistance, and armor repair. If an item does not solve one of those problems, I usually leave it at base unless I have a specific reason to carry it.
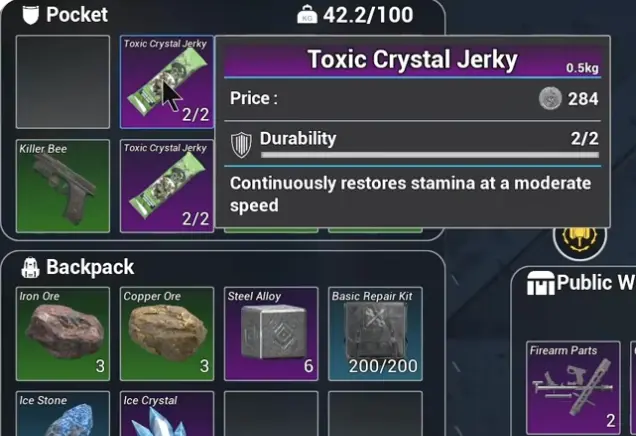
Toxic Crystal Jerky is the clearest current-version stamina example I have verified. Its tooltip shows 0.5kg weight, 284 price, 2/2 durability, and the effect: continuously restores stamina at a moderate speed.
| Consumable role | What it solves | When I bring it |
|---|---|---|
| Fast healing | Recover after a bad hit or during combat | Serious extractions and boss attempts |
| Stamina support | Keep sprinting, dodging, and retreating safe | Long routes, boss runs, and maps where movement matters |
| Status cleanse | Remove abnormal status buildup or active debuffs | Poison or debuff-heavy zones |
| Elemental resistance food | Reduce zone-specific pressure | Ice, Flame, Thunder, or Poison pushes |
| Repair kit | Keep armor usable before the exit or boss | New zones, boss attempts, or already-damaged armor |
| Compact emergency food | Buy time when healing is low | Runs where I expect mistakes or long fights |
Element Prep: Do Not Enter Every Zone With the Same Gun
Element prep is one of the first places where extraction stops being only about raw damage.
The strongest verified example in my current route is Emergency Protocol. The quest teaches that attribute materials can be placed on the right side of the firearm crafting panel, and it directly recommends ice-type support before entering Extreme Flame Land.
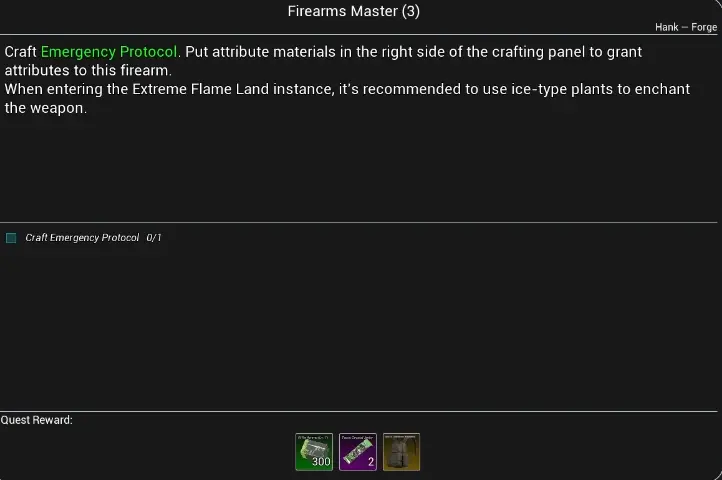
That is the rule I am comfortable writing firmly: if I am preparing for Extreme Flame Land, I want ice or frost support, enough ammo, and repaired armor before I turn the run into a serious push.
Other element relationships should still be checked against the current tooltip before I spend rare alloys. Some player-route notes describe poison and thunder as opposing element directions, but I do not treat that as the same evidence level as the Ice-before-Flame quest text.
| Next problem | What I prepare | Evidence level |
|---|---|---|
| Extreme Flame Land | Ice / frost weapon support, repaired armor, enough ammo | Strong: quest text directly points toward ice-type preparation |
| Temple / first clears | Stable weapon, ammo, healing, and exit discipline | Safe: use Temple to learn extraction before relying on element counters |
| Extreme Ice Land | A non-frost main plan, enough ammo, and an early exit route | Safe practical rule: do not bring frost-only damage into an ice-focused area |
| Poison or debuff-heavy routes | Status cleanse, resistance food, healing, and safer exit planning | Safe practical rule: status pressure can be as dangerous as raw damage |
| Thunder or poison matchups | Check the current tooltip before spending poison or thunder alloy | Medium: supported by route notes, but not screenshot-verified here |
| Boss attempts | Correct attribute support where verified, repaired armor, healing, and enough ammo | Practical boss rule: element prep matters most when the fight is expensive |
When to Turn Back
I turn back when the run has already paid for the next upgrade, or when one more room would risk the useful loot I already have.
| Turn-back signal | Why I leave |
|---|---|
| Evacuation route found and useful loot secured | The run has already succeeded |
| Armor damage changes fight quality | Every enemy now costs more |
| Ammo is below retreat comfort | A bad hallway can become fatal |
| Weight is changing movement or loot decisions | The backpack is now part of the danger |
| I have not found the exit yet | I stop deep looting and scout outward |
| The next fight is only optional value | Optional value is not worth a failed extraction |
| The route is pulling me deeper without a clear reward | I leave before curiosity becomes a loss |
| The run goal is complete | More loot is not always more progress |
A safe extraction with iron, ammo, value, or a rare material is better than a failed run with a full backpack.
Boss Runs: Scout First, Boss Later
A boss attempt should be planned before departure.
I do not walk into a new zone, find the boss route by accident, and decide that the current farming loadout is suddenly a boss loadout. That is how armor, ammo, and rare gear get wasted.
| Boss check | Good answer |
|---|---|
| Exit known? | I know how to evacuate after the fight or after a failed attempt |
| Armor repaired? | It is good enough for burst damage and mistakes |
| Ammo enough? | I can fight and still retreat |
| Element matched? | The weapon, food, or attribute plan fits the zone |
| Healing ready? | I can survive more than one mistake |
| Status handled? | Poison or abnormal buildup has a cleanse plan |
| Can I afford the loadout? | Losing the gear would not break my progression |
If I entered the map to gather iron, stones, seeds, or ammo, I only turn it into a boss attempt when the loadout already passes this checklist.
Armor Repair Changes the Cost of a Run
Armor is part of the extraction economy.
Repair kits can restore armor enough to keep running, but I still treat armor as replaceable gear. A run that damages armor badly costs more than ammo and healing. It may also delay the next zone because I need iron, coins, or materials to repair or replace the set.
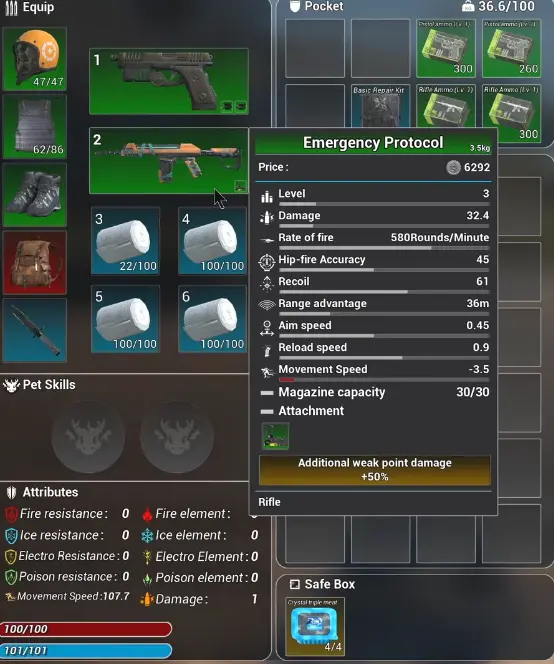
My armor judgment:
| Situation | What I do |
|---|---|
| Learning a new zone | Wear usable gear, but do not risk the best set blindly |
| Farming easy materials | Use cheaper or already-worn gear if enemies are manageable |
| Boss attempt | Repair first and bring healing |
| Maximum durability is dropping | Start planning replacement instead of endless repair |
| Armor is weak mid-run | Stop deep looting and route toward extraction |
| Iron is already tight | Think before crafting a full replacement immediately |
Ice Runs: Containers Are Part of the Route
Once I reach Land of Extreme Ice, I do not only chase enemies.
Jars and containers can turn an Ice run into an iron, stone, ammo, and material route. That matters because mid-game upgrades start draining ingots, and a single armor piece can represent a large raw ore cost once smelting is involved.
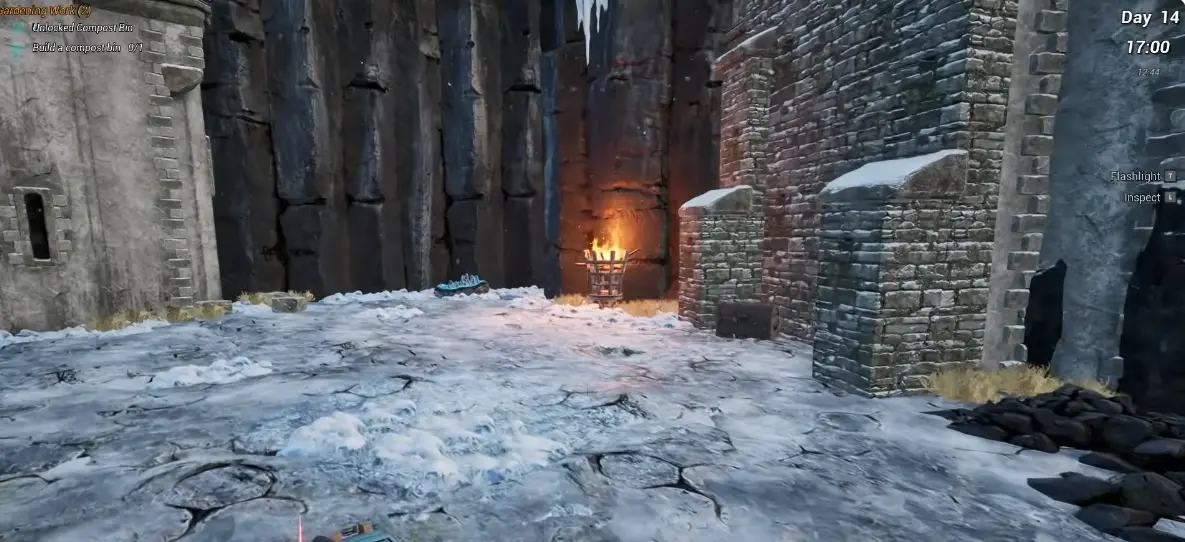
When I farm Ice, I look for:
| Target | Why it matters |
|---|---|
| Iron ore or ingots | Weapons, armor, and upgrades drain iron quickly |
| Ice stones / crystals | Can feed elemental or farming-related progression |
| Ammo | Reduces crafting pressure before the next run |
| Seeds and attribute materials | Supports farming and element prep |
| Exit route | Loot only matters if I can leave |
| Boss route knowledge | Useful later, but not required on the first farming pass |
Extraction Value Still Matters, But It Is Not the Goal
Extraction value matters for achievements and long-term cleanup, but I do not treat it as the main reason to overstay a run.
The current achievement list includes extracted-value milestones, so value is worth tracking over time. For an actual extraction route, though, the better question is simpler: did this run bring back the material, ammo, rare item, or value that moves the next upgrade?
Common Extraction Problems and Fixes
This table keeps the repeated mistakes in one place.
| Problem | What is really happening | Fix |
|---|---|---|
| I cannot find the evacuation point | You started looting before treating the run as a route search | Stay light, scout outward, and confirm the exit before deep rooms |
| The minimap does not help enough | The run may require discovery, route knowledge, or difficulty-specific scouting | Do not wait until overweight to start searching |
| I always get overweight | You are carrying common heavy resources too early | Take goal materials first; drop stone or log filler when risk rises |
| Safe Box feels too small | You are using it like storage | Reserve it for one quest-critical, rare, or compact high-value item |
| I die after a good start | You stayed after the run had already paid off | Set a leave condition before entering |
| Bosses feel unfair | You are turning scout or farm runs into boss runs | Scout first; boss with repaired armor, ammo, healing, and element prep |
| Poison routes feel worse than expected | Status buildup or debuffs are not being handled | Bring cleanse, resistance food, and safer exit planning |
| Flame zone feels too tanky | You may be missing Ice or frost support | Prepare Ice-type weapon materials or ice-type plants before pushing |
| Runs feel profitable but progression stalls | The loot is not feeding the next upgrade | Choose a target before departure: iron, ammo, value, rare material, or boss drop |
Related Nuclear Epoch Guides
Use this extraction guide when the problem is getting in and out safely. Use the other pages when you need to decide what the run should feed next.
| If you need help with… | Read this |
|---|---|
| Overall route from Day 1 to early mid-game | Nuclear Epoch Guide |
| Iron, weapon crafting, armor, alloys, farming, and zone prep | Nuclear Epoch Mid-Game Progression |
| Achievement thresholds, rare goals, and hidden achievement warnings | Nuclear Epoch Achievements Guide |
Final Extraction Rule
My final rule is simple:
Discover the exit before you start gambling.
Player notes may point to useful proximity-discovery behavior, but the route does not depend on memorizing an unverified number. The reliable habit is to scout while light, protect the one item that matters most, choose loot by the next upgrade, and leave when the run has already paid for itself.
That is how extraction turns into steady progression instead of a long list of almost-good runs.
FAQ
How do you extract in Nuclear Epoch? +
Enter the extraction area, collect useful resources, find or discover the evacuation point, then leave safely. The most important habit is to search for the exit before your backpack becomes heavy or your armor gets worn down.
How do I find the evacuation point in Nuclear Epoch? +
Treat the run as a route search before treating it as a full loot clear. Scout while you are still light, watch the minimap and route direction, and confirm how you are leaving before you commit to deep rooms or boss paths.
Why can I not see the evacuation point on the minimap? +
Some extraction information can depend on discovery, map state, or difficulty. If the icon is not obvious at the start, stay light, scout safely, and avoid filling your inventory before you know the exit route.
What should I put in the Safe Box? +
Use the Safe Box for the item you would hate to lose most: a quest-critical item, rare material, compact high-value item, or important drop. Do not waste early protected space on common stone, logs, or bulky low-value loot.
What consumables should I bring into extraction runs? +
Bring consumables by role: fast healing, stamina support, status cleanse, elemental resistance food, and a repair plan for armor. Toxic Crystal Jerky is a verified stamina-support example in the current version.
Is Toxic Crystal Jerky useful in Nuclear Epoch? +
Yes. In the current version, Toxic Crystal Jerky weighs 0.5kg, has a price of 284, has 2/2 durability, and continuously restores stamina at a moderate speed.
Should I fight the boss on my first run in a new zone? +
Usually no. On a first visit, find the evacuation route, learn enemy damage, check useful loot, and leave safely. Come back for the boss with repaired armor, enough ammo, healing, and the right element.
What is the safest extraction rule? +
Leave when the run has already paid for the next upgrade. A safe extraction with iron, ammo, value, or a rare material is better than a failed run with a full backpack.