MechWarrior 5 Ashes and Ascension Complete Walkthrough
Complete the 18-mission Ashes and Ascension campaign through Matamoras, Janette, Hanover, Bangor, and Albiero, with mission objectives, repair deadlines, and survival strategies.
Updated:
Quick Answer
Follow Matamoras → Janette → Hanover → Bangor → Albiero to complete Operation Bulldog.
Before each deployment, check Days to Launch against your repair queue. Janette’s reconnaissance mission requires 9 enemy ‘Mech identifications, not 9 kills. Later, preserve enough combat-ready machines to survive Bangor’s consecutive operations and reach Albiero’s final spaceport battle.
The most dangerous part of Ashes and Ascension is often the mission you have to launch after the one you just survived.
Operation Bulldog takes you through five campaign locations across 18 missions. The drop limits rise, Clan opposition grows stronger, and your company begins acquiring equipment that would be extremely valuable if there were enough time to repair and field it. Sometimes there isn’t. A badly damaged heavy ‘Mech can survive one operation only to remain unavailable throughout the next several deployments.
The campaign also changes objectives frequently. Reconnaissance gives way to assaults, commander hunts, defensive battles, and finally the attempt to prevent the Smoke Jaguars from escaping Albiero. Killing another enemy is not always the action that advances the mission.
If you have not started Operation Bulldog, complete the Ashes and Ascension start requirements first. Once Matamoras begins, follow the objective changes and deployment windows below.
Matamoras Pt.1 — 190-ton drop
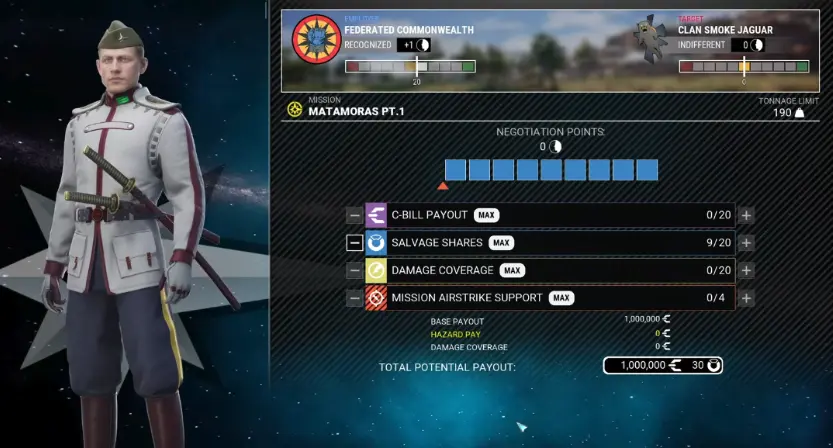
The opening Matamoras contract has a 190-ton drop limit. Smoke Jaguar raiders are threatening the SLDF staging area, and your lance must move through the canyon to eliminate the hostile forces blocking the operation.
The negotiation screen can show 9/20 Salvage Shares with a base payout of 1,000,000 C-Bills. The available salvage matters, but the first battle is also where you should begin protecting the equipment already installed on your machines.
Follow the marked contacts through the canyon and engage each Jaguar group blocking the route. Bring the full lance into firing range before committing to the heavier targets. If one friendly machine becomes the focus of several enemies, move it out of the lead and let another lancemate absorb the next exchange.
Watch side-torso and arm damage. A surviving chassis with its main weapons destroyed may require more work than the next deployment allows.
After clearing the required opposition, withdraw. Do not keep fighting simply because additional contacts remain on the battlefield.
Matamoras Pt.2 — 200 tons and only 3 days to launch
Matamoras Pt.2 increases the drop limit to 200 tons, but gives you just 3 days before the next mission.
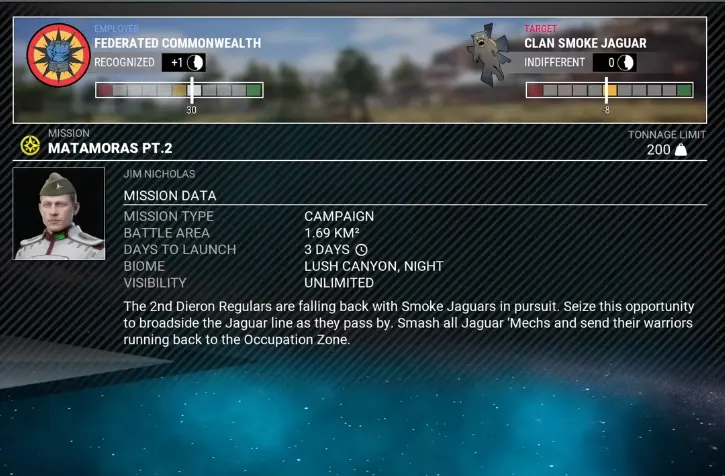
A repair lasting 12 or 15 days will not help this drop. A severely damaged ‘Mech requiring 32 days is unavailable for the immediate operation, even if you can afford the bill.
Check which machines are already combat-ready, then complete only the work that can finish within the remaining three days. Armor repairs and minor component replacements may still be possible. Major reconstruction and extensive refits can wait.
The 2nd Dieron Regulars are withdrawing while the Jaguars stretch their line in pursuit. Move toward the interception point, allowing the allied force to draw enemy units into the engagement area.
Once the first group breaks, follow the next mission objective rather than assuming the operation is complete.
Repair facilities appear during the battle. Use an available repair opportunity when a machine has already lost substantial protection or is in danger of losing an important weapon. Preserving that machine now reduces the chance that the next assignment begins with an incomplete roster.
Continue through the marked objectives until extraction becomes available.
Janette Recon — find and target all 9 enemy ‘Mechs
Janette begins with a reconnaissance operation rather than a conventional assault.
The mission has a 220-ton limit and two important conditions:
Primary objective: Find and Target Enemy ‘Mechs — 0/9
Optional objective: Evac Without Raising a General Alarm
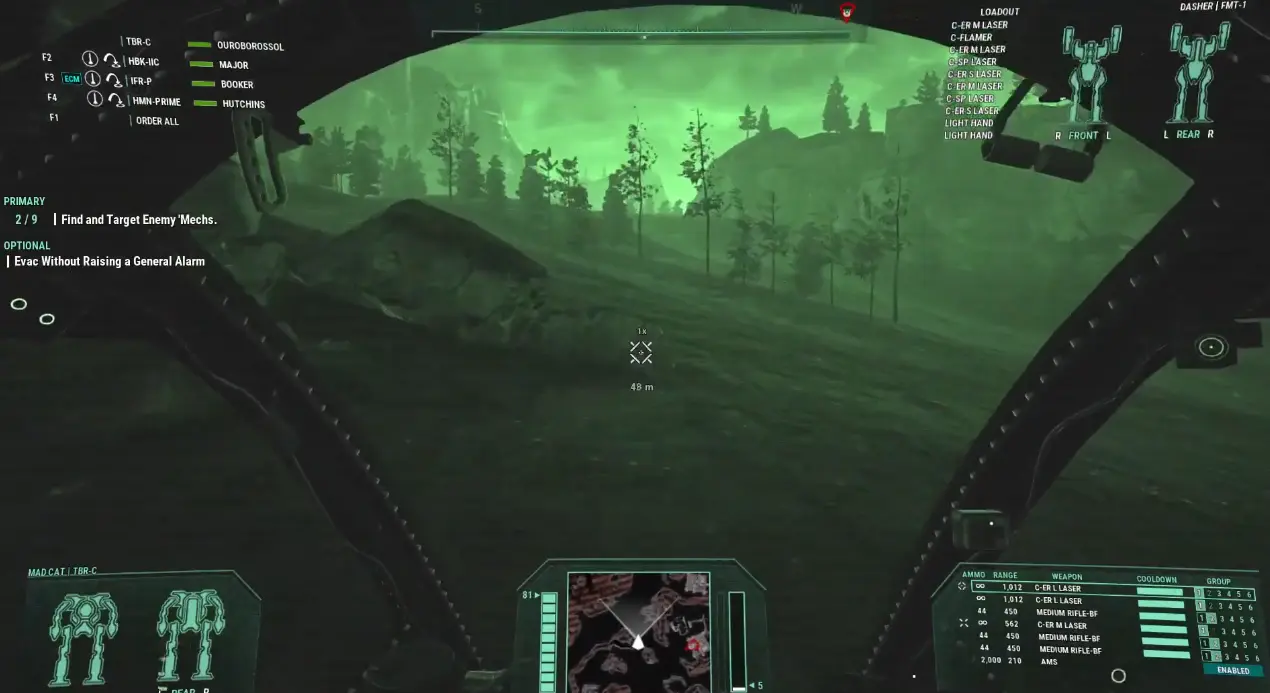
Take a faster machine capable of moving between enemy positions without remaining exposed for long. Poor visibility makes it difficult to identify the final contacts, so rely on the objective counter rather than attempting to clear every visible group.
Acquire an enemy ‘Mech until the identification counter advances. Continue around the perimeter toward the next group and keep your slower lancemates from drawing unnecessary attention.
Destroying an isolated enemy does not necessarily trigger the general alarm, but repeated engagements can turn the reconnaissance operation into a much larger fight.
The safer sequence is to identify each group, avoid remaining in enemy formations, and continue until the counter reaches 9/9.
If the alarm triggers, the optional condition may already be lost. Finish the remaining identifications and return to friendly territory when instructed.
An optional high-value pickup can also be encountered during the reconnaissance sweep. Check its marker before moving past it, but avoid returning through hostile positions after the extraction order appears.
Before the next Janette operation — repair against the 7-day deadline
The next Janette deployment can arrive after just 7 days.
That creates an immediate problem when a badly damaged or newly acquired Clan chassis requires around 60 days to repair.
Even if the machine would make your lance considerably stronger, it cannot fight in a mission that starts before its work order finishes.
Use the seven-day window on damaged armor, missing weapons, ammunition, and repairs that will return an existing machine to service.
Keep at least one usable reserve available. A company with four powerful machines under repair and no replacements is in a worse position than a company with several ordinary but operational machines.
Janette — clear the Nova Cat positions
The reconnaissance results expose Nova Cat positions and supporting infrastructure. The next operation sends your lance through several marked objectives while friendly units perform their own assignments.
Poor visibility remains a problem. Advance toward the designated waypoint rather than charging directly toward the farthest detected contact.
Wait until your lancemates have reached the engagement area before concentrating fire on the next Clan target. A fast machine that advances alone can draw fire from enemies the rest of the lance cannot yet engage.
Friendly forces can help absorb pressure during the operation. When one of your machines begins taking structure damage, pull it back toward those forces instead of advancing deeper into the hostile position.
Continue following the marked objectives until the required positions are secured.
Preserve ammunition and avoid unnecessary engagements. Janette still has another major confrontation ahead.
Janette finale — defeat Gregor Nostra and his Star
Captured bondsmen identify Star Colonel Gregor Nostra as the Nova Cat commander.
Nostra pilots a Supernova, but defeating his machine alone is not sufficient to complete the objective.
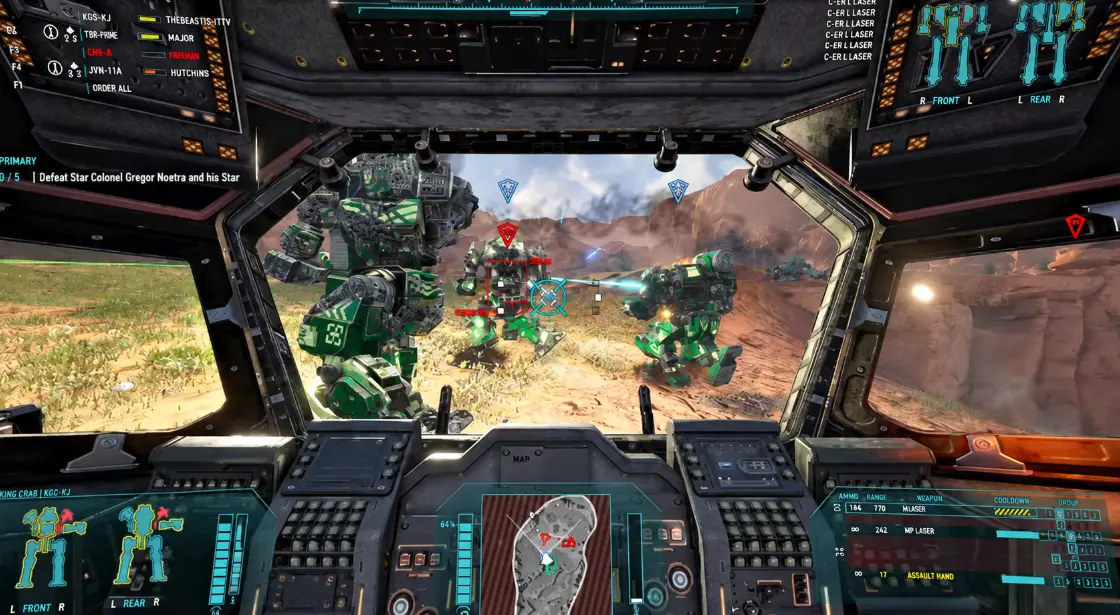
The objective reads:
Defeat Star Colonel Gregor Nostra and his Star — 0/5
Advance into the designated area and eliminate the required contacts until the confrontation develops.
Avoid focusing exclusively on the Supernova while the other four Clan machines are still able to attack your lance. Concentrated incoming fire can remove an arm or expose a side torso before you finish Nostra.
Remove whichever Star members are creating the most immediate pressure, then shift fire toward Nostra when you have a safer firing angle.
Keep moving laterally and use terrain to protect exposed components. The encounter ends only when the objective reaches 5/5.
After the Star is defeated, the Nova Cats accept the result and the strike force prepares to leave Janette.
Departing Janette — use the 20-day trip to Hanover
The transition gives a concrete travel window:
Depart from Janette — Duration: 20 Days
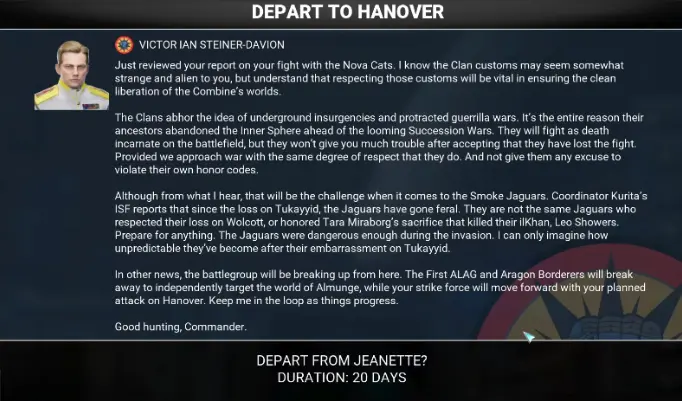
A machine requiring 23 days of repairs already misses this window. A heavily damaged Clan assault ‘Mech that needs several months of reconstruction belongs in a longer-term project, not the immediate Hanover lineup.
Prioritize restoring machines that are already close to operational condition. Replace destroyed primary weapons, check ammunition compatibility, and preserve your remaining funds for the missions ahead.
There is little benefit in rebuilding a powerful new chassis if the repair consumes your budget and leaves the rest of the company unable to launch.
Hanover beachhead — 260-ton landing operation
The first Hanover deployment increases the limit to 260 tons and places your lance at the front of the SLDF landing force.
The operation advances through several objectives:
- Destroy the marked radar and satellite installations.
- Move into the enemy garrison and secure the target area.
- Destroy the newly identified artillery batteries.
- Return toward the landing-zone defense.
- Hold while the allied Dropships descend.
The first priority is the installations controlling the enemy position. Follow their markers and remove them before committing the lance to fights unrelated to the objective.
After securing the garrison, check for an updated artillery target. Another emplacement can become active after the previous group is destroyed.
When the objective changes to defending the landing zone, stop advancing toward distant enemies. Hold near the designated area and allow hostile forces to enter overlapping firing arcs.
The larger Jaguar force can inflict substantial damage if your lance becomes separated. Keep the heavier machines together and use the repair opportunities available during the operation.
Blue battlefield pickups may provide ammunition rather than fixed high-value rewards. Collect an ordinary pickup when it is convenient or when ammunition is becoming a problem, but do not expose a damaged machine just to investigate every recovery marker.
Hanover head-hunter operation — kill the target, then regroup
The next Hanover operation changes the combat rhythm.
House Dai Da Chi holds the Jaguar line while command identifies likely officers. Your lance is assigned to eliminate those commander candidates.
After a marked commander is destroyed, the objective changes to:
Disengage and regroup at the marked waypoint.
Do not remain in the center of the battle waiting for another target to appear.
Move toward the marked officer, concentrate fire until the target is destroyed, and immediately withdraw to the regroup point. Command may then identify another candidate and repeat the sequence.
Killing one commander does not necessarily end the operation. If Jaguar resistance continues, another target may be selected.
Long-range weapons help here because they allow you to remove priority targets without moving the entire lance through the heaviest concentration of enemy fire.
When friendly forces can no longer maintain the engagement and withdrawal becomes the objective, stop fighting and move toward extraction.
Hanover counteroffensive — 280 tons, Target Alpha and Bravo
The Hanover counteroffensive raises the drop limit to 280 tons.
While the Crater Cobras draw Jaguar forces away, your lance must strike two exposed enemy positions.
Begin by advancing toward Target Alpha. Destroy the screening force and move into the objective area until the mission updates.
Then proceed toward Target Bravo.
Extreme weather interferes with sensors, so expect short-range contact even when the radar appears quiet. Do not assume a route is clear simply because enemies are not currently marked.
The diversion creates an opportunity to reach both objectives. Spending too much time chasing unrelated enemies increases the chance that hostile forces return before your operation is finished.
Once the objective changes to withdrawal, leave the battlefield. The campaign can provide only 6 days before another briefing, making additional damage particularly expensive.
Hanover aftermath — rescue the Crater Cobras
The counteroffensive does not leave the Crater Cobras in a good position.
Their battalion has suffered severe damage, and Captain Shelly Ruddau’s surviving force is sheltering among civilian buildings while awaiting evacuation support.
Your immediate assignment is to reach the Cobras, reinforce their position, and drive the Smoke Jaguars back long enough for the wounded to escape.
Treat this as a rescue and defensive operation, not a search for additional salvage.
Move into supporting range of the friendly position and engage the Jaguar units threatening it. Hostile ground vehicles are part of the pressure, so do not focus exclusively on enemy ‘Mechs while vehicles remain close to the defenders.
The important objective is to create an evacuation window.
A repair facility is available during this engagement. Use it before continuing if a key machine has already sustained serious damage. Losing another primary weapon here could leave your company unable to field that machine at Bangor.
When the enemy force has been pushed back and the withdrawal objective appears, move toward the rendezvous point instead of remaining in the area.
This is the point where Operation Bulldog begins to punish a company that has relied on the same four machines for every mission.
Bangor — prepare for the third invasion wave
After Hanover, Operation Bulldog moves toward Bangor.
The campaign briefing explains that Smoke Jaguar forces have begun counterattacks on other worlds in an effort to divert the SLDF. Bangor appears vulnerable because part of its normal defending force has been identified elsewhere.
That does not mean the upcoming operations will be easy.
Your company may arrive with damaged machines, injured pilots, insufficient replacement weapons, and Clan chassis that are technically owned but remain unusable.
Before entering the next operation, check the ready roster instead of selecting the heaviest machines in storage.
A salvaged Dire Wolf can still need months of repairs. Expensive Clan equipment may also be available in the market while your company lacks the C-Bills or time to make use of it.
For the immediate operation, preserve reliable damage output, working ammunition supplies, and enough armor to survive concentrated Clan fire.
The next series of missions gives limited opportunities to recover from mistakes.
Bangor landing — break through the blockade
The first Bangor operation begins while SLDF naval forces are attempting to break through the Smoke Jaguar blockade around Bangor IV.
Your Leopard must reach the surface while allied aerospace forces keep enemy warships occupied.
The deployment can begin without another meaningful repair window. Check the available machines and their ammunition before accepting the drop.
Once deployed, move toward the friendly forces and follow the marked landing objectives.
The operation brings Jaguar units into the engagement area while allied Dropships attempt to reach the surface. Destroy the enemies threatening the landing force and stay close enough to respond when new contacts appear.
The important decision is whether to pursue distant enemies or remain positioned to support the landing.
As new hostile contacts arrive, prioritize those attacking the immediate objective. Keep your lance moving rather than allowing multiple enemies to concentrate fire on a stationary machine.
If a repair facility becomes available, use it on the machine that has lost the most useful combat capability. Restoring a damaged primary weapon may be more important than repairing cosmetic armor damage across several machines.
Finish the marked operation and preserve whatever remains of the roster for the next Bangor assignment.
Bangor — destroy Jaguar logistics and secure the communications objectives
Bangor’s middle operations target Jaguar infrastructure rather than simply clearing every hostile unit from a battlefield.
One assignment sends your group against remaining logistical supplies across three sectors.
The mission depends on completing the marked objectives. Follow the current sector marker, destroy the required targets, and move to the next indicated location.
Do not spend excessive time fighting enemies far away from the assigned position.
Some target areas may not contain the expected priority enemy when you arrive. If command reports that the intended target is not present, continue to the next marked location instead of searching the empty sector indefinitely.
Other objectives involve hostile communications positions and HPG-related infrastructure.
These operations are particularly dangerous when heavy enemies, vehicles, and turrets can engage from outside your comfortable detection range. A long-range firing position reduces the need to drive every friendly machine through the center of the enemy formation.
If one of your lancemates suffers serious component damage, consider whether the current mission can still be completed without exposing it further.
The goal is to finish the remaining marked targets and return with enough operational firepower for Bangor’s later battles.
Bangor — hold the western flank until relief arrives
The western-flank defense is one of the clearest tests of whether your company has survived the earlier attrition.
The briefing assigns Mason’s lance to cover the flank while allied forces push toward the city.
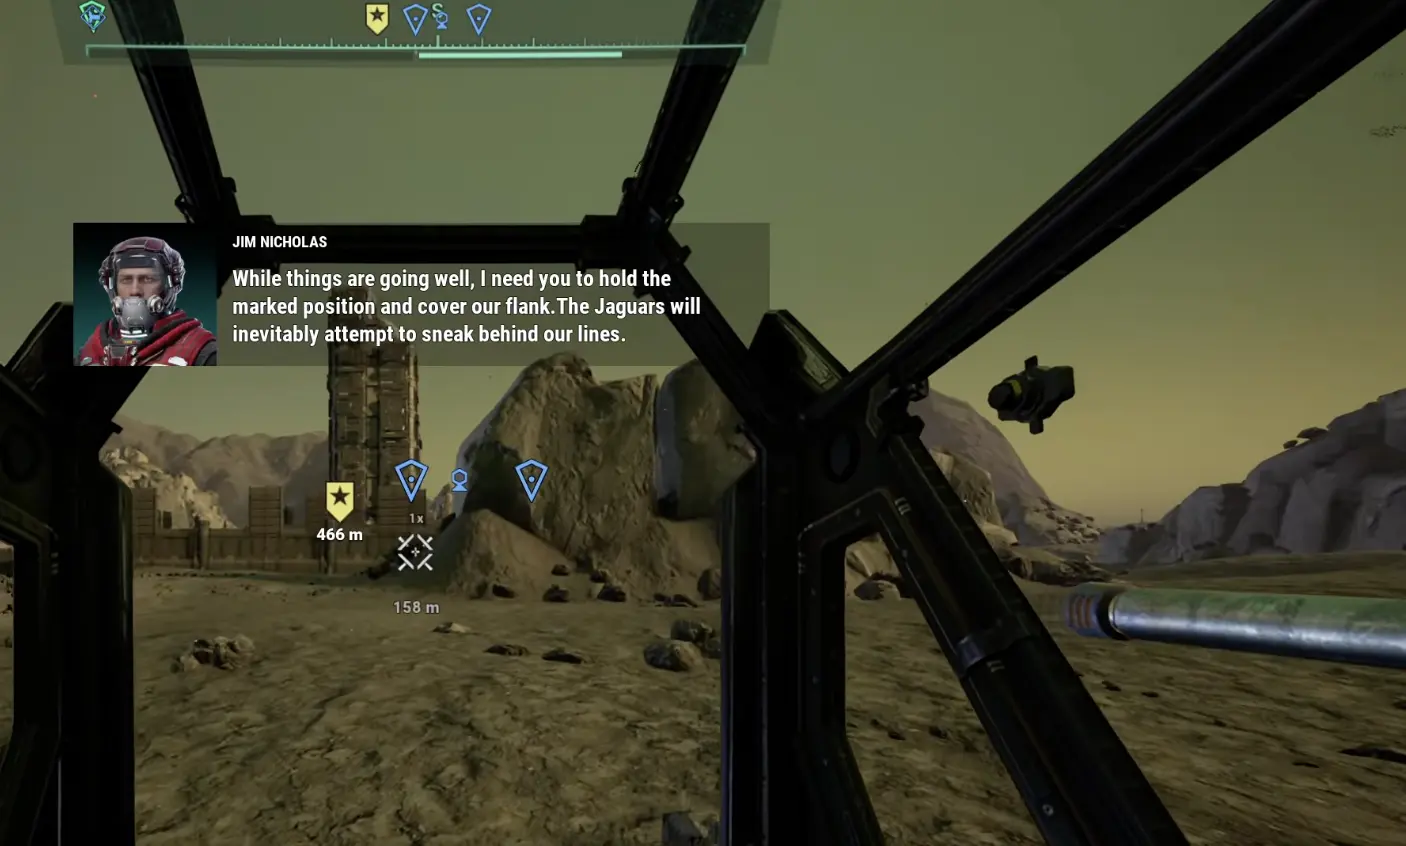
The objective is to hold the marked position until relief arrives.
You are not required to drive across the entire battlefield chasing every new enemy contact.
The briefing may allow only 3 days before deployment. That is especially punishing when damaged machines still have several weeks of repairs remaining.
Before launching, choose the most reliable available machines. An ordinary heavy ‘Mech already in working condition is more useful than a salvaged assault chassis still under reconstruction.
Bring enough ammunition to survive a prolonged engagement. A build that can eliminate one Clan ‘Mech with a strong opening volley may still struggle if it runs out of ammunition halfway through repeated reinforcement waves.
At the marked position, watch the approaches from which Jaguar units can threaten the flank.
The defenders encounter repeated hostile contacts, including heavy ‘Mechs. Focus fire to reduce the number of active attackers rather than spreading damage across several machines.
If your personal ‘Mech starts receiving concentrated fire, use movement and the allied positions to change the engagement angle. Remaining stationary while several enemies focus on the same torso can destroy expensive components surprisingly quickly.
Keep checking the objective panel. The important milestone is the arrival of relief or the next order, not an arbitrary kill total beyond the required defense.
A fresh Career can reach this battle with most of its strongest machines still in repair queues. That makes surviving the preceding missions with operational reserves far more important than maximizing the weight of a single lance.
Bangor finale — break the remaining Jaguar resistance
The final Bangor engagement follows the earlier landing and defensive operations.
The Jaguars have regrouped, and allied Wolf forces are approaching after engaging the enemy’s naval assets.
The objective is to break the remaining resistance so the allied offensive can secure Bangor.
Bring machines capable of keeping pace with the player-controlled ‘Mech. A powerful but extremely slow lancemate can spend too much of the fight trying to catch up, leaving the player to absorb enemy fire without enough support.
Advance with the friendly force rather than sprinting ahead of it.
At the first hostile contacts, remove enemies that are already in your firing line, then continue toward the marked objectives. When the Jaguars introduce heavier units, concentrate fire on one dangerous target at a time.
Avoid allowing all four friendly machines to stand together in a narrow firing lane where damaged units cannot withdraw.
The operation culminates in the remaining Jaguars offering surrender to Clan Wolf rather than the SLDF.
Once the final resistance is broken, Bangor is secured and the campaign prepares for the fourth wave.
This does not end the DLC.
Bangor to Albiero — use the 14-day preparation window
After Bangor, Operation Bulldog shifts toward Albiero.
The transition creates another important maintenance decision: the next major preparation period can provide 14 days.
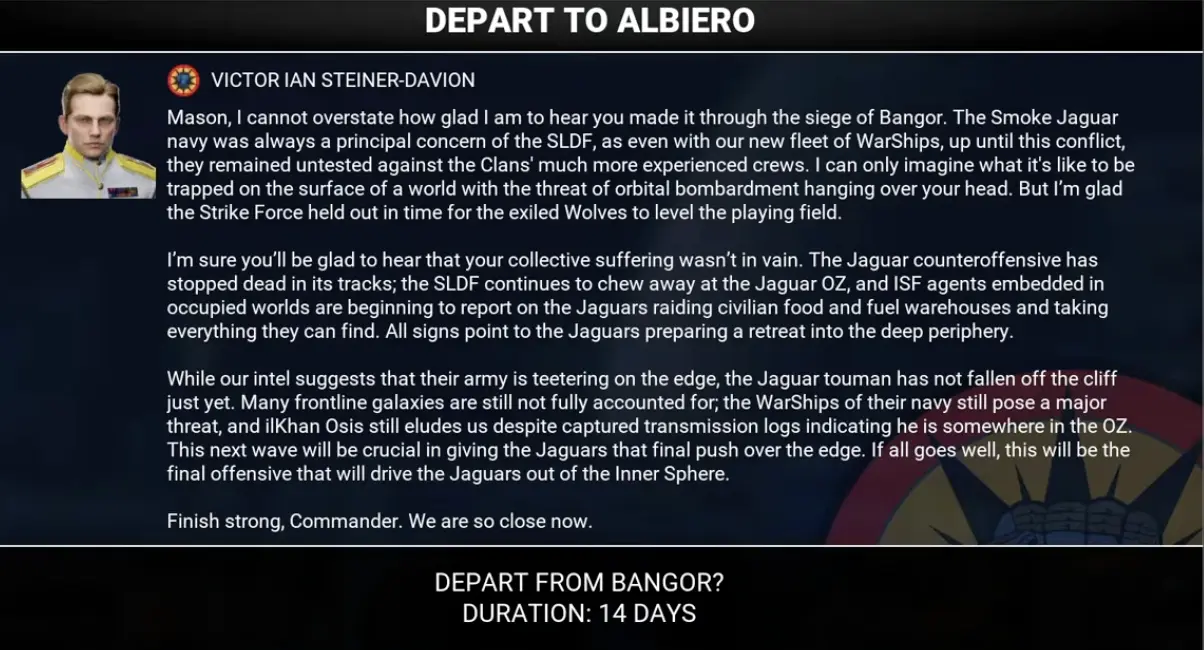
A refit requiring 13 or 14 days may fit the window. One requiring 16 or 17 days will not be ready for that deployment.
Check these numbers before making changes:
- the remaining preparation time;
- the repair duration of each important machine;
- the number of healthy pilots;
- the weapons and ammunition needed by the intended lance;
- the C-Bills remaining after the repairs.
A severely damaged assault ‘Mech may show a repair cost of several million C-Bills and a duration far longer than the available window.
That does not automatically make it a good investment.
At this point, restoring an existing weapon or replacing a single damaged component can return a machine to service sooner than performing a complete redesign.
If the company is short on operational machines, keep an unmodified reserve available rather than committing everything to ambitious refits.
You may not receive another convenient preparation window before the final offensive.
Albiero — hunt the priority Jaguar commanders
Albiero is one of the Smoke Jaguars’ remaining major logistical positions.
The opening operation targets the commanders still holding the planet. Intelligence identifies priority enemies whose removal may force the defending units to withdraw or surrender.
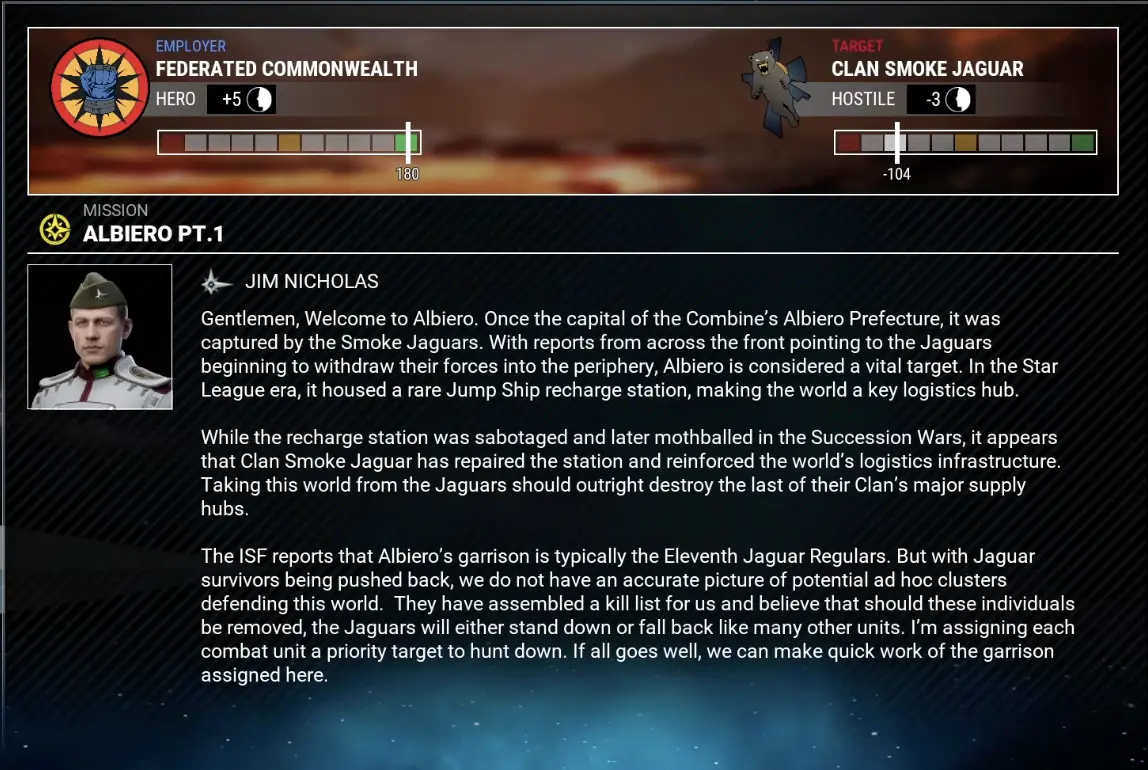
The mission takes place under extreme weather conditions that interfere with sensors and restrict visibility.
Use a lance capable of engaging targets at range, but keep enough armor to survive enemies that appear at shorter distances than expected.
Follow the assigned priority targets rather than clearing every hostile contact.
As command identifies the next target, move into a position where the entire lance can support the engagement. Concentrate fire on that enemy and continue only when the objective updates.
Avoid driving into the center of the Jaguar formation merely to gain a firing angle on a distant officer.
If a friendly machine begins losing its primary weapon systems, withdraw it from the front line. There are still further Albiero operations to complete.
Albiero — destroy the Jaguar supplies
The campaign then turns against the supplies supporting the remaining Jaguar forces.
The objective is to cut off food, fuel, and other logistical resources so the defenders cannot sustain their resistance.
Follow the marked destruction targets through the operation.
Enemy vehicles and turrets can be particularly troublesome here because some of them are difficult to detect before entering firing range. A radar display without visible contacts does not guarantee that an approach is safe.
Destroy the enemies directly blocking the current target, then attack the marked supply objectives.
Several important structures can be vulnerable to explosive damage. Maintain distance from anything likely to detonate rather than standing directly beside it while firing.
The battlefield can contain ordinary recovery pickups, but pursuing them is secondary to completing the assigned destruction targets.
Once the required supplies are eliminated, follow the withdrawal order and return to the company.
The remaining campaign is approaching its final offensive.
Before the final Albiero battle — prepare a 400-ton lance
The last major operation reaches a 400-ton drop limit.
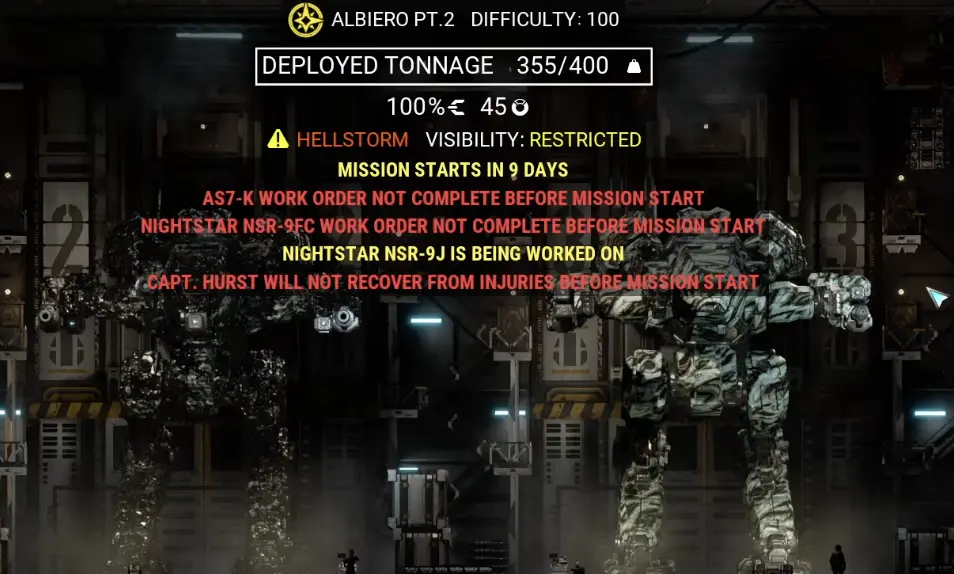
The enemy is preparing to retreat through the planet’s spaceports, and the SLDF must prevent the surviving Smoke Jaguar forces from leaving the system.
Before launching, check the company one last time.
Prioritize machines with intact primary weapons, reliable ammunition reserves, and enough armor to remain in combat through multiple enemy waves.
Do not spend your remaining funds buying a powerful Clan chassis if you cannot finish its repairs before the final deployment.
A partially upgraded but fully operational machine is a better choice than an impressive assault ‘Mech that remains unavailable.
Bring the strongest reliable lance you can actually deploy. The mission’s tonnage allowance is not a reason to sacrifice readiness for weight.
Albiero final mission — stop the Jaguar Dropships
The final mission takes place around Albiero’s spaceports.
The Jaguar forces are trying to evacuate, and your task is to prevent their remaining Dropships from escaping.
At the beginning of the operation, advance toward the marked spaceport objectives and eliminate the perimeter defenders.
The mission soon introduces additional Jaguar reinforcements.
Do not spend all your ammunition on enemies outside the required engagement area. Preserve enough firepower to deal with the final objectives when the evacuation sequence becomes active.
As the operation progresses, command confirms that hostile Dropships are preparing to leave.
The mission then shifts from clearing the battlefield to stopping the evacuation before the launch window expires.
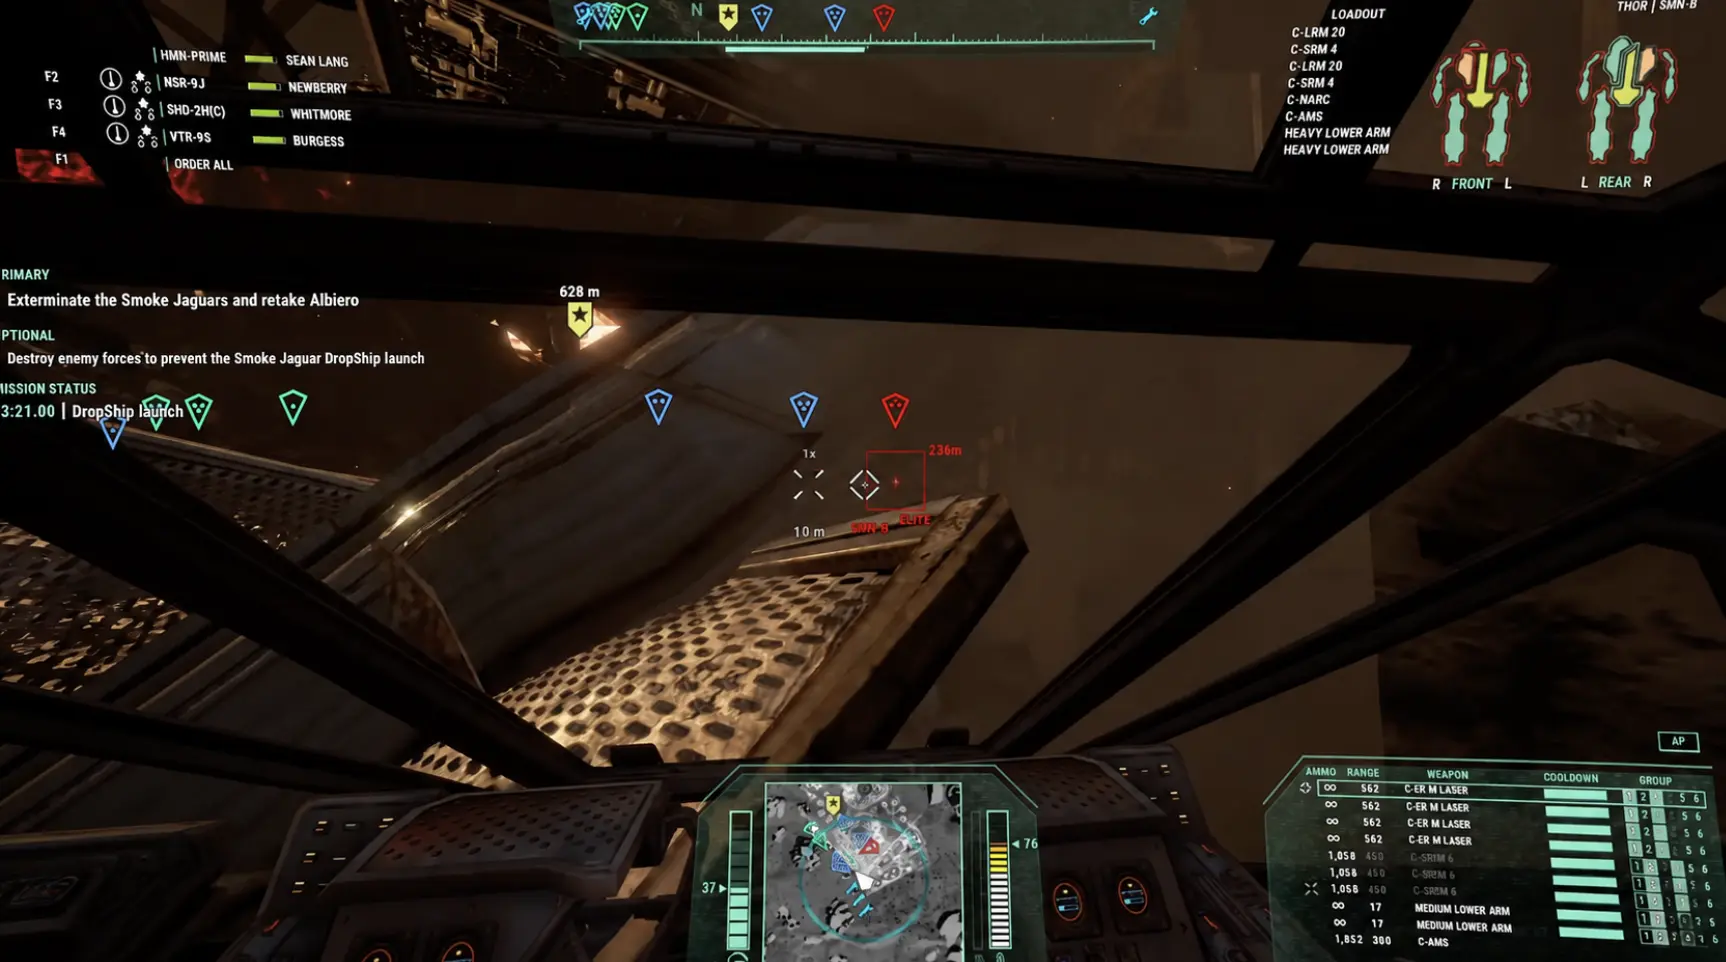
At this point, keep moving toward the indicated launch objective.
Enemy reinforcements may still be active, but destroying every opponent is not the condition you should rely on for progression.
Remove enemies blocking the route or threatening your surviving lance, then return fire toward the priority targets required to stop the escape.
Movement matters because slower machines can fall behind when the battlefield objectives change. Keep a functional unit close enough to support the final engagement.
As the Dropship launch sequence approaches, pay attention to the remaining time and the objective updates. A delayed response can leave the enemy evacuation underway while your lance is still fighting unrelated contacts.
The final battle ends when the Jaguar resistance is defeated and command confirms that the operation has succeeded.
Operation Bulldog ending — what happens after Albiero?
After the final Albiero engagement, command announces the successful conclusion of Operation Bulldog.
Clan Smoke Jaguar has been driven out of the Inner Sphere.
The remaining campaign dialogue explains that the SLDF has liberated the occupied worlds and that the conflict will continue beyond the Inner Sphere through Task Force Serpent and the pursuit of the surviving Jaguars.
Commander Mason’s mercenary company is not automatically committed to that next expedition.
The contract has been fulfilled, and the company can return to its own operations.
The campaign continues into a final narrative sequence before returning control to the player.
Completing Albiero therefore finishes the Ashes and Ascension storyline. You do not need to keep hunting remaining battlefield enemies or search for another Operation Bulldog mission after the conclusion has been confirmed.
Any remaining optional pickups, equipment decisions, and unfinished company work belong to your continuing Career rather than a second required campaign ending.