MechWarrior 5 Ashes & Ascension: All 10 High-Reward Crates
Find all 10 High-Reward Crates in Ashes and Ascension, with the correct missions, fixed weapon rewards, and the locations most easily missed.
Updated:
Quick Answer
Find the 10 red High-Reward Crates during Operation Bulldog’s missions on Matamoras, Janette, Hanover, Bangor, and Albiero.
Look for the red pickup marker, not the ordinary blue supply marker. Check the mission’s buildings and secondary positions before following the final withdrawal objective.
Ashes and Ascension has 10 High-Reward Crates spread across its campaign. Each contains a fixed collection of high-tier weapons or equipment, making them considerably more useful than ordinary battlefield pickups when you need specific upgrades.
The difficult part is knowing which missions contain them. Operation Bulldog mixes specially designed campaign maps with more conventional combat assignments, and not every mission has a red crate. Spending an entire Warzone operation searching every structure can produce nothing except random supply pickups.
There is also a numbering trap on Bangor. Its four reported red-crate missions are Pt.1, Pt.3, Pt.5, and Pt.6, not four consecutive assignments.
The easiest way to collect them is to track the correct mission before deployment, check the relevant buildings while advancing, and recover the red pickup before committing to the final withdrawal.
All 10 High-Reward Crate missions and rewards
The following checklist follows Operation Bulldog’s campaign order.
| # | Mission | Fixed rewards |
|---|---|---|
| 1 | Matamoras Pt.2 | SSRM 4 ×4; ER Small Laser ×4 |
| 2 | Janette Pt.3 | Clan Double Heat Sink ×3; ER Medium Laser ×3 |
| 3 | Hanover Pt.2 | Clan Heavy Medium Laser ×4; Clan Heavy Machine Gun ×4 |
| 4 | Hanover Pt.3 | Clan ATM 9 ×2 |
| 5 | Hanover Pt.4 | LB 20-X AC ×1; UAC/20 ×1 |
| 6 | Bangor Pt.1 | Clan Heavy Large Laser ×2 |
| 7 | Bangor Pt.3 | Light Gauss Rifle ×2; LB 5-X AC ×2 |
| 8 | Bangor Pt.5 | UAC/10 ×2; LB 2-X AC ×3 |
| 9 | Bangor Pt.6 | SSRM 6 ×3; UAC/2 ×3 |
| 10 | Albiero Pt.2 | Clan ATM 12 ×2 |
For the exact crate positions, check the
10 High-Reward Crate location maps
before deployment. The maps show the red pickup markers and nearby landmarks for each mission.
The Inner Sphere weapons are Tier 5. Weapons explicitly identified as Clan equipment use their Clan variants instead. Ammunition-using weapon rewards also include ammunition, with at least two tons reported for each applicable crate.
The quantities are useful when deciding whether to divert from the mission. A cache containing several working weapons may solve an equipment shortage, while a reward you cannot currently fit or supply with ammunition is less valuable to the next deployment.
How to recognize the correct red crate
Both types of pickup can use the same recovery interaction. The important distinction is the marker color.
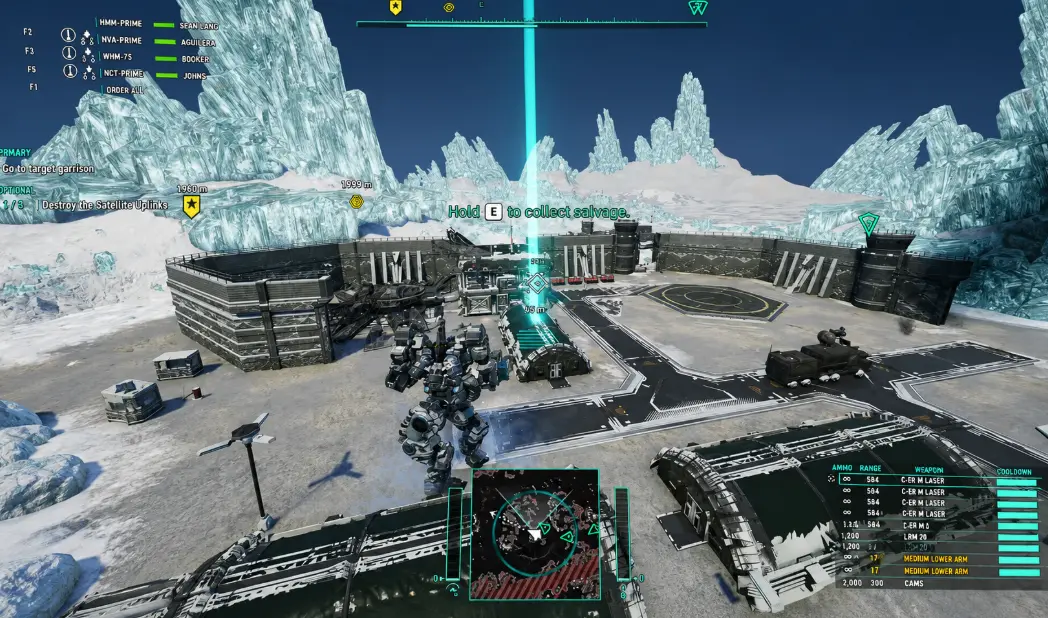
A red marker identifies the special High-Reward Crate. A blue marker indicates an ordinary battlefield pickup, which may provide ammunition rather than one of the fixed rewards listed above.
That distinction saves time on missions where several pickup prompts appear near the objective route.
You do not need to investigate every blue pickup to complete the ten-crate collection. If ammunition is running low, collecting a nearby blue pickup may still help. Otherwise, continue toward the next objective or the red marker you are looking for.
The fixed crates commonly appear around structures on the specially designed campaign maps. Long green barracks-style buildings are worth checking when you enter a new objective area, although not every crate occupies that exact building type.
One Bangor location is particularly easy to misread because the pickup has been encountered around different structures in the same area.
Matamoras Pt.2 — SSRM 4 and ER Small Lasers
Rewards:
- 4 × SSRM 4
- 4 × ER Small Laser
The first reported High-Reward Crate is in Matamoras Pt.2, the second operation on Matamoras.
This mission begins with a 200-ton deployment limit and only three days after the opening assignment. The SLDF is attempting to catch Smoke Jaguar forces while the 2nd Dieron Regulars withdraw.
The red crate belongs to this second Matamoras operation, not the opening 190-ton mission.
Follow the interception objectives and inspect the structures around the campaign route before completing the withdrawal. Look specifically for a red recovery marker rather than assuming an ordinary blue ammunition pickup is the fixed reward.
The exact building and approach have not been established from the mission instructions alone, so use the pickup marker to make the final identification instead of committing to an unmarked detour.
Collect the reward before leaving the battlefield.
The SSRM 4s provide additional short-range missile options, but they are only useful immediately if a machine has compatible hardpoints and sufficient ammunition.
The four ER Small Lasers are easier to distribute among multiple machines when you need replacement energy weapons.
Janette Pt.3 — Clan Double Heat Sinks and ER Medium Lasers
Rewards:
- 3 × Clan Double Heat Sink
- 3 × ER Medium Laser
The Janette crate is associated with Janette Pt.3, the operation involving Star Colonel Gregor Nostra.
It is not the same objective as the earlier reconnaissance mission where you identify nine enemy ‘Mechs.
Where is the Janette red crate?
Head toward Navpoint Delta.
The crate has been found to the right of the town, inside one of the tents near the Delta objective area.
Use the town as your landmark and inspect the nearby tent structures before moving away from the position.
This is an easier location to miss than a pickup standing directly in the middle of the main combat route. During the confrontation with Nostra’s forces, enemy contacts can pull your attention toward the primary objective while the crate remains off to one side.
Recover the red pickup while you are still in the Delta area.
If you are already fighting Nostra’s Star, remember that the campaign objective requires defeating all five members, not merely destroying his Supernova. The full encounter is covered in the Janette campaign walkthrough.
The Clan Double Heat Sinks are useful for machines carrying demanding energy loadouts. The ER Medium Lasers can replace damaged weapons or provide upgrades where the receiving chassis supports them.
You do not need to rebuild a machine immediately after collecting them. Keep the equipment available until you have a suitable installation window.
Hanover — three crates across Pt.2, Pt.3, and Pt.4
Hanover contains three separate High-Reward Crates.
Unlike Janette, where one specific mission contains the reward, Hanover has a sequence of valuable pickups across its later assignments.
Hanover Pt.2 — Clan Heavy Medium Lasers and Machine Guns
Rewards:
- 4 × Clan Heavy Medium Laser
- 4 × Clan Heavy Machine Gun
Check the specially designed Hanover Pt.2 battlefield for its red pickup before completing the operation.
Keep the required objectives moving, but inspect the accessible structures around the route rather than treating every pickup prompt as an ordinary ammunition cache.
This reward provides multiple examples of two Clan weapon types, which can be particularly useful when replacing lost equipment across several machines.
The Heavy Medium Lasers and Heavy Machine Guns require different mounting considerations, so inspect the receiving chassis before spending time on a refit.
Hanover Pt.3 — Clan ATM 9
Rewards:
- 2 × Clan ATM 9
The next Hanover red crate appears during Pt.3, separate from the Pt.2 reward.
The important distinction is the mission number. Returning to the previous battlefield or repeatedly searching ordinary random pickups will not recover this fixed pair of launchers.
Look for the red marker around the operation’s structures before leaving the mission.
Do not remove working missile systems from an operational ‘Mech until you have checked the ATM launcher’s hardpoint and ammunition requirements. A newly recovered launcher without a usable installation does not immediately improve the lance.
Hanover Pt.4 — LB 20-X AC and UAC/20
Rewards:
- 1 × LB 20-X AC
- 1 × UAC/20
Hanover’s third red crate is especially attractive if you want large ballistic weapons.
The LB 20-X AC and UAC/20 provide two different high-caliber ballistic options, but their installation requirements and ammunition needs can make them difficult to use immediately on a company that is already short on working machines.
Recover the crate before following the mission’s final withdrawal order.
Hanover’s later operations can leave the company with only a short preparation window before the next assignment. Obtaining both weapons is valuable, but rebuilding an entire chassis around one of them may not be possible before the campaign moves on.
Bangor — four crates, but not in four consecutive missions
Bangor has the most misleading crate sequence in the campaign.
The four reported fixed pickups belong to:
- Bangor Pt.1
- Bangor Pt.3
- Bangor Pt.5
- Bangor Pt.6
Bangor Pt.2 is a conventional Warzone-style mission rather than the second red-crate map. Bangor Pt.4 is another assignment you should not confuse with the later fixed-crate operations.
This matters because searching a generic battlefield for a special pickup can waste time and leave the lance exposed to additional damage.
Bangor Pt.1 — Clan Heavy Large Lasers
Rewards:
- 2 × Clan Heavy Large Laser
The first Bangor crate appears during Pt.1, as the SLDF begins the assault on the planet.
Move through the landing operation while watching for the red pickup marker around the specially constructed mission area.
Do not assume every supply marker near the landing zone is the valuable cache.
The pair of Clan Heavy Large Lasers is a useful acquisition for a company that wants additional long-range energy firepower. Before replacing existing weapons, check the required slots and cooling capacity.
Bangor Pt.3 — Light Gauss Rifles and LB 5-X Autocannons
Rewards:
- 2 × Light Gauss Rifle
- 2 × LB 5-X AC
This is the Bangor crate with the clearest additional location clue.
The mission involves securing the HPG, and its red pickup is associated with the communications installation and nearby satellite dishes.
Check the satellite dishes and adjoining buildings
Players have encountered this reward in different structures around the same HPG area.
One reported location is inside a low barracks-style building behind the satellite dishes. Another reported location is inside the tower.
If the red marker does not appear in the tower, inspect the low building behind the dishes before leaving the communications compound.
The difference is important because checking only the tower can make the crate seem absent when it is actually nearby.
Do not mistake the lack of a pickup in one structure for confirmation that the whole mission has no red crate.
The Light Gauss Rifles and LB 5-X Autocannons provide different ballistic options. Check ammunition and compatible slots before deciding which should replace the weapons already installed on your machines.
Bangor Pt.5 — UAC/10 and LB 2-X AC
Rewards:
- 2 × UAC/10
- 3 × LB 2-X AC
The next fixed Bangor crate is associated with Pt.5, not Pt.3 as in some earlier mission-number listings.
Look for its red marker on the dedicated campaign battlefield and inspect the accessible buildings before completing the operation.
The UAC/10s provide heavier ballistic firepower, while the LB 2-X Autocannons offer smaller-caliber alternatives.
The best choice for your company depends on available ballistic hardpoints, ammunition, and how much weight can be devoted to the new weapons.
There is no benefit in beginning a major refit that prevents an otherwise usable machine from taking part in Bangor’s remaining battles.
Bangor Pt.6 — SSRM 6 and UAC/2
Rewards:
- 3 × SSRM 6
- 3 × UAC/2
The final reported Bangor red crate belongs to Pt.6.
It is separate from the Pt.5 reward, and its three SSRM 6 launchers and three UAC/2 autocannons should not be confused with the earlier UAC/10 and LB 2-X cache.
Check the red marker before completing Bangor’s final campaign objectives.
At this point, preserving your existing machines may be more valuable than immediately fitting the new weapons. The campaign is preparing to move toward Albiero, and a weapon upgrade that requires extensive workshop time may not be available for the next assignment.
Albiero Pt.2 — Clan ATM 12
Rewards:
- 2 × Clan ATM 12
The tenth reported High-Reward Crate appears in Albiero Pt.2.
Albiero’s late operations are particularly dangerous places to search for optional equipment because the campaign is approaching its conclusion and some objectives become time-sensitive.
The Pt.2 deployment allows 400 tons, but your actual roster may still be restricted by repairs and injured pilots.
Check the objective area for the red pickup before committing to the closing stages of the operation.
When the mission switches to preventing the Jaguar DropShip launch, the optional evacuation-prevention objective can introduce a countdown. Do not assume that recovering a crate is more important than the timed objective if you intend to complete both.
The final reward contains two Clan ATM 12 launchers.
These are worth collecting for later missile-focused loadouts even if your current machines cannot mount them immediately. The Clan ‘Mechs and salvage guide covers the equipment and repair decisions that matter when adding new Clan weaponry to your company.
What if a red crate is not appearing?
Start by checking the mission number.
This is especially important on Bangor, where the fixed reward locations are not arranged in four consecutive missions.
Next, make sure you are looking for a red marker. Blue recovery markers can appear on ordinary maps and do not establish the presence of a High-Reward Crate.
If you are on a listed mission but cannot find the pickup, inspect the buildings around its main objective positions before searching distant, unrelated parts of the map.
The HPG operation on Bangor Pt.3 is a good example. Searching only the tower may miss the low building near the satellite dishes.
Do not spend the remainder of a difficult combat mission driving around random terrain because one ordinary supply marker looked promising.
After recovering a crate, check the inventory for the expected weapons and quantities. That is the useful confirmation that you collected the intended reward rather than an unrelated ammunition pickup.
Which crates are worth prioritizing?
All ten are useful for expanding your weapon inventory