How I Use the Chain Spear in DOOM Revelations
I use the Chain Spear for Meat Hook movement, Orbit pressure, Slam and Throw damage, Perfect Dodge Empowerment, and focused Hollow Shrine upgrades.
Updated:
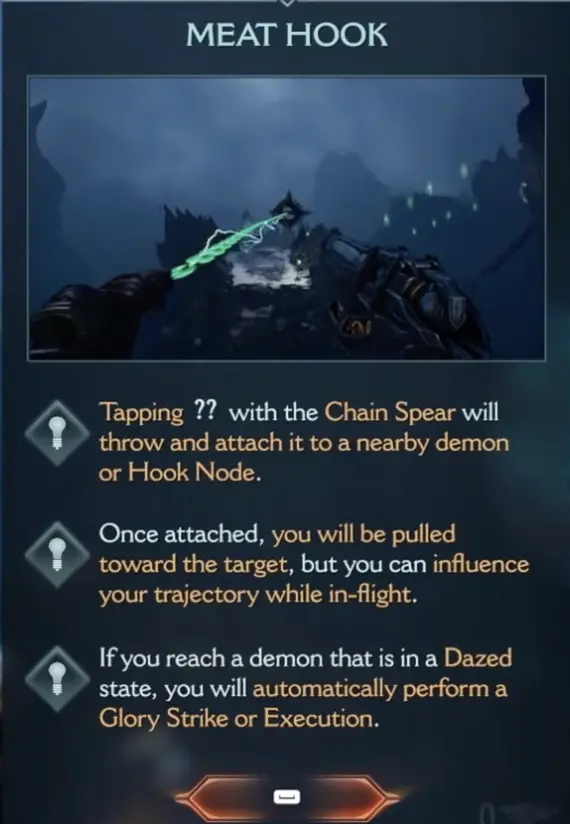
Quick Answer
To use the Chain Spear in DOOM Revelations, I start with Meat Hook for movement, steer the pull toward a useful angle, use Orbit when I want to stay around a target in the air, and then choose the follow-up that fits the fight: Slam for groups, Throw for safer ranged pressure, Stab for priority targets, or Slash for fodder. I use Perfect Dodge on Hell Surge attacks to build Empowerment. For a first upgrade, I usually take Slam; Throw is the safer alternative. Once Shield Saw returns, I press T to swap instead of forcing one tool into every fight.
How to Use the Chain Spear in DOOM Revelations
I do not treat the Chain Spear as one attack with several upgrades. I use it as a short decision chain:
move → hold the angle → choose the follow-up → reset if the landing turns bad
| What I need | Chain Spear action | What I do next |
|---|---|---|
| Close distance or cross a gap | Meat Hook | Steer toward a useful angle instead of accepting the first landing |
| Stay around a dangerous target | Orbit | Keep firing with the right-hand weapon and choose the landing later |
| Punish a group below me | Slam | Use the aerial route as setup, then crash into the cluster |
| Damage a target I do not want to approach | Throw | Stay at range and aim for a clean punish |
| Hit one priority demon directly | Stab | Commit only when the target will stay in range |
| Clear nearby fodder | Slash | Reset the space before the next hook or dodge |
| A Hell Surge attack is coming | Perfect Dodge | Dash late, build Empowerment, then spend it on a meaningful spear action |
| The arena becomes too messy | Swap to Shield Saw | Stabilize on the ground, then return to the spear when movement is useful again |
The most important control lesson is not memorizing one combo. It is knowing what I want the hook to accomplish before I press it. If I cannot describe the landing, target angle, or follow-up, I normally wait.
What the Chain Spear Actually Changes
The Chain Spear is not just another damage button.
It changes how you move through Revelations. The base campaign already taught shield throws, parries, melee armor, and heavy weapon timing. Revelations adds a second rhythm: hook into enemies, circle targets in the air, fire with your right-hand weapon while moving, dash after movement, slam into groups, stab priority targets, and use Perfect Dodge to charge stronger spear attacks.
| Chain Spear tool | What it does | Best use |
|---|---|---|
| Meat Hook | Pulls you toward a demon or hook node | Start movement, close distance, cross gaps, set up aerial pressure or Slam |
| Orbit | Keeps you circling a locked target in the air | Maintain angle, keep firing, avoid grounded pressure |
| Stab | Fast direct thrust | Punish demons that need focused close pressure |
| Slash | Sweeping close-range attack | Clear fodder and reset space |
| Slam | Aerial impact after movement | Drop into groups and stagger pressure targets |
| Throw | Ranged spear attack | Hit flying enemies, headshot targets, punish from distance |
| Dash | Gives the spear route air control | Extend movement and avoid Hell Surge attacks |
| Perfect Dodge | Dash just before a Hell Surge attack | Build Empowerment |
| Empowerment | Charged state for spear abilities | Spend it on the next meaningful spear action |
The mistake is using the Chain Spear like a shield. The spear wants movement first, then damage.
Chain Spear Controls and Settings to Check
Before judging the weapon, I check the bindings and settings that make its movement readable. Chain Spear actions can be rebound, so I trust the current on-screen prompt and my Controls menu rather than assuming every player uses the same key layout.
| Control / setting | What I check | Why it matters |
|---|---|---|
| Chain Spear action / Meat Hook bind | Make sure the main spear input is comfortable | A late or awkward hook makes every movement route feel worse |
| Orbit / aerial control prompts | Read the current on-screen prompt when the mechanic is introduced | Orbit only helps if I can hold the target angle without fighting the input |
| Dash | Keep the dash input easy to reach | Dash controls aerial movement and is also the input used for Perfect Dodge timing |
| Perfect Dodge Window | Check the setting before changing my build | A more or less forgiving window changes how consistently I can build Empowerment |
| Spear Empowerment HUD | Keep the charge state readable | I want to know when the next powered spear action is actually ready |
| Chain Spear / Shield Saw swap | T after Shield Saw returns | Later fights reward swapping between movement and grounded control |
How to Use Meat Hook Without Hooking Into Death
Meat Hook is the first thing to slow down and practice.
When the spear attaches, do not treat it like a normal grapple where the game does all the work. You still need to read the landing direction, the enemy position, and whether you are hooking into safety or into a bad crowd. A good Meat Hook gives you an angle. A bad one throws you into a demon pile with no armor buffer.
| Meat Hook situation | Better decision |
|---|---|
| Hook node across a gap | Use it as traversal, then look for a dash extension |
| Fodder demon near a group | Hook in only if Slash, Slam, or aerial pressure is ready after arrival |
| Flying enemy | Use Throw for ranged punishment, or use Orbit when the air angle is stronger |
| Heavy demon in the middle | Do not hook straight into its face unless you have a follow-up ready |
| Low health | Hook toward a safer enemy or recovery route, not the biggest target |
| Secret route nearby | Test whether Meat Hook plus dash reaches the ledge before moving on |
Orbit: Hold the Angle Before You Land
Orbit turns the Chain Spear from a simple hook tool into a full aerial combat system.
Instead of using Meat Hook only to fly in and land, Orbit lets you stay around a target, keep an angle, and continue pressure while using your right-hand weapon. This matters because the Chain Spear is not locked to one gun style. You can use the spear for positioning while your other weapon keeps dealing damage.
| Orbit situation | Why it matters | What to do |
|---|---|---|
| Large target is dangerous on the ground | Circling keeps you out of its direct front angle | Hold the angle, fire, then land only when safe |
| Right-hand weapon damage is available | You keep pressure while moving around the target | Use the spear for angle and the weapon for damage |
| Arena floor is crowded | Staying airborne avoids ground pressure | Stay up long enough to choose a safer landing |
| You keep landing into damage | Movement is ending too early | Circle or dash before committing to Slam or landing |
| Endgame arena demands both tools | Aerial pressure alone does not solve the room | Combine aerial pressure with Shield Saw resets when the room gets messy |
| Target breaks the angle | The air route loses value when the line collapses | Reset with dash, shield, or Meat Hook instead of forcing one more shot |
Right-Hand Weapon Pressure
The spear does not have to be your only damage source.
When you circle a target, your right-hand weapon keeps working. That makes aerial pressure different from a simple gap closer: you reposition while the rest of your kit still deals damage.
| Right-hand weapon situation | How the spear route helps |
|---|---|
| Boss or heavy demon is readable | Air movement gives time to keep firing without standing still |
| Flying or tall target is awkward from the ground | Aerial angle improves tracking and target access |
| Crowd blocks the floor | Staying up buys time before you choose a landing |
| Power weapon window appears | Fire only when you can keep control after the shot |
| You start drifting into danger | Stop attacking and reset movement first |
| Shield Saw is needed | Land, swap, and stabilize instead of forcing aerial damage |
Slash: Your Fast Reset Button
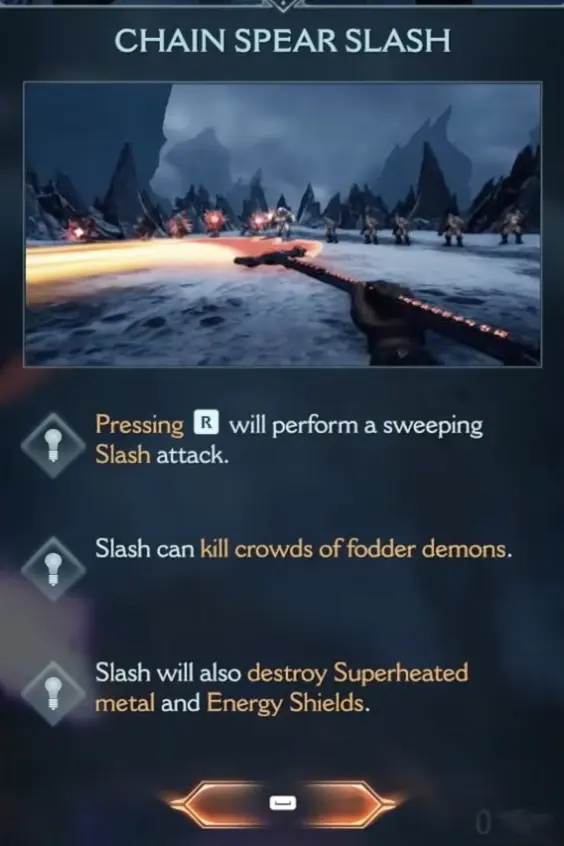
Slash is the first reset tool that makes close-range spear routes stable.
The tutorial teaches that Slash can kill fodder, and that matters because Revelations often throws small enemies around bigger threats. Use Slash when you need a quick close-range reset instead of wasting a heavy shot on something that exists mainly to feed recovery.
| Slash use | Good time to use it | Bad time to use it |
|---|---|---|
| Fodder clear | Small enemies are crowding your hook route | A heavy demon is about to swing |
| Post-hook reset | You land near weak enemies and need space | You land inside an explosion or Hell Surge pattern |
| Armor / health setup | You need to control nearby fodder | You should be dodging instead |
| Dazed enemy follow-up | Later upgrades support execution-style pressure | You have not bought the upgrade line yet |
Slash is not flashy, but it keeps the spear route from getting messy.
Relics, Platinum and Hollow Shrine Upgrades
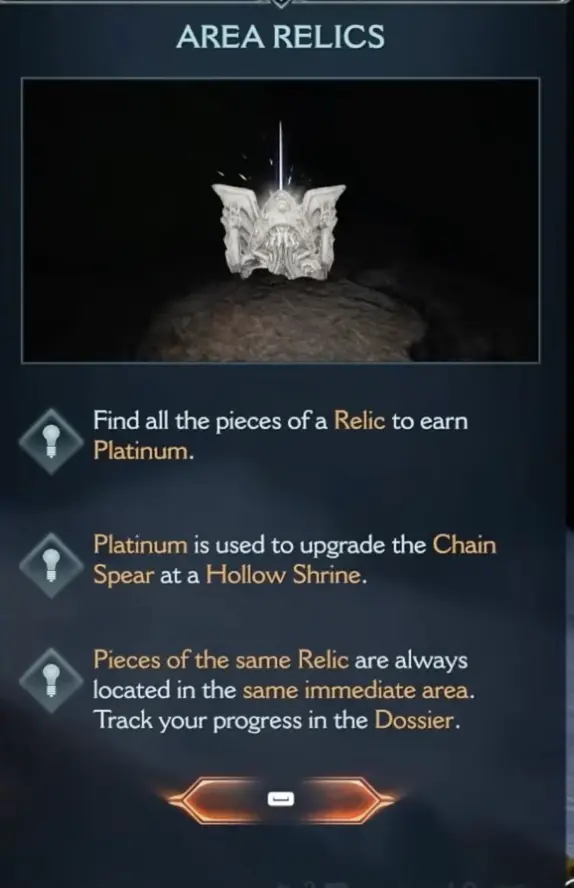
The Chain Spear upgrade economy starts with Relics.
The game explains the rule clearly: find all pieces of a Relic to earn Platinum. Platinum is used to upgrade the Chain Spear at a Hollow Shrine, and pieces of the same Relic stay in the same immediate area. That last line is the important route clue.
| Upgrade resource | What it means | Route habit |
|---|---|---|
| Relic piece | One part of a local relic set | When you find one, search the same immediate area |
| Completed Relic | Pays out Platinum | This is why relic cleanup matters before upgrades |
| Platinum | Buys Chain Spear abilities and upgrades | Save it for the ability you actually use |
| Hollow Shrine | Upgrade station for Chain Spear | Buy with a plan, not just because the shrine is open |
| Blood Iron | Later endgame upgrade material | Save serious final-upgrade planning for endgame cleanup |
First Hollow Shrine: Do Not Buy Randomly
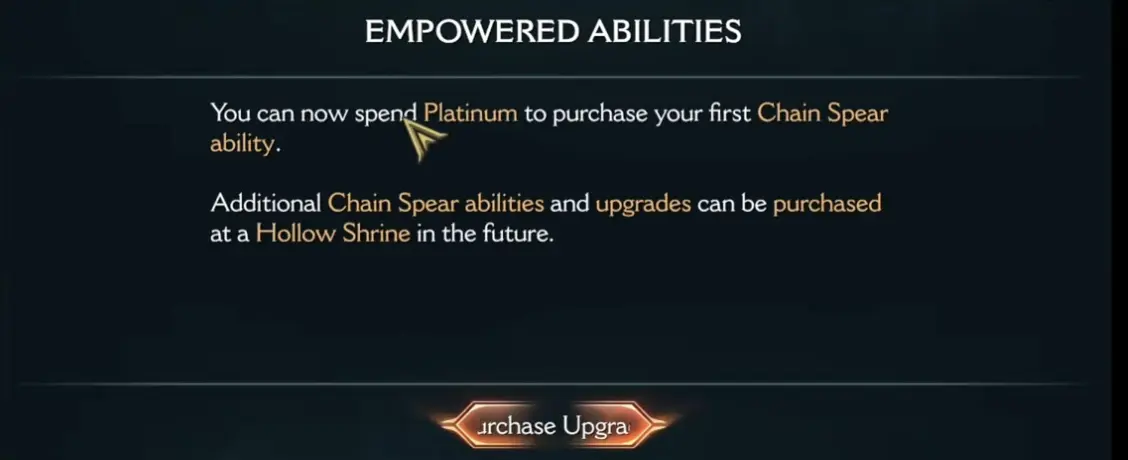
The first Hollow Shrine is where you decide what kind of spear player you are going to be for the next stretch.
Do not spread early Platinum across abilities you barely use. If you are already hooking into groups, buy toward Slam. If you are playing safer and picking off flying enemies, Throw has more value. If you want to stay airborne and keep your right-hand weapon firing, Orbit becomes the air-control route. If slippery demons keep breaking pressure, Stab becomes the priority-target answer.
| First upgrade direction | What it helps with | Buy priority |
|---|---|---|
| Slam | Hook into the air, then drop into groups with impact | Best first pick for aggressive Meat Hook routes |
| Throw | Headshots, flying enemies, ranged spear damage | Best first pick for safer ranged play |
| Orbit | Air control around a target while your right-hand weapon fires | Strong if you want aerial pressure instead of quick landings |
| Stab | Focused thrust and close-range priority pressure | Best after priority demons become the problem |
| Slash line | Fodder control and later execution-style pressure | Good if small enemies keep ruining your route |
| Meat Hook upgrades | More aerial control and movement freedom | Strong later if you already trust your movement |
| Empowerment support | Rewards Perfect Dodge timing | Best after you stop missing dodge windows |
My first recommendation is still Slam because it fits the DLC’s first big lesson: hook, move, then punish the group. Throw is the cleaner alternative if you prefer distance. Orbit becomes more important once you are comfortable staying airborne instead of landing immediately.
Best Chain Spear Upgrade Paths
Pick a route based on how you actually fight, not on which ability sounds strongest in a menu.
| Playstyle | First focus | Follow-up | Best for |
|---|---|---|---|
| Aggressive mobility | Slam | Meat Hook upgrades, then Empowerment support | Players who hook often and want movement to become damage |
| Aerial weapon pressure | Orbit | Throw or Slam, then Empowerment support | Players who want to circle targets and keep firing with right-hand weapons |
| Safe ranged | Throw | Empowerment support, then Stab | Players who prefer headshots, flying enemy control, and distance |
| Priority target pressure | Stab | Throw or Slam depending on arena problem | Players struggling with slippery or dangerous demons |
| Fodder control | Slash line | Slam, then survivability upgrades | Players who keep losing space to small enemies |
| Spear Adept fastest | One ability line only | Finish that line before spreading points | Achievement-focused players |
| Endgame mastery | Main line first | Fill remaining lines with relic, Platinum, Blood Iron, and cleanup | Spear Mastery / full-save cleanup |
Perfect Dodge, Energy and Empowerment
Perfect Dodge is where the Chain Spear stops being only a movement tool.
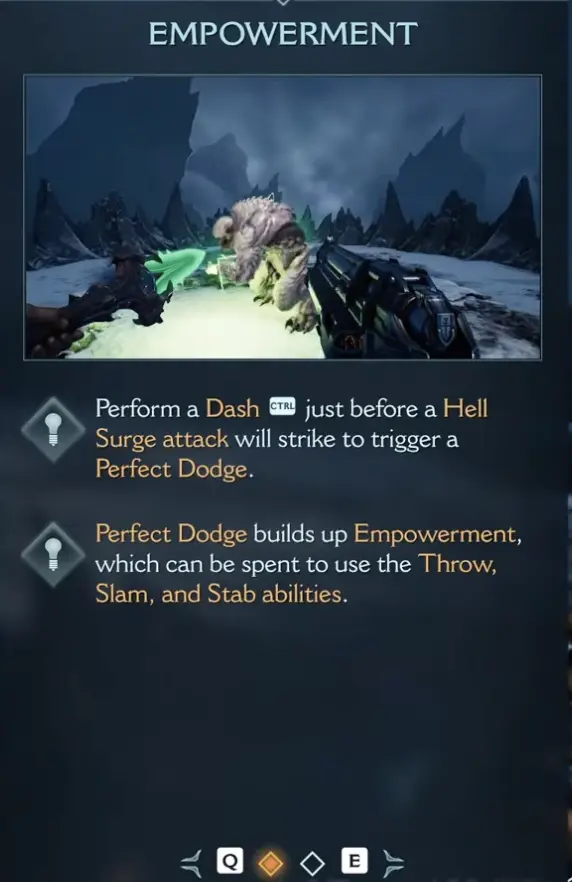
The core rule is direct: dash just before a Hell Surge attack to trigger Perfect Dodge. Perfect Dodge builds Empowerment, and Empowerment powers up spear abilities like Throw, Slam, and Stab.
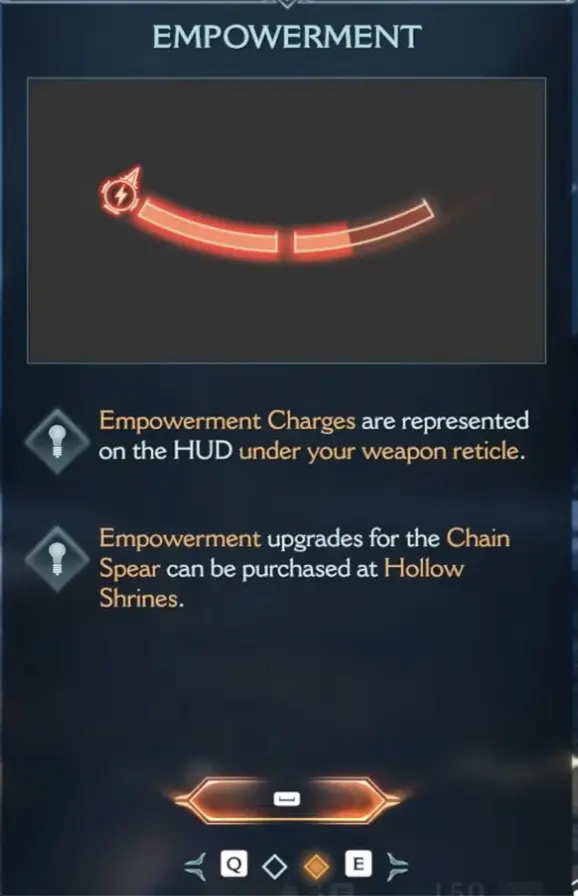
Watch the spear HUD instead of guessing by feel. When the HUD shows energy or Empowerment ready, spend the next spear action on a target that will stay in range.
| Situation | What to do |
|---|---|
| Hell Surge attack is coming | Dash late enough to trigger Perfect Dodge, not early enough to waste it |
| Empowerment charge is ready | Spend it on the next meaningful spear action |
| Energy / charge HUD is full | Stop hoarding and convert the resource into pressure |
| You keep missing the timing | Stop attacking for one pattern and practice the dodge window |
| Arena has too much clutter | Clear fodder first so you can actually read the surge |
| Boss or heavy demon is open | Use Empowerment when the target will stay in range |
| Low health | Dodge first, empower second; do not greed for a charge while dying |
Slam: The Safest First Power Spike
Slam is the ability I trust first because it turns Meat Hook movement into crowd control.
After becoming airborne from Meat Hook, Slam lets you crash into the ground, damage enemies, and create breathing room. It is not just damage. It is a way to make the spear’s movement end in a useful position instead of a panic landing.
| Slam moment | Why it works |
|---|---|
| After hooking over fodder | Turns movement into area damage |
| When a group is forming below | Lets you punish the cluster instead of landing weakly |
| When you need space | Falter and impact can buy time |
| After Perfect Dodge | Empowered Slam is easier to value than a rushed Stab |
| Against mixed groups | Start with Slam, then swap to guns or Slash for cleanup |
Throw: Better Than It Looks If You Aim It
Throw is easy to ignore if you are excited about movement, but it has a clear role.
It is the safer spear option when you do not want to hook into danger. With the upgrade route, Throw is especially useful for headshots and flying enemies. Use it when the arena gives you a high-priority target that you can punish without diving into the middle.
| Throw target | Why I use it |
|---|---|
| Flying demon | The upgrade path supports safer pressure |
| Distant pressure enemy | Lets you punish without bad positioning |
| Headshot opening | Good value if you can aim cleanly |
| Crowd before a hook | Softens the room before you commit to movement |
| Enemy you do not want to stand near | Safer than hooking into melee range |
Use Throw as the safer route when aggressive hooks become too risky.
Stab: Use It for Priority Pressure
Stab is the direct punish option.
Do not treat it as a random melee button. Save it for enemies that need focused pressure, especially when the arena has teleporting or slippery threats that keep escaping normal damage windows.
With healing, stun, or daze synergy active, Stab becomes more than a damage poke. It becomes a way to stabilize a priority target fight without instantly falling back to shield play.
| Stab use | My judgment |
|---|---|
| Priority demon | Good when you need a fast direct hit |
| Teleporting enemy | Use it when the enemy keeps breaking normal pressure |
| Dazed demon | Stronger once the upgrade line supports execution-style follow-up |
| Healing or stun upgrade active | Treat Stab as survival pressure, not just damage |
| Crowded arena | Riskier than Slam if you cannot control the landing |
| Low health | Better if the upgrade line gives sustain; risky if it does not |
During the learning route, build Slam first, then add Stab once priority demons become the problem.
When to Use Chain Spear vs Shield Saw
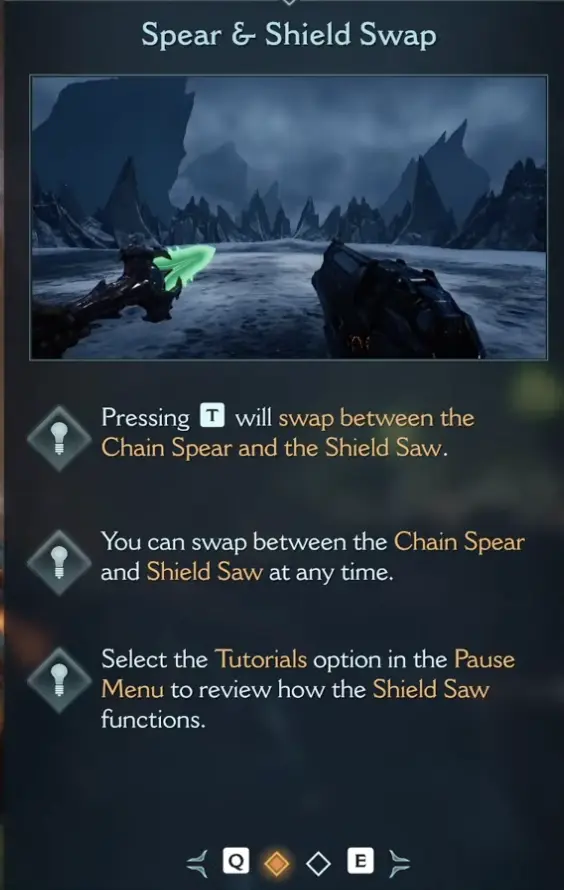
Later, the game gives you the important rule: press T to swap between the Chain Spear and Shield Saw.
Chain Spear is the mobility, air-pressure, and aerial offense tool. Shield Saw is the grounded control tool. Endgame asks you to use both.
| Situation | Better tool | Why |
|---|---|---|
| Crossing gaps / reaching hook nodes | Chain Spear | Meat Hook and dash solve movement |
| Aerial circle around a target | Chain Spear | Holding the target angle lets you keep pressure while staying off the ground |
| Aerial approach into groups | Chain Spear | Hook into Slam gives a clean opener |
| Grounded shield pressure | Shield Saw | Better when you want the old defensive rhythm |
| Armor break and shield control | Shield Saw | Safer against enemies that punish close spear landings |
| Fast reposition after Hell Surge | Chain Spear | Dash and Perfect Dodge feed Empowerment |
| Messy arena with too many angles | Shield Saw first | Stabilize, then swap back to spear for offense |
| Master Arenas / endgame mastery rooms | Both | Aerial pressure, shield control, recovery, and burst all matter |
Common Chain Spear Mistakes
| Mistake | What is really happening | Fix |
|---|---|---|
| I keep missing parries | The spear rhythm is not the same as the shield rhythm | Practice Perfect Dodge windows separately from normal attacks |
| I hook into death | Meat Hook is being used as a panic button | Hook only when the landing gives an advantage |
| I drop out of air pressure too early | You are treating the aerial route like travel instead of pressure | Hold the angle long enough to fire and choose a safe landing |
| I bought the wrong upgrade | Platinum was spent on an ability you do not use | Pick Slam, Orbit, Throw, Stab, or Slash based on actual fight habits |
| I ignore Relic pieces | Relics are being treated like lore instead of upgrade fuel | Finish local Relic sets for Platinum |
| I never use Empowerment | You are dodging too early or not reading Hell Surge attacks | Clear space, wait for the surge, then dash late |
| I only use spear after the shield returns | You forgot Shield Saw is still valuable | Swap to shield when the room needs grounded control |
| I only use shield after the shield returns | You are avoiding the DLC’s new movement layer | Use spear for hook nodes, aerial pressure, route control, and Slam openers |
| I chase full upgrades too early | Full mastery is an endgame route | Focus one useful line first, then clean up later |
Chain Spear Achievement Notes
Three useful Revelations achievement routes touch this weapon directly.
| Achievement | Condition | Practical route |
|---|---|---|
| Time to Hunt | Acquire the Chain Spear | Story progression through Revelations |
| Spear Adept | Acquire all upgrades for a single Chain Spear ability | Pick one ability line early and focus it |
| Spear Mastery | Acquire all Chain Spear upgrades in a single save slot | Save for full Relic, Platinum, Blood Iron, and endgame cleanup |
Related Revelations Guides
| If you need help with… | Read this |
|---|---|
| Overall DLC route, campaign structure, and cleanup order | DOOM Revelations Guide |
| Opening route, item tracker, Proving Grounds secrets, and Agaddon Brute Champion | Proving Grounds Walkthrough |
| Master Key doors, replay portals, endgame upgrades, Classic Levels, and Slayer Trials | Master Key Endgame Guide |
| Astral Boss Key route, Uber Boss gate, Master Arena Key, and Master Arenas | Uber Boss Unlock Guide |
| Spear Adept, Spear Mastery, Relics, and trophy cleanup | Achievements Guide |
Final Rule for Using the Chain Spear
Use the spear for movement, air pressure, and damage setup, not only for a single hit.
If you hook without a landing plan, you die. If you stay airborne without watching the arena, you drift into danger. If you dodge without reading the Hell Surge, you waste Empowerment. If you buy upgrades without knowing what you use, you slow down the whole run.
The clean route is to learn Meat Hook first, pick one early upgrade line, use Perfect Dodge to charge real damage, practice target circling when the enemy is safe to track, and swap back to Shield Saw when the fight needs grounded control.
FAQ
How do you use the Chain Spear in DOOM Revelations? +
I use Meat Hook to create movement, steer the pull toward a useful angle, use Orbit when I want to stay around a target in the air, and follow with Slam, Throw, Stab, Slash, or right-hand weapon fire. Perfect Dodge builds Empowerment, and once Shield Saw returns I swap between the two tools instead of forcing the spear into every fight.
What are the Chain Spear controls in DOOM Revelations? +
Chain Spear bindings can be adjusted, so I follow the current on-screen prompts and check the Controls menu if Meat Hook, Orbit, dash timing, or other spear actions feel uncomfortable. Once Shield Saw returns, press T to swap between Chain Spear and Shield Saw.
How do you unlock the Chain Spear in DOOM Revelations? +
The Chain Spear unlocks through the Revelations campaign route after the opening Purgatory setup. Once the DLC shifts away from the normal shield rhythm, the spear becomes your main movement and combat tool.
What are the Chain Spear skills in DOOM Revelations? +
The main Chain Spear skill set is Stab, Slash, Slam, Throw, and Orbit. Meat Hook is the core movement action that pulls you toward enemies or hook nodes, while Perfect Dodge and Empowerment support stronger spear attacks.
How does Orbit work with the Chain Spear? +
Orbit locks your movement around a target so you can circle in the air while keeping pressure on the enemy. Use it to hold an angle, avoid grounded danger, keep firing with your right-hand weapon, and choose a safer landing.
How does Meat Hook work in Revelations? +
Meat Hook throws the Chain Spear into a demon or hook node and pulls you toward it. You can influence your travel direction, which makes it useful for closing distance, crossing gaps, starting aerial routes, entering air pressure, and setting up Slam.
What does Platinum do in DOOM Revelations? +
Platinum is used to upgrade the Chain Spear at Hollow Shrines. You earn Platinum by finding all pieces of a Relic, and pieces of the same Relic stay in the same immediate area.
What Chain Spear upgrade should I buy first? +
For most players, Slam is the safest early recommendation because it naturally follows Meat Hook movement, helps against groups, and teaches the DLC's aerial rhythm. Throw is better if you want safer ranged damage against flying or distant enemies.
How do you build Empowerment with the Chain Spear? +
Perform a dash just before a Hell Surge attack to trigger a Perfect Dodge. Perfect Dodge builds Empowerment, which can be spent to strengthen spear abilities such as Throw, Slam, and Stab.
Can you still use the Shield Saw in Revelations? +
Yes, once the shield returns. Press T to swap between Chain Spear and Shield Saw. Chain Spear favors mobility, air pressure, and aerial offense, while Shield Saw keeps a more grounded defensive style.
Should I upgrade every Chain Spear ability evenly? +
No. Pick the ability you actually use in fights first. Focus one line for Spear Adept, then use deeper relic, Platinum, Blood Iron, and endgame cleanup to push toward Spear Mastery.