How I Navigate Red Moon Manor and Reach Every Important Boss
The manor gets much easier once I stop chasing every question mark. I use the map, fixed boss landmarks, the maze, garden, and northern hall to stay on route.
Updated:
Quick Answer
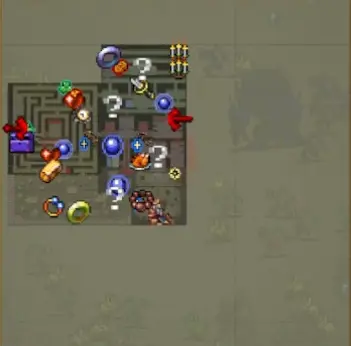
My first priority in Red Moon Manor is the map relic. Once the detailed map is visible, I use the major landmarks rather than clearing every question mark.
The route I keep in my head is:
map first
→ Malice coffin and Ashtart around the first Manor section
→ Sargon farther north
→ Congregation in the upper-left maze
→ pentagram in the maze center for Baal’Thasar
→ garden for the Kujata statue
→ northern maze hallway when I need Jaman Jatos
If I am completing the four-boss Bloodmoon requirement, I handle Ashtart, Sargon, Congregation, and Baal’Thasar in the same run.
Red Moon Manor stopped feeling confusing once I realized that the problem was not its size by itself.
The real problem was that the stage gives me a lot of question marks before I understand which ones actually matter.
My first attempts turned into long detours. I would enter a room because something looked important, circle a wall, reach another marker, then realize I was farther from the objective I actually wanted.
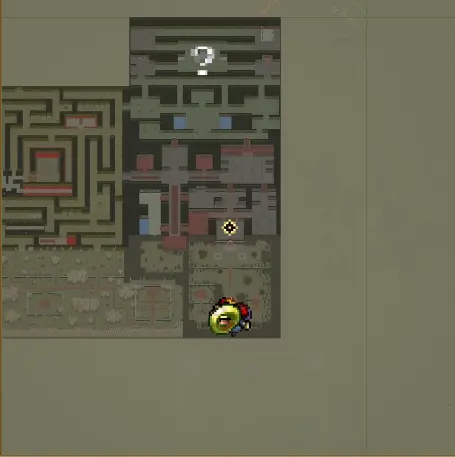
The detailed map changes that.
After I have it, I navigate by large areas:
- the entrance section;
- the northern Manor rooms;
- the upper-left maze;
- the maze center;
- the outside garden;
- and the northern maze hallway.
Those landmarks are enough for almost every Bloodmoon objective I return here to finish.
I Get the Red Moon Manor Map Before I Start Clearing Question Marks
The map relic is the single pickup that saves me the most wasted movement in this stage.
I follow the green relic indicator and pick it up early.
The difference is immediate.
Before picking it up, the Manor is a collection of corridors, walls, gardens, and disconnected-looking rooms.
Afterward, I can see the structure and start treating question marks as landmarks.
That matters because several Bloodmoon objectives are not close enough together to justify wandering blindly between them.
If I am here specifically to work through all 12 characters rather than to navigate the stage itself, I follow the Bloodmoon unlock route. This page is where I keep the physical Manor route.
Malice’s Coffin Is Easier to Miss Than It Is to Reach
The coffin taught me the first important Red Moon Manor lesson: a nearby objective can still take far too long if I let other question marks distract me.
It is inside the early Manor section and is not especially far from the start.
Once I know which marker I am following, reaching it is straightforward.

There is no extra arena clear attached to the coffin itself.
I open it, get Malice, and then decide whether the rest of that run still has a purpose.
That distinction matters in Red Moon Manor because simply being near another question mark is not enough reason for me to turn every short objective into a full map clear.
Ashtart Is the Boss I Expect Near the Manor Entrance
Ashtart is my first useful orientation point once I move into the Manor.
The boss appears around the entrance area. A screen flash tells me the encounter has become active, and the red-robed boss is easy to recognize once I know what I am looking for.
The attack that causes the most trouble is telegraphed by a spinning wheel.
The dangerous part is the direction the wheel is facing. The ash wave fires out in front of it, so standing directly on that line is what gets me punished.
My response is movement, not extra damage.
As soon as the wheel appears, I shift away from its front arc and keep my damage running while repositioning.
This fight also taught me not to judge a boss by how long the health bar seems to be taking. Bloodmoon bosses can absorb a lot of damage, and forcing myself closer just because the kill feels slow usually creates the mistake I was trying to avoid.
Sargon Is North, but the Floor Trigger Is the Part That Matters
Sargon is farther north in the Manor and appears as another question mark.
Finding the room is only half the job.
I need to step onto the floor trigger to start the fight.
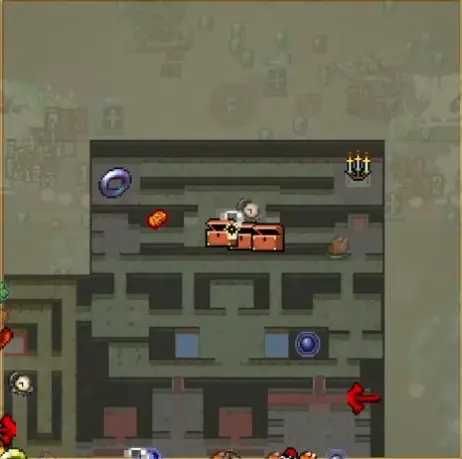
Sargon then cycles through several attacks that make the room more dangerous than the route itself.
The three patterns I watch for are:
- marked ground before meteors land;
- a fire area that makes staying close expensive;
- bouncing fireballs that keep moving through the room.
The other complication is that Sargon does not politely stay in one place.
After taking enough damage, he can relocate north or south, and later I have to follow him again.
That is the real reason this fight can feel longer than expected. Part of the time is spent finding his new position rather than dealing damage.
When he disappears, I look at the nearby route first instead of assuming the fight is over.
Congregation Turns the Upper-Left Maze Into the Fight
The next major landmark is the maze in the upper-left part of Red Moon Manor.
Congregation is different from the first two bosses because I do not have to stand on one precise trigger and wait for it.
Once I enter the maze area, the boss comes toward me.
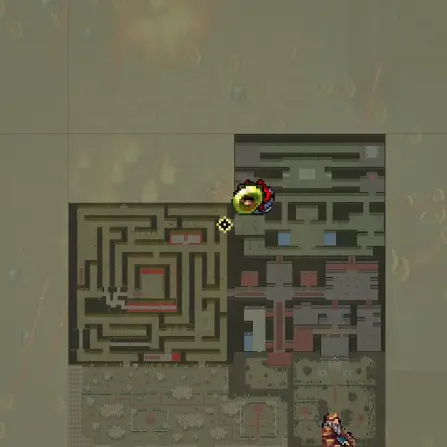
The frustrating part is what happens after that.
Congregation approaches, but when I chase it, the boss can back away and use the maze walls to keep distance.
A build that only feels good in open rooms suddenly becomes much less comfortable.
Weapons that can hit through walls make this encounter far cleaner. Freezing also helps because a stopped target cannot keep retreating through the maze while I try to close the gap.
The boss is durable, but once I stop spending half the fight chasing it around corners, the encounter becomes much more predictable.
Baal’Thasar Starts From the Middle of the Maze
This was the route that cost me the most time before I understood the layout.
Baal’Thasar is not reached by simply continuing toward another ordinary room.
After Congregation, I move toward the middle of the maze and look for the pentagram.
Stepping onto it sends me into the route leading toward Baal’Thasar.
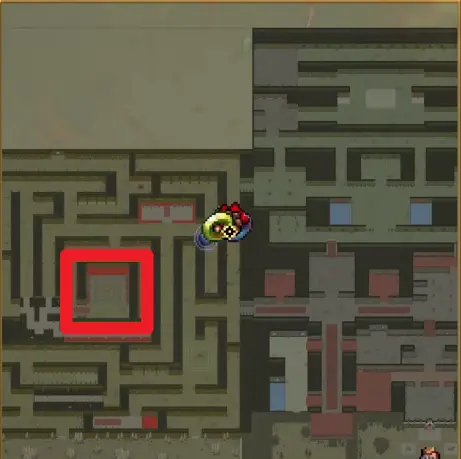
After teleporting, I head north.
The route becomes much more linear here: continue upward, activate the switches in the center, deal with the encounters they trigger, then keep pushing north until the main fight starts.
This is also why I prefer reaching Baal’Thasar after I have already handled the other required bosses.
Once I use the pentagram, I am mentally committing to the final part of the run rather than planning another detour across the Manor.
The Red Circle in the Baal’Thasar Fight Can Cost Me a Weapon
Baal’Thasar has one mechanic I take more seriously than ordinary contact damage.
A large black hole can appear during the encounter.
The warning I watch for is the red circle on the floor.
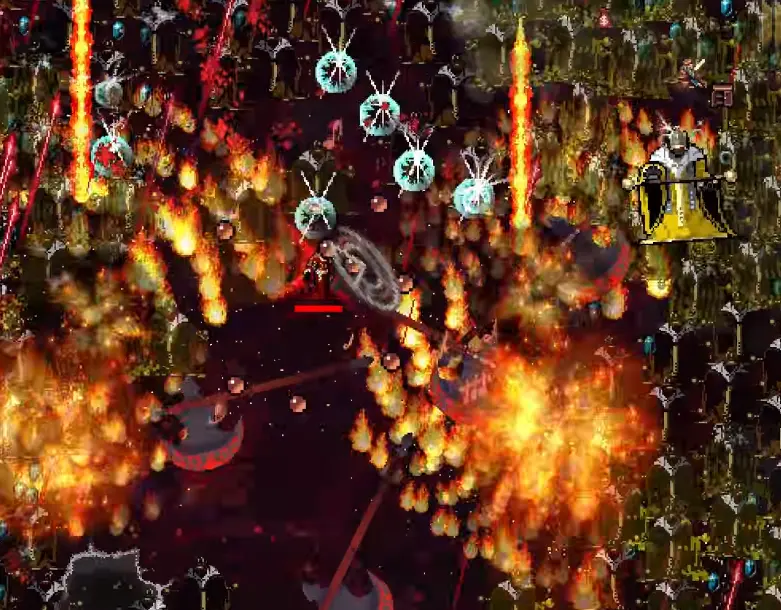
If I stay inside it, the pull becomes the problem first.
Then comes the worse part: the attack can take away one of my weapons.
That can turn a strong six-weapon setup into a noticeably weaker boss build in one mistake.
The warning is not as loud as the attacks I am used to reacting to elsewhere in Vampire Survivors, so I watch the floor whenever the arena starts becoming visually crowded.
Baal’Thasar then leads directly into the next phase rather than giving me a fresh setup screen.
For me, that changes the risk calculation completely. Losing a core weapon late in the first phase is not only damage lost now; I am carrying that weaker setup into what comes immediately afterward.
The Kujata Statue Is Outside in the Garden
The Kujata statue is a different kind of Red Moon Manor problem.
Finding it is not enough.
I go to the outside garden and use its question mark as the landmark.

The statue can be broken with 108 Bocce or 108 Responsive Prayers.
That requirement changes whether I stay.
If I reach the garden without either option, the location is solved but the objective is not. I remember the question mark and come back with the correct setup.
When I do have the required weapon, Mad Groove can make the setup less tedious by pulling useful stage items toward me.
With 108 Bocce active, I stay around the statue and allow the weapon to keep hitting it until the statue finally breaks.
The mistake here is assuming the first visible hit should complete the event.
It can take repeated attacks.
I leave only after the statue actually breaks and the unlock registers.
I Farm Jaman Jatos in the Northern Maze Hallway
For the 6,000 Jaman Jato requirement, I use the northern part of the maze.
The easiest landmark for me is the long upper hallway with the red circular floor switches.
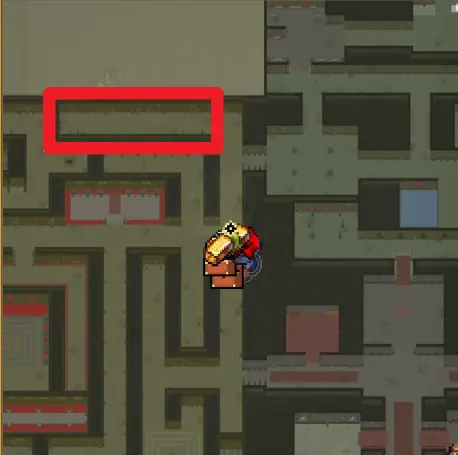
I reach it by coming through the maze, moving up from the right side, then settling around the middle of the upper hallway.
Once Jaman Jatos begin charging into the area, I stop treating the run like a navigation problem.
Now it is a density problem.
I want enough survivability to stay in place and enough area damage to kill continuously.
One successful run reached roughly 150,000 total enemies defeated by the end of the stage before the 6,000 Jaman Jato requirement confirmed.
Those numbers are useful for one reason: they remind me that the overall kill counter is not the objective.
150,000 total kills does not automatically mean 6,000 Jaman Jatos.
I wait for the actual Jaman Jato unlock rather than trying to infer it from the results screen.
If I Only Need Hyper Red Moon Manor, I Stay for Batti Lei
Some Red Moon Manor objectives reward leaving early.
Hyper Red Moon Manor is not one of them.
The unlock condition is defeating Batti Lei in Red Moon Manor.
A completed run confirmed Hyper after Batti Lei was defeated, so when Hyper is the missing stage unlock, I stop treating the run like a coffin or statue trip.
I bring a build I trust and stay long enough for the stage-specific boss objective to resolve.
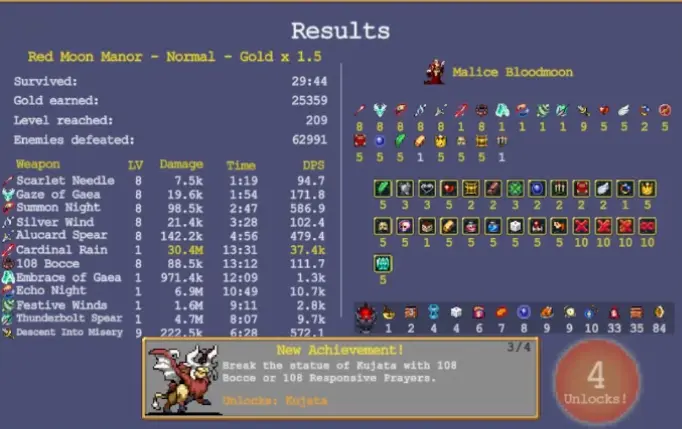
Once Hyper appears in the results, that trip is finished.
The Manor Makes More Sense as Six Landmarks Than Dozens of Rooms
I no longer try to memorize every corridor in Red Moon Manor.
I remember six places.
The map relic gives me the stage.
The entrance gives me Ashtart.
The northern Manor rooms give me Sargon.
The upper-left maze gives me Congregation.
The maze center pentagram opens the Baal’Thasar route.
The garden and northern hallway cover Kujata and Jaman Jato cleanup.
That is enough structure to keep me moving even when the screen is full of enemies and the map is covered in pickups.
Once those landmarks are familiar, Red Moon Manor stops being a stage I clear randomly and becomes a place where I enter with one specific job, go straight to the part of the map that owns that job, and leave after it is actually done.