Machine Party Minigames
Featured
How I Play Every Machine Party Minigame
A player-first breakdown of all 15 modes, including the opening move, common failure point, and adjustment that helped me survive.
Read Guide →Game Guide Hub
My practical route through 15 lethal minigames, from setting up a 2–4 player lobby to choosing inputs, fixing early problems, and chasing achievements.
Recommended Order
Use these guides in order if you are starting a new casino.
Minigames
A player-first breakdown of all 15 modes, including the opening move, common failure point, and adjustment that helped me survive.
Achievements
A practical route for all 15 achievements, including the exact condition, the safest setup, and the attempts I would abandon early.
Guide Cluster
A player-first breakdown of all 15 modes, including the opening move, common failure point, and adjustment that helped me survive.
Read Guide →A practical route for all 15 achievements, including the exact condition, the safest setup, and the attempts I would abandon early.
Read Guide →Machine Party is a 2–4 player online party game with 15 lethal minigames and no board between them. My best first-session route is to gather the group before launching, play one complete rotation without chasing rare achievements, note the modes that caused real confusion, and then build a short custom playlist around those weak points.
Machine Party became much easier once I stopped treating it as one game with one control scheme.
Each simulation changes the objective, the failure condition and sometimes the best input device. One round asks me to memorize a cube. The next asks me to assemble a gun, climb an escalator, hide from a Hunter or sort objects with two mouse buttons.
The Hub is therefore my starting route, not a second copy of every minigame solution. I use the All Minigames Guide when I need the exact objective and failure point, and the Achievements Guide when I am deliberately trying to satisfy one of the 15 Steam conditions.

Machine Party is a direct sequence of competitive minigames for 2–4 online players. There is no board phase, shop route or item economy between rounds. Once the group is ready, the game moves from one simulation to the next and awards points based on the result.
That structure changes how I prepare:
The 15 modes reward very different skills. Minefield and Tunnel Hazard punish bad routes. Chisel Gauntlet and The Filter punish one wrong input. Duck Hunt and Inside Job change the player’s role. Firearm Factory and Forklift Certified ask me to move objects through a shared space while other players interfere.
That variety is the reason I play the full rotation once before building a practice list. A mode that looks difficult from its briefing can become simple in one round, while an apparently basic two-button game can expose the biggest control problem of the night.
I treat Machine Party as a friend-lobby game. I choose one host, make sure every player has joined, and wait for all four characters to appear before starting. If I only have two players, I can still enter the player setup, but I prefer three or four for the first session because more players make the asymmetric and push-heavy modes easier to understand.
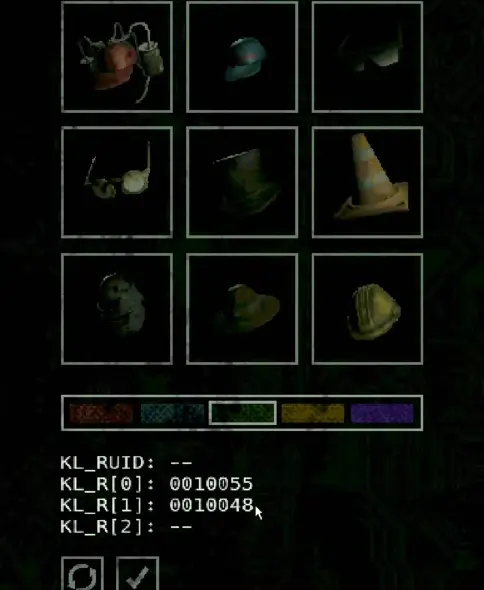
I also call out clothing instead of relying only on names. A blue cap, orange hat or bright jacket is easier to track when four characters overlap in a narrow safe zone.
One session opened with the image occupying only part of the screen. Turning fullscreen off and then enabling it again restored the normal layout.
I fix that immediately. The briefings move quickly, and losing half the screen can hide the objective or the second instruction page.
I also decide my main input before the first difficult cursor mode. Keyboard and mouse work well for normal movement, and a controller is comfortable in many arena modes, but the best choice changes by simulation:
The important Chisel Gauntlet warning is that changing devices after the round has already committed to controller input may not work cleanly. I choose the mouse before readying rather than trying to rescue the round after the target cube disappears.
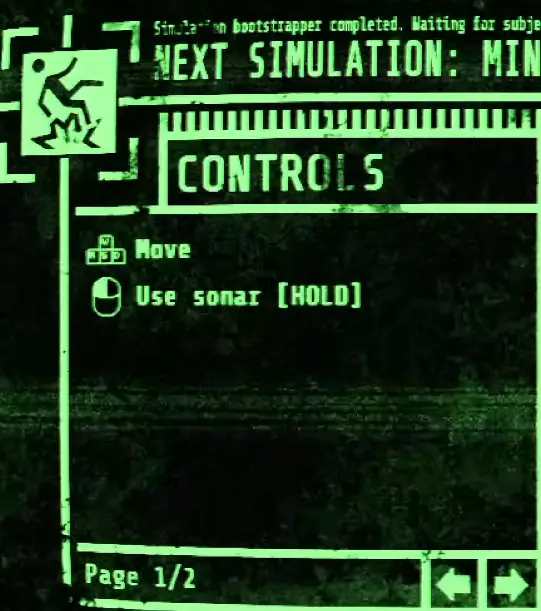
Several briefings separate the control list from the actual win condition. The
first page might say Move and Interact; the next page explains that I must
memorize, carve and submit, or that green zones are safe while red zones are
fatal.
My rule is simple:
I do not press Ready until I know what ends the round.
This prevents the most common first-round failures:
The first rotation is for identifying real weak points. I do not slow the entire lobby to force a rare achievement before everyone understands the mode.
I record only three things after each round:
Those answers tell me what to practice. If I understood the rule but missed one shot, I probably need another normal rotation. If I could not select a cube segment or kept entering opposite arrows, I put that mode into the next custom playlist.
After a full rotation, I choose only the modes that need another attempt. I do not immediately repeat all 15.
A useful practice playlist contains different kinds of problems:
This keeps the session moving and gives me a clean comparison between input, route planning and player interference.
The game rewards speed, but most of my losses came from continuing the wrong action for one second too long.
In Minefield, I begin with sonar and move through the widest revealed gap. I do not scan every foot of the map. Once the harvester is close enough that another pause would trap me, I commit to the exit even if the final line is not perfect.
The same principle applies in Tunnel Hazard. Early in the round I can wait near the center and compare green spaces. When only one nook remains visible, I enter it first and fight from inside instead of standing outside to line up a push.
Debris Platforms is the clearest example. Throwing junk at another player is useful only while my own platform is safe. Once my floor reaches its danger state, I clear space first. An achievement attempt is already dead if I am aiming a crate while my own platform collapses.
In Lethal Rebound, I keep an escape lane before I try to push. In Stable Footing, I move onto the currently marked tile before looking for another player to remove. In Forklift Certified, I stop stealing when a loose crate is blocking my own deposit route.
A failed achievement route should not automatically become a failed match.
I stop forcing the condition when:
At that point I return to the normal win condition. I can repeat the mode later through the custom selection screen.
I separate normal rotations from achievement cleanup.
During a normal rotation, I play for survival and points. I take the easy achievement when the condition appears naturally, but I do not ask three people to stop playing so I can set up a cumulative push or four-crate deposit.
During a practice playlist, I tell the group the target before pressing Ready. That matters in the cooperative achievements:
The complete routes and the conditions that still need verification are in the Machine Party Achievements Guide.
Machine Party keeps a running leaderboard across the rotation, but I do not use an assumed scoring formula to decide whether a match is over.
In one full session, a player who believed they were last moved into first after a later simulation. That does not prove an exact weighting rule, but it is enough for me to keep playing every round.
My practical scoring rules are:
I do not rely on the lobby solving itself after a problem.
When a session was kicked out after a run, the clean recovery was to regroup and build a custom list containing the simulations that had not been played. That is faster than restarting a full rotation and hoping the missing modes appear at the right point.
Another session developed lag and robotic voice audio. Leaving and rejoining restored the connection for the affected player. I treat that as a practical single-session fix, not a guaranteed cure for every network problem.
My recovery order is:
I also identify one host before the session and use direct invitations. I did not use a working public matchmaking route, so I do not start the game expecting unknown players to fill empty slots.
Use the All 15 Minigames Guide when the problem is a rule, control, route or failure condition. It covers the specific order I use in Minefield, Firearm Factory, Inside Job, Forklift Certified and every other simulation.
Use the Achievements Guide when the normal win condition is not enough. It covers all 15 Steam achievements, including the three-second infection, 50-step streak, four-crate deposit, 100% Filter run and the two cumulative 0.2% achievements.
For a first session, I would not open the achievement page yet. I would gather the group, fix the display, read both briefing pages and complete one full rotation. The difficult achievement routes become much shorter once every player already understands what the underlying minigame is asking them to do.
Machine Party does not use a board between rounds. I move directly from one lethal minigame to the next, so the useful preparation is learning each simulation's controls and failure condition rather than planning a board route or buying items.
The player setup supports 2–4 players. My most complete sessions used four players, and I have not isolated every minigame in a two-player lobby, so I treat 3–4 players as the safer choice for seeing the intended roles, pushing pressure, and elimination flow.
Turning fullscreen off and then enabling it again restored the full image in one affected session. I do this before everyone readies up, because changing display settings during a fast briefing can make me miss the objective page.
I did not use a working public matchmaking flow in these sessions. I plan around a host and direct friend invitations, and I make sure the full group is ready before starting the rotation rather than expecting the lobby to fill automatically.