Backrooms Lost Runners Level 0 Walkthrough
A practical Backrooms Lost Runners Level 0 walkthrough for players who need the opening route, first puzzle, bridge repair, M.E.G. door trigger, almond water, recycler, pressure systems, Epsilon route, unstable zone, password clues, early threats, and Level 0 exit path explained.
Updated:
Quick Answer
Use this Level 0 walkthrough when a door, pressure system, unstable zone, password display, or Epsilon route is blocking you. The fastest way through Level 0 is to solve each route state in order instead of searching every room like a random maze.
Level 0 Quick Route
Use this table first. The detailed steps below explain the blockers one by one.
| Order | Route step | What to do | Main blocker |
|---|---|---|---|
| 1 | Wake up / first objective | Follow “find survivors” and inspect the opening route | Do not wander before the first switch route |
| 2 | Backup power | Hit the switch route and wait for the first puzzle update | Door state does not change until power updates |
| 3 | Early bridge | Use the power state so the bridge stays open, then cross | Do not cross with no stamina |
| 4 | M.E.G. door trigger | Find the nearby switch box and interact with it | Do not force the M.E.G. door itself |
| 5 | Recovery and inventory | Buy or carry almond water, use recycler if your bag is full | Sanity and inventory pressure |
| 6 | Pressure door | Use the panel near the pressure hub, then follow the pipe-and-valve machinery routes | First and second compartment pressure |
| 7 | Decompression route | Return to the large door after pressure and power are fixed | Leaving before the door state updates |
| 8 | Epsilon route | Enter the yellow Level 0 halls and move toward Epsilon | Side-room over-looting |
| 9 | Unstable zone | Enter only with sanity recovery and a clear exit | Sanity drain and route confusion |
| 10 | Password clues | Search the display area, the side branches, and the swarm-sound branch for numbers | Partial password display |
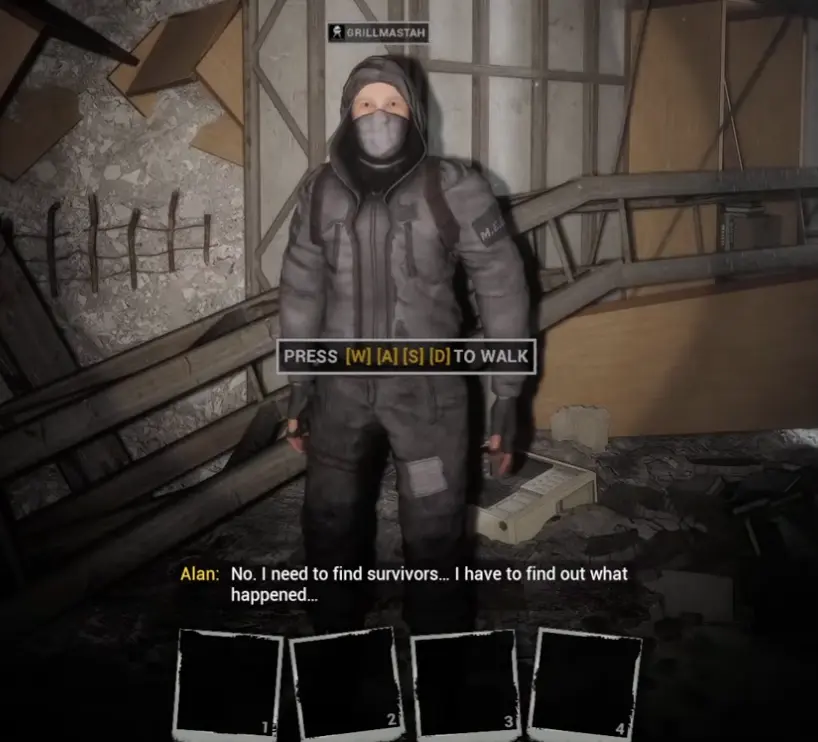
Step 1: Follow the Opening Objective
The first objective is to find survivors and figure out what happened.
Start by moving through the obvious route instead of treating the first room like a hidden-object puzzle. The early notes set the tone, but progress comes from the switch route and backup power.
| Opening clue | What it means | What to do |
|---|---|---|
| Find survivors | Main route objective | Move through the room and follow the available path |
| Alan’s Diary / notes | Story and atmosphere | Read if you want context, then keep moving |
| Generator / voltage hint | Power will matter soon | Watch for switches and panels |
| Fallen / damaged rooms | The route is not normal hallway walking | Check holes, doors, and ledges before sprinting |
| No obvious enemy yet | The game is teaching controls first | Learn movement and inventory before rushing |
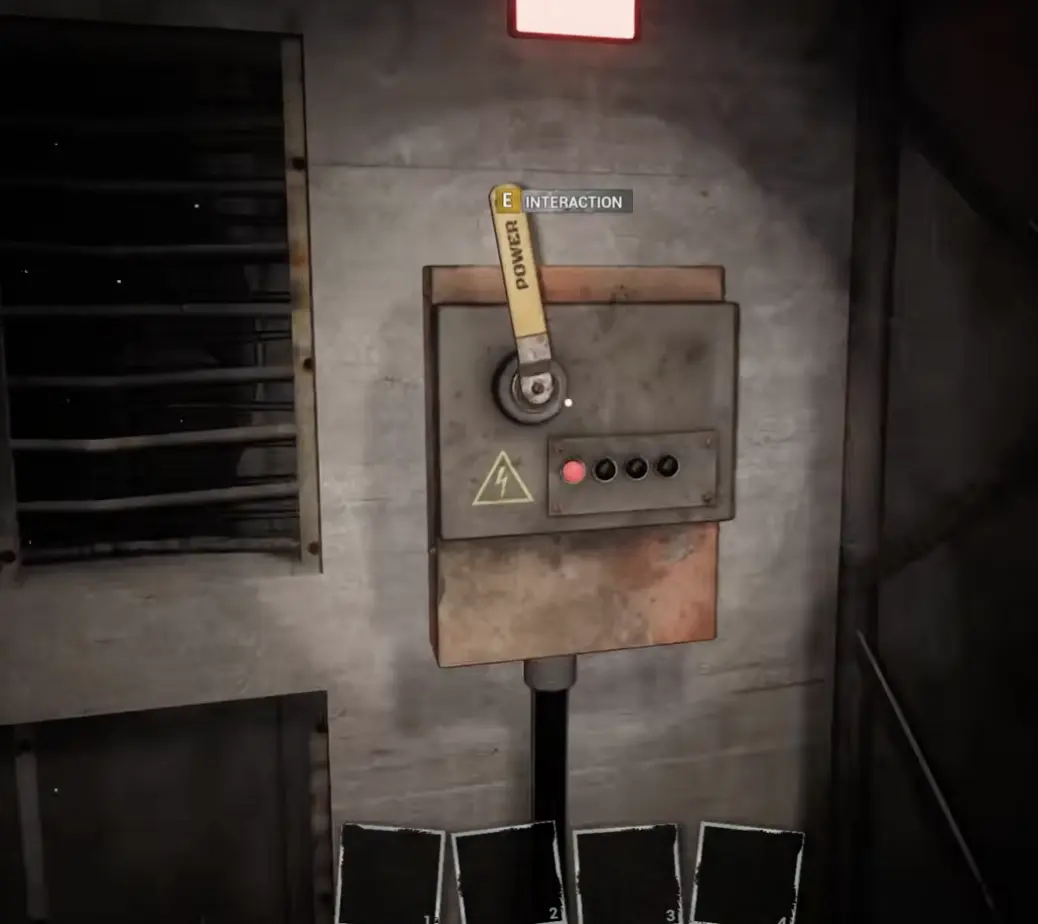
Step 2: Restore Backup Power and Solve the First Puzzle
The first puzzle is a route-state lesson.
You hit the switch route, backup power comes on, and the game confirms the first puzzle after the area updates. If the door does not open immediately, recheck the switch path before assuming you missed a key.
| Step | Action | What to verify |
|---|---|---|
| 1 | Follow the wire / switch route from the opening room | You are not looping back into the start |
| 2 | Restore backup power | The game acknowledges backup power |
| 3 | Recheck the newly opened route | Doors that looked blocked may now open |
| 4 | Pick up early supplies | Almond water and energy items matter soon |
| 5 | Continue after the puzzle update | Do not stand around waiting for another clue |
Step 3: Repair the Bridge, Then Use the M.E.G. Door Trigger
The early route has two different blockers that are easy to mix up.
First, there is a bridge route where the bridge can stay open after the correct power state. Later, there is a M.E.G. door that opens from a nearby switch interaction. Do not use the M.E.G. switch screenshot as your bridge-repair proof.
| Blocker | Landmark | Correct action |
|---|---|---|
| Bridge route | Early crossing after the power path | Use the switch state so the bridge stays up, then cross |
| No energy / bridge confusion | Near the bridge interaction | Recheck the power state instead of rushing across |
| M.E.G. door | Door marked with M.E.G. branding | Search nearby for the switch box |
| Switch box | Lever with interaction prompt | Interact with it, then return to the door |
| Door opens | Route state updated | Move through and check the next room before sprinting |
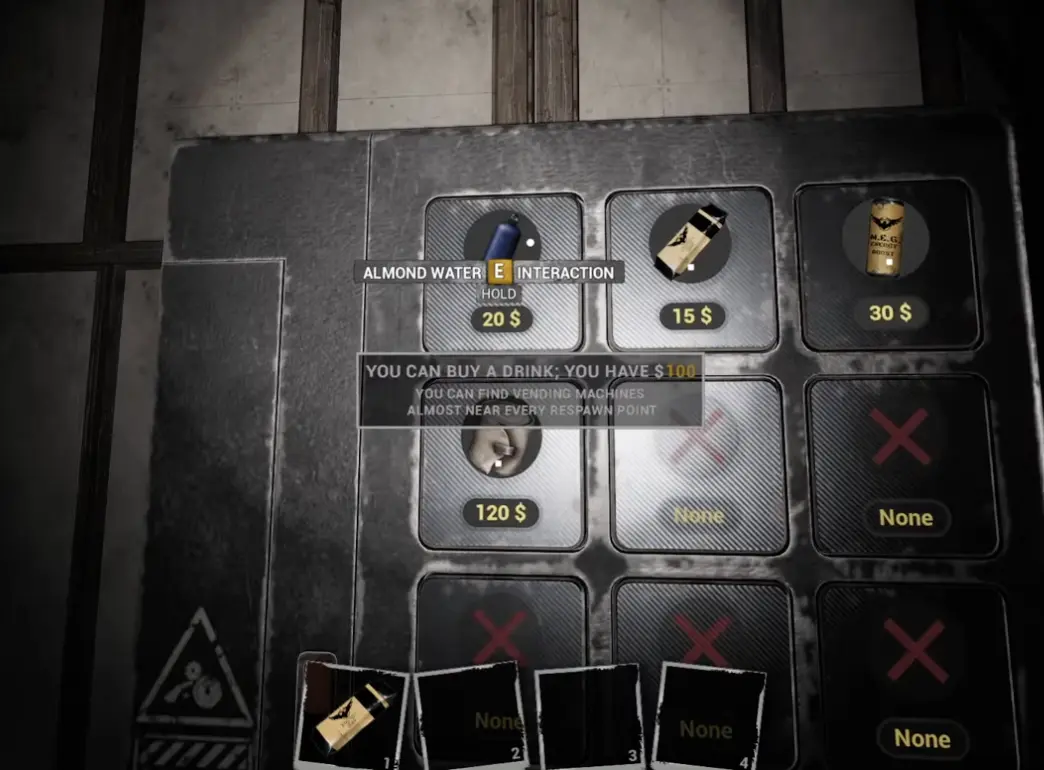
Step 4: Buy Almond Water and Manage Sanity
Almond water is not optional comfort.
Level 0 starts using sanity pressure before the map becomes fully readable. Buy or pick up almond water when you can, especially before unstable zones, long clue searches, or rooms where the screen begins to distort.
| System | What it does | Practical use |
|---|---|---|
| Almond water | Helps stabilize sanity | Drink before unstable zones or when the screen changes |
| Energy drink / recovery | Helps survival pressure | Keep one for dangerous route pushes |
| Sanity bar | Shows mental pressure | Watch it before clue hunting |
| Vending machine | Lets you buy recovery | Use it before leaving a safer hub |
| Inventory slots | Limit route items | Keep space for clues, keys, and tools |
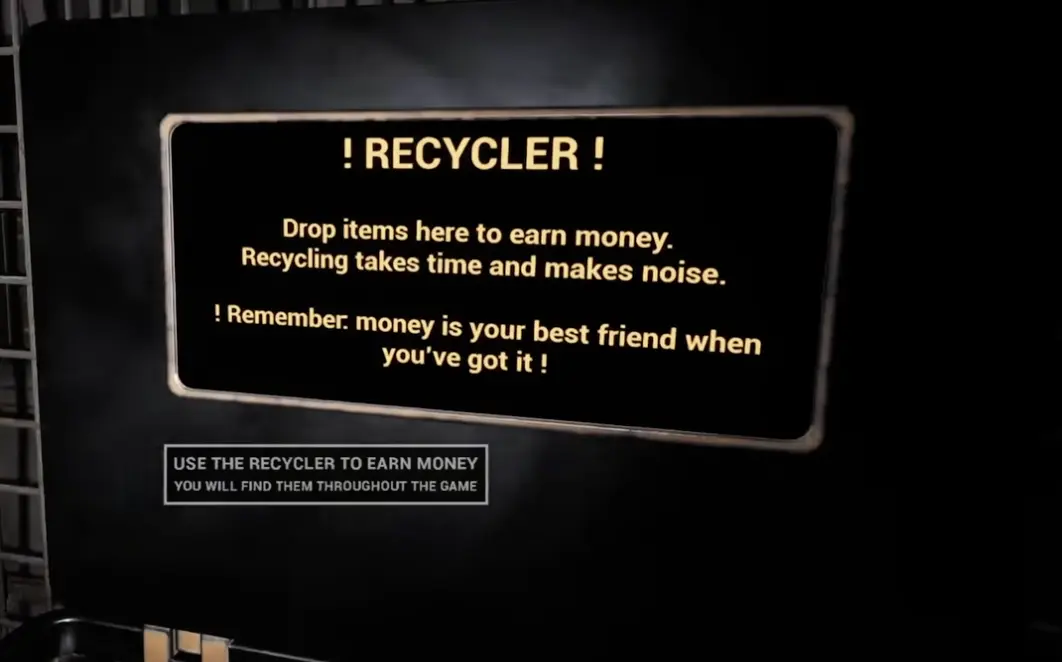
Step 5: Use the Recycler Without Over-Hoarding
The recycler supports the route by clearing junk and turning it into money.
This matters before pressure and password sections because those areas can give you notes, tools, clue items, and recovery. If your bag is full, you may waste time deciding what to drop while sanity is falling.
| Item type | Keep or recycle? | Why |
|---|---|---|
| Almond water | Keep | Sanity is route safety |
| Route key / card / clue | Keep | You may need it at the next blocker |
| Crowbar / useful tool | Keep | Tools can matter for pickups and achievements |
| Duplicate junk | Recycle | Converts clutter into money |
| Unknown crafting material | Keep if you are unsure | Later tools may need it |
| Low-value clutter | Recycle when safe | Clears space before long routes |
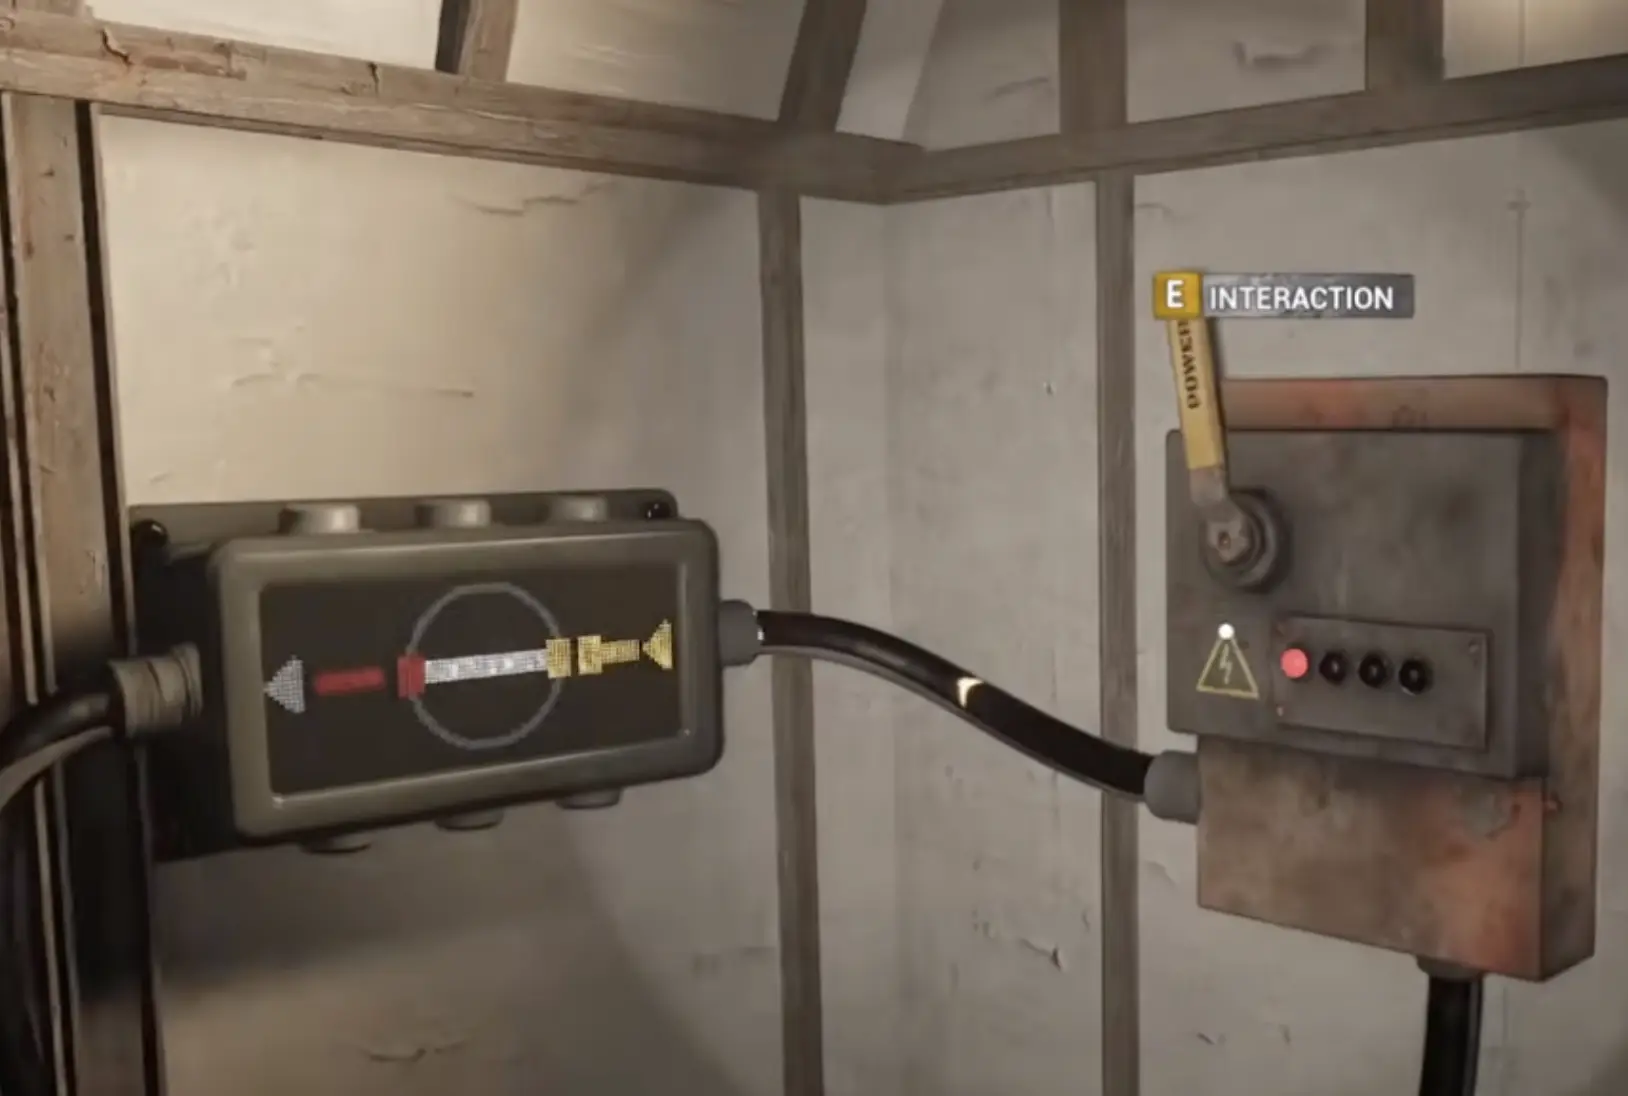
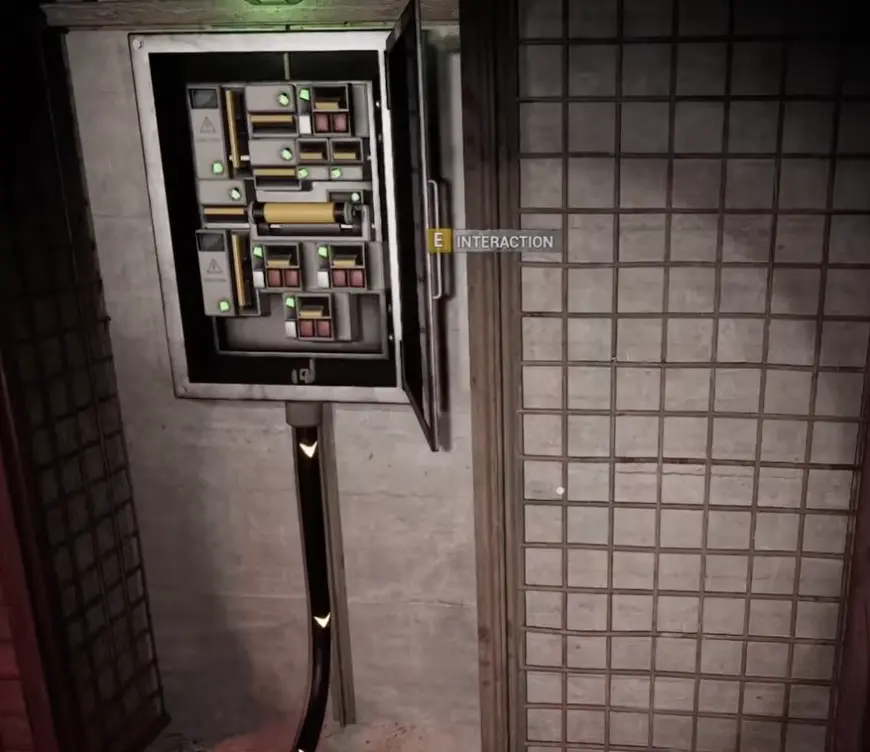
Step 6: Solve the Pressure System in Order
The large pressure door is one of the most common Level 0 blockers.
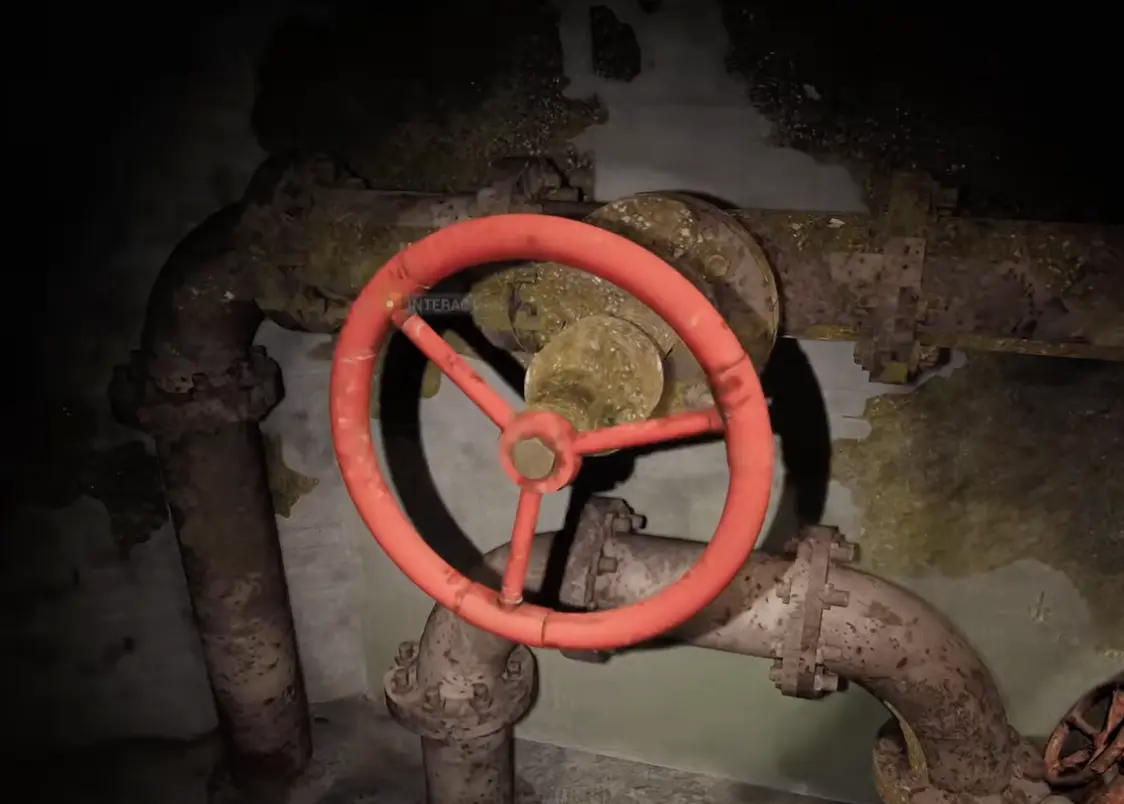
Because you can approach the hub from different angles, left and right can be misleading. Use visual landmarks instead: the open electrical cabinet / pressure system panel, the metal mesh wall, the machinery path, and the large red wheel valve on rusty pipes.
| Order | Visual landmark | What to do | How to know you are done |
|---|---|---|---|
| 1 | Large blocked pressure door | Read the message about pressure loss and power being offline | You know this is a system puzzle, not a key door |
| 2 | Open electrical cabinet beside metal mesh / cage walls | Interact with the pressure system panel first | Indicator lights show that one part of the system is being handled |
| 3 | Machinery path leaving the panel area | Follow the route with industrial walls, pipes, or lower machinery instead of returning to the main door | You stop seeing office-like rooms and start seeing pipe machinery |
| 4 | Large red wheel valve on rusty pipes | Turn the valve / pump interaction | The system accepts one pressure fix or the route state changes |
| 5 | Back at the panel / pressure hub | Do not keep clicking the main door. Search the other machinery branch from the same hub area | You find another pressure-related interaction instead of a normal loot room |
| 6 | Second pressure interaction | Finish the remaining valve / pump / panel state | The main door stops complaining about pressure and power |
| 7 | Main pressure door | Return only after both pressure routes are handled | Decompression route opens |
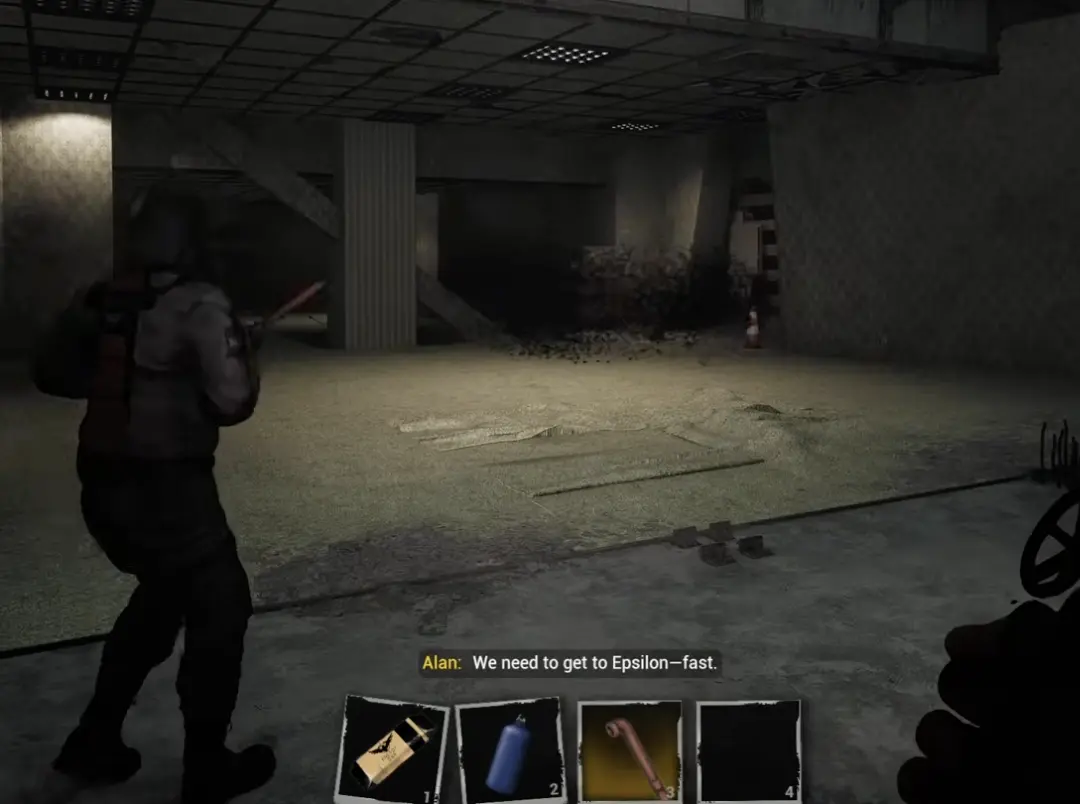
Step 7: Enter the Decompression Route and Understand Epsilon
After the pressure and power chain, the large route opens and the decompression sequence starts.
This is the point where the game moves you from the complex into the more recognizable Level 0 space. The objective shifts toward Epsilon. In this route, Epsilon is best understood as a named destination or route milestone, not a loose item, shop, or NPC standing in the first room.
| Route signal | What it means | What to do |
|---|---|---|
| Decompression warning | The complex route is opening | Leave the area and follow the exit path |
| Yellow Level 0 walls | You are in the main Level 0 route | Watch holes, sounds, and side rooms |
| “Get to Epsilon fast” | Epsilon is now the route target | Move forward instead of clearing every shelf |
| Hazard 3 / holes | Some drops are dangerous, not shortcuts | Do not jump unless the path is clearly intended |
| Moving anomaly nearby | The route can pressure you immediately | Give it space and keep stamina ready |
Level 0 Threats and How to React
Level 0 has threats before you can fully identify every enemy.
This section only includes behavior you can react to during the route. It avoids treating notes or vague wall messages as enemies.
| Threat / signal | Where it appears | Behavior you should plan for | Safer response |
|---|---|---|---|
| Moving anomaly near Epsilon route | After decompression, near the Level 0 entry path | Drifts or approaches while you are trying to orient yourself | Do not touch it; move around and keep stamina |
| Swarm / fly sounds | Around password and unstable-zone branches | Sound cue before a dangerous branch or clue area | Search quickly, keep almond water ready, leave after the clue |
| Environmental strike / window hit | Early complex side rooms and broken openings | Can hurt you suddenly during looting | Do not hug broken windows or suspicious openings |
| Dark holes | Level 0 hallway floors and side paths | Often look tempting but can drop or kill you | Treat them as hazards unless the objective clearly points down |
| Sanity pressure | Unstable zones and long searches | Screen effects make route reading harder | Drink almond water before clue hunting |
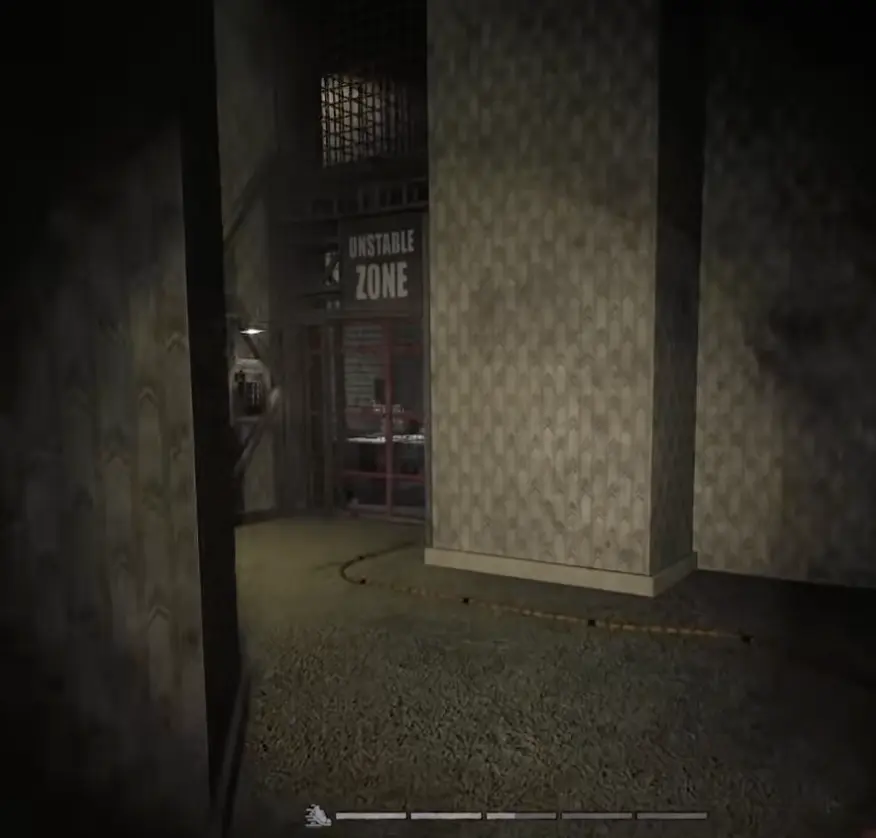
Step 8: Handle the Unstable Zone
The unstable zone is part of the password and route pressure, not just a side room.
In the current Level 0 route, the clearest route-relevant unstable zone appears around the password branch. You may see other strange rooms or hazard-like spaces, but do not treat every unstable-looking room as mandatory. Enter the route-relevant one, get the clue or update, and leave.
| Question | Practical answer |
|---|---|
| How many unstable zones should I force? | Only the one blocking route or clue progress |
| Is the signed unstable zone important? | Yes, treat the signed zone near the password route as the main route-relevant one |
| What should I bring? | Almond water and open inventory space |
| What should I avoid? | Standing inside while deciding what to drop |
| When should I leave? | After the clue, number, or route update is done |
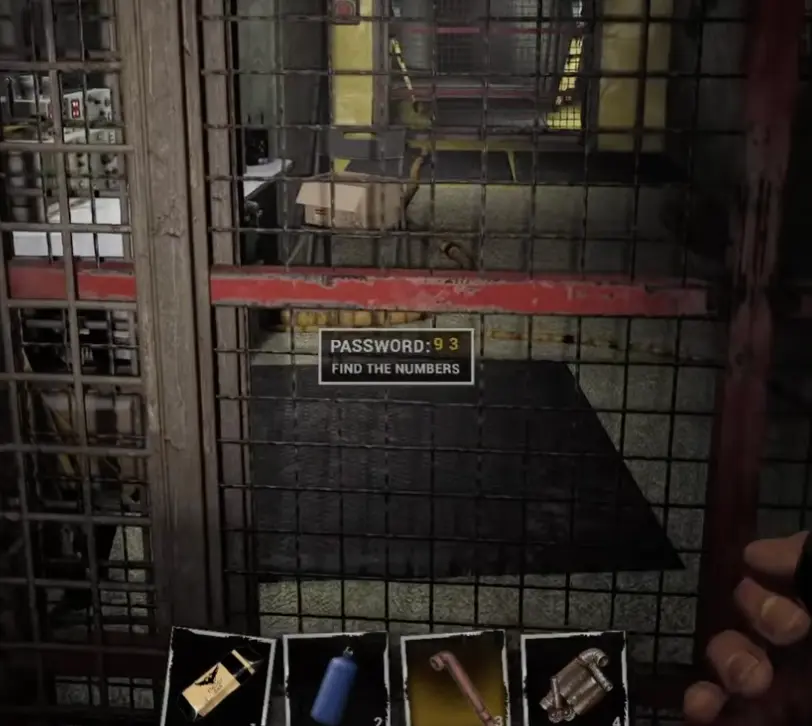
Step 9: Find Password Clues Without Guessing
The password route is the most confusing Level 0 section because it can show partial numbers.
You may see a display such as PASSWORD: 93 with Find the Numbers, or hear clue progress before the full code is complete. Treat these as clue states, not the final answer unless your current display confirms the full code.
The Easy-to-Miss Swarm-Sound Branch
The branch with swarm or fly-like sounds is easy to skip because it feels dangerous.
When you reach the password display, do not only check the rooms directly beside the gate. Turn away from the display and listen for the harsher buzzing / swarm sound. That branch may look like the wrong direction because it sounds unsafe, but it is part of the clue sweep. Enter with almond water ready, look for number clues on walls, notes, or route prompts, then leave and return to the password display before sanity pressure gets worse.
| Search order | Landmark | What to look for | Why it matters |
|---|---|---|---|
| 1 | Password gate / display | Check the visible digits and prompt | Confirms whether you are missing numbers |
| 2 | Rooms immediately near the display | Search notes, walls, and side-room clues | Some clues are close and easy to overlook |
| 3 | Branch with swarm / fly sounds | Follow the sound only after preparing sanity recovery | This is the branch players skip because it feels unsafe |
| 4 | Signed unstable zone | Enter prepared and check for clue progress | The route can update after this zone |
| 5 | Return to the display | Recheck the password state | Do not test the gate before clue progress is updated |
| 6 | Final check | Confirm all digits before forcing the route | Partial numbers waste time if treated as complete |
Final Level 0 Push
After the password and Epsilon route, the game starts punishing slow looting harder.
If the route opens, move. Do not stop to recycle, sort inventory, or recheck random shelves unless the objective clearly sends you back. The safest Level 0 exit is usually the one you take before your sanity and inventory collapse.
Solve the current system, return to the last clear landmark when you get lost, then move only after the route updates.
What to Read Next
Use the next Backrooms Lost Runners guide based on your blocker.
- Read the Puzzle Solutions if the M.E.G. door, pressure system, unstable zone, password display, or route-state logic is blocking you.
- Read the Achievements Guide if you want to route First Puzzle Solved, Fix the Bridge, Out of the Complex, Into the Unstable Zone, Epsilon, and Level 0.
- Read the Level 1 Guide after you leave Level 0 and start dealing with the Dark Zone, M.E.G. Access Card, Aerostation, and elevator route.
- Return to the Backrooms Lost Runners Guide Hub if you want the full guide cluster route.
FAQ
How do you start Level 0 in Backrooms Lost Runners? +
Follow the opening objective to find survivors, restore backup power, solve the first switch puzzle, pick up recovery items, then move through the early bridge and complex route.
How do you fix the bridge? +
Use the early power route so the bridge stays up after the switch state changes. Cross only after the bridge remains open and the objective updates.
Is the M.E.G. door the bridge repair puzzle? +
No. The M.E.G. door opens from a nearby switch interaction. Do not label that switch as bridge repair; it is a separate door trigger.
Where are the pressure valves? +
Use the pressure system panel first, then look for the machinery path with rusty pipes and a large red wheel valve. If the main door still blocks you, return to the pressure hub and check the other machinery branch before testing the door again.
What is Epsilon? +
In the Level 0 route, Epsilon is the next named route destination or milestone. Once the game tells you to get to Epsilon fast, stop over-looting and follow the main path.
How do password clues work? +
The password display can show partial progress, such as visible numbers and a 'Find the Numbers' prompt. Search the nearby branches, including the dangerous branch with swarm-like sounds, before testing the gate again.
What threats appear in Level 0? +
The main confirmed threats are behavior-based: a moving anomaly near the Epsilon route, swarm-like sounds around the password branch, environmental hits near broken openings, dark holes, and sanity pressure inside unstable zones.
Should I enter every unstable zone? +
No. Enter the unstable zone that blocks route or clue progress, but bring almond water, keep inventory space open, and leave once the clue or update is done.
Is this a full game walkthrough? +
No. This page focuses on Level 0. Use the Puzzle Solutions, Achievements Guide, and Level 1 Guide for later blockers.