Orb of Creation 1.0 Beginner Guide
Start Orb of Creation 1.0 with a practical first-hour route covering Spellcraft, Gather Knowledge, Whirling Sorcery, early loadouts, mana capacity, Output Lv, mastery, and stuck checks.
Updated:
Quick Answer
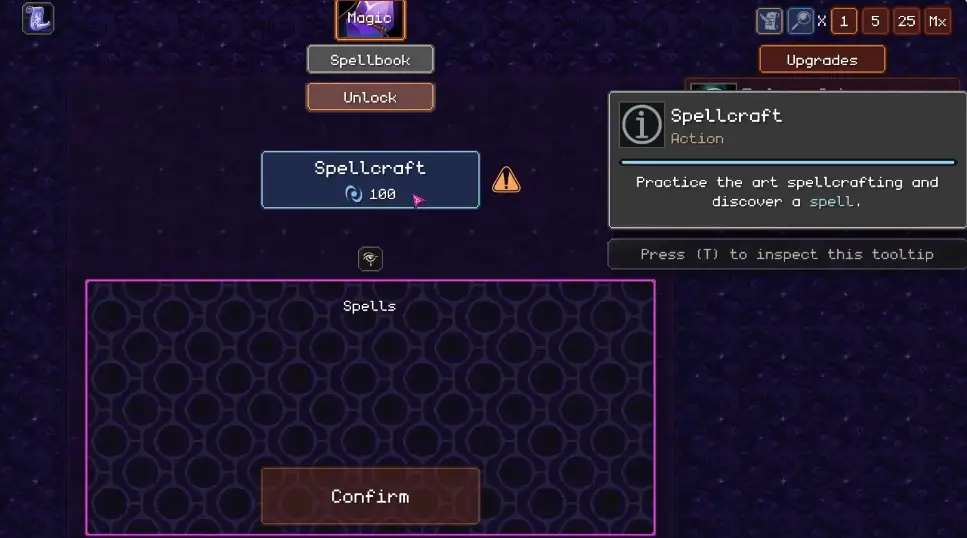
In Orb of Creation 1.0, my first goal is to turn mana into Knowledge: unlock Spellcraft, discover Gather Knowledge, then use Whirling Sorcery before key cantrip casts. If I feel stuck, I check the requirement, mana capacity, Output Lv, mastery, and loadout room before waiting.
This beginner guide is for the first hour of Orb of Creation 1.0.
The game looks like a calm incremental at the start, but the early route is not just “wait until numbers go up.” I get better results when I read tooltips, use hotkeys, build a small spell loop, and fix the exact thing blocking the next unlock.
How to start Orb of Creation 1.0
My opening route is simple.
I bind mana to the orb, learn Insight, unlock Spellcraft, discover Gather Knowledge, and use that spell to start earning Knowledge for Wizardry. Once Whirling Sorcery appears, I stop casting randomly and start using a small loadout loop.
The first clean loop is:
Whirling Sorcery → Gather Knowledge → spend Knowledge → buy capacity if the loop no longer fitsThat is enough structure for the first hour. I do not need to understand every late-game system yet.
1.0 discoveries can be randomized
One important 1.0 change is that discoveries can vary from run to run. I do not expect every spell, glyph, or option to appear in exactly the same visual place every time.
That does not make guides useless. It just means I follow the role of the unlock, not only the exact slot.
For the first route, the important idea is:
I need the early Knowledge spell and the early cantrip support.If Gather Knowledge or a related early discovery appears in a slightly different position, I still follow the same logic: unlock Spellcraft, find the spell that turns mana into Knowledge, then support it with the cantrip boost when available.
Build the first real loadout
The first loadout I care about is not complicated.
I use:
Slot 1: Whirling Sorcery
Slot 2: Gather Knowledge
Whirling Sorcery costs 200 mana, lasts up to 30.0 seconds, and gives +40% Cantrip Spell Power in this early setup. Gather Knowledge is a cantrip, so I cast Whirling Sorcery first, then cast Gather Knowledge while the boost is active.
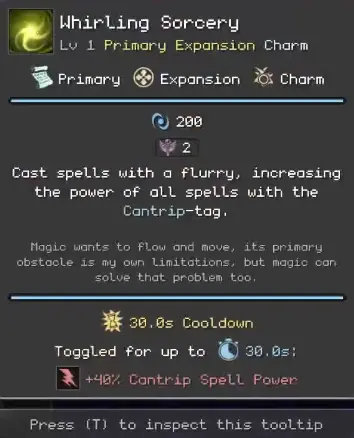
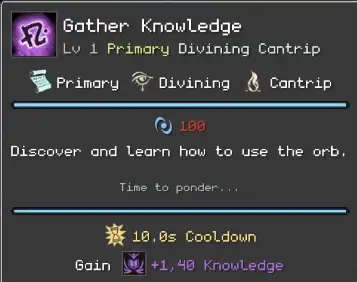
In practice, this means I am not just clicking the brightest button. I am creating a short buff window, then spending mana on the spell that benefits from that window.
Fix mana capacity before forcing bigger loops
The first painful wall is usually mana capacity.
A spell build can be correct and still feel terrible if I cannot hold enough mana to cast it. Whirling Sorcery plus Gather Knowledge already asks for a meaningful mana budget. If I add more casts or raise Output Lv, the cost gets heavy quickly.
Wisdom is one of the first clean capacity fixes. In the tooltip used for this route, Wisdom gives +80 Base Mana Capacity at level 0.
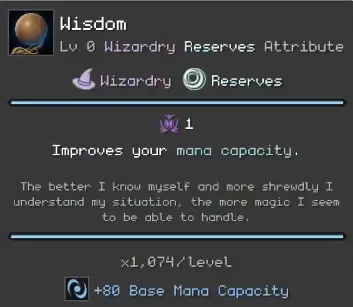
A full mana bar is not automatically progress. If I know what I want to cast but cannot afford the loop, I raise capacity first. For the full early diagnostic, use the table below.
Mana capacity and spell capacity are different
This is easy to mix up.
Mana capacity is the size of my mana bar. It controls whether I can afford a spell cycle.
Spell capacity is loadout room. It controls whether the spellbook can hold the setup I want. Later, research such as Greater Spell Capacity can add more spell capacity, but that does not mean my mana bar is bigger.
| Term | What it affects | Beginner example |
|---|---|---|
| Mana capacity | How much mana I can hold | I need enough mana to cast Whirling Sorcery plus Gather Knowledge |
| Spell capacity | How much spell setup I can fit | I need enough room to equip a bigger loadout later |
| Spell cost | How much mana each cast spends | Output Lv can make this much higher |
| Cooldown | How long before I can cast again | Higher output or slow spells can make the loop feel stuck |
Use Aptitude when Gather Knowledge is still the route
Aptitude improves Divining spell power, and Gather Knowledge is a Divining spell. That makes Aptitude useful while my early route still depends on Knowledge generation.
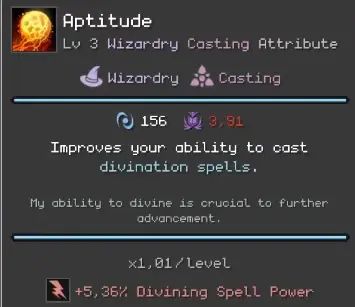
I do not buy Aptitude blindly. If the current problem is “I cannot afford the loop,” Wisdom or another capacity option matters more. If the current problem is “Gather Knowledge is too weak,” Aptitude becomes more attractive.
Output Lv is a push tool
Output Lv is strong, but it is not something I leave high forever.
At Output Lv 1, the tooltip shows:
x2.75 Spell Cost
x2 Cantrip Spell Power
x1.25 Cantrip Cooldown Time
x3 Spell Experience Rate
That is a real tradeoff. It can help me push a requirement or gain spell experience faster, but it can also make the first hour feel worse if my mana capacity is not ready.
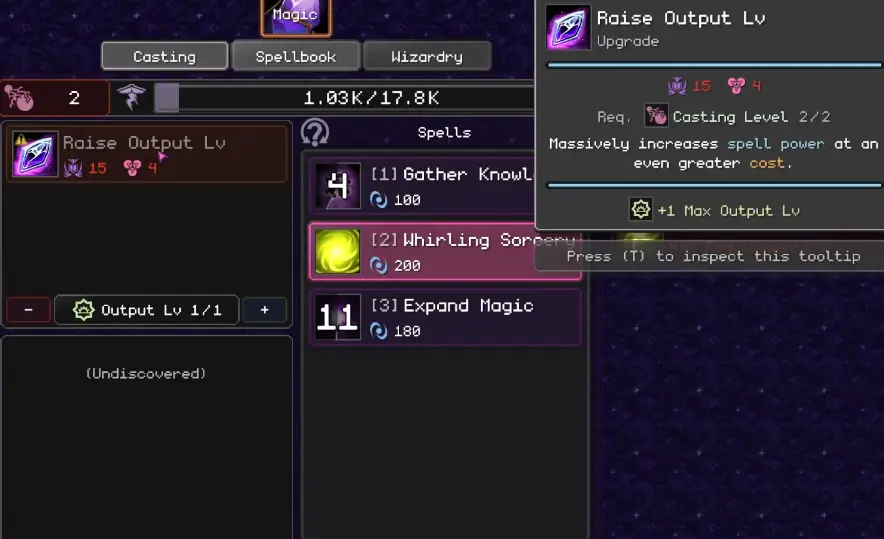
My rule is:
Raise Output Lv for a specific push.
Lower it if the loop becomes one expensive cast followed by waiting.
Buy capacity before judging the build.Spell mastery: what actually changes
Spell mastery is not just a vague “use the spell more” system. For Gather Knowledge, mastery connects to its spell classifications: Primary, Divining, and Cantrip.
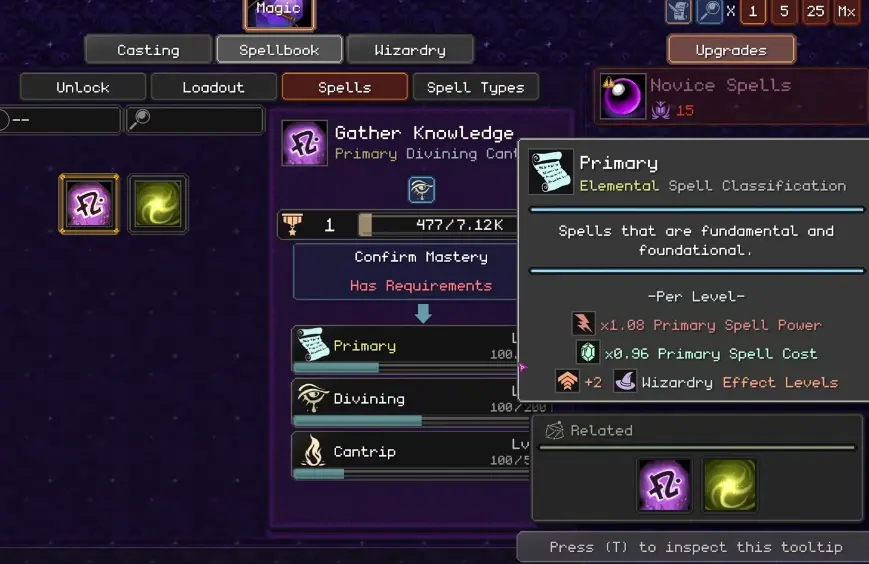
The important part is that mastery feeds the related spell-type progress. In this route, Master Gather Knowledge shows:
x1.50 Experience Rate
+100 Primary Type XP
+100 Divining Type XP
+100 Cantrip Type XP
That means confirming mastery is not only about the Gather Knowledge spell itself. It also advances the classifications attached to that spell.
For example, the Primary tooltip shows per-level benefits such as:
x1.08 Primary Spell Power
x0.96 Primary Spell Cost
+2 Wizardry Effect Levels
So when I keep using Gather Knowledge, I am not only farming Knowledge. I am also pushing the spell-type system that can make later casts stronger, cheaper, or more useful for Wizardry scaling.
What to check when I feel lost
This is the main beginner diagnostic. I use it whenever the screen has too many buttons and I am no longer sure what the next useful click is.
| What I see | What it usually means | What I check next |
|---|---|---|
| Mana is full | I am not spending or storing correctly | Cast, buy capacity, or inspect the next unlock |
| I cannot afford the spell loop | Mana capacity is too low | Wisdom or another capacity source |
| I cast once and wait too long | Restore rate or output cost is the wall | Lower Output Lv or improve recovery |
| The next upgrade says “requires” | It is not a raw resource problem | Read the exact requirement |
| A spell needs mastery | I need to cast that specific spell more | Open the spellbook and inspect mastery |
| The spellbook feels cramped | This is spell capacity, not mana capacity | Look for loadout room later |
| My discovery layout looks different | 1.0 randomization may be changing presentation | Follow the resource role and tooltip |
| The numbers did not jump as expected | Modifier stacking may not work how I assumed | Check the real tooltip after buying |
This is the section I want when I feel stuck. I do not need a perfect walkthrough. I need to identify which kind of wall the game is showing me.
When to move to the Progression Guide
This beginner guide has done its job once I understand the first loop:
- Gather Knowledge is my first Knowledge engine.
- Whirling Sorcery should be cast before key cantrip casts.
- Mana capacity fixes the mana bar; spell capacity fixes loadout room.
- Output Lv is powerful but expensive.
- Tooltips and requirements matter more than random clicking.
- 1.0 discoveries can vary, so I follow the role of the unlock, not only its position.
I move to the Orb of Creation Progression Guide once I hit my first real research wall, mastery wall, spell capacity wall, or mid-game system unlock. At that point, I do not need more beginner basics; I need a wall-by-wall checklist.
Related Guides
- Orb of Creation Guide — Return to the main hub for the 1.0 overview, guide order, FAQ, achievements, and endgame planning.
- Orb of Creation Progression Guide — Use this when you are stuck on capacity, mastery, Output Lv, research, spell capacity, or unclear unlock requirements.
- Orb of Creation Spell Builds & Loadouts Guide — Build better early and mid-game setups around cantrips, loadouts, Output Lv, and resource goals.
- Orb of Creation Achievements Guide — Track all 50 achievements after the early route is stable.
- Orb of Creation New Game Plus & Time Runes Guide — Save this for later 1.0 endgame planning.
FAQ
How do I start Orb of Creation 1.0? +
Bind mana to the orb, learn Insight, unlock Spellcraft, discover Gather Knowledge, then use Knowledge to buy early Wizardry upgrades. After that, build a simple Whirling Sorcery plus Gather Knowledge loop.
What should I do when I feel stuck early in Orb of Creation? +
Check the blocked upgrade requirement first. Then check mana capacity, spell cost, Output Lv, spell mastery, loadout slots, and whether a new discovery or research option is waiting.
What is the best early Orb of Creation spell loadout? +
My first simple loadout is Whirling Sorcery plus Gather Knowledge. Whirling Sorcery boosts cantrip spell power, then Gather Knowledge converts mana into more Knowledge during the buff window.
How do I increase mana capacity in Orb of Creation? +
Wisdom is one of the first capacity fixes because it increases Base Mana Capacity. I buy capacity when the correct spell loop costs more mana than I can comfortably hold.
What is the difference between mana capacity and spell capacity? +
Mana capacity controls how much mana I can hold for casting. Spell capacity controls how much spell weight or loadout room I can use. One fixes the resource bar; the other fixes the spellbook setup.
Should I raise Output Lv early? +
Only for a clear push. Output Lv can improve spell power and experience, but it also raises spell cost and cooldown pressure, so I lower it again if the loop becomes too expensive.